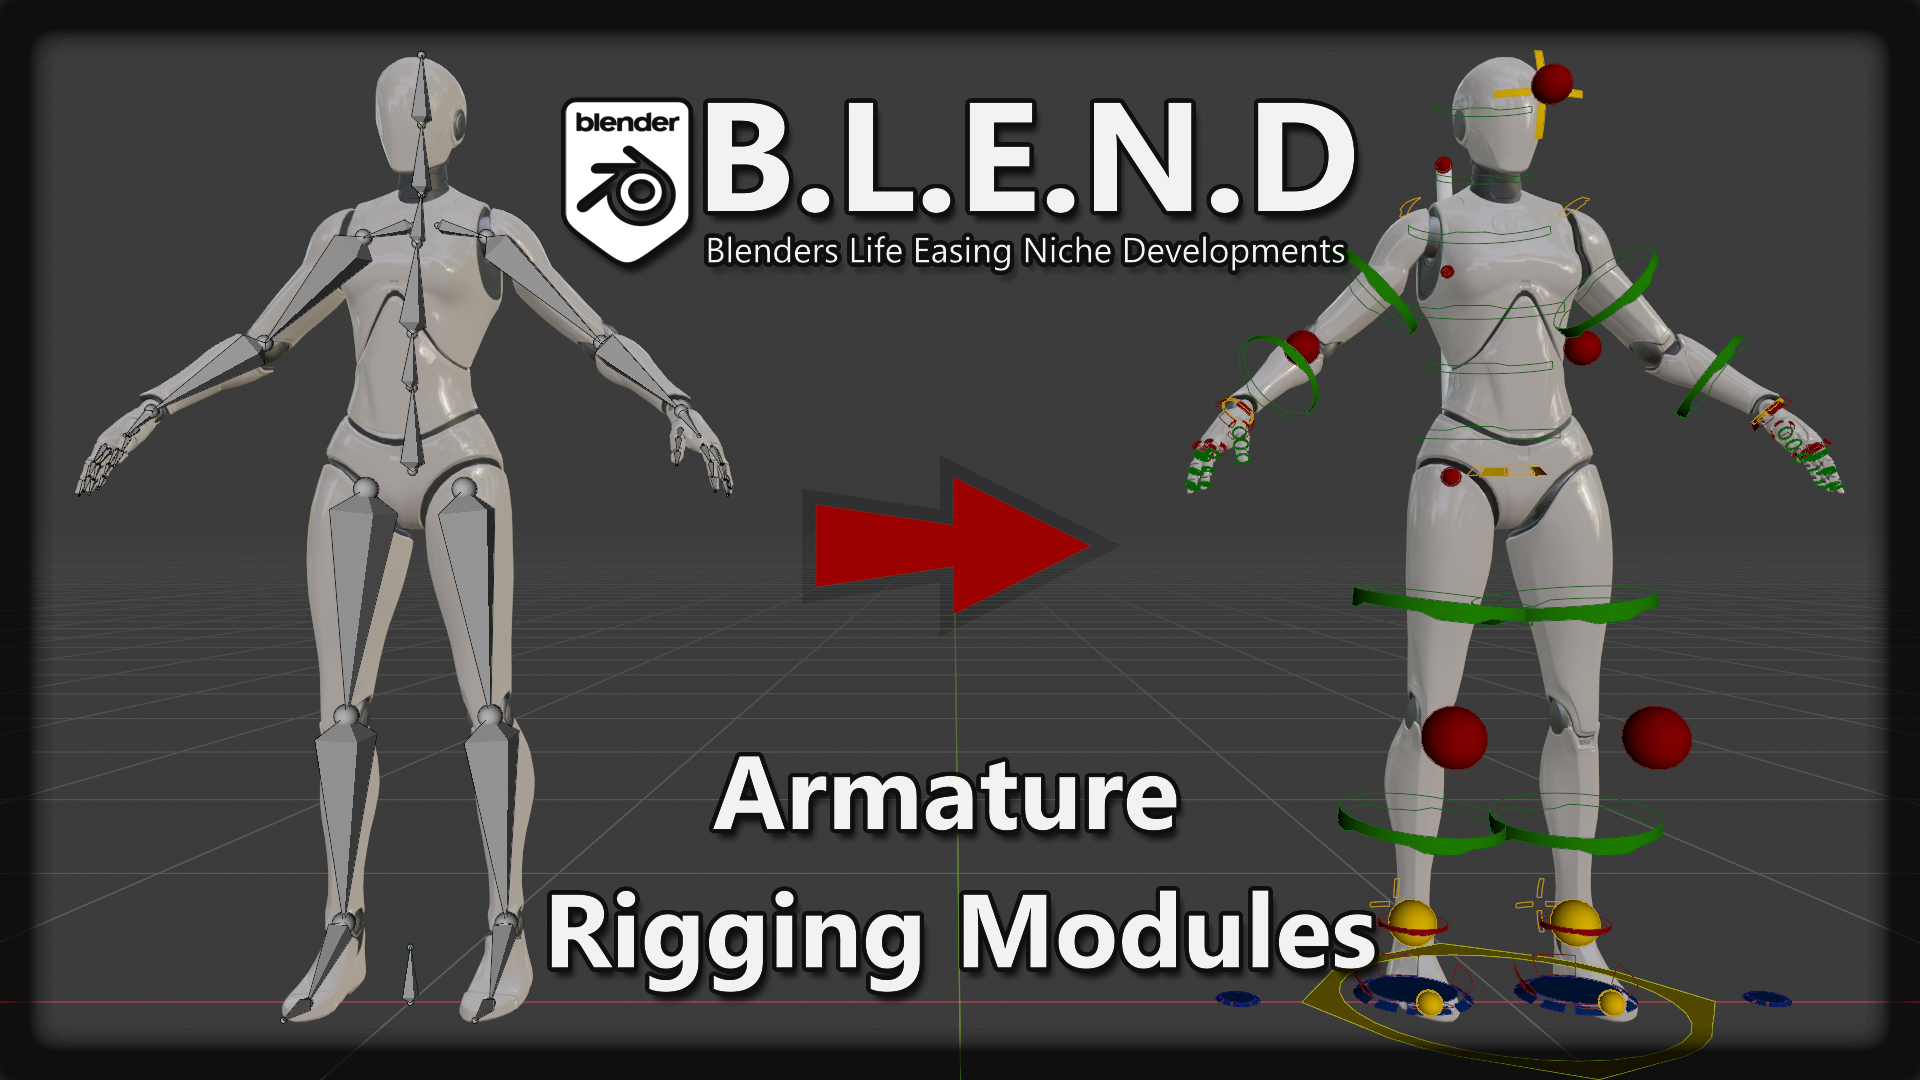
Topic blender 3 rigging: Discover the art of Blender 3 rigging and bring your 3D models to life. This guide offers essential tips, techniques, and insights for animators of all skill levels to master the rigging process.
Table of Content
- Understanding Rigging in Blender
- Getting Started with Rigging
- Advanced Rigging Techniques
- Rigging Tools and Addons
- Getting Started with Rigging
- What are some tips and techniques for rigging in Blender 3?
- Advanced Rigging Techniques
- YOUTUBE: Blender - Rigging a Character in 5 Minutes
- Rigging Tools and Addons
- Advanced Rigging Techniques
- Rigging Tools and Addons
- Rigging Tools and Addons
- Introduction to Blender 3 Rigging
- Getting Started with Basic Rigging Techniques
- Understanding Bone Structure and Armatures
- Advanced Rigging Techniques and Tools
- Weight Painting and Vertex Groups
- Using Rigify for Automated Rigging
- Custom Bone Shapes and IK/FK Switches
- Facial Rigging and Animation
- Common Rigging Problems and Solutions
- Resources for Learning Blender Rigging
Understanding Rigging in Blender
Rigging in Blender allows animators to create a complex system of bones and constraints, which can be manipulated to animate 3D models. This includes features like envelope, skeleton, and automatic skinning, easy weight painting, and mirror functionality.
Key Features
- Envelope, skeleton, and automatic skinning
- Easy weight painting and mirror functionality
- Bone layers and colored groups for organization
- B-spline interpolated bones and constraints

READ MORE:
Getting Started with Rigging
Beginners can start with simple rigs, gradually moving towards more complex structures. It\"s important to understand the basics of adding bones and setting up a basic armature before diving into advanced techniques.
Steps for Basic Rigging
- Start Blender and import your 3D model.
- Add bones by entering Edit Mode and using the Shift+A command.
- Position the bones to match the anatomy of your model.
- Parent the mesh to the armature with automatic weights for initial skinning.
Advanced Rigging Techniques
For more complex projects, Blender offers tools like Rigify for automatic rigging, which simplifies the process of creating a fully functional rig. Advanced users can explore features like custom bone shapes, IK/FK switches, and facial rigging.
Resources for Learning
- Online tutorials and YouTube videos for step-by-step instructions
- Blender\"s official documentation for in-depth understanding
- Community forums and Blender user groups for tips and advice
Rigging Tools and Addons
Blender supports various addons that enhance rigging capabilities, such as Rigify for automatic rigging setups and custom scripts for specific rigging tasks. These tools are designed to streamline the rigging process, making it accessible to artists of all skill levels.
Conclusion
Rigging in Blender 3 is a powerful process that opens up endless possibilities for animation. Whether you\"re a beginner or an experienced animator, mastering rigging techniques is essential for bringing your 3D models to life.
Getting Started with Rigging
Beginners can start with simple rigs, gradually moving towards more complex structures. It\"s important to understand the basics of adding bones and setting up a basic armature before diving into advanced techniques.
Steps for Basic Rigging
- Start Blender and import your 3D model.
- Add bones by entering Edit Mode and using the Shift+A command.
- Position the bones to match the anatomy of your model.
- Parent the mesh to the armature with automatic weights for initial skinning.

_HOOK_
What are some tips and techniques for rigging in Blender 3?
Here are some tips and techniques for rigging in Blender 3:
- Understand the basics: Before you start rigging in Blender 3, it\'s essential to have a solid understanding of the software\'s rigging tools and concepts.
- Use Rigify add-on: Blender 3 comes with a powerful add-on called Rigify, which can help you quickly rig characters by generating a complex rig with just a few clicks. Take some time to explore and understand how to use Rigify effectively.
- Proper bone placement: When rigging characters, ensure that you place bones properly in relation to the character\'s anatomy. This will make it easier to control movements and deformations later on.
- Weight painting: Utilize Blender\'s weight painting tools to assign weights to different parts of the character mesh. This will determine how each bone influences the mesh during movement.
- Set up IK and FK controls: Implement Inverse Kinematics (IK) and Forward Kinematics (FK) controls for your rigs to allow for more realistic and precise movements of your character.
- Test and iterate: After setting up your rig, be sure to test it by posing and animating the character. Make adjustments as needed to improve the rig\'s functionality and flexibility.
- Utilize constraints: Blender offers a range of constraints that can help you create complex rig setups. Experiment with constraints like Copy Rotation, Limit Distance, and Child Of to add additional functionality to your rigs.
Advanced Rigging Techniques
For more complex projects, Blender offers tools like Rigify for automatic rigging, which simplifies the process of creating a fully functional rig. Advanced users can explore features like custom bone shapes, IK/FK switches, and facial rigging.
Resources for Learning
- Online tutorials and YouTube videos for step-by-step instructions
- Blender\"s official documentation for in-depth understanding
- Community forums and Blender user groups for tips and advice

Blender - Rigging a Character in 5 Minutes
For the captivating world of character animation, immerse yourself in a whirlwind of creativity and storytelling. Watch as characters come to life through movement and expression, crafting dynamic and engaging narratives that will spark your imagination. Embark on a journey of efficiency and innovation with quick rigging techniques that will streamline your workflow and bring your characters to life in no time. Learn how to rig your creations swiftly and seamlessly, allowing you to focus on the fun part - animating and bringing your characters to life with ease.
Rigging for Impatient People in Blender Tutorial
Learn to rig NOW. I show how to set up an armature, how to parent things to bones, weight painting and how to solve common ...
Rigging Tools and Addons
Blender supports various addons that enhance rigging capabilities, such as Rigify for automatic rigging setups and custom scripts for specific rigging tasks. These tools are designed to streamline the rigging process, making it accessible to artists of all skill levels.
Conclusion
Rigging in Blender 3 is a powerful process that opens up endless possibilities for animation. Whether you\"re a beginner or an experienced animator, mastering rigging techniques is essential for bringing your 3D models to life.
Advanced Rigging Techniques
For more complex projects, Blender offers tools like Rigify for automatic rigging, which simplifies the process of creating a fully functional rig. Advanced users can explore features like custom bone shapes, IK/FK switches, and facial rigging.
Resources for Learning
- Online tutorials and YouTube videos for step-by-step instructions
- Blender\"s official documentation for in-depth understanding
- Community forums and Blender user groups for tips and advice

Rigging Tools and Addons
Blender supports various addons that enhance rigging capabilities, such as Rigify for automatic rigging setups and custom scripts for specific rigging tasks. These tools are designed to streamline the rigging process, making it accessible to artists of all skill levels.
Conclusion
Rigging in Blender 3 is a powerful process that opens up endless possibilities for animation. Whether you\"re a beginner or an experienced animator, mastering rigging techniques is essential for bringing your 3D models to life.
_HOOK_
Rigging Tools and Addons
Blender supports various addons that enhance rigging capabilities, such as Rigify for automatic rigging setups and custom scripts for specific rigging tasks. These tools are designed to streamline the rigging process, making it accessible to artists of all skill levels.
Conclusion
Rigging in Blender 3 is a powerful process that opens up endless possibilities for animation. Whether you\"re a beginner or an experienced animator, mastering rigging techniques is essential for bringing your 3D models to life.
Introduction to Blender 3 Rigging
Blender 3 rigging is an essential process for animators, providing the framework to bring 3D models to life with realistic movements. Rigging involves creating a skeleton for your model, where each bone represents a part of the model\"s body that can move independently. This guide introduces you to the fundamentals of rigging in Blender 3, covering everything from the basics to more advanced techniques.
- Understanding the basics of armatures and bones in Blender
- How to set up a basic rig for a character or object
- Exploring weight painting and how it affects your rig
- Advanced rigging techniques, including inverse kinematics (IK)
- Utilizing Blender\"s Rigify add-on for automatic rigging
Starting with rigging in Blender 3 can be daunting, but it\"s a crucial skill for animators. This process allows for intricate animations and movements, enhancing the realism and depth of your projects. Whether you\"re rigging a simple model or a complex character, understanding the principles of Blender rigging will provide a solid foundation for your animation work.
Rigging in Blender includes a variety of tools and features, such as envelope, skeleton, and automatic skinning, easy weight painting, mirror functionality, bone layers, and colored groups for organization. These tools help streamline the rigging process, making it more efficient and user-friendly.
By mastering Blender 3 rigging, you\"ll unlock new possibilities in animation, creating more dynamic and engaging 3D content. Whether you\"re a beginner looking to understand the basics or an experienced animator aiming to refine your skills, this introduction will set you on the right path.
Getting Started with Basic Rigging Techniques
Embarking on the journey of Blender 3 rigging starts with understanding the core principles and basic techniques. Rigging is the backbone of animation, providing the necessary structure to animate characters and objects. This section outlines the fundamental steps to get you started with rigging in Blender 3, ensuring a solid foundation for beginners and a refresher for seasoned artists.
- Import Your Model: Begin by importing the 3D model you intend to rig. Ensure your model is ready for rigging, with a clean topology and optimized geometry.
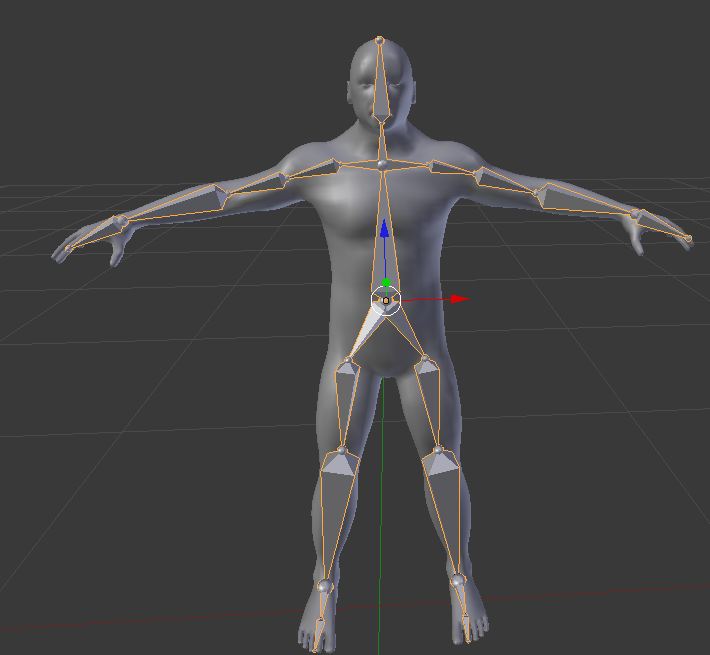
- Create an Armature: Armatures are Blender\"s version of a skeleton. Start by adding an armature object, which will serve as the bones for your model. Position these bones accurately to match the major joints of your model.
- Edit Bones: Enter Edit Mode to adjust the bones\" length and orientation, ensuring they align with your model\"s anatomy. Pay special attention to joint locations for natural movement.
- Name Your Bones: Properly naming bones is crucial for organization and efficiency, especially in complex rigs. Use a logical naming convention that reflects the bone\"s function and location.
- Parent the Mesh to the Armature: With automatic weights, parent your mesh to the armature. This step binds the 3D model to the skeleton, allowing the bones to control the mesh during animation.
- Test the Rig: In Pose Mode, manipulate the bones to test the rig. Look for any deformation issues or areas where the mesh does not follow the bones as expected. This is crucial for identifying and fixing problems early in the rigging process.
Understanding these basic rigging techniques in Blender 3 is your first step towards creating dynamic and believable animations. As you become more familiar with rigging, you can explore more advanced techniques and tools to enhance your animations further.
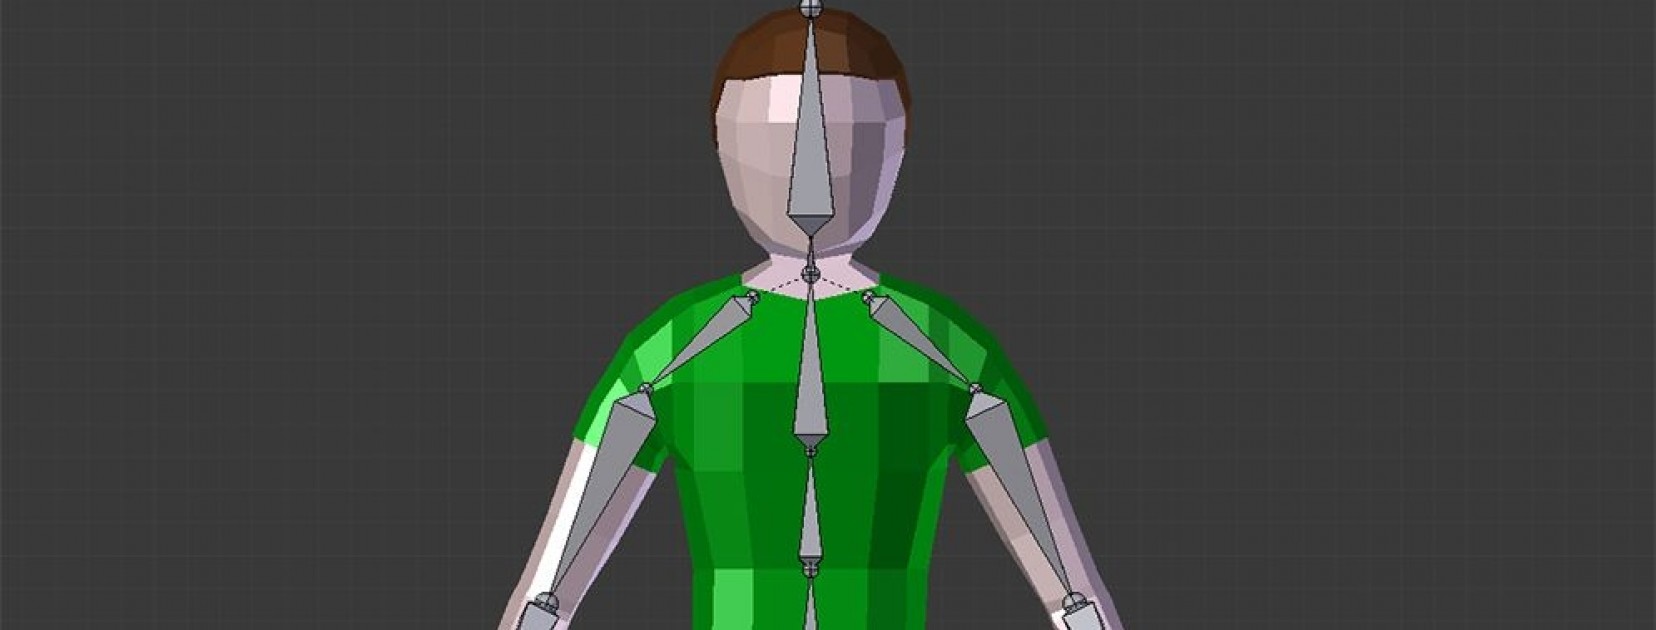
Understanding Bone Structure and Armatures
At the heart of Blender 3 rigging lies the bone structure and armatures, serving as the skeleton that drives the animation of 3D models. This section delves into the fundamentals of creating and managing armatures and bones, crucial for anyone aiming to master rigging in Blender.
- Armature Basics: An armature in Blender is a collection of bones used to deform a mesh. Armatures are used to create the skeleton of your character or object, allowing for realistic movement and animation.
- Adding Bones: Bones are added within an armature to represent the limbs and parts of the model that will move. You can add a bone by entering Edit Mode and using the Shift+A command. Bones can be extruded from existing ones to form a chain, simulating the connected structure of a skeleton.
- Editing Bone Properties: Each bone has properties that can be edited, such as length, direction, and parent-child relationships. These properties are crucial for defining how bones influence each other and the mesh during animation.
- Bone Naming Convention: Naming bones is essential for organization and clarity, especially in complex rigs. Use a consistent naming convention that reflects the bone\"s function and location in the body.
- Parenting and Weighting: Once your bone structure is in place, you need to parent the mesh to the armature and assign weights. Weight painting allows you to control how much influence a bone has on different parts of the mesh, crucial for smooth and realistic animations.
Understanding the bone structure and how armatures work is fundamental for successful rigging in Blender 3. These elements form the basis of any animation, dictating how a model moves and behaves. With a solid grasp of armatures and bones, you\"ll be well-equipped to tackle more advanced rigging and animation challenges.
Advanced Rigging Techniques and Tools
Blender 3 offers a wealth of advanced rigging techniques and tools, enabling animators to create more sophisticated and complex animations. This section explores some of the advanced options available for those looking to push their rigging skills further.
- IK (Inverse Kinematics) Rigging: IK simplifies the animation process by allowing the end effector to drive the movement of connected bones, ideal for limbs and tails.
- Rigify Add-on: Rigify automates the rigging process, generating complete rigs for characters with a few clicks. It includes features like automatic weight painting and bone placement.
- Custom Bone Shapes: Custom bone shapes can be used to create user-friendly rigs, making it easier for animators to select and manipulate bones during animation.
- Constraints: Blender\"s constraint system offers a powerful way to control bone behavior, including maintaining volume during deformation, targeting other bones for IK setups, and much more.
- Drivers and Expressions: Drivers allow properties to control others, such as using a bone\"s rotation to drive facial expressions. Expressions can add complexity to these relationships for nuanced control.
- Facial Rigging: Advanced techniques for facial rigging include using shape keys for expressions, bone-driven controls, and custom scripts for lip sync and facial movements.
- BlenRig: BlenRig is an auto-rigging and skinning system that provides high-quality results for character rigging, offering advanced features like jiggle bones and automated skin weighting.
Mastering these advanced techniques and tools in Blender 3 rigging opens up new possibilities for animation, allowing for more dynamic and expressive characters. While these methods require a deeper understanding of Blender\"s rigging system, they offer the potential to significantly enhance your animations.
_HOOK_
Weight Painting and Vertex Groups
Weight painting and vertex groups are fundamental to Blender 3 rigging, allowing for precise control over how a mesh deforms in response to the movements of its armature. This section provides an overview of how to utilize weight painting and vertex groups to achieve realistic and controlled deformations.
- Understanding Vertex Groups: Vertex groups are collections of vertices that you can assign to specific bones. By doing so, you define which parts of the mesh are influenced by which bones.
- Starting with Weight Painting: Weight painting is the process of painting the mesh to specify the influence a particular bone has on the vertices. Colors range from blue (no influence) to red (full influence), allowing for smooth transitions and deformations.
- Creating Vertex Groups: In Edit Mode, you can create vertex groups and assign vertices to them. These groups can then be linked to bones in the armature for precise control over the mesh deformation.
- Applying Weights: Use Weight Paint Mode to apply weights to the vertex groups. The influence of the bone on the mesh is determined by the weight assigned to the vertices in these groups.
- Adjusting Weights: Adjusting weights is crucial for achieving realistic movement. Blender offers tools such as the Brush, Gradient, and Subtract modes to fine-tune the influence each bone has on the mesh.
- Mirroring Weights: For symmetrical models, Blender allows you to mirror weights across the X-axis, ensuring uniform deformation on both sides of the model.
- Testing and Tweaking: It\"s important to continually test the rig by posing it in various positions. This testing phase helps identify areas where weight adjustments are necessary for more natural-looking movements.
Mastering weight painting and vertex groups in Blender 3 is essential for any rigger looking to create professional-quality animations. These tools give you the ability to fine-tune how your models deform, ensuring that your characters move in a lifelike manner.
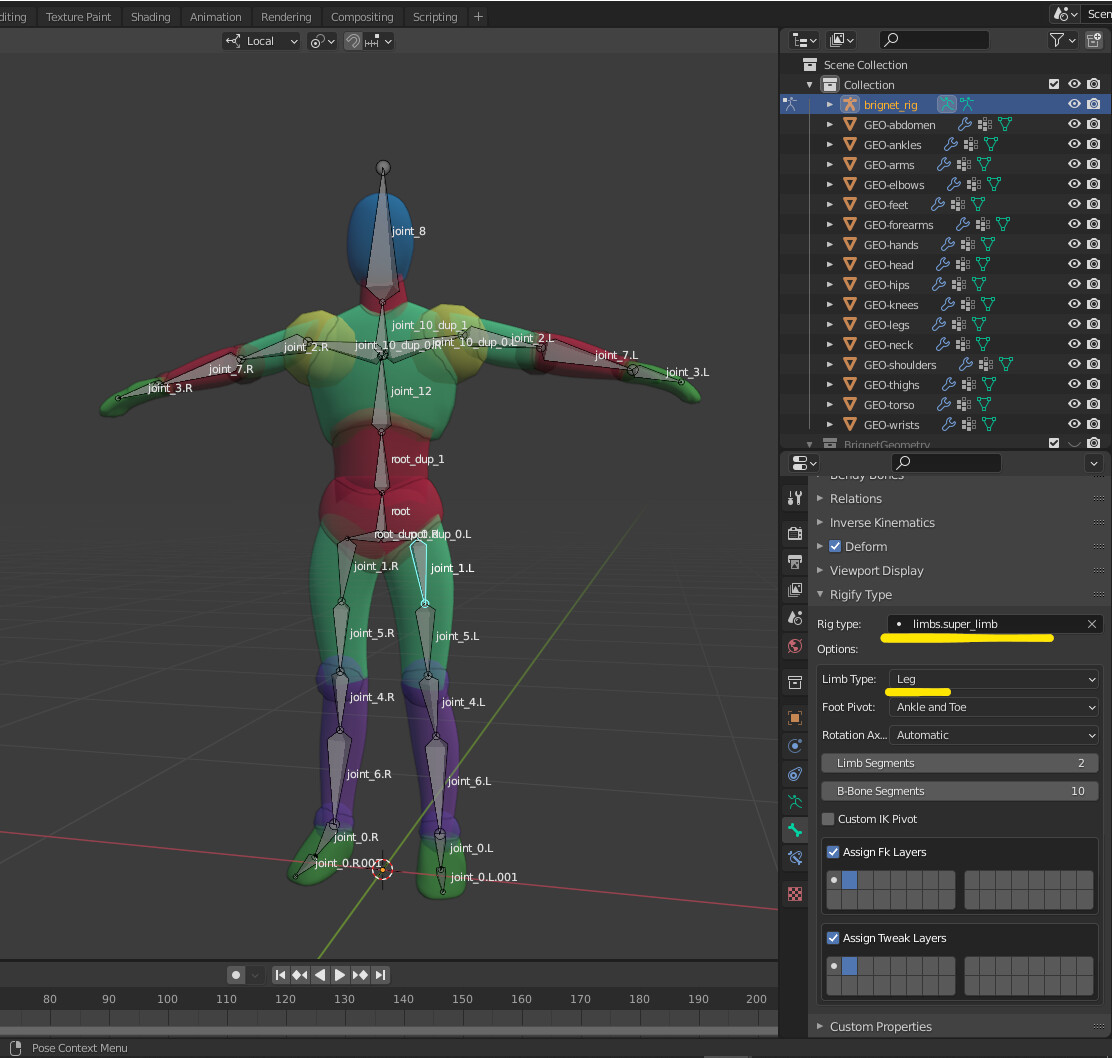
Using Rigify for Automated Rigging
Rigify is a powerful add-on for Blender that significantly simplifies the rigging process, making it accessible for artists of all skill levels. This section guides you through using Rigify to automate the rigging of your characters, ensuring a more efficient workflow.
- Enabling Rigify: First, enable Rigify in Blender\"s preferences under the Add-ons tab. Search for Rigify and check the box to activate it.
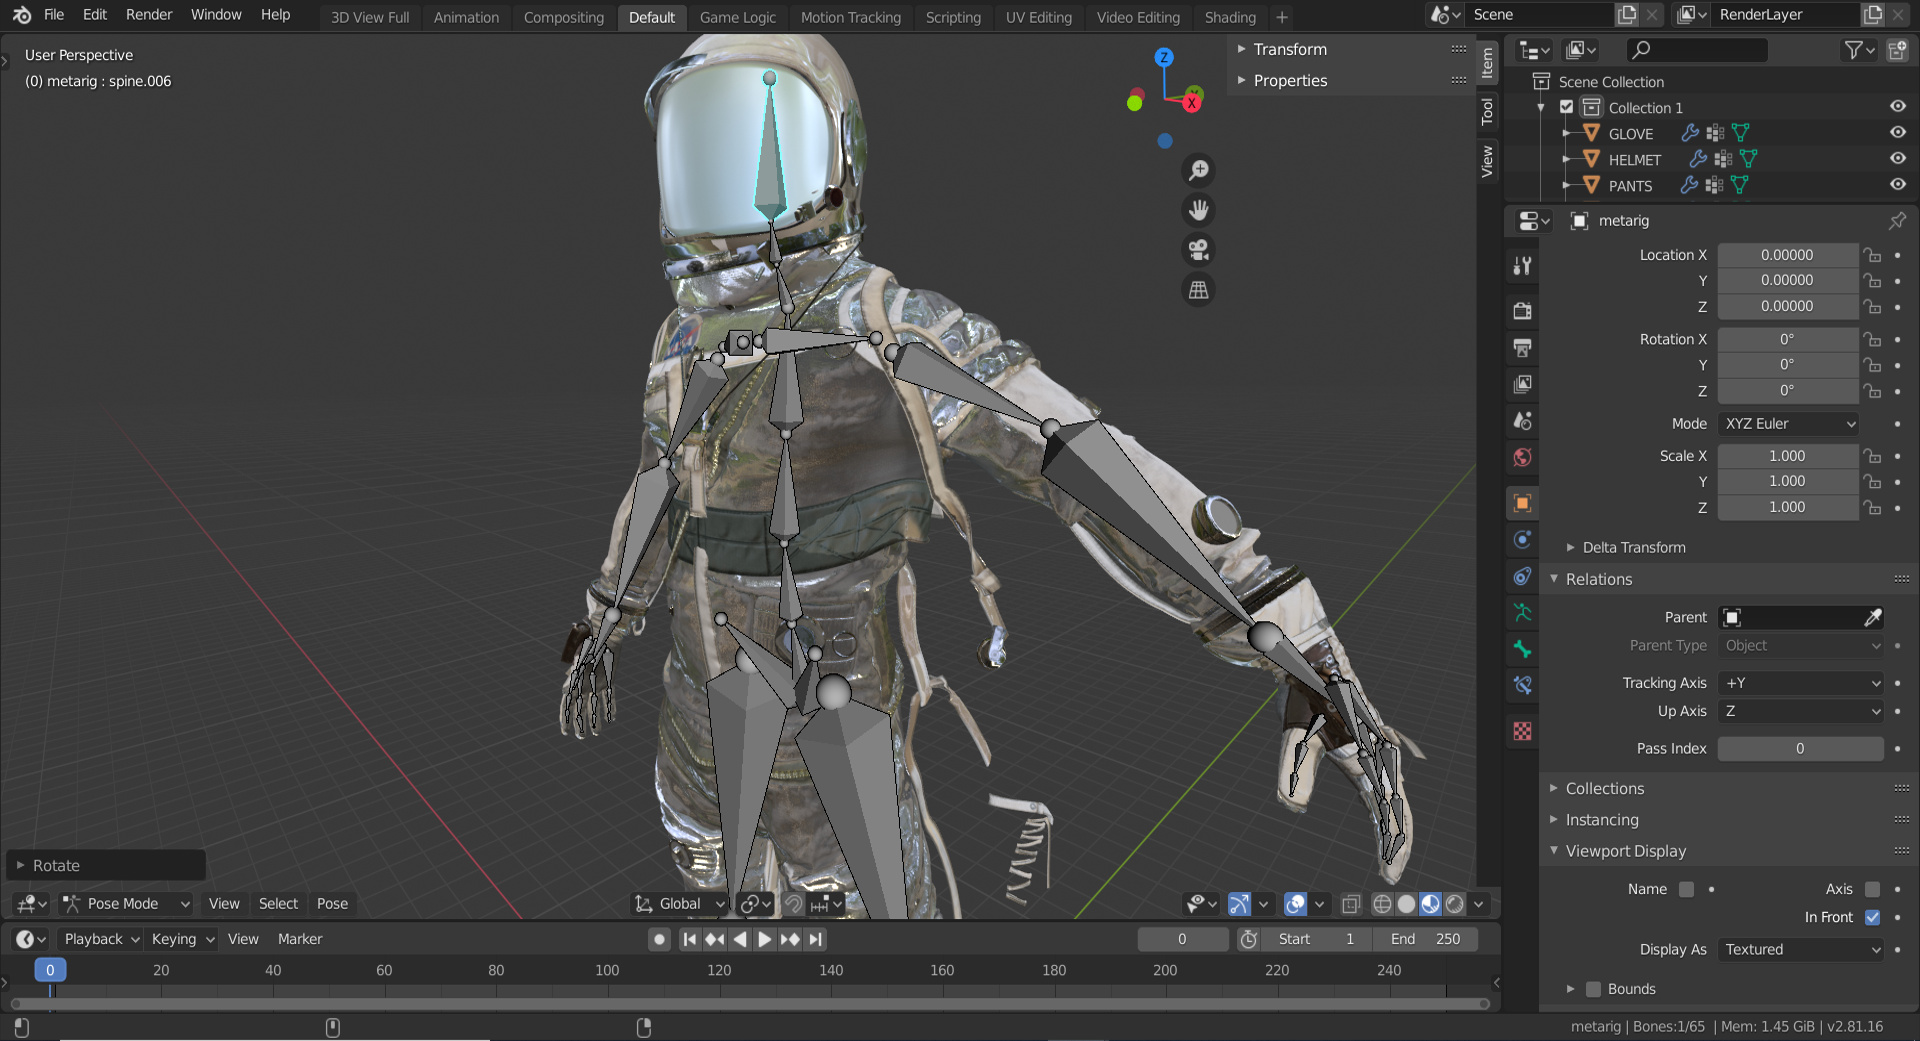
- Adding a Metarig: With Rigify enabled, add a Metarig to your scene. This serves as a template for your character\"s rig and can be customized to fit your model.
- Customizing the Metarig: Adjust the Metarig to match your character\"s proportions. This step is crucial for ensuring that the generated rig will properly fit your model.
- Generating the Rig: Once the Metarig is customized, use Rigify\"s Generate Rig button to create the full rig. This automated process builds a complex rig based on the Metarig\"s structure, complete with controls for animation.
- Weight Painting: After generating the rig, you may need to fine-tune the weight painting to ensure smooth deformations. Rigify automates much of this process, but manual adjustments can enhance the final outcome.
- Animating Your Character: With the rig in place and weight painting adjusted, your character is ready to be animated. Rigify provides a comprehensive set of controls for animating everything from basic movements to complex facial expressions.
Using Rigify not only speeds up the rigging process but also ensures that artists can focus more on the creative aspects of character animation. Its automated system generates professional-quality rigs that can be easily customized and animated, making it an invaluable tool for Blender users looking to streamline their workflow.
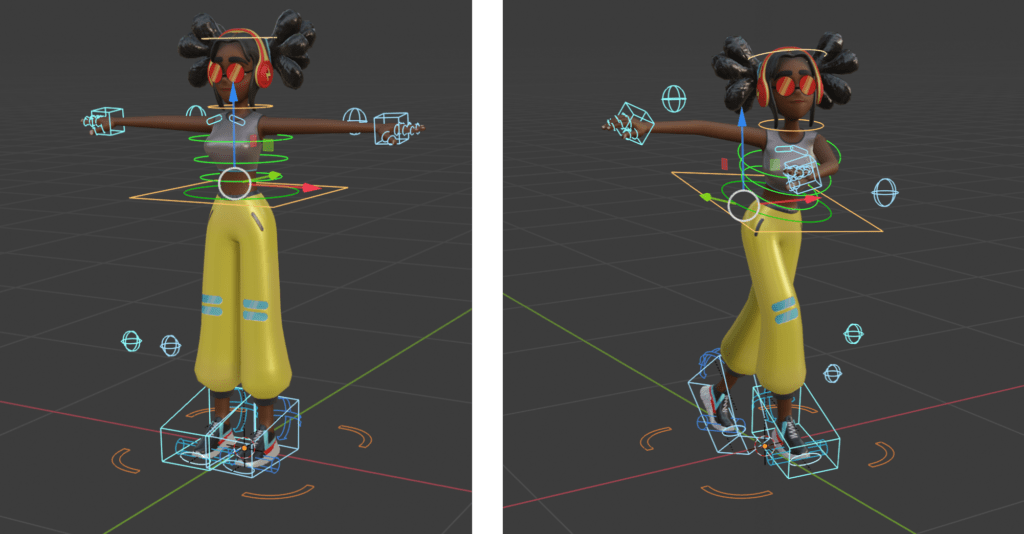
Custom Bone Shapes and IK/FK Switches
Blender 3 rigging allows for the customization of bone shapes and the implementation of IK (Inverse Kinematics) / FK (Forward Kinematics) switches, enhancing the animator\"s control and efficiency. This section covers how to utilize these advanced features to refine your rigging workflow.
- Custom Bone Shapes: Customizing bone shapes provides a more intuitive interface for animators. To create a custom bone shape, model a new shape and assign it to a bone via the bone\"s custom shape property. This makes selecting and manipulating bones in complex rigs easier.
- Creating IK/FK Switches: IK/FK switches allow for dynamic switching between IK and FK controls on a rig, offering versatility in animation. This is achieved by setting up separate IK and FK bone chains and using a custom property to blend between these two states.
- Setting Up IK Controls: IK controls are essential for animating limbs and tails. Create an IK constraint on the last bone in the chain and target a control bone. Adjust the chain length to define how many bones the IK influence extends to.
- Configuring FK Controls: FK controls are straightforward, with each bone rotating independently. Ensure that each FK bone in the chain is parented correctly to achieve natural movement.
- Implementing the Switch: Use custom properties and drivers to control the IK/FK blend. This allows animators to smoothly transition between IK and FK controls based on the needs of the animation.
- Testing and Refinement: Thorough testing is crucial to ensure that the IK/FK switches work as intended. Animate the controls to test the switch and make adjustments as necessary for smooth transitions.
Custom bone shapes and IK/FK switches significantly improve the rigging and animation process in Blender 3, offering animators greater control and flexibility. By mastering these techniques, you can create rigs that are both highly functional and intuitive to use.
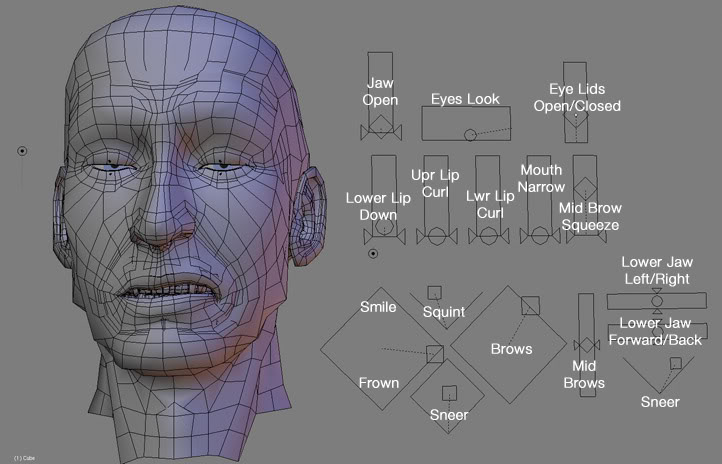
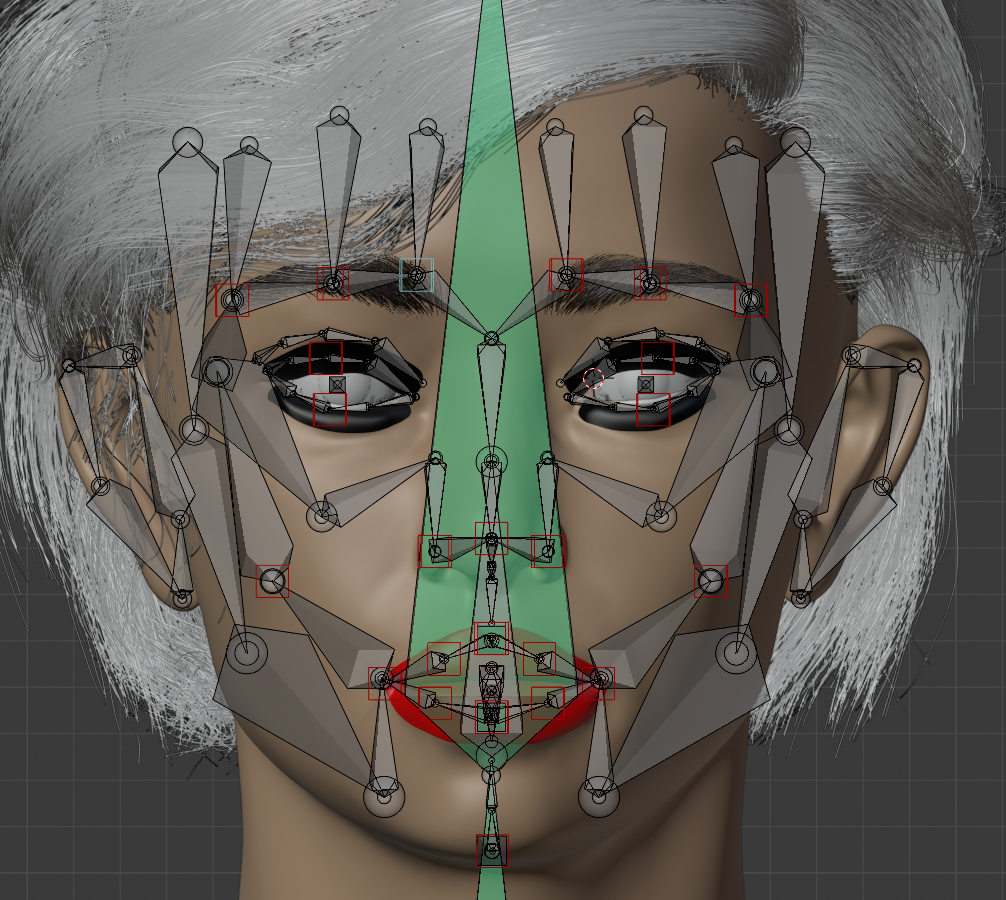
Facial Rigging and Animation
Facial rigging and animation in Blender 3 are crucial for bringing characters to life with expressive, nuanced animations. This section explores techniques and tools for creating facial rigs that can convey a wide range of emotions and reactions.
- Understanding Facial Rigging: Facial rigging involves creating a network of bones or shape keys that control the facial features. This allows animators to craft expressions and lip-syncing for characters.
- Using Shape Keys: Shape keys are pivotal for facial animation, allowing for smooth transitions between expressions. By adjusting vertices, you can create a library of facial expressions that can be animated over time.
- Setting Up Bone Controls: For more complex rigs, bones can be used to control facial movements. This includes jaw movement, eyebrow raises, and eye blinks. Properly placed bone controls can mimic the subtleties of facial expressions closely.
- Weight Painting for Facial Rigging: Weight painting determines how much influence each bone or shape key has on the mesh. Fine-tuning this influence is key to achieving realistic facial animations.
- Driver-Based Controls: Drivers can automate facial expressions by linking shape keys or bone movements to simple controls. This makes animating complex expressions much easier and more intuitive.
- Integrating Lip Sync: For dialogues, lip-syncing can be achieved through a combination of shape keys and bone controls. Timing the movements with audio files can bring characters to life in a believable way.
- Advanced Techniques: For high-end production, techniques such as muscle-based rigging and corrective shape keys can add another layer of realism to facial animations.
Mastering facial rigging and animation in Blender 3 allows animators to create deeply expressive characters. Whether it\"s a subtle smirk or a wide range of emotions, facial rigging is essential for storytelling and character development in animation.
Common Rigging Problems and Solutions
Rigging in Blender 3 can sometimes lead to common issues that frustrate artists. However, most of these problems have straightforward solutions that can keep your project moving forward smoothly.
- Incorrect Bone Weighting: A common issue arises when bones do not influence the mesh as intended. Solutions include adjusting the weight paint mode to ensure proper distribution of influence across vertices.
- IK/FK Snapping Issues: IK (Inverse Kinematics) and FK (Forward Kinematics) systems might not transition smoothly. Using constraints with custom attributes can help manage these transitions effectively.
- Mesh Deforms Unexpectedly: Sometimes, a mesh may deform in an unintended manner when rigged. This can often be corrected by revisiting the weight painting for the affected areas, ensuring more accurate influence from the bones.
- Control Rig Complexity: Overly complex control rigs can make animation difficult. Simplifying these controls, or using Blender\"s Rigify system, can offer more manageable and animator-friendly rigs.
Addressing these common rigging challenges in Blender 3 can greatly enhance your animation workflow, leading to more lifelike and controlled character movements.
_HOOK_
READ MORE:
Resources for Learning Blender Rigging
Mastering rigging in Blender 3 is a crucial step for animators and 3D artists looking to bring their characters and objects to life. Fortunately, there are numerous resources available for learners at all levels to get started or refine their rigging skills. Here are some of the top resources for learning Blender rigging:
- Blender Studio: Access in-depth tutorials and project files from Blender\"s own production team, covering everything from basic rigging concepts to advanced techniques like facial rigging and IK/FK switching.
- Udemy Courses: Find comprehensive courses like \"The Ultimate Guide to Blender 3D Rigging and Animation,\" which cater to both beginners and advanced users wanting to master Blender rigging.
- Humane Rigging by Nathan Vegdahl: Dive into this dedicated rigging course created by one of Blender\"s lead riggers, Nathan Vegdahl. This course covers foundational rigging techniques and introduces the Rigify addon.
- YouTube Tutorials: YouTube is a goldmine for Blender rigging tutorials, offering everything from beginner guides to detailed breakdowns of complex rigging challenges.
- Blender Developer Documentation: For those looking to understand the technical underpinnings of Blender\"s rigging tools, the Blender Developer Documentation offers insights into animation and rigging modules.
- Online Forums and Blender Communities: Engage with other Blender users on platforms like Blender Artists and the Blender subreddit to get feedback, share tips, and find solutions to rigging challenges.
By leveraging these resources, you can progressively build your rigging skills, from basic armatures to complex character rigs, enhancing your animations and bringing your 3D creations to life.
Unlock the full potential of your 3D models with Blender 3 rigging. Mastering these techniques will elevate your animations, bringing your creations to life with unparalleled realism and fluidity. Start your rigging journey today and transform your artistic visions into reality.