Topic how to install blender: Discover the simplicity of installing Blender, the leading 3D creation software, with our easy-to-follow guide designed to get beginners started on their 3D modeling journey effortlessly and quickly.
Table of Content
- How to install Blender?
- Step 1: Download Blender
- Step 2: Run the Installer
- Step 3: Launch Blender
- Updating Blender
- Troubleshooting
- Step 2: Run the Installer
- Step 3: Launch Blender
- Updating Blender
- Troubleshooting
- YOUTUBE: Download and Install Blender
- Step 3: Launch Blender
- Updating Blender
- Troubleshooting
- Updating Blender
- Troubleshooting
- Troubleshooting
- Introduction to Blender Installation
- Step 1: Downloading Blender
- Step 2: Running the Installer
- Step 3: Completing Installation
- Step 4: Launching Blender
- Configuration and First Steps
- Updating Blender
- Advanced Installation Tips
- Troubleshooting Common Installation Issues
- Exploring Blender’s Features After Installation
- Community and Support
How to install Blender?
To install Blender on your computer, follow these steps:
- Visit the official Blender website at https://www.blender.org/
- Click on the \"Download Blender\" button.
- Choose your operating system (Windows, macOS, Linux) and click on the download button for that platform.
- Once the download is complete, locate the downloaded file and run the installer.
- Follow the on-screen instructions to install Blender on your computer.
- After the installation is complete, you can launch Blender and start using it for your 3D projects.
Make sure to regularly check for updates on the official Blender website to ensure you have the latest features and bug fixes.
READ MORE:
Step 1: Download Blender
Visit the official Blender website (www.blender.org) and navigate to the download section. Choose the version that is compatible with your operating system (Windows, macOS, or Linux). Blender supports a wide range of operating systems including Windows Vista, 7, 8, 10 in both 32-bit and 64-bit configurations.
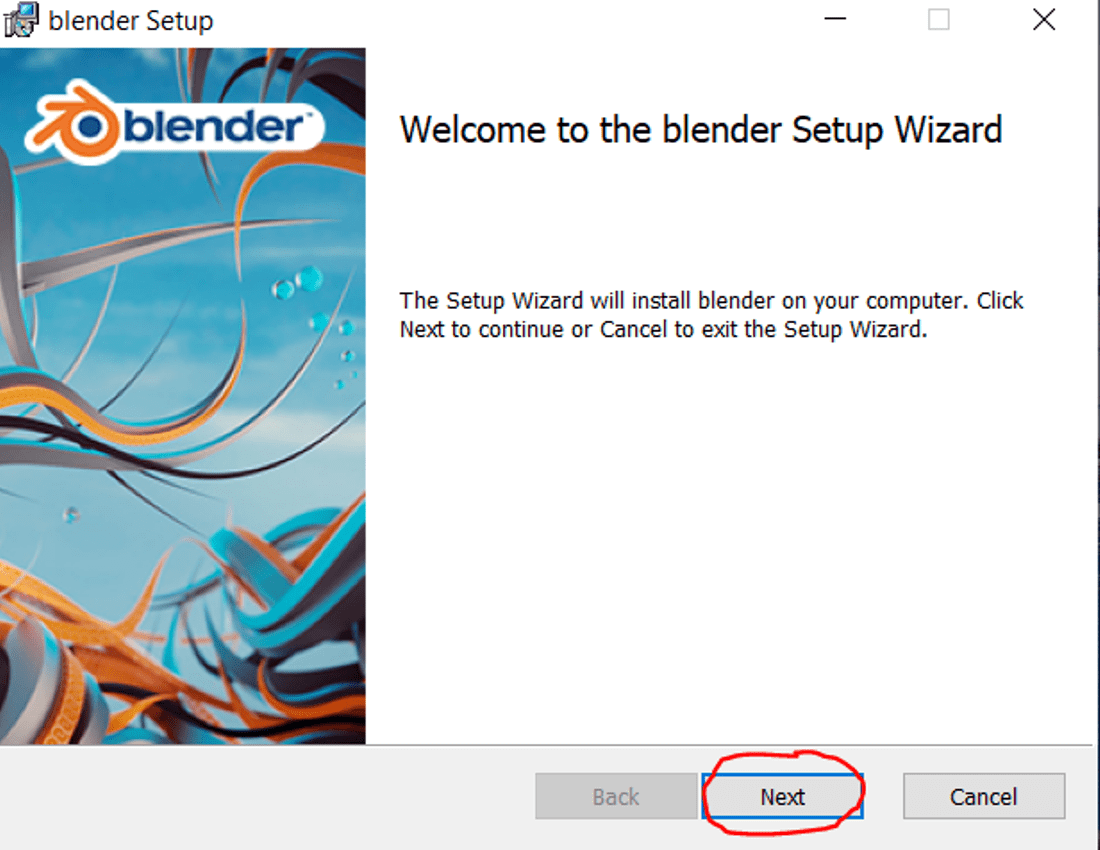
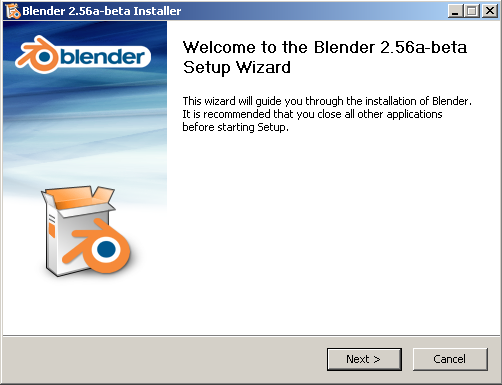
Step 2: Run the Installer
Once the download is complete, locate the installer file in your downloads folder and double-click it to start the installation process. Follow the on-screen instructions to complete the installation. The installer may ask you to choose the installation directory and whether to add Blender to the system PATH.

Step 3: Launch Blender
After installation, you can launch Blender from your desktop shortcut or from the start menu. On the first launch, Blender will configure itself and may take a few moments to open.
Additional Tips:
- For advanced users, Blender’s API allows for Python scripting to customize the application and write specialized tools.
- If you need to install multiple versions of Blender, consider using the portable .zip version. You can then add a folder called \"config\" inside the version number folder to keep all files contained and prevent interference between versions.
Updating Blender
To ensure you have the latest features and bug fixes, check the Blender website for updates regularly. Updating Blender is straightforward—download the latest version and run the installer, which will replace the older version while preserving your settings.

_HOOK_
Troubleshooting
If you encounter any issues during installation, refer to the Blender manual or the FAQs on the Blender website. The Blender community is also a great resource for support and advice.

Step 2: Run the Installer
Once the download is complete, locate the installer file in your downloads folder and double-click it to start the installation process. Follow the on-screen instructions to complete the installation. The installer may ask you to choose the installation directory and whether to add Blender to the system PATH.

Step 3: Launch Blender
After installation, you can launch Blender from your desktop shortcut or from the start menu. On the first launch, Blender will configure itself and may take a few moments to open.
Additional Tips:
- For advanced users, Blender’s API allows for Python scripting to customize the application and write specialized tools.
- If you need to install multiple versions of Blender, consider using the portable .zip version. You can then add a folder called \"config\" inside the version number folder to keep all files contained and prevent interference between versions.

Updating Blender
To ensure you have the latest features and bug fixes, check the Blender website for updates regularly. Updating Blender is straightforward—download the latest version and run the installer, which will replace the older version while preserving your settings.

Troubleshooting
If you encounter any issues during installation, refer to the Blender manual or the FAQs on the Blender website. The Blender community is also a great resource for support and advice.

_HOOK_
Download and Install Blender
Download: \"Discover how easy it is to download your favorite music, movies, and more with our step-by-step guide. Learn new tips and tricks to enhance your downloading experience and enjoy seamless access to content.\" Computer: \"Unleash the full potential of your computer with our comprehensive tutorial video. From optimizing performance to troubleshooting common issues, this video will empower you to make the most of your device.\"
Install Blender on Computer Laptop
https://www.blender.org/download/ In this video we will see How to Install Blender on Windows 11. So let us see how to Download ...
Step 3: Launch Blender
After installation, you can launch Blender from your desktop shortcut or from the start menu. On the first launch, Blender will configure itself and may take a few moments to open.
Additional Tips:
- For advanced users, Blender’s API allows for Python scripting to customize the application and write specialized tools.
- If you need to install multiple versions of Blender, consider using the portable .zip version. You can then add a folder called \"config\" inside the version number folder to keep all files contained and prevent interference between versions.
Updating Blender
To ensure you have the latest features and bug fixes, check the Blender website for updates regularly. Updating Blender is straightforward—download the latest version and run the installer, which will replace the older version while preserving your settings.
Troubleshooting
If you encounter any issues during installation, refer to the Blender manual or the FAQs on the Blender website. The Blender community is also a great resource for support and advice.
_HOOK_
Troubleshooting
If you encounter any issues during installation, refer to the Blender manual or the FAQs on the Blender website. The Blender community is also a great resource for support and advice.
Introduction to Blender Installation
Blender is a comprehensive, free, and open-source 3D creation suite that supports the entire 3D pipeline, including modeling, rigging, animation, simulation, rendering, compositing, and motion tracking, as well as video editing. Installing Blender opens up a world of creative possibilities, whether you\"re a beginner in 3D design or a seasoned professional. This section will guide you through the initial steps to get Blender up and running on your computer.
- First, visit the official Blender website to find the version that best suits your operating system\"s requirements. Blender is compatible with Windows, macOS, and Linux.
- Download the Blender installer or package for your operating system. Detailed instructions are available on the Blender website, ensuring a smooth download process.
- Once the download is complete, run the installer or unpack the package, depending on your operating system. Follow the on-screen instructions to install Blender on your computer.
- After installation, you can immediately start using Blender. A shortcut may be created on your desktop or in your applications menu, allowing easy access to Blender.
For those new to Blender or 3D modeling, the Blender community offers extensive resources, including tutorials, forums, and documentation, to help you get started. By following these initial steps, you\"ll be well on your way to exploring the vast capabilities of Blender and bringing your 3D projects to life.
Step 1: Downloading Blender
Starting your journey into 3D modeling and animation with Blender begins with downloading the software. Blender is available for free, catering to various operating systems including Windows, macOS, and Linux. Here\"s how you can download Blender:
- Navigate to the official Blender website (www.blender.org) and locate the download section.
- Select the version of Blender you wish to download. The website typically recommends the latest version, but older versions are also available for compatibility reasons.
- Choose the installer based on your operating system. Blender provides separate installers for Windows, macOS, and Linux. For Windows, you can choose between a 64-bit and a 32-bit version, depending on your system\"s capabilities.
- Click the download button to start the download process. The file size is relatively small, ensuring a quick download even on slower internet connections.
- Once the download is complete, proceed to the installation process detailed in the next section.
It\"s important to download Blender only from the official website to ensure you\"re getting a safe, virus-free version of the software. Blender\"s community and development team continually update the software, adding new features and fixing bugs, so check back regularly for updates.
Step 2: Running the Installer
Once you have downloaded the Blender installer, the next step is to run it to install Blender on your system. This process is straightforward but varies slightly depending on your operating system. Here\"s how to proceed:
- Locate the downloaded file, usually found in your \"Downloads\" folder, and double-click to open it. On Windows, this will be an \".exe\" file, while on macOS, it will be a \".dmg\" file, and on Linux, it might come as a \".tar.gz\" file or similar format.
- Windows users will see a security prompt asking for permission to run the installer. Click \"Yes\" to proceed.
- Follow the on-screen instructions. The installer will typically ask you to agree to the terms and conditions, select an installation directory, and choose whether to create shortcuts.
- For macOS, drag the Blender application to your Applications folder to complete the installation. Linux users may need to extract the file and run a script or use their package manager, depending on the distribution.
- Once the installation is complete, you may be prompted to restart your computer, though this is usually not necessary for Blender.
After running the installer, Blender should be fully installed on your computer. You can now proceed to launch Blender and start exploring its vast array of features and capabilities. Remember, installing Blender is only the first step. The real journey begins as you dive into 3D modeling, animation, and beyond.
Step 3: Completing Installation
Finalizing the installation of Blender is a straightforward process that ensures you have everything set up for your 3D creative endeavors. This step involves final adjustments and configurations to tailor Blender to your preferences and system capabilities. Follow these steps to complete the installation:
- After running the installer, you might be prompted to select additional installation options, such as creating desktop shortcuts or choosing the installation directory. It\"s generally recommended to stick with the default settings unless you have specific needs.
- Once the installation process is complete, the installer will usually provide a confirmation screen. Here, you may be given the option to directly launch Blender or read release notes. Select \"Finish\" to close the installer.
- If Blender doesn\"t automatically open after installation, you can manually launch it by finding the Blender icon on your desktop or by searching for Blender in your computer\"s application menu.
- Upon first launch, Blender may take a moment to configure itself, loading necessary plugins and default settings. This is normal and ensures that Blender is optimized for your system.
- Consider adjusting Blender\"s settings to suit your workflow. You can access preferences through the \"Edit\" menu, where you can customize themes, input devices, and other settings to enhance your Blender experience.
With Blender now installed and configured on your computer, you\"re ready to dive into the world of 3D modeling, animation, rendering, and more. Whether you\"re a hobbyist or a professional, Blender offers a robust set of tools to bring your creative visions to life.
_HOOK_
Step 4: Launching Blender
After successfully installing Blender, the next step is launching the application and starting your 3D modeling journey. Here\"s what you need to know to get started:
- If you chose to create a desktop shortcut during installation, simply double-click the Blender icon on your desktop to launch the program.
- Alternatively, you can find Blender in your Start Menu (Windows), Launchpad (macOS), or application menu (Linux). Just search for \"Blender\" and click the application to open it.
- Upon launching Blender for the first time, you might see a splash screen showcasing the latest features and updates. You can click anywhere outside the splash screen to close it and access the main interface.
- Blender\"s user interface is highly customizable. Take some time to familiarize yourself with the layout, tools, and settings. You can adjust the interface to suit your workflow through the preferences menu.
- For new users, it\"s recommended to start with the tutorials available on the Blender website or through the community forums. These resources provide valuable guidance on navigating the interface, basic modeling techniques, and more.
Launching Blender opens a gateway to endless creative possibilities. Whether you\"re interested in animation, modeling, rendering, or game creation, Blender offers comprehensive tools to bring your ideas to life. Enjoy exploring and creating in the world of 3D with Blender.
Configuration and First Steps
After installing Blender, configuring it correctly and taking the first steps are crucial to make the most out of this powerful 3D creation suite. Here are some essential tips to get started:
- Adjust User Preferences: Access the preferences menu by going to Edit > Preferences. Here, you can customize Blender’s interface, input devices, and other settings to fit your workflow.
- Choose a Theme: Blender offers several themes to customize the look of the interface. Select one that suits your preference for a more personalized workspace.
- Set Up Input Devices: In the Input tab, configure your mouse and keyboard settings. You can also set up shortcuts for frequently used actions to speed up your workflow.
- Configure Add-ons: Blender supports numerous add-ons that can extend its functionality. Explore and enable add-ons relevant to your projects in the Preferences menu.
- Explore the Interface: Familiarize yourself with Blender’s interface, including the 3D viewport, outliner, properties panel, and timeline. Knowing where everything is will significantly improve your efficiency.
- Start a Simple Project: Begin with a simple project to get a feel for Blender’s tools and features. Follow a tutorial for creating a basic object like a cup or a box to learn the basics of modeling, texturing, and rendering.
- Save Your Workspace: Once you’ve set up Blender to your liking, save your workspace layout by going to File > Defaults > Save Startup File. This way, Blender will open with your custom setup every time.
By configuring Blender to suit your needs and taking some initial steps to learn its interface and tools, you\"ll be well on your way to creating stunning 3D art and animations. Remember, the Blender community is vast and supportive, offering a wealth of tutorials, forums, and resources to help you on your journey.
Updating Blender
Keeping Blender up to date is crucial to ensure access to the latest features, improvements, and bug fixes. Updating Blender is straightforward, and here are the steps to follow to make sure you\"re always using the latest version:
- Check the Current Version: Open Blender and look at the splash screen that appears to see the current version you are using. Alternatively, you can find the version number in Blender under Help > About Blender.
- Download the Latest Version: Visit the official Blender website (www.blender.org) and go to the download section. Here, you will find the latest version of Blender available for download.
- Install the New Version: Once the download is complete, run the installer. It will automatically update your Blender to the latest version. On Windows, this may involve an executable file (.exe), while macOS users will have a disk image file (.dmg), and Linux users might download a tarball (.tar.gz).
- Verify the Update: After installation, launch Blender to ensure that the update was successful. Check the splash screen or the About section again to verify the new version number.
- Keep Your Settings and Add-ons: Blender offers an option to copy your previous settings and add-ons to the new version during the first launch. Select this option if you want to retain your customizations.
Regularly updating Blender not only gives you the latest tools and features but also helps in maintaining a secure and stable 3D creation environment. Follow these simple steps to ensure your Blender installation remains up to date.
Advanced Installation Tips
For users looking to optimize their Blender installation or manage multiple versions, here are some advanced tips to enhance your setup:
- Choose the Right Version: Blender offers stable releases for general use and nightly builds for users who want the latest features. Consider your needs when selecting which version to install.
- Custom Installation Path: During the installation process, you can choose a custom directory. This is useful if you wish to install Blender on a different drive or if you need to manage multiple versions.
- Use Portable Versions: Blender can be run as a portable application from any location, including external drives. Download the ZIP version, extract it, and run Blender directly from the folder for a portable setup.
- Configure Environment Variables: Advanced users can set up environment variables to control Blender\"s behavior, such as customizing the temporary files directory or specifying a different location for user preferences and configurations.
- Graphics Card Drivers: Ensure your graphics card drivers are up to date to maximize Blender\"s performance, especially for rendering and viewport performance.
- Multiple Versions: If you need to keep multiple versions of Blender installed, consider renaming the installation folder to include the version number. This way, you can easily switch between versions without conflict.
- Scripting and Add-ons: For users interested in scripting or using custom add-ons, verify that your Python installation is compatible with the Blender version you\"re installing. Blender comes with its own Python, but additional configurations might be needed for complex setups.
These advanced tips can help you tailor Blender\"s installation to fit your specific needs, whether you\"re a professional artist, developer, or hobbyist. With the right setup, you can ensure Blender runs smoothly and efficiently on your system.
Troubleshooting Common Installation Issues
Encountering issues during the installation of Blender can be frustrating. Here are some common problems and their solutions to help you get Blender installed smoothly:
- Missing Desktop Icon: If you used the ZIP file for installation and can\"t find the desktop icon, manually create one. Navigate to the Blender installation folder, right-click the Blender.exe file, and choose \"Send to > Desktop (create shortcut)\".
- Installation Freezes or Crashes: This could be due to insufficient system permissions or conflicts with security software. Run the installer as an administrator and temporarily disable antivirus software during the installation.
- Graphics Card Compatibility: Blender requires up-to-date graphics drivers. If Blender fails to start after installation, update your graphics card drivers from the manufacturer\"s website.
- Errors on Startup: Missing DLL errors or other startup issues might occur if the installation is corrupted. Re-download the installer from the official Blender website and reinstall.
- Blender Doesn\"t Start After Update: If Blender worked before an update but doesn\"t start afterwards, try resetting Blender to its factory settings by launching it with the --factory-startup command line option.
- Missing Add-ons or Features: Ensure you\"ve installed the correct version of Blender. Some add-ons or features might not be available in older versions or in experimental builds.
- Permission Issues: On macOS or Linux, you might need to adjust the permissions for the Blender application. Use the chmod command in Terminal to change the permissions.
Most installation issues can be resolved by following these steps. If you continue to experience problems, consult the Blender manual or seek assistance from the Blender community forums for additional support.
_HOOK_
Exploring Blender’s Features After Installation
Once Blender is installed, a vast array of features awaits to be explored, enabling you to create detailed 3D models, stunning animations, and realistic renderings. Here\"s a guide to some of the key features you should check out:
- Interface Customization: Blender\"s interface is highly customizable. You can adjust layouts, themes, and the placement of tools to fit your workflow.
- Modeling Tools: Dive into Blender\"s extensive modeling tools, including sculpting, retopology, and modifiers, to create complex 3D models.
- Animation & Rigging: Explore Blender\"s animation tools, from simple keyframes to complex rigging systems, to bring your creations to life.
- Shading & Texturing: Use Blender\"s shading and texturing capabilities to add realism to your models. The node-based material system allows for intricate materials and textures.
- Lighting & Rendering: Experiment with different lighting setups and utilize Blender’s powerful rendering engines, Cycles and Eevee, for photorealistic results or real-time rendering.
- Simulation: Blender offers robust simulation tools for physics, cloth, particles, and fluids to add realism and dynamics to your scenes.
- Video Editing: Blender includes a fully-featured video editor for post-production work, allowing you to edit your animations or even live-action footage directly within the software.
- Scripting & Extensions: With built-in support for Python scripting, you can automate tasks, create custom tools, and extend Blender\"s functionality through addons.
- Community & Resources: The Blender community is one of its greatest assets. Explore online forums, tutorials, and resources to learn new techniques and solve challenges.
Starting with these features will help you understand the depth and power of Blender as a 3D creation tool. Whether you\"re interested in animation, game development, visual effects, or 3D printing, Blender offers the tools you need to turn your ideas into reality.
READ MORE:
Community and Support
The Blender community is a vibrant and supportive ecosystem for users of all levels, offering a wide range of resources to help you get started, solve problems, and share your work. Whether you\"re a beginner or an experienced user, here are some key resources:
- Official Blender Forums: The Blender Artists Forum and Blender Developer Forum are great places to ask questions, share tips, and connect with other Blender users.
- Blender Stack Exchange: A question and answer site for people who use Blender to create 3D graphics, animations, or games. It\"s a valuable resource for finding solutions to specific problems.
- Blender Chat: Join the #blender and #blender-coders channels on blender.chat for real-time discussions with the Blender community and developers.
- Video Tutorials: The official Blender YouTube channel, as well as channels from Blender enthusiasts, offer tutorials ranging from beginner to advanced levels.
- Documentation: The comprehensive Blender Manual (docs.blender.org) is regularly updated and is an excellent starting point for learning about Blender\"s features and tools.
- Blender Network: For professional support, the Blender Network connects you with experienced Blender professionals and trainers.
- Blender Market: A marketplace for Blender add-ons, models, and materials that also supports the Blender community.
- Workshops and Meetups: Blender conferences, user groups, and meetups around the world offer opportunities to learn from and network with other Blender users in person.
Leveraging these resources can dramatically enhance your Blender experience, helping you to overcome challenges and improve your skills. The Blender community is known for its willingness to help and share knowledge, so don\"t hesitate to participate and contribute.
Embarking on your Blender journey unlocks a world of creativity and innovation. Follow this guide to seamlessly install Blender and explore its vast capabilities, joining a community eager to see what you create next.