Topic setup blender for 3d printing: Discover the essentials of setting up Blender for 3D printing and transform your digital designs into tangible realities, unleashing endless creative possibilities.
Table of Content
- How do I set up Blender for 3D printing?
- Getting Started with Blender for 3D Printing
- Optimizing Models for Printing
- Exporting Your Model
- Final Checks
- Optimizing Models for Printing
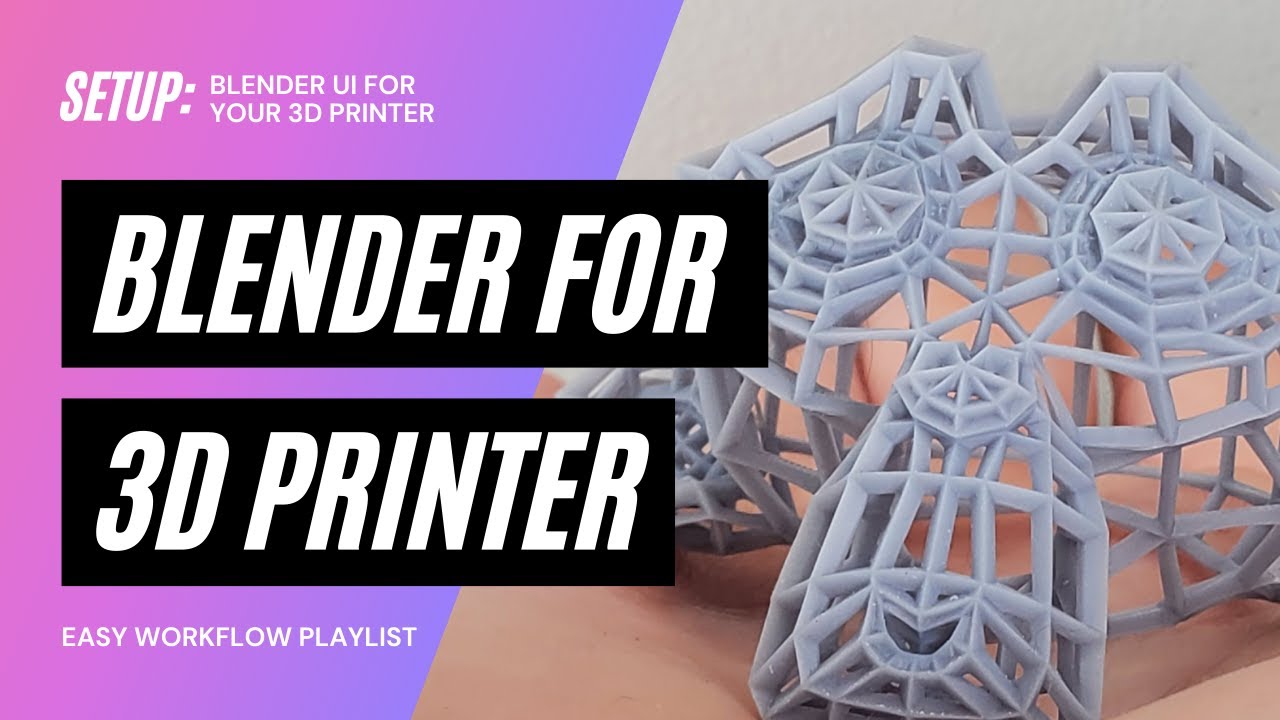
- YOUTUBE: Setup Blender for your 3D Printer in 5 Minutes! Scale, 3D Volume, Add-Ons, HD Studio 2020
- Exporting Your Model
- Final Checks
- Exporting Your Model
- Final Checks
- Final Checks
- Introduction to Blender and Its Importance in 3D Printing
- Preparing Your Workspace: Blender Settings for 3D Printing
- Modeling for Printability: Best Practices and Tips
- Optimizing Your 3D Models for Printing
- Using Blender\"s 3D Printing Toolbox for Error Checking
- Exporting Models: Formats and Settings for 3D Printing
- Post-Processing: Preparing Your Model for the Final Print
- Advanced Techniques: Maximizing Blender for Professional 3D Printing Projects
- Common Pitfalls and How to Avoid Them
- Conclusion: Taking Your 3D Printing to the Next Level with Blender
How do I set up Blender for 3D printing?
To set up Blender for 3D printing, follow these steps:
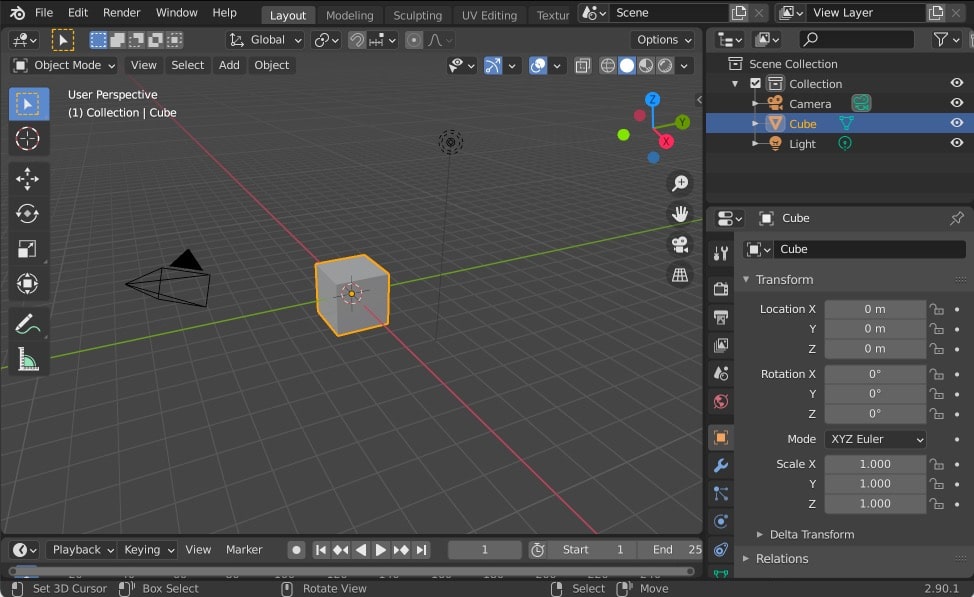
- Open Blender and navigate to Edit > Preferences.
- In the Preferences window, select Add-ons.
- Search for \"3D-print\" in the search bar.
- Enable the 3D Print Toolbox add-on by checking the box next to it.
- Click on the Add-ons tab, then click on Mesh.
- Find the 3D Print Toolbox add-on in the list and enable it by ticking the box.
- You should now see a new tab labeled \"3D-Print\" in the sidebar of Blender.
- You are now set up to use Blender for 3D printing.
READ MORE:
Getting Started with Blender for 3D Printing
Begin by familiarizing yourself with Blender\"s interface and basic functions. Create your design using Blender\"s extensive toolset, from simple shapes to complex structures. Remember to save your work frequently.
Unit Setup
- Go to the Scene properties.
- Under Units, select Metric with a scale of 0.001 for millimeters precision.
Modeling Tips
- Ensure your model is solid with no holes.
- Avoid non-manifold edges, as they can cause printing errors.
- Use the 3D Printing Toolbox addon for Blender to check for errors.

Optimizing Models for Printing
Optimization involves making sure your model is printable, with attention to detail on aspects like wall thickness, overhangs, and support structures if necessary.
Scaling and Dimensions
Adjust the scale of your model to match the desired physical size. Use the Transform panel to set exact dimensions.
Applying Modifiers
Before exporting, apply any modifiers to ensure the geometry is correctly interpreted by the slicing software.
Exporting Your Model
Export your model as an STL file, which is widely supported by 3D printing software:
- Select your model.
- Go to File > Export > STL.
- Choose the destination and save your file.
Final Checks
Before sending your model to the printer, use slicing software to check for any last-minute adjustments. This software will also generate the G-code necessary for your 3D printer.
Conclusion
Blender can be an invaluable tool for 3D printing enthusiasts. By following these steps, you can transform your digital creations into physical objects. Happy printing!

_HOOK_
Optimizing Models for Printing
Optimization involves making sure your model is printable, with attention to detail on aspects like wall thickness, overhangs, and support structures if necessary.
Scaling and Dimensions
Adjust the scale of your model to match the desired physical size. Use the Transform panel to set exact dimensions.
Applying Modifiers
Before exporting, apply any modifiers to ensure the geometry is correctly interpreted by the slicing software.

Setup Blender for your 3D Printer in 5 Minutes! Scale, 3D Volume, Add-Ons, HD Studio 2020
Blender: \"Discover the limitless possibilities of creating stunning visual masterpieces with Blender! Unleash your creativity and learn how to design incredible 3D animations, models, and more in an easy-to-follow tutorial. Dive into the world of digital art today!\" 3D Printing: \"Explore the revolutionary world of 3D printing and witness the magic of turning digital designs into tangible objects! From intricate prototypes to personalized creations, experience the future of manufacturing right at your fingertips. Join the 3D printing revolution now!\"
Setup Blender for 3D Printer Instantly Blender for 3D Printing Design
Download Blender Starter Pack: https://printthatthing.us/ Learn Blender for 3D printing design quickly. Watch FULL Playlists: ...
Exporting Your Model
Export your model as an STL file, which is widely supported by 3D printing software:
- Select your model.
- Go to File > Export > STL.
- Choose the destination and save your file.

Final Checks
Before sending your model to the printer, use slicing software to check for any last-minute adjustments. This software will also generate the G-code necessary for your 3D printer.
Conclusion
Blender can be an invaluable tool for 3D printing enthusiasts. By following these steps, you can transform your digital creations into physical objects. Happy printing!

Exporting Your Model
Export your model as an STL file, which is widely supported by 3D printing software:
- Select your model.
- Go to File > Export > STL.
- Choose the destination and save your file.
Final Checks
Before sending your model to the printer, use slicing software to check for any last-minute adjustments. This software will also generate the G-code necessary for your 3D printer.
Conclusion
Blender can be an invaluable tool for 3D printing enthusiasts. By following these steps, you can transform your digital creations into physical objects. Happy printing!

_HOOK_
Final Checks
Before sending your model to the printer, use slicing software to check for any last-minute adjustments. This software will also generate the G-code necessary for your 3D printer.
Conclusion
Blender can be an invaluable tool for 3D printing enthusiasts. By following these steps, you can transform your digital creations into physical objects. Happy printing!
Introduction to Blender and Its Importance in 3D Printing
Blender, a free and open-source 3D creation suite, serves as a powerful tool for artists, designers, and hobbyists aiming to delve into the world of 3D printing. Its comprehensive set of features for modeling, sculpting, and texturing makes it ideal for creating detailed and complex designs suitable for 3D printing.
The importance of Blender in the 3D printing community cannot be overstated. It democratizes access to high-quality 3D modeling tools, enabling users to bring their visions to life without the burden of expensive software. Blender\"s versatility allows for the creation of everything from simple models for educational purposes to intricate art and functional parts.
- Blender\"s support for a wide range of file formats ensures compatibility with most 3D printers and slicing software, facilitating a seamless transition from design to print.
- The software includes specialized tools for checking model printability, such as the 3D Printing Toolbox, which identifies and helps correct common issues that could affect the quality of the print.
- With an active and supportive community, users can find a wealth of tutorials, forums, and resources aimed at improving their 3D printing skills with Blender.
By leveraging Blender\"s capabilities, users can significantly enhance their 3D printing projects, ensuring that their designs are not only imaginative but also optimized for the printing process. This introduction aims to highlight Blender\"s role in 3D printing, from basic setup and model preparation to advanced techniques for professional-quality prints.
Preparing Your Workspace: Blender Settings for 3D Printing
Setting up your Blender workspace for 3D printing is crucial for a smooth workflow and successful prints. These settings ensure your designs are accurately represented when printed.
- Unit Setup: For precision, switch to metric units with millimeters as the scale. This reflects real-world dimensions accurately in your models.
- Grid Settings: Adjust the grid scale to match the common dimensions of your prints, providing a visual guide for sizing your objects.
- Scene Setup: Enable the 3D Printing Toolbox addon for Blender. This toolbox provides essential features for preparing models for printing, such as analyzing and fixing common issues.
- Viewport Shading: Use the viewport shading mode to inspect the model for any surface imperfections that might affect the print quality.
Additionally, configuring the correct camera and view settings can help in visualizing your models as they would appear when printed. Tailoring your Blender environment to 3D printing not only streamlines the design process but also minimizes errors, leading to better print outcomes.
- Go to Edit > Preferences > Add-ons and search for \"3D Print Toolbox\" to enable it.
- In the Scene properties, set Units to Metric and Length to Millimeters.
- Customize your layout by closing unnecessary panels and saving your startup file to preserve these settings for future projects.
Embracing these settings from the start of your 3D printing journey with Blender ensures a more efficient design process and higher quality prints.
Modeling for Printability: Best Practices and Tips
Creating models in Blender for 3D printing requires a blend of artistic vision and technical precision. Here are best practices and tips to ensure your models are both beautiful and printable.
- Start with a Solid Base: Begin your model with a solid mesh. Avoiding hollow parts can reduce complexity and increase printability.
- Check for Non-Manifold Edges: Non-manifold geometry, where edges do not connect properly, can cause printing errors. Use Blender\"s tools to identify and fix these issues.
- Consider Print Size and Detail: The size of your print and the level of detail must be balanced. Small prints may not capture very fine details well.
- Wall Thickness: Ensure your model\"s walls are thick enough to be printed. Too thin, and they may not print at all, or could be very fragile.
- Avoid Overhangs: Design your model to minimize overhangs without support, as these can lead to printing problems.
- Use Supports Wisely: If overhangs are unavoidable, design your model for easy removal of support structures, or consider integrating support strategies into your model\"s design.
Additionally, leveraging Blender\"s 3D Printing Toolbox can help identify and rectify common printability issues before exporting your model. This can significantly reduce trial-and-error time and material waste, leading to a more efficient and enjoyable 3D printing experience.
- Regularly use the \"Check All\" feature in the 3D Printing Toolbox to preemptively identify and solve common printing issues.
- Experiment with Blender\"s modifiers, like Solidify, to ensure your model has adequate thickness and stability for printing.
- Preview your model in different materials and scales using Blender\"s simulation tools to better anticipate the final printed result.
By adhering to these guidelines, you can enhance the printability of your models, ensuring a smoother transition from Blender to the physical world.
Optimizing Your 3D Models for Printing
Optimizing models for 3D printing involves a careful balance between aesthetic detail and structural integrity. Here are detailed steps and considerations to ensure your Blender models are perfectly prepared for printing.
- Minimize Geometry Complexity: Simplify your model\"s geometry without compromising essential details to reduce printing time and material usage.
- Ensure Solidity: Use Blender\"s \"Solidify\" modifier to add thickness to thin walls, crucial for the model\"s physical strength.
- Reduce Overhangs: Design with minimal overhangs to avoid the need for excessive support structures, which can save material and post-processing time.
- Apply Modifiers: Before exporting, apply all modifiers to ensure the geometry is correctly finalized and ready for printing.
- Check for Errors: Utilize the 3D Printing Toolbox addon to check for and repair errors like non-manifold edges, internal faces, and thin walls.
Additionally, paying attention to the model\"s orientation can significantly impact the success of the print. Orienting parts to minimize supports and maximize the strength of the printed object is crucial.
- Position the most detailed side facing upwards to enhance the quality of visible details.
- Split complex models into multiple parts to print separately and assemble later, reducing the need for supports and risk of printing errors.
Following these optimization strategies can lead to a more efficient printing process, resulting in higher quality prints with less waste and post-processing work.
_HOOK_
Using Blender\"s 3D Printing Toolbox for Error Checking
Blender\"s 3D Printing Toolbox is an indispensable tool for ensuring your models are ready for printing. This feature-packed addon offers a range of functions to analyze and prepare your designs, making error checking a straightforward process.
- Accessibility: Easily enable the 3D Printing Toolbox from Blender\"s preferences to integrate it directly into your workflow.
- Error Analysis: Utilize the toolbox to identify and rectify common issues such as non-manifold edges, inverted normals, and thin walls, which are critical for successful prints.
- Volume and Area Calculations: Before printing, calculate your model\"s volume and surface area to estimate material usage and printing time.
- Thickness Checks: The toolbox can analyze your model for areas that may be too thin to print, allowing you to make necessary adjustments.
- Overhang Analysis: Identify overhangs that may require support structures and adjust your model accordingly to reduce post-processing work.
Following a systematic approach with the 3D Printing Toolbox streamlines the preparation process:
- After enabling the addon, select your model and use the \"Check All\" function to perform a comprehensive analysis.
- Review the identified issues and use Blender\"s modeling tools to correct them, ensuring your model is structurally sound and ready for printing.
- Use the export function within the toolbox to generate an STL file, ensuring it meets the requirements for your 3D printer or printing service.
Integrating the 3D Printing Toolbox into your Blender workflow not only improves the quality of your prints but also enhances your efficiency, reducing the trial-and-error typically associated with 3D printing preparation.
Exporting Models: Formats and Settings for 3D Printing
Exporting your Blender model correctly is crucial for a successful 3D print. This section outlines the best formats and settings to use for 3D printing.
- Choose the Right Format: STL and OBJ are the most common formats for 3D printing. STL focuses on the geometry of the model, while OBJ can include color and texture information.
- Optimize the Mesh: Ensure your model\"s mesh is clean and optimized. Remove any unnecessary vertices, edges, or faces to reduce file size without compromising quality.
- Apply Modifiers: Before exporting, apply all modifiers to your model. This step finalizes any procedural effects, like subdivisions, making them part of the mesh geometry.
- Scale Appropriately: Verify the scale of your model in Blender matches the desired physical size. Adjust the scale if necessary to ensure the print matches your expectations.
- Check Orientation: Orient your model in a way that minimizes the need for support structures. The orientation can significantly impact the quality and strength of the printed object.
Exporting Steps:
- Go to File > Export and select the appropriate format for your 3D printer or printing service.
- In the export options, select Selection Only if you do not want to export the entire scene.
- Adjust the scale in the export options if your model needs resizing to fit the printer\"s build volume or your specific requirements.
- Click Export and choose a location to save your file.
Following these guidelines ensures that your Blender models are properly prepared and exported for 3D printing, leading to higher quality prints and a smoother printing process.
Post-Processing: Preparing Your Model for the Final Print
After your model has been printed, post-processing is a critical step to enhance its appearance and functionality. This section provides a step-by-step guide on finishing techniques to achieve the best results.
- Removal of Support Structures: Carefully remove any support material from your print. Use fine tools like tweezers or pliers for precision work to avoid damaging the model.
- Sanding: Sand your print to remove layer lines and smooth the surface. Start with coarser grit sandpaper and gradually move to finer grits for a polished finish.
- Priming and Painting: Apply a primer to make the surface even and paint your model to add color and details. Use acrylic paints and apply them with brushes or airbrushing techniques for a professional look.
- Sealing: After painting, apply a sealant to protect the paint job and give your model a glossy or matte finish, depending on your preference.
- Gluing Parts: If your model was printed in parts, use a strong adhesive to assemble it. Ensure alignment and hold the pieces together until the glue sets.
For detailed models, consider using a magnifying glass or headset to see small features more clearly during post-processing. Patience and attention to detail in these final steps can significantly enhance the overall quality of your 3D printed models.
Advanced Techniques: Maximizing Blender for Professional 3D Printing Projects
For professionals seeking to leverage Blender for intricate 3D printing projects, mastering advanced techniques is crucial. These strategies enhance model quality, efficiency, and creativity.
- Simulation for Material Testing: Utilize Blender\"s physics simulation capabilities to test how your model will behave with different materials. This can inform adjustments to design for better durability and functionality.
- Photorealistic Rendering: Use Blender\"s rendering engine to create photorealistic images of your models. This is invaluable for pre-visualization, allowing for adjustments before the printing process begins.
- Non-Destructive Modifiers: Employ non-destructive modifiers for complex model adjustments. This approach allows for extensive customization without altering the original mesh, facilitating easy revisions.
- Scripting and Automation: Blender\"s Python API supports scripting and automation of repetitive tasks. This can significantly speed up the preparation of models for printing, especially for large-scale projects.
- Multi-Part Assembly Design: Design models in separate parts for assembly post-printing. This technique can solve size constraints and facilitate the creation of moving or interlocking parts.
Integrating these advanced techniques into your Blender workflow will not only streamline your 3D printing projects but also push the boundaries of what can be achieved, resulting in more sophisticated and innovative prints.
Common Pitfalls and How to Avoid Them
When setting up Blender for 3D printing, there are several common pitfalls that can hinder the printing process. Understanding and avoiding these can save time and resources.
- Ignoring Scale and Units: Not setting your units to metric or imperial based on your region can result in models that are too large or small. Always check the scale before exporting.
- Neglecting Model Solidity: A model that isn\"t solid or has thin walls may not print correctly. Use Blender\"s tools to ensure your model is solid and has adequate wall thickness.
- Overlooking Non-Manifold Edges: Non-manifold edges can create issues during printing. Utilize Blender\"s 3D Printing Toolbox to identify and fix these errors.
- Forgetting to Apply Modifiers: Modifiers should be applied before exporting your model to ensure the geometry is accurately represented in the printed object.
- Underestimating the Importance of Orientation: The orientation of your model can affect the need for support structures and the quality of the print. Consider the best orientation for printing to minimize supports.
By being mindful of these pitfalls and actively taking steps to avoid them, you can enhance the success of your 3D printing projects using Blender.
_HOOK_
READ MORE:
Conclusion: Taking Your 3D Printing to the Next Level with Blender
Blender is not just a tool for creating stunning 3D artwork; it\"s a bridge between the digital and physical worlds, enabling artists, designers, and hobbyists to bring their visions to life through 3D printing. By following the guidelines and techniques outlined in this article, you can avoid common pitfalls, optimize your models for printing, and explore advanced techniques to enhance your projects.
- Continuous Learning: The world of 3D printing and Blender evolves rapidly. Staying informed about new tools and techniques is crucial for advancing your skills.
- Community Engagement: Participating in forums and communities can provide valuable insights, feedback, and support as you navigate your 3D printing journey.
- Experimentation: Don’t be afraid to experiment with different materials, settings, and complex designs. Each project is a learning opportunity that can bring new insights and improvements.
In conclusion, Blender offers a comprehensive suite of tools for 3D printing enthusiasts at all levels. Whether you\"re creating simple models for educational purposes or intricate designs for professional projects, Blender can help you achieve high-quality results. Embrace the challenges and opportunities that come with 3D printing, and let Blender be your guide to realizing the full potential of your creative endeavors.
Embrace the power of Blender to transform your 3D printing projects from concept to reality, unleashing unparalleled creativity and precision in your designs. Start your journey today and explore the endless possibilities.