Topic blender tutorial 3d modeling: Discover the world of 3D modeling with our Blender tutorial, designed to guide beginners through the exciting process of bringing their creative visions to life with this powerful software.
Table of Content
- What are the best blender tutorials for learning 3D modeling in Blender?
- Getting Started with Blender
- Beginner Tutorials
- Advanced Techniques
- Resources for Further Learning
- Additional Tips
- Beginner Tutorials
- Advanced Techniques
- Resources for Further Learning
- Additional Tips
- Advanced Techniques
- Resources for Further Learning
- YOUTUBE: Blender 2.8 Beginner 3D Modeling Tutorial
- Additional Tips
- Resources for Further Learning
- Additional Tips
- Additional Tips
- Introduction to Blender and 3D Modeling
- Essential Blender Interface and Tools Overview
- Step-by-Step Tutorials for Beginners
- Advanced Modeling Techniques and Tips
- Creating Realistic Textures and Materials
- Animation Basics with Blender
- Project Ideas to Practice Your Skills
- Resources for Continuous Learning
- Community and Support for Blender Artists
What are the best blender tutorials for learning 3D modeling in Blender?
To learn 3D modeling in Blender, you can follow these recommended tutorials:
- Begin by adjusting Blender\'s settings to optimize the modeling tools.
- Learn how to shape a basic object using Blender\'s modeling tools.
- Explore tutorials on specific modeling techniques such as extrusion, sculpting, and beveling.
- Practice modeling different objects like furniture, buildings, or characters to enhance your skills.
READ MORE:
Getting Started with Blender
- Introduction to Blender Interface and Basics
- Navigating the 3D Viewport
- Understanding Blender\"s Modeling Tools

Beginner Tutorials
- Modeling for Absolute Beginners - Learn how to create simple models with basic techniques.
- Easy Step-by-Step Guide for Beginners - A comprehensive tutorial to get you shaping models in no time.
- Blender 3.0 Beginner Tutorial - Updated for Blender 4.0, this series guides you through the fundamentals.

Advanced Techniques
- Creating a Morph between Two Shapes - Master the art of shape-shifting with advanced modeling techniques.
- Designing a Low-Poly Forest - Perfect for game development, learn to create an unlimited number of low-poly trees.

Resources for Further Learning
- Official Blender Tutorials - Access a wide range of video tutorials covering every aspect of Blender.
- Character Modeling for Beginners - Dive into the basics of character modeling with this beginner-friendly tutorial.
- The Complete Guide to 3D Modeling with Blender - An in-depth course to deepen your understanding of 3D modeling and animation.
_HOOK_
Additional Tips
Practice consistently, experiment with different tools and techniques, and engage with Blender\"s vibrant community for feedback and support. With dedication and creativity, you\"ll be able to bring your 3D visions to life.
Beginner Tutorials
- Modeling for Absolute Beginners - Learn how to create simple models with basic techniques.
- Easy Step-by-Step Guide for Beginners - A comprehensive tutorial to get you shaping models in no time.
- Blender 3.0 Beginner Tutorial - Updated for Blender 4.0, this series guides you through the fundamentals.
Advanced Techniques
- Creating a Morph between Two Shapes - Master the art of shape-shifting with advanced modeling techniques.
- Designing a Low-Poly Forest - Perfect for game development, learn to create an unlimited number of low-poly trees.

Resources for Further Learning
- Official Blender Tutorials - Access a wide range of video tutorials covering every aspect of Blender.
- Character Modeling for Beginners - Dive into the basics of character modeling with this beginner-friendly tutorial.
- The Complete Guide to 3D Modeling with Blender - An in-depth course to deepen your understanding of 3D modeling and animation.
Additional Tips
Practice consistently, experiment with different tools and techniques, and engage with Blender\"s vibrant community for feedback and support. With dedication and creativity, you\"ll be able to bring your 3D visions to life.
_HOOK_
Advanced Techniques
- Creating a Morph between Two Shapes - Master the art of shape-shifting with advanced modeling techniques.
- Designing a Low-Poly Forest - Perfect for game development, learn to create an unlimited number of low-poly trees.
Resources for Further Learning
- Official Blender Tutorials - Access a wide range of video tutorials covering every aspect of Blender.
- Character Modeling for Beginners - Dive into the basics of character modeling with this beginner-friendly tutorial.
- The Complete Guide to 3D Modeling with Blender - An in-depth course to deepen your understanding of 3D modeling and animation.
Blender 2.8 Beginner 3D Modeling Tutorial
Beginners: \"Are you new to yoga and feeling a bit overwhelmed? Our video for beginners is here to guide you step by step, making your yoga journey easy and enjoyable. Join us and start your yoga practice today!\"
Blender Modeling Introduction: How to create 3D objects
Introduction: \"Curious about the world of mindfulness meditation but not sure where to start? Our introduction video provides a gentle entry point into this transformative practice, offering insights and techniques to kickstart your journey towards inner peace and well-being.\"
Additional Tips
Practice consistently, experiment with different tools and techniques, and engage with Blender\"s vibrant community for feedback and support. With dedication and creativity, you\"ll be able to bring your 3D visions to life.
Resources for Further Learning
- Official Blender Tutorials - Access a wide range of video tutorials covering every aspect of Blender.
- Character Modeling for Beginners - Dive into the basics of character modeling with this beginner-friendly tutorial.
- The Complete Guide to 3D Modeling with Blender - An in-depth course to deepen your understanding of 3D modeling and animation.
Additional Tips
Practice consistently, experiment with different tools and techniques, and engage with Blender\"s vibrant community for feedback and support. With dedication and creativity, you\"ll be able to bring your 3D visions to life.
_HOOK_
Additional Tips
Practice consistently, experiment with different tools and techniques, and engage with Blender\"s vibrant community for feedback and support. With dedication and creativity, you\"ll be able to bring your 3D visions to life.
Introduction to Blender and 3D Modeling
Blender is a comprehensive, open-source 3D creation suite that supports the entirety of the 3D pipeline—modeling, rigging, animation, simulation, rendering, compositing, and motion tracking, even video editing, and game creation. Advanced users employ Blender’s API for Python scripting to customize the application and write specialized tools; often these are included in Blender’s future releases. Blender is well suited to individuals and small studios who benefit from its unified pipeline and responsive development process. Examples of Blender’s use range from individual artists to major studios exploring new artistic ideas with Blender\"s cutting-edge technology.
- Understanding the Blender Interface: Navigating Blender\"s interface is the first step towards mastering 3D modeling. Familiarize yourself with the viewport, panels, and different modes to efficiently use the software.
- Basic Modeling Techniques: Learn the foundational skills of 3D modeling, including creating and editing basic shapes, using modifiers, and understanding mesh topology.
- Advanced Modeling Tools: As you progress, delve into more sophisticated techniques such as sculpting, retopology, and texturing to enhance the detail and realism of your models.
- Animation and Rendering: Discover how to bring your models to life with Blender\"s animation tools. Learn about keyframing, motion paths, and rendering settings to produce high-quality animations.
- Resources and Community Support: Take advantage of Blender’s extensive online community and resources. Engage with forums, tutorials, and project files to expand your skills and connect with other artists.
Whether you are a hobbyist or a professional looking to refine your skills in 3D modeling, Blender offers a powerful platform for creating stunning 3D art. With dedication and practice, you can unlock the full potential of your creative visions using Blender.
Essential Blender Interface and Tools Overview
Blender\"s interface is designed to be as flexible as possible, catering to the needs of a wide variety of users. It allows for fully customizable layouts to optimize the workflow for modeling, animation, or any other task. This section provides an overview of the key components and tools within Blender that are essential for effective 3D modeling.
- 3D Viewport: The central area of Blender\"s interface, where you can view and interact with your 3D scene.
- Properties Panel: This panel provides detailed information and options for the active object or scene.
- Outliner: A hierarchical list of all objects in the scene, allowing for easy selection and organization.
- Timeline: Located at the bottom of the default layout, it\"s crucial for animation, providing control over keyframes and playback.
Understanding Blender\"s modeling tools is essential for creating detailed and complex models:
- Mesh Modeling: Blender\"s primary modeling system, allowing for the creation and editing of mesh objects with tools like extrude, loop cut, and bevel.
- Sculpt Mode: For more organic models, sculpt mode offers a variety of brushes to shape your object in a more hands-on manner.
- Modifiers: Non-destructive tools that automatically perform operations like smoothing, subdividing, or adding complexity to your models.
- Shading and Texturing: Tools for applying colors, textures, and materials to your model to create the final look.
Blender also includes robust support for UV mapping, rigging, and animation, allowing for the creation of not just static models but fully animated scenes. Its comprehensive toolset supports everything from quick models to complex scenes with thousands of objects.
Step-by-Step Tutorials for Beginners
Starting your journey in 3D modeling with Blender can be exhilarating yet challenging. To ease into the process, we\"ve compiled a list of step-by-step tutorials tailored for beginners. These tutorials cover everything from the basics of the Blender interface to creating your first 3D model.
- Introduction to Blender: Begin with understanding Blender’s interface, navigating through the viewport, and learning basic operations.
- Creating Your First Model: Follow a simple tutorial to create your first 3D model, learning essential tools and techniques.
- Understanding Mesh Modeling: Dive into mesh modeling basics, including editing, extruding, and modifying your objects.
- Exploring Sculpting Tools: Sculpting in Blender allows for more organic creations. Learn the basics of sculpt mode and its brushes.
- Materials and Texturing: Discover how to apply materials and textures to your models, giving them color and realism.
- Basic Animation Techniques: Start animating with Blender by learning keyframe animation and simple movement.
- Rendering Your Scene: Learn about Blender\"s rendering options to bring your 3D models and animations to life.
These tutorials are designed to build a solid foundation in Blender and 3D modeling. Practice regularly, and don\"t hesitate to experiment with different tools and techniques to develop your skills further.
Advanced Modeling Techniques and Tips
Mastering advanced modeling techniques in Blender can significantly enhance the quality and realism of your 3D projects. This section explores sophisticated methods and professional tips to elevate your modeling skills. Whether you\"re creating intricate characters, detailed environments, or complex mechanical objects, these advanced strategies will help you achieve more realistic and dynamic results.
Subdivision Surface Modeling
Subdivision surface modeling is a powerful technique for creating smooth, high-resolution meshes. It allows you to start with a simple mesh and progressively add detail, smoothing out hard edges and adding complexity without losing control of the overall shape.
- Begin with a low-poly base mesh to ensure easy manipulation and adjustment.
- Apply the Subdivision Surface modifier to smooth out the mesh, increasing the subdivision level to add more detail.
- Use loop cuts and edge creases to maintain sharp edges where necessary, combining smooth surfaces with crisp details.
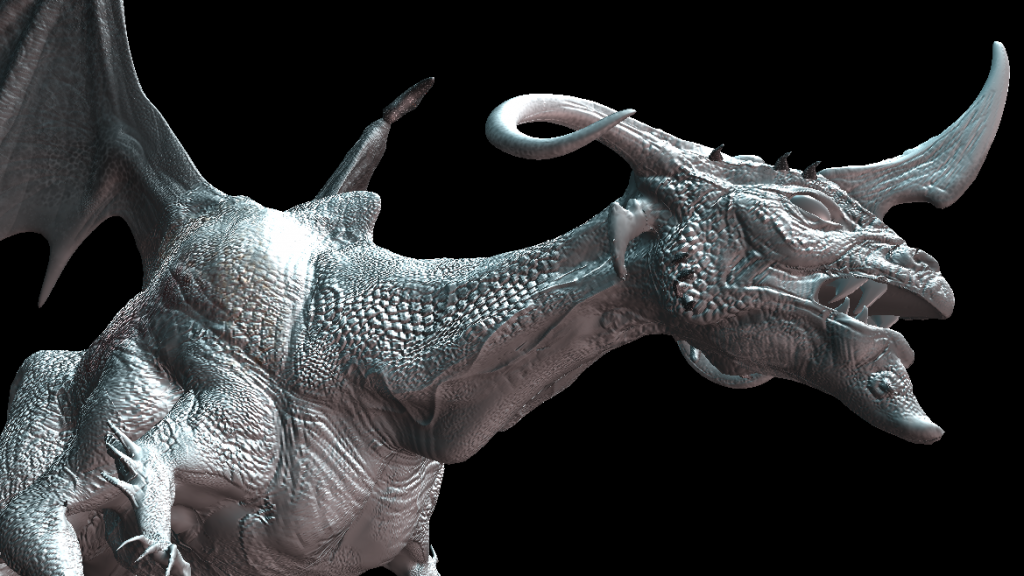
Sculpting for Detail
Sculpting in Blender is a technique that allows for intuitive shaping of your models, adding fine details that are difficult to achieve through traditional modeling methods.
- Choose a high subdivision level or use dynamic topology for detailed sculpting.
- Utilize various brushes for different effects, such as creasing, smoothing, and texturing.
- Focus on adding realistic details like wrinkles, scars, or fabric folds to bring your models to life.
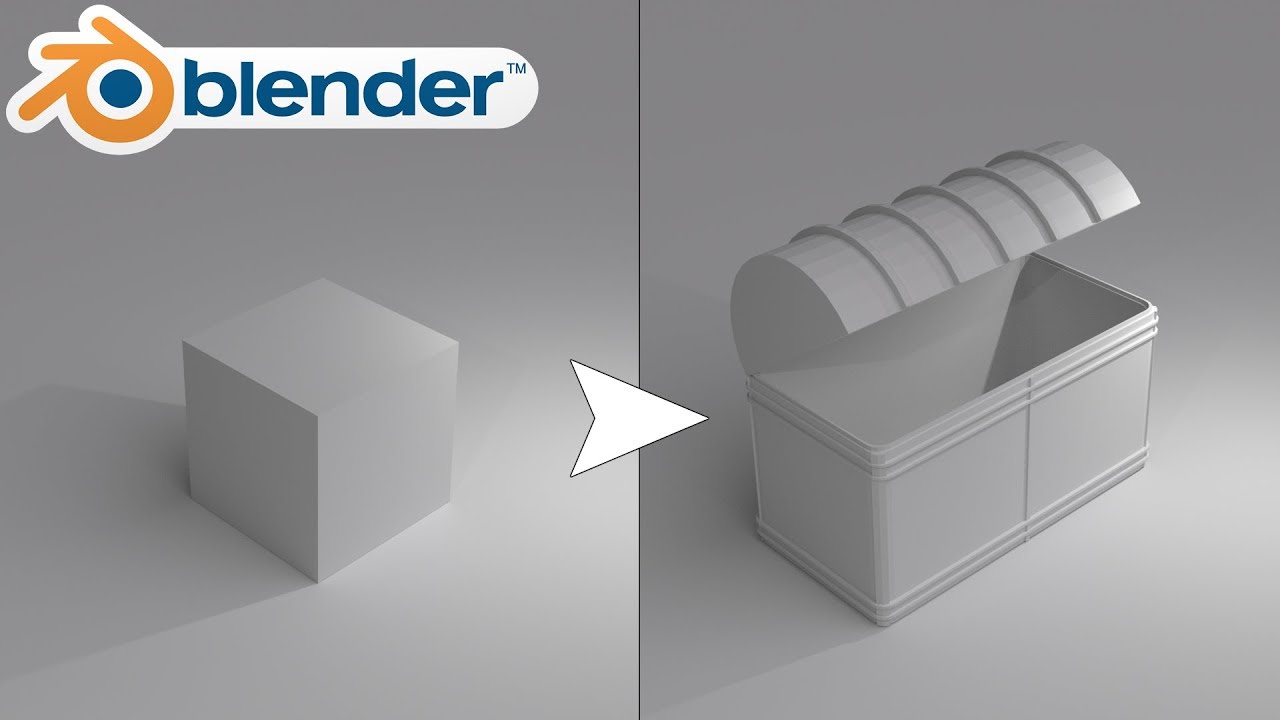
Hard Surface Modeling
Hard surface modeling involves creating non-organic models, such as vehicles, machinery, and technology, with precision and accuracy. This technique requires a focus on clean topology and sharp edges.
- Utilize modifiers like Boolean for cutting and combining shapes precisely.
- Pay attention to edge flow and topology to maintain a clean, quad-based mesh for easier editing and texturing.
- Incorporate bevels and chamfers to edges to add realism and reduce the artificial look of perfectly sharp corners.
Retopology for Animation
Retopology is the process of converting high-poly models into lighter meshes suitable for animation. This step is crucial for creating models that deform naturally during animation.
- Use the Shrinkwrap modifier to project a new, low-poly mesh onto the surface of your high-poly sculpt.
- Ensure your mesh has good topology, with edge loops following the natural lines of movement in your model to facilitate smoother animations.
- Apply the Mirror modifier for symmetrical models to save time and ensure uniformity.
UV Mapping and Texture Painting
UV mapping is the process of projecting a 3D model\"s surface onto a 2D plane for texturing. Texture painting then allows you to apply colors, patterns, and detailed textures directly onto the 3D model.
- Begin with marking seams on your model to guide the UV unwrapping process, ensuring minimal stretching and distortion.
- Unwrap your model in the UV/Image Editor, adjusting the layout to make efficient use of space.
- Use Blender\"s texture painting tools to add details, wear and tear, or specific features directly onto the 3D model.
By incorporating these advanced modeling techniques into your workflow, you can push the boundaries of your 3D modeling projects in Blender. Remember, practice and experimentation are key to mastering these skills and achieving professional-quality results.
_HOOK_
Creating Realistic Textures and Materials
Creating realistic textures and materials in Blender is a fundamental skill for any 3D artist looking to bring their models to life. This guide will walk you through the essential steps and tips to achieve stunningly realistic results, blending technical knowledge with artistic intuition.
Understanding Material Basics
Begin with a solid grasp of material properties in Blender, including color, reflectivity, and transparency. Familiarize yourself with base color, roughness, metallic, and normal maps to control the appearance of your objects.
Collecting Reference Images
Accurate reference images are key to realistic texturing. Choose images that reflect various lighting conditions and angles to better understand the material\"s real-world characteristics.
Applying Base Colors and Textures
- Create a new material and select a base color or texture that matches your target surface.
- Adjust texture scale and rotation to fit your model\"s dimensions accurately.
Enhancing Surface Details
Add depth with bump or normal maps to simulate imperfections like scratches or bumps, adjusting their strength and scale for the best fit.
Adjusting Reflectivity and Roughness
Modify reflectivity and roughness parameters to mimic the real-world material\"s look, utilizing procedural textures for additional detail.
Utilizing Procedural Textures
Experiment with Blender\"s procedural textures to add unique patterns and details, fine-tuning their intensity and scale for added realism.
Rendering and Review
After texturing, render your scene to evaluate how materials interact with light and shadows, making necessary adjustments for the most realistic outcome.
Tips for Realism
- Study real-world materials closely to understand their unique properties.
- Experiment with different textures and settings to find what works best for your material.
- Adjust material reflectivity and roughness based on real-world references for accuracy.
- Incorporate bump or displacement maps for added texture and detail.
- Remember, lighting is crucial in showcasing your materials\" realism effectively.
By following these steps and continually experimenting with Blender\"s vast texturing and material tools, you can achieve materials that breathe life into your 3D models, enhancing their realism and visual appeal.
Animation Basics with Blender
Blender is a powerful tool for creating animations, offering a wide range of features that can bring your 3D models to life. This section introduces the basics of animation in Blender, covering key concepts and step-by-step instructions to start your journey in 3D animation.
Understanding Keyframes
Keyframes are the cornerstone of animation in Blender. They define the start and end points of any animation, marking the position, rotation, and scale of an object at a specific point in time. To create an animation, you simply set keyframes at different points in the timeline for your object\"s properties.
- Select the object you wish to animate.
- Move to the frame on the timeline where you want the animation to start.
- Press I to insert a keyframe and choose the property to animate (e.g., location, rotation, scale).
- Move to another frame, change the object\"s property, and insert another keyframe.
- Play back the animation to see your object move between the keyframes.
Animation Editors
Blender offers several editors for fine-tuning your animations, including the Dope Sheet, Graph Editor, and Nonlinear Animation (NLA) Editor.
- Dope Sheet: Provides an overview of all keyframes in your scene. Useful for managing timing and keyframe selection.
- Graph Editor: Allows you to edit the interpolation and easing of keyframes. This is where you can refine the velocity and acceleration of your animations.
- NLA Editor: Enables you to layer and blend different animations together. Perfect for complex animation sequences.
Animating with Armatures and Rigging
For character animation, armatures (skeletons) are used to rig models. This involves creating a bone structure and attaching it to the mesh so that you can animate the model as if it had a real skeleton.
- Create an armature by adding bones within your character model.
- Parent the mesh to the armature with automatic weights to ensure the mesh deforms correctly.
- Use pose mode to animate the bones, which in turn animates the character.
Animation Tips
Here are some tips to help you create more realistic and engaging animations:
- Use reference footage: Studying real-life movements can help you create more natural animations.
- Experiment with spacing and timing: The timing of movements contributes significantly to the feel of the animation. Fast movements are spaced further apart, while slower movements have closer keyframes.
- Pay attention to easing: Most movements start slow, speed up, and then slow down again. Use the Graph Editor to adjust the interpolation of your keyframes accordingly.
Starting with these basics, you can explore more advanced techniques in Blender to bring your animations to the next level. Remember, practice and experimentation are key to mastering 3D animation.
Project Ideas to Practice Your Skills
Enhancing your Blender skills requires practice and experimentation. Below are several project ideas that cover a range of skills and techniques. These projects are designed to challenge you and help solidify your understanding of Blender\"s tools and features.
Beginner Projects
- Custom Coffee Cup: Start with something simple by modeling a coffee cup. Focus on the basic shapes, and then add details like a handle and textures for practice.
- Animated Logo: Use Blender\"s animation tools to bring a static logo to life. This project helps with understanding keyframes and animation principles.
Intermediate Projects
- Realistic Fruit Bowl: Model a bowl filled with various fruits. This project challenges you to create realistic textures and materials for different types of surfaces.
- Interior Design Scene: Design an interior scene such as a living room or kitchen. This will improve your skills in modeling furniture, lighting, and arranging scenes.
Advanced Projects
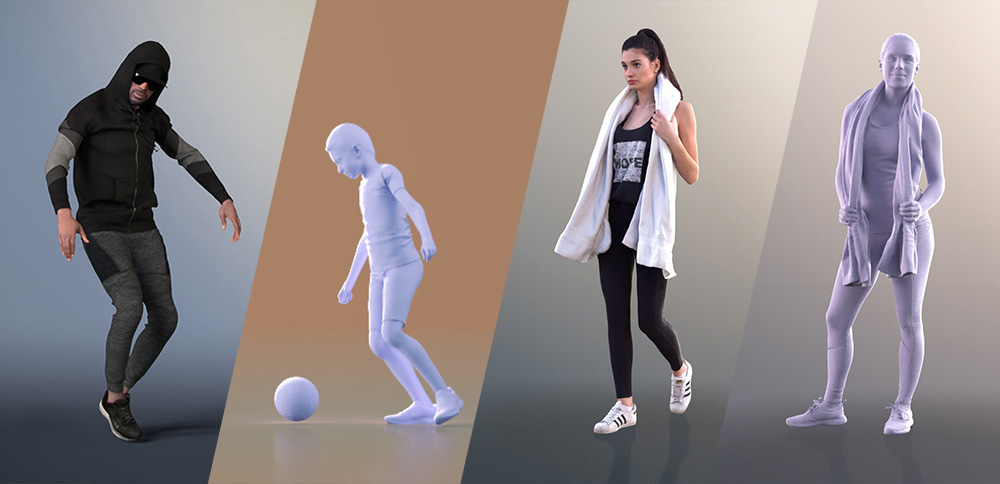
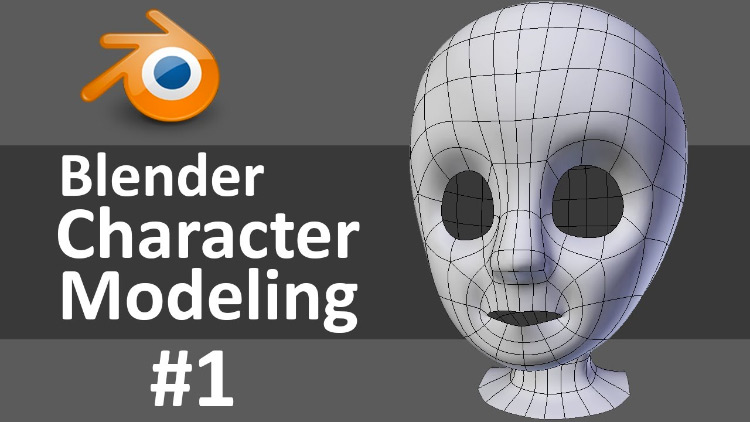
- Character Modeling: Create a character from scratch. This involves sculpting, texturing, and possibly rigging for animation, covering a wide range of advanced skills.
- Complex Mechanical Object: Model something complex like a watch or engine. This project requires precision and attention to detail, as well as knowledge of advanced modeling techniques.
Project Tips
Here are some tips to help you succeed in your projects:
- Start Simple: Begin with basic shapes and gradually add details as you become more comfortable with the tools.
- Use References: Always have reference images to guide your modeling. They provide a realistic benchmark for your work.
- Experiment with Lighting: Good lighting can make a big difference in the appearance of your scenes. Try different setups to see what works best.
- Practice Regularly: Consistency is key to improvement. Try to practice regularly, even if it\"s just for a short time each day.
By working through these projects, you will gain confidence in your abilities and develop a portfolio of work that showcases your skills. Remember, the key to mastering Blender is persistence and a willingness to experiment.
Resources for Continuous Learning
Advancing your skills in Blender and staying updated with the latest techniques requires access to a variety of learning resources. Below, we list some key platforms and communities that offer extensive tutorials, courses, and support for both beginners and advanced users.
Online Tutorials and Courses
- Blender Guru: Offers comprehensive tutorials for Blender users of all levels, focusing on everything from basic modeling to advanced texturing and lighting.
- CG Cookie: Provides a wide range of Blender tutorials and courses, covering various aspects of 3D modeling, animation, and game development.
- Udemy and Coursera: Host multiple Blender courses ranging from introductory to advanced levels, taught by industry professionals.
YouTube Channels
- Blender Foundation: The official YouTube channel for Blender, featuring tutorials, new feature announcements, and project showcases.
- Darrin Lile: Offers detailed tutorials on character modeling, animation, and more, suitable for Blender users looking to expand their skill set.
Forums and Communities
- Blender Artists Community: An active forum where users can share their work, ask questions, and receive feedback from other Blender enthusiasts.
- Reddit - r/blender: A subreddit dedicated to Blender, where users post tutorials, artwork, and discussions on various topics related to 3D modeling and animation.
Books and eBooks
- \"Blender 3D Cookbook\" by Enrico Valenza: Offers a range of projects to help you learn Blender\"s capabilities through practical examples.
- \"Blender For Dummies\" by Jason van Gumster: A comprehensive guide to getting started with Blender, covering all the basics for new users.
These resources are just a starting point for continuous learning in Blender. Exploring new tutorials, participating in community challenges, and practicing regularly will greatly enhance your skills and understanding of 3D modeling and animation.
READ MORE:
Community and Support for Blender Artists
The Blender community is vibrant and supportive, offering a wealth of resources for both novice and experienced 3D artists. Whether you\"re seeking advice, feedback on your work, or opportunities to collaborate, there\"s a platform or group that meets your needs. Below are key community and support resources to help you connect with fellow Blender enthusiasts and professionals.
Official Blender Community
- Blender Artists Forum: A popular online community where users can share their work, ask for help, and discuss all things Blender.
- Blender Network: The official Blender professional network, connecting artists, trainers, and studios, and offering job listings.
Online Platforms and Social Media
- Reddit - r/blender: A subreddit dedicated to Blender where users post tutorials, artwork, and engage in discussions.
- Blender Discord Servers: Several Discord communities exist for Blender users, providing a real-time platform for discussion, collaboration, and support.
- Twitter and Instagram: Many artists and Blender-affiliated organizations use these platforms to showcase work, share updates, and connect with the community.
Learning and Collaboration Opportunities
- Blender Cloud: Subscription service offering training, assets, and film production files. It\"s a great way to learn from professional projects.
- Blender Meetups and Conferences: Local and international events offer fantastic opportunities to meet other Blender users, learn from experts, and showcase your work.
Support Resources
- Blender Stack Exchange: A Q&A site for Blender users to ask technical questions and get answers from the community.
- Blender Documentation: The official Blender manual is an invaluable resource for understanding all aspects of the software.
Engaging with the Blender community can greatly enhance your learning experience and open up new opportunities for personal and professional growth. Whether through forums, social media, or direct collaboration, connecting with other artists can provide support, inspiration, and valuable feedback on your journey with Blender.
Embark on a journey to master Blender 3D modeling with our comprehensive tutorials. From beginners to advanced artists, our guide offers step-by-step instructions, project ideas, and resources to enhance your skills and unleash your creative potential.
_HOOK_