Topic blender car modeling tutorial: Unlock the secrets of car modeling in Blender with our comprehensive tutorial, designed to guide beginners and advanced users through every step of creating stunning 3D vehicles.
Table of Content
- What are the best Blender car modeling tutorials available online?
- Beginner Tutorials
- Intermediate to Advanced Tutorials
- Specialized Tutorials
- Intermediate to Advanced Tutorials
- Specialized Tutorials
- Specialized Tutorials
- Introduction to Blender Car Modeling
- YOUTUBE: Blender Secrets: Car Modeling Tips
- Choosing the Right Blender Version for Car Modeling
- Setting Up Your Blender Workspace for Car Modeling
- Step-by-Step Guides for Beginners
- Intermediate Techniques in Car Modeling
- Advanced Strategies for Realistic Car Modeling
- Texturing and Shading Your Car Model
- Lighting and Rendering Techniques for Car Models
- Animating Your Car Model in Blender
- Common Pitfalls and How to Avoid Them
- Additional Resources and Communities for Learning
What are the best Blender car modeling tutorials available online?
Here is a list of some of the best Blender car modeling tutorials available online:
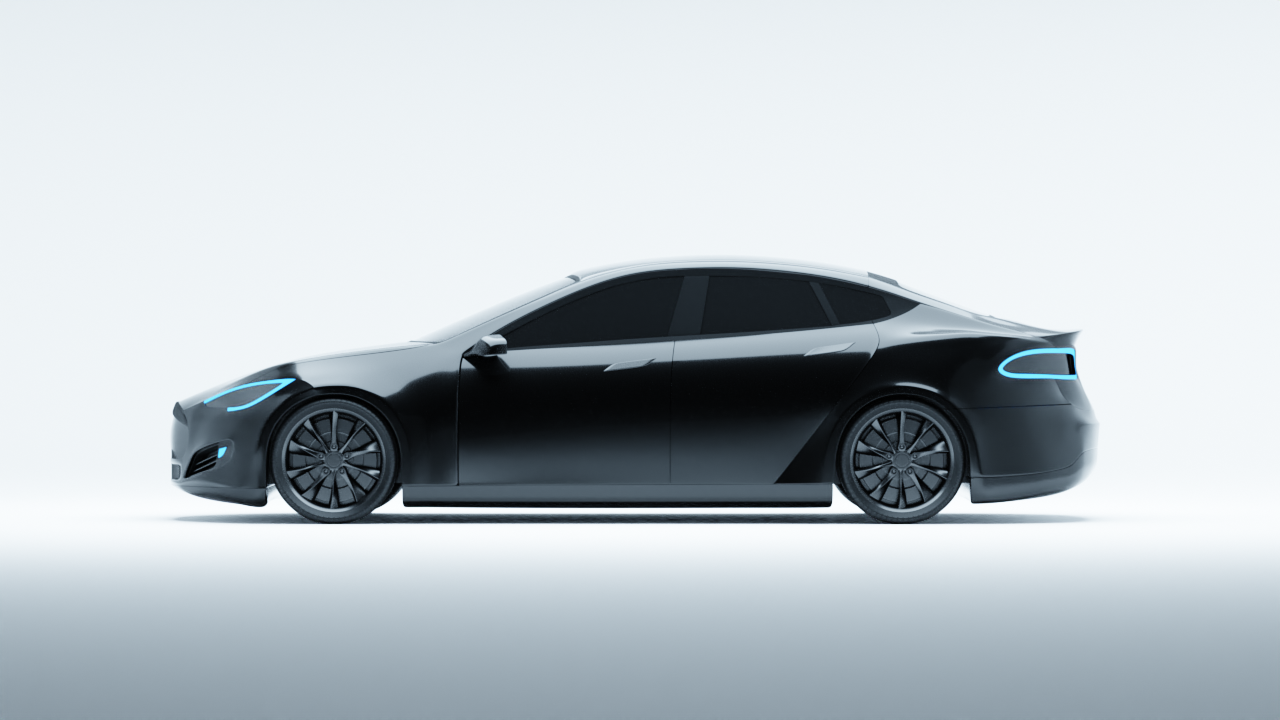
- Tesla Model S Car Modeling Tutorial - A 4 part series starting from Sep 24, 2020.
- Boxy Car Modeling Tutorial - Dec 29, 2022.
- Comprehensive Car Modeling Tutorial - Apr 15, 2022.
READ MORE:
Beginner Tutorials
- Introduction to Car Modeling in Blender - A beginner-friendly series that guides you through the process of modeling a Tesla Model S inspired car. It is structured in four parts to ease you into the 3D modeling world.
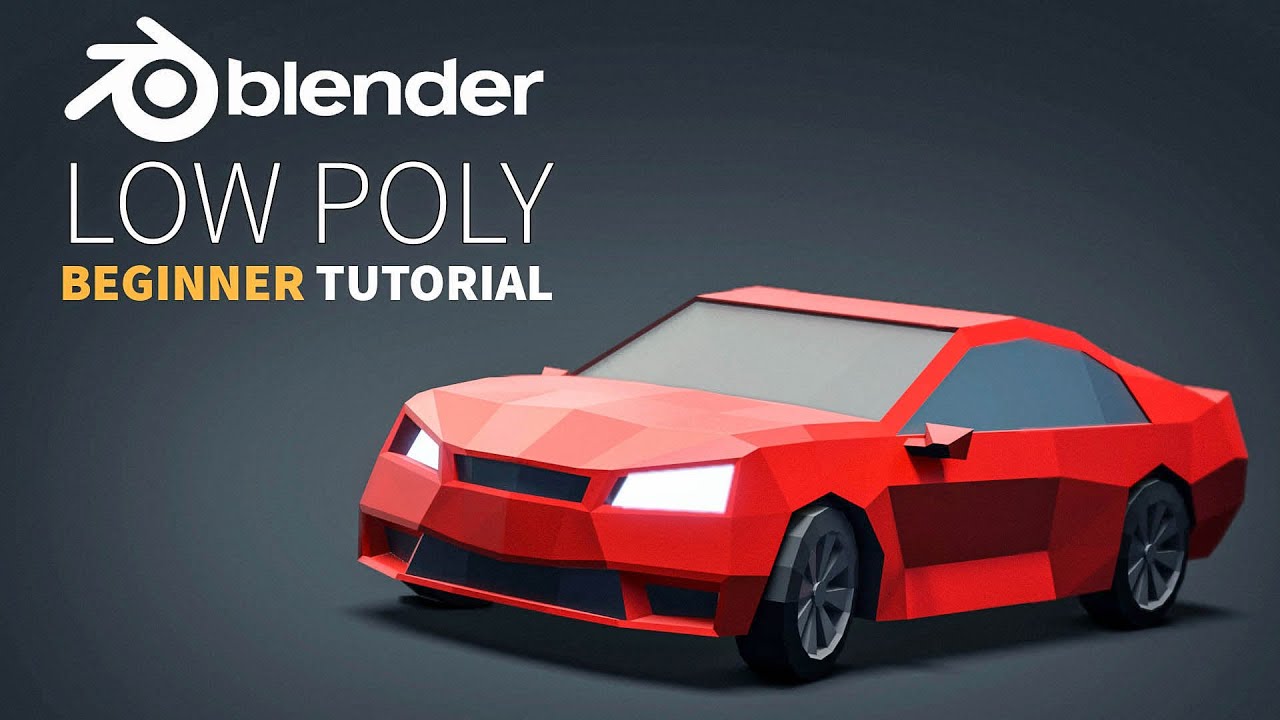
- Low Poly Car Modeling - Learn how to create a low poly car in Blender, covering basics like adding a mirror modifier, modeling wheels, and doors. Ideal for beginners looking to understand the fundamentals of 3D modeling.
- Car Modeling for Beginners in Blender 2.8x - An in-depth video course spanning over 2.5 hours that covers everything you need to know to make a car from scratch. It promises benefits for both beginners and intermediate artists.

Intermediate to Advanced Tutorials
- 3D Cars: Inside and Out - A comprehensive course designed for an intermediate skill level, offering 45 hours of content on Blender 3.6 or 4.0. It includes creating a full car interior and provides online support.
- Realistic Vehicle Creation - This Udemy course dives into the joy of modeling vehicles, teaching you how to model a vehicle with attention to detail to make your project realistic and visually appealing.
- Advanced Car Modeling Master Class - Covering all fundamentals and important steps to model a car with complex designs, this series is perfect for those looking to refine their skills.

Specialized Tutorials
For those interested in concept car modeling for films or looking to create highly detailed and realistic models, specialized tutorials are available. These tutorials focus on building, lighting, shading, texturing, rendering, rigging, animating, and compositing a complete shot using the car model.
Additional Resources
Besides the step-by-step tutorials, many resources offer tips on setting up reference images, using subdivision surfaces for high-quality surfaces, and experimenting with vehicle concept sculpting. Whether you\"re a beginner or an advanced user, these tutorials and resources provide the knowledge and skills needed to excel in car modeling with Blender.

Intermediate to Advanced Tutorials
- 3D Cars: Inside and Out - A comprehensive course designed for an intermediate skill level, offering 45 hours of content on Blender 3.6 or 4.0. It includes creating a full car interior and provides online support.
- Realistic Vehicle Creation - This Udemy course dives into the joy of modeling vehicles, teaching you how to model a vehicle with attention to detail to make your project realistic and visually appealing.
- Advanced Car Modeling Master Class - Covering all fundamentals and important steps to model a car with complex designs, this series is perfect for those looking to refine their skills.

_HOOK_
Specialized Tutorials
For those interested in concept car modeling for films or looking to create highly detailed and realistic models, specialized tutorials are available. These tutorials focus on building, lighting, shading, texturing, rendering, rigging, animating, and compositing a complete shot using the car model.
Additional Resources
Besides the step-by-step tutorials, many resources offer tips on setting up reference images, using subdivision surfaces for high-quality surfaces, and experimenting with vehicle concept sculpting. Whether you\"re a beginner or an advanced user, these tutorials and resources provide the knowledge and skills needed to excel in car modeling with Blender.
Introduction to Blender Car Modeling
Blender car modeling offers an exciting journey into the world of 3D design, enabling artists and hobbyists alike to create detailed and realistic vehicle models. This section dives into the foundational aspects of car modeling in Blender, guiding you through the initial steps to get started on your 3D car modeling adventure.
- Understanding Blender\"s Interface: Familiarize yourself with Blender\"s user interface, including navigation controls, toolbars, and panels essential for 3D modeling.
- Setting Up Reference Images: Learn how to import and align reference images of cars to serve as a guide during the modeling process.
- Basic Modeling Techniques: Discover the core modeling tools and techniques in Blender, such as extrusion, loop cuts, and mirroring, to start shaping your car model.
- Adding Details to Your Car Model: Explore methods to add intricate details like doors, wheels, and car interiors, enhancing the realism of your model.
- Materials and Texturing: Get to grips with Blender\"s material and texturing capabilities to give your car a unique appearance and realistic finish.
- Lighting and Rendering: Introduction to basic lighting setups and rendering techniques to showcase your car model in the best light.
Each step in this guide is designed to build upon the last, ensuring a comprehensive understanding of car modeling in Blender. Whether you\"re aiming to create a photorealistic vehicle for a game, animation, or personal project, these initial steps will set you on the right path.
- Practical Tips and Tricks: Gain insights into practical tips and tricks that can streamline the modeling process and enhance the quality of your work.
- Common Pitfalls and How to Avoid Them: Learn about common challenges faced by beginners and how to overcome them.
By the end of this introduction, you\"ll have a solid foundation in Blender car modeling, ready to tackle more complex projects and refine your skills further.
Blender Secrets: Car Modeling Tips
Techniques: Discover a world of creative possibilities as we delve into fascinating techniques in our latest video. Learn tips and tricks to elevate your skills and bring your artistic visions to life! Low Poly: Immerse yourself in the mesmerizing beauty of low poly art in our captivating video. Explore the unique charm of this simplistic yet stunning style that will inspire and delight your artistic senses.
Modeling a Low Poly Car in Blender 3.5 Tutorial
In this tutorial, we\'ll learn how to make a low car in Blender. 00:00 Introduction 00:35 Adding Mirror Modifier 01:54 Modeling The ...
Choosing the Right Blender Version for Car Modeling
Selecting the appropriate Blender version is crucial for efficient car modeling. This section helps you navigate through the options to find the best fit for your project needs.
- Blender 2.8x Series: Known for introducing a revamped user interface, the 2.8x series is a great starting point for beginners due to its ease of use and comprehensive modeling tools.
- Blender 2.9x Series: Offers enhanced features and improvements over the 2.8x series, including better sculpting tools and viewport enhancements, making it ideal for more detailed car modeling.
- Blender 3.0 and Beyond: The latest versions of Blender, including 3.6 and 4.0, introduce cutting-edge features such as improved rendering engines and simulation capabilities. These versions are suited for advanced users seeking to push the limits of realism in their car models.
When choosing a Blender version, consider the complexity of your project and your proficiency with 3D modeling. New users may find the interface and tools of the 2.8x or 2.9x series more manageable, while experienced modelers might prefer the advanced capabilities offered by Blender 3.0 and beyond.
Additionally, keep in mind that each version of Blender may have different system requirements. Ensure your computer meets these requirements for a smooth modeling experience. Regardless of your choice, all versions support a wide range of tools and features for car modeling, from basic shapes to intricate details and textures.
Setting Up Your Blender Workspace for Car Modeling
Creating an optimal workspace in Blender is key to a smooth car modeling process. This guide will help you set up your Blender workspace efficiently, ensuring you have the tools and views you need at your fingertips.
- Choose Your Blender Version: Select the Blender version that suits your needs. Newer versions offer advanced features but ensure your system meets the requirements.
- Configure the Interface: Adjust Blender\"s interface to your liking. You can customize toolbars, viewport, and window layouts to optimize your workflow.
- Import Reference Images: Importing and correctly positioning reference images of the car you\"re modeling is crucial. Use the background images feature to load your references into the 3D viewport.
- Set Up Collections: Organize your project using Collections. This allows you to manage different parts of the car model, such as the body, wheels, and interior, more efficiently.
- Customize Shading and Viewport Settings: Adjust the shading (e.g., wireframe, solid, material, rendered) and viewport settings to get the best view of your work. This can help in modeling with precision.
- Keyboard Shortcuts: Familiarize yourself with Blender\"s keyboard shortcuts. This can significantly speed up your modeling process.
Additionally, consider enabling add-ons that can aid in car modeling, such as LoopTools or Carver. These can introduce new functionalities to your workspace, making complex tasks more manageable.
- Save Frequently: Set up autosave preferences to avoid losing work.
- Backup Your Work: Keep versions of your project saved to revert back if needed.
By preparing your Blender workspace ahead of time, you can ensure a more efficient and enjoyable car modeling experience.
_HOOK_
Step-by-Step Guides for Beginners
Starting with Blender for car modeling can seem daunting, but with the right guides, it becomes an exciting and rewarding journey. Here\"s a step-by-step guide tailored for beginners to kickstart your car modeling in Blender.
- Introduction to Blender: Begin with understanding Blender\"s interface, navigation, and basic tools. This foundational knowledge is crucial for efficient 3D modeling.
- Setting Up Reference Images: Learn how to import and place reference images in Blender. This step is vital for accuracy and proportion in your car model.
- Modeling the Basic Shape: Start modeling the basic shape of your car using simple meshes. Focus on creating the main body, using extrusion and loop cuts to refine the shape.
- Adding Details: Once the basic shape is ready, add details like doors, wheels, and windows. This involves more advanced modeling techniques and careful attention to your reference images.
- Materials and Texturing: Explore Blender\"s material and texturing options to add colors and textures to your car model. This step brings your model to life by adding realism.
- Lighting and Rendering: Set up basic lighting and learn about Blender\"s rendering options. Rendering your model allows you to create stunning images of your car.
Throughout these steps, remember to save your work frequently and experiment with different tools and techniques to enhance your model. Blender\"s community forums and tutorials are great resources for troubleshooting and learning new skills.
- Practice Makes Perfect: The more you practice, the better you\"ll become. Start with simpler car models and gradually move on to more complex designs.
- Explore Blender Add-ons: Blender offers various add-ons that can simplify car modeling tasks, like sculpting tools and advanced modifiers. Experiment with these to enhance your workflow.
By following this guide, you\"ll build a strong foundation in Blender car modeling and be on your way to creating your own stunning 3D car models.

Intermediate Techniques in Car Modeling
Moving beyond the basics, intermediate car modeling techniques in Blender introduce more complexity and detail into your 3D models. These methods are essential for creating more realistic and intricate vehicle designs.
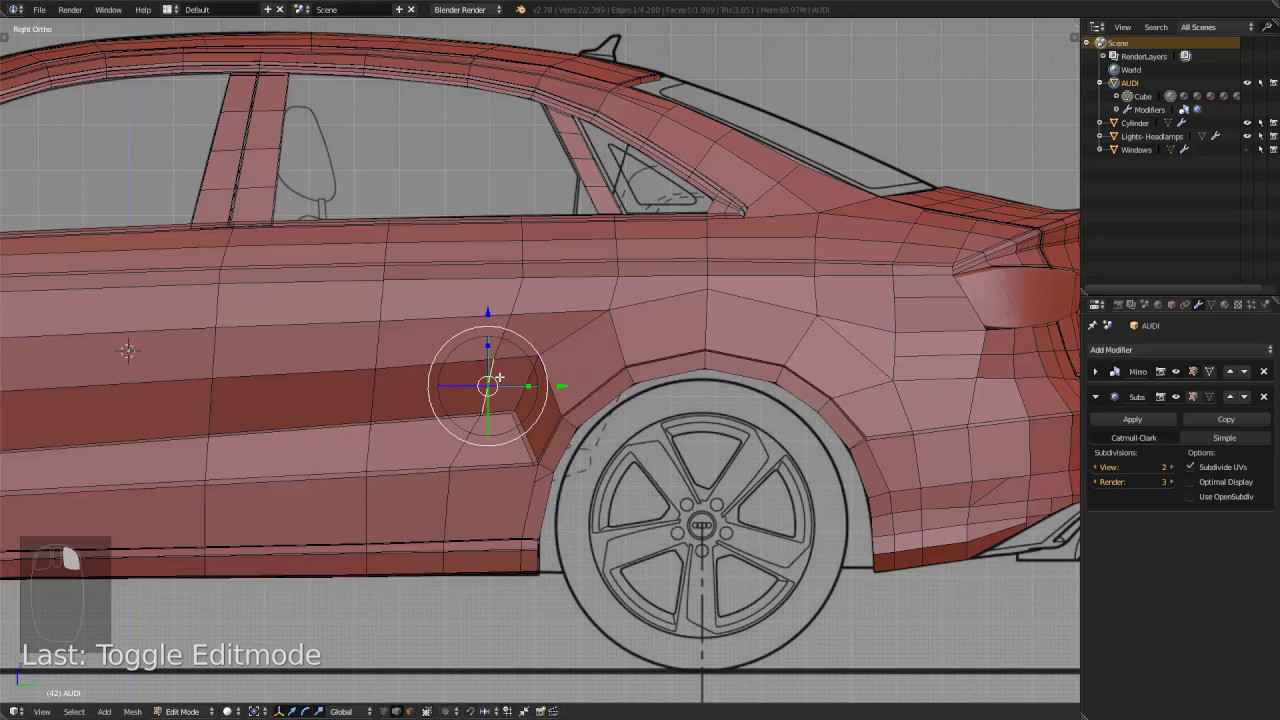
- Subdivision Surface Modeling: Learn to use the Subdivision Surface modifier to smooth out the geometry of your car model, adding a higher level of detail and refinement.
- Hard Surface Modeling Techniques: Master the art of hard surface modeling to create the sleek, precise lines needed for car bodies, including techniques for managing topology and avoiding pinching.
- Advanced Sculpting: For concept cars or custom details, sculpting allows you to mold and shape your model with a higher degree of freedom and creativity.
- High-Detail Components: Focus on creating high-detail components such as grilles, headlights, and interior details. This often involves separate modeling processes and attention to fine detail.
- UV Mapping for Cars: Proper UV mapping is crucial for texturing your car model accurately. Learn to unwrap your model efficiently for painting or applying realistic textures.
- Shader and Material Creation: Develop skills in creating and applying materials and shaders that mimic real-world surfaces, including metallic paints, glass, and rubber, enhancing the realism of your model.
These intermediate techniques require patience and practice but are essential for creating professional-quality car models in Blender. As you progress, continually challenge yourself with more complex designs and textures to refine your skills.
- Optimizing Workflow: Discover tips and tricks to optimize your modeling workflow, saving time while increasing the quality of your work.
- Rendering and Lighting: Improve your rendering skills with advanced lighting setups and render settings to showcase your car models in the best possible way.
By mastering these intermediate techniques, you\"ll take a significant step forward in your car modeling journey, opening up new possibilities for creativity and professionalism in your work.
Advanced Strategies for Realistic Car Modeling
For those aiming to achieve photorealistic car models in Blender, advanced strategies are essential. These techniques delve into the nuances of modeling, texturing, and rendering to mimic the intricate details of real-world vehicles.
- High-Poly Modeling: Focus on creating high-poly models for close-up renders, ensuring every detail from the bodywork to the smallest components is meticulously crafted.
- Complex Shader Networks: Develop complex shader networks to simulate various materials found in cars, such as metallic paint, glass, rubber, and interior fabrics, using nodes in Blender\"s shader editor.
- Photorealistic Texturing: Apply photorealistic textures and decals, utilizing UV mapping techniques for accurate placement and scaling. This includes logos, labels, and tire treads for added realism.
- Advanced Lighting Techniques: Implement advanced lighting techniques to showcase the car model in different environments, using HDRIs for realistic reflections and illumination.
- Environment and Scene Setup: Create or import detailed environments that complement your car model, adding context and enhancing realism through background elements and ground reflections.
- Rendering and Post-Processing: Utilize Blender\"s rendering engines (Cycles or Eevee) for final renders, followed by post-processing in Blender\"s compositor or external software to adjust colors, contrast, and add effects.
These advanced strategies require a deep understanding of Blender\"s tools and a keen eye for detail. Success in realistic car modeling relies on patience, practice, and the continuous study of real cars to understand their form, function, and the way they interact with light.
- Study Real Vehicles: Analyze real vehicles and their components to understand their structure, materials, and how they reflect light.
- Continuous Learning: Stay updated with new Blender features and plugins that can enhance the realism of your car models.
By integrating these advanced strategies, your car models will not only look realistic but also evoke a sense of authenticity and attention to detail that sets professional work apart.
Texturing and Shading Your Car Model
Texturing and shading are critical steps in bringing your Blender car model to life, adding color, realism, and depth. This section outlines the process for applying textures and creating shaders that mimic real-world materials.
- Understanding Materials and Textures: Begin by familiarizing yourself with Blender\"s material system. Learn how to create new materials and apply them to your model.
- UV Mapping: Master the art of UV mapping, which allows you to unfold your model\"s geometry for accurate texture application. This is essential for applying decals, logos, and complex textures accurately.
- Creating Realistic Textures: Utilize Blender\"s texture painting tools or import high-quality images to create realistic textures. Pay attention to details like wear and tear, dirt, and reflections to add realism.
- Shader Development: Dive into shader development to simulate various car materials, including metal, glass, rubber, and car paint. Use Blender\"s node-based shader system to layer and blend materials for a more realistic effect.
- Lighting and Reflections: Experiment with lighting setups to enhance the textures and shaders\" appearance. Proper lighting is crucial in highlighting the materials\" qualities and creating realistic reflections.
- Rendering Tests: Conduct rendering tests to evaluate the textures and shaders under different lighting conditions. Adjust the materials as needed to achieve the desired level of realism.
Texturing and shading require a good eye for detail and patience to adjust and fine-tune. With practice, you can achieve photorealistic results that make your car models stand out. Remember to utilize Blender\"s vast online resources and community forums for tips and troubleshooting.
- Resource Libraries: Take advantage of online libraries and marketplaces for high-quality textures and materials that can save time and enhance your models.
- Continued Learning: Keep exploring advanced texturing and shading techniques, including procedural texturing and PBR (Physically Based Rendering) workflows, to keep your skills sharp and your models up-to-date with current trends.
Lighting and Rendering Techniques for Car Models
Effective lighting and rendering are crucial for showcasing your Blender car models in their best light. This section covers techniques to enhance the visual appeal of your car models through strategic lighting setups and rendering settings.
- Understanding Blender\"s Lighting Tools: Familiarize yourself with Blender\"s lighting options, including point lights, spotlights, area lights, and sun lamps. Learn how each can be used to simulate different lighting conditions.
- Using HDRI for Natural Lighting: HDRI (High Dynamic Range Imaging) maps can provide your models with realistic ambient lighting based on real-world scenes. Explore how to use HDRI backgrounds to enhance reflections and overall lighting.
- Three-Point Lighting Setup: Master the three-point lighting setup (key light, fill light, and back light) to add depth and dimension to your car models, highlighting details while controlling shadows.
- Rendering with Cycles and Eevee: Blender offers two powerful rendering engines, Cycles and Eevee. Cycles is a ray-trace based engine that produces photorealistic results, while Eevee is a real-time renderer for faster previews.
- Material and Shader Settings: Adjust material and shader settings to reflect the true characteristics of car surfaces, such as metallic paint, glass, and rubber, enhancing realism in your renders.
- Post-Processing Techniques: Utilize Blender\"s compositor for post-processing to adjust the final image\"s color balance, contrast, and brightness, or to add effects such as lens flares or motion blur.
By carefully planning your lighting and rendering approach, you can dramatically improve the presentation of your car models, making them look more professional and lifelike. Experiment with different techniques and settings to find what works best for your specific model and artistic vision.
- Experimentation is Key: Don\"t be afraid to experiment with different lighting setups and rendering settings to see how they affect the appearance of your model.
- Continuous Learning: Stay updated with the latest Blender updates and community tutorials to continuously improve your lighting and rendering skills.
_HOOK_
Animating Your Car Model in Blender
Animating your car model in Blender adds an extra layer of realism and dynamism to your project. Whether it\"s for a video game, animation, or simply to showcase your model in motion, follow these steps to bring your car to life.
- Rigging Your Car: Start by rigging your car model. This involves creating a skeleton structure that defines how your model moves. Focus on rigging the wheels and steering mechanism for basic movements.
- Applying Constraints: Apply constraints to your rig to simulate realistic car movements. Constraints like \"Limit Rotation\" and \"Copy Rotation\" can be used to ensure the wheels turn correctly when the car moves or steers.
- Creating Simple Animations: Begin with simple animations. Animate the car moving forward or turning by keyframing the movement of the rig. This is a great way to understand the basics of animation in Blender.
- Animating Complex Movements: Once you\"re comfortable with simple animations, move on to more complex movements. This could include drifting, suspension adjustments, or even crashes if your project requires it.
- Simulating Physics: For added realism, use Blender\"s physics engine to simulate gravity, friction, and other forces acting on the car. This can add a lot of depth to animations, making them feel more dynamic.
- Rendering Your Animation: With your animation complete, it\"s time to render. Use Blender\"s rendering engines, Cycles or Eevee, for this purpose. Adjust your render settings to balance between quality and rendering time.
Remember, animating a car model requires patience and practice. Start with simple movements and progressively tackle more complex animations as you become more comfortable with Blender\"s animation tools.
- Use Reference Videos: Watching real car videos can help you understand movements and timings for your animations.
- Experiment with Speed and Timing: Play with different speeds and timings to make your animations more realistic and engaging.
By following these steps, you can create compelling animations that showcase your car model in motion, adding a new dimension to your 3D modeling projects in Blender.
Common Pitfalls and How to Avoid Them
Car modeling in Blender is a rewarding yet challenging endeavor, and there are common pitfalls that both beginners and experienced users can encounter. Understanding these challenges and knowing how to avoid them can save time and frustration.
- Overlooking Reference Images: Not using or incorrectly using reference images can lead to inaccuracies in proportions and details. Always start with accurate reference images and regularly compare your model against them.
- Ignoring Topology: Poor topology not only affects the visual quality but also complicates texturing and animation. Focus on maintaining clean topology, using quads wherever possible, and avoiding n-gons and excessive triangles.
- Underestimating UV Mapping: Inadequate UV mapping can result in distorted or unrealistic textures. Spend time learning UV mapping techniques to ensure your textures align correctly on the model.
- Overcomplicating the Model: Adding too much detail too early can make the modeling process cumbersome and lead to performance issues. Work from large to small, focusing on the overall shape before adding details.
- Neglecting Lighting and Materials: Lighting and materials play a crucial role in the realism of your car model. Experiment with different lighting setups and materials to find what best suits your model.
- Forgetting to Save Regularly: Losing progress due to not saving your work regularly can be disheartening. Set up autosave features and habitually save your progress.
By being aware of these common pitfalls and implementing strategies to avoid them, you can enhance your Blender car modeling experience, leading to more successful and satisfying outcomes.
- Seek Feedback: Don\"t hesitate to seek feedback from the Blender community or peers. Fresh eyes can spot issues you might have missed and provide valuable insights.
- Continuous Learning: Blender is constantly evolving, and so should your skills. Stay updated with tutorials, new features, and best practices to improve your modeling techniques.
READ MORE:
Additional Resources and Communities for Learning
The journey of mastering car modeling in Blender is an ongoing process, enriched by a vast array of resources and supportive communities. Here are some key platforms and resources to further your learning and connect with like-minded individuals.
- BlenderNation: Offers tutorials, news, and articles about Blender, including car modeling tutorials for all skill levels.
- YouTube: Home to countless Blender tutorial channels with step-by-step guides on car modeling, texturing, and animation.
- Blender Artists Community: An online forum where Blender users, from beginners to professionals, share their work, ask questions, and offer feedback.
- CG Cookie: Provides comprehensive courses on Blender, including vehicle modeling. Though it requires a subscription, the quality of tutorials and community support can be invaluable.
- Udemy: Offers a range of Blender tutorials for car modeling, catering to various skill levels, with courses often available at discounted rates.
- Blender Market: A marketplace for Blender add-ons, models, and materials, which can speed up your car modeling workflow and add detail to your projects.
- Blender Cloud: Subscription service offering access to training, assets, and films by Blender. It\"s a great way to learn directly from the source and support the Blender Foundation.
Exploring these resources can significantly enhance your Blender car modeling skills. Engaging with the community not only helps in resolving doubts but also provides inspiration and new perspectives on your projects.
Embark on your Blender car modeling journey with confidence, leveraging these insights and resources. Whether you\"re a novice or seasoned artist, the path to mastering 3D car design awaits your creativity and dedication.