Topic blender combine objects: Discover the art of combining objects in Blender to elevate your 3D designs. This guide unlocks the secrets to merging meshes for enhanced creativity and efficiency in your modeling projects.
Table of Content
- How can I combine objects in Blender to merge their data and create a single object?
- Methods to Combine Objects
- Practical Applications
- Conclusion
- Practical Applications
- Conclusion
- Conclusion
- Overview of Combining Objects in Blender
- YOUTUBE: How to Combine Objects in Blender like a Pro 2024
- Step-by-Step Guide to Joining Objects
- Exploring the Boolean Modifier for Complex Shapes
- Utilizing the Merge Tool for Precise Control
- Advanced Techniques: Shape Keys and Modifiers
- Common Pitfalls and How to Avoid Them
- Optimizing Your Workflow When Combining Objects
- Real-World Applications: From 3D Printing to Animation
- Additional Resources and Tutorials
How can I combine objects in Blender to merge their data and create a single object?
To combine objects in Blender to merge their data and create a single object, you can follow these steps:
- Make sure you are in Object mode in Blender.
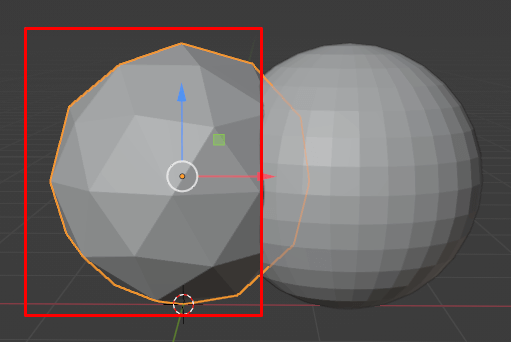
- Select the objects you want to combine by clicking on them while holding the Shift key.
- Ensure the last object you select is the one you want as the active object.
- Press Ctrl + J on your keyboard to join the selected objects into a single object.
- You will see that all object data is now linked to the active object, creating a single combined object.
READ MORE:
Methods to Combine Objects
Joining Objects
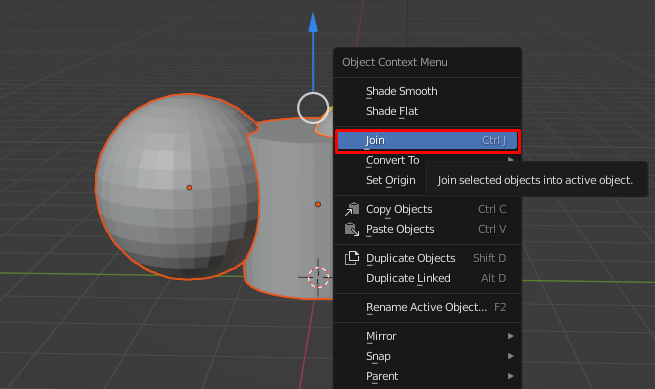
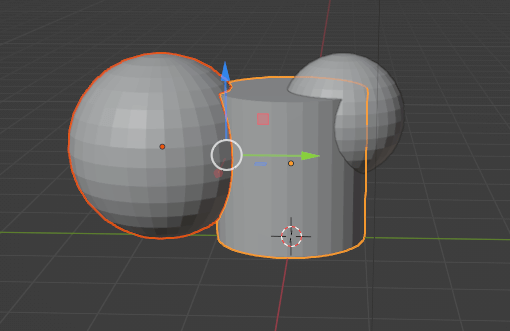
One of the simplest ways to combine objects in Blender is by joining them. This can be done by selecting the objects you wish to join in Object Mode and pressing Ctrl + J. This method is quick and effective for merging multiple objects into one.
Boolean Modifier
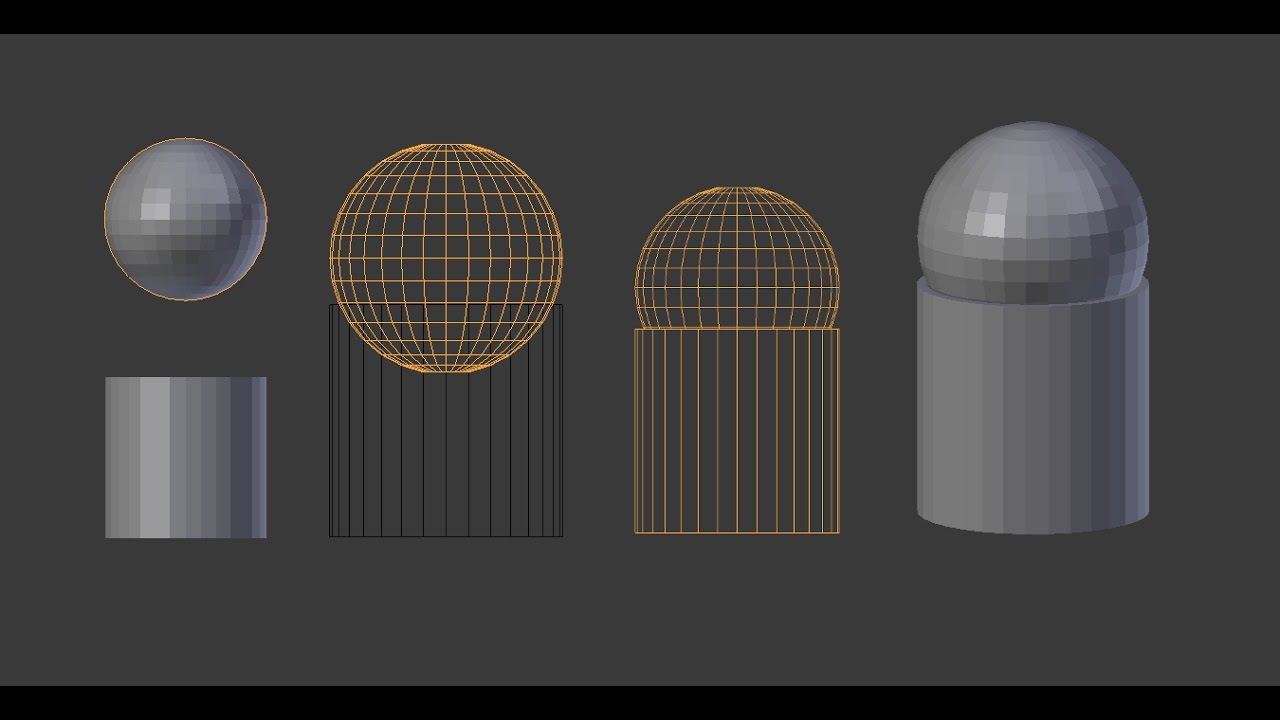
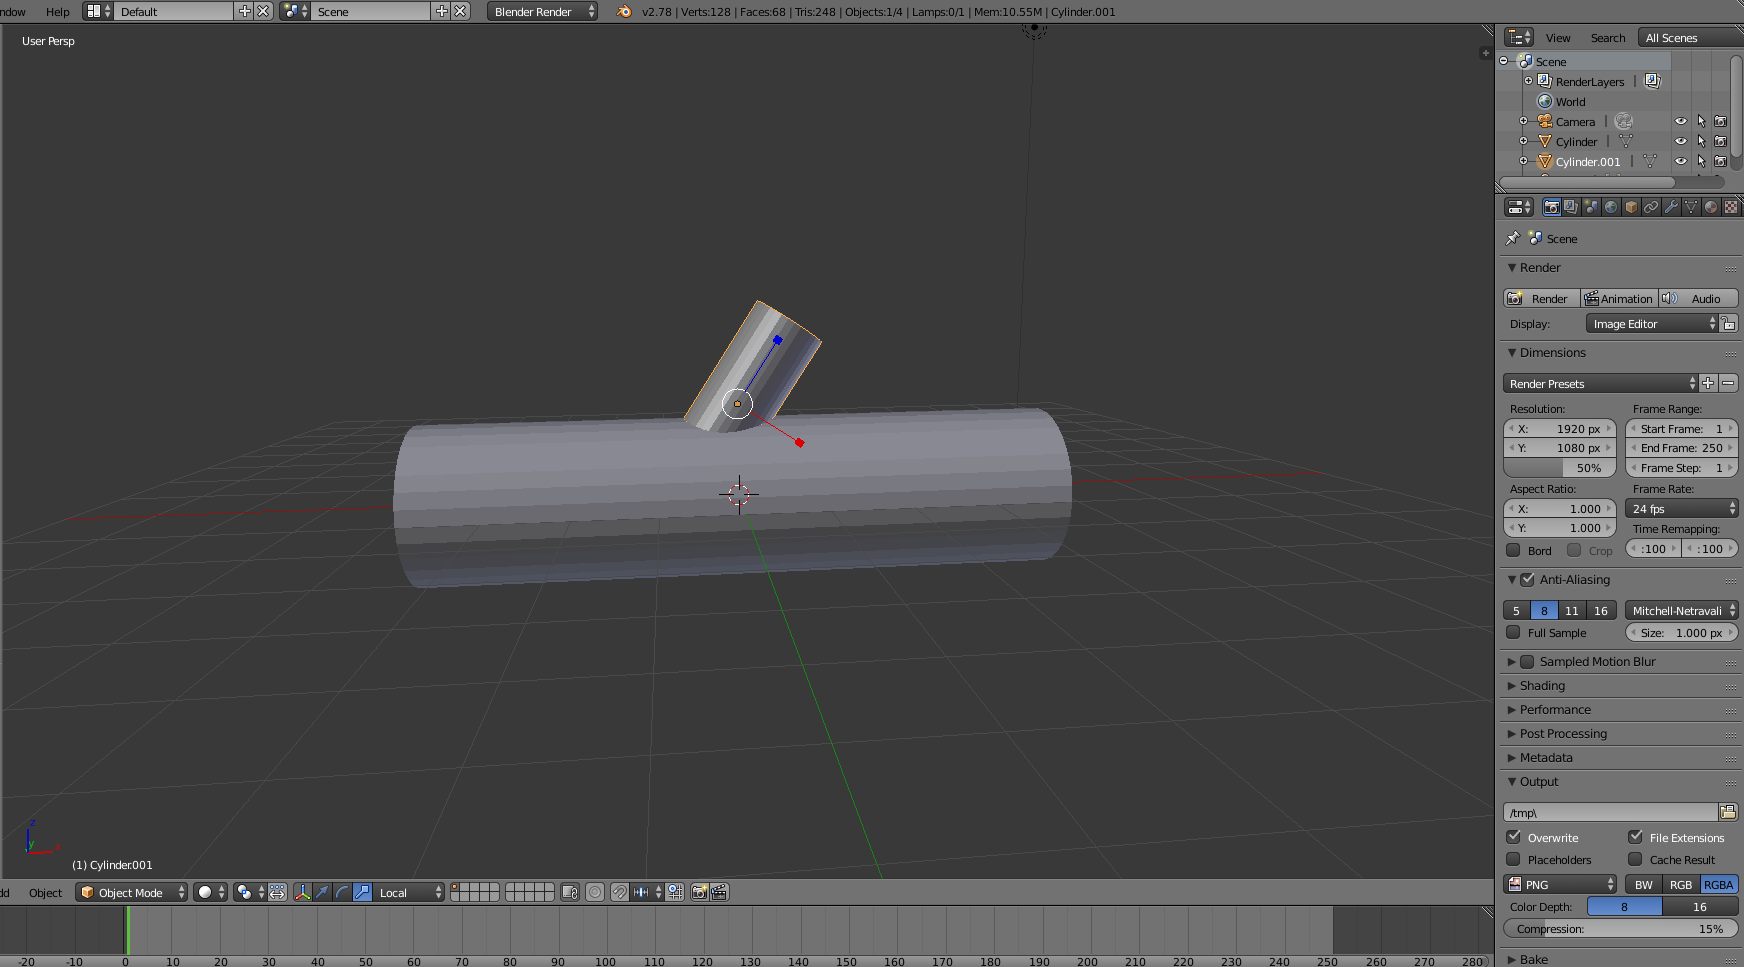
The Boolean modifier allows for a more complex combination of objects. It provides options like Union, Difference, and Intersect to control how objects merge. Applying the Boolean modifier to your objects can create intricate shapes and designs by combining their meshes in various ways.
Merging Vertices
In Edit Mode, vertices of objects can be merged to create seamless transitions between meshes. After joining objects, select the vertices you want to merge, right-click, and choose \"Merge Vertices.\" This method is useful for fine-tuning the details of your combined object.

Practical Applications
- Modeling Complex Structures: Combining objects is essential for creating complex models that are difficult to achieve with a single mesh.
- Optimizing Scenes: By merging objects, you can reduce the number of meshes in your scene, leading to better performance and easier management.
- Creating Detailed Designs: Use the merging techniques to add intricate details to your models that would be challenging to sculpt from scratch.
Conclusion
Blender\"s object combining features are powerful tools in the arsenal of a 3D artist. Whether you\"re joining objects for simplicity, using the Boolean modifier for complex shapes, or merging vertices for precision, Blender offers the flexibility needed to bring your creative visions to life.
Practical Applications
- Modeling Complex Structures: Combining objects is essential for creating complex models that are difficult to achieve with a single mesh.
- Optimizing Scenes: By merging objects, you can reduce the number of meshes in your scene, leading to better performance and easier management.
- Creating Detailed Designs: Use the merging techniques to add intricate details to your models that would be challenging to sculpt from scratch.
_HOOK_
Conclusion
Blender\"s object combining features are powerful tools in the arsenal of a 3D artist. Whether you\"re joining objects for simplicity, using the Boolean modifier for complex shapes, or merging vertices for precision, Blender offers the flexibility needed to bring your creative visions to life.
Overview of Combining Objects in Blender
Blender, a powerful 3D modeling and animation software, provides various methods for combining objects to create complex models and scenes. This process is essential for efficient workflow and achieving detailed designs. Understanding the fundamental techniques is crucial for any 3D artist.
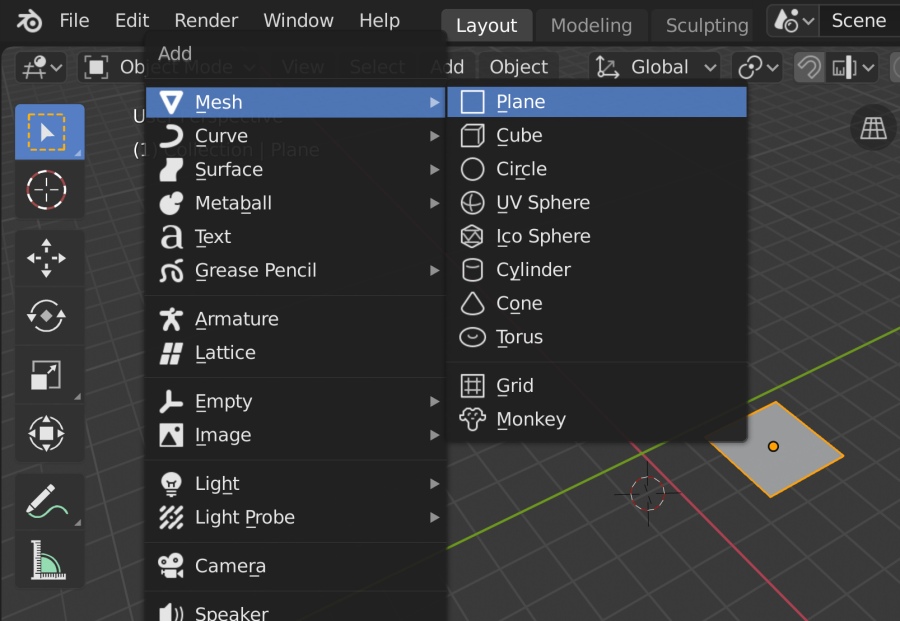
- Joining Objects: Quickly merge multiple objects into a single mesh using the shortcut Ctrl+J. This method is straightforward and ideal for objects that don\"t require complex interactions.
- Boolean Operations: Utilize Boolean modifiers (Union, Difference, Intersect) to combine objects in more complex ways, allowing for the creation of intricate shapes and designs.
- Merging Vertices: For detailed control, you can manually merge vertices by selecting them and using the Alt+M shortcut. This method is perfect for fine-tuning the mesh.
- Using Modifiers: Beyond the Boolean modifier, other modifiers like Array and Mirror can indirectly contribute to combining objects by replicating and positioning them strategically.
Each method serves different needs and offers unique benefits. Whether you\"re building simple models or complex scenes, mastering these techniques will significantly enhance your Blender projects.
How to Combine Objects in Blender like a Pro 2024
Dive into the world of pro-level gaming with our video showcasing intense competition, strategic gameplay, and expert tips from top players. Get inspired to elevate your skills and dominate the virtual battlefield!
Step-by-Step Guide to Joining Objects
Combining multiple objects into a single object in Blender is a fundamental skill for 3D modeling. This process can streamline your scene, reduce the complexity of your project, and prepare your models for animation or rendering. Follow these steps to join objects in Blender:
- Select the Objects: In Object Mode, hold the Shift key and right-click on the objects you wish to join. Ensure that the last object selected is the one you want the others to merge into, as it will dictate the resulting object\"s origin point and material settings.
- Join the Objects: With your objects selected, press Ctrl + J. This will combine your selected objects into a single object. The mesh data of all selected objects will be merged into the last selected object.
- Edit the Joined Object: After joining the objects, you may enter Edit Mode (Tab key) to modify the mesh as needed. This step is crucial for adjusting vertices, edges, and faces, ensuring that the merged object looks seamless.
- Use the Boolean Modifier for Complex Shapes: For more complex merging operations, such as when you need parts of objects to intersect or subtract from one another, use the Boolean modifier. Add the modifier to one object and select another as the target. Choose the operation type (Union, Difference, or Intersection) based on the desired outcome.
- Apply the Modifier: Once you are satisfied with the settings of the Boolean modifier, apply it to make the changes permanent. This operation can significantly alter the mesh, so it\"s recommended to duplicate your objects before applying the modifier, preserving the original models.
- Clean Up the Mesh: Combining objects can sometimes create unnecessary vertices, edges, or faces. In Edit Mode, use tools like Merge Vertices, Limited Dissolve, or Clean Up to refine the mesh and maintain a clean topology.
Remember, mastering object combination in Blender takes practice. Experiment with different tools and modifiers to achieve the best results for your projects.

How to Combine Objects into One Mesh in Blender Sub Surf Modifier Remesh
Unleash your creativity and discover the power of modifiers in our video that explores how these tools can transform your photos, videos, and designs. Learn new techniques to enhance your projects and take them to the next level!
Exploring the Boolean Modifier for Complex Shapes
The Boolean modifier in Blender is a powerful tool for creating complex shapes by combining or subtracting mesh objects. It allows for the realization of intricate designs that would be difficult to model from scratch. Here\"s how to use the Boolean modifier effectively:
- Understand the Boolean Operations: The Boolean modifier offers three primary operations - Union, Difference, and Intersection. Union combines multiple meshes into one, Difference subtracts one mesh from another, and Intersection creates a mesh from the overlapping volumes of the selected objects.
- Select Your Primary Object: Start by selecting the object you want to modify. This will be the base object to which the Boolean modifier is applied.
- Apply the Boolean Modifier: With the primary object selected, go to the Modifier Properties panel and add a Boolean modifier. Choose the operation type based on your desired outcome (Union, Difference, or Intersection).
- Select the Secondary Object: In the Boolean modifier settings, use the Eyedropper tool or the dropdown menu to select the second object you want to combine with the primary object. This is the object that will be used to either add to, subtract from, or intersect with the primary object.
- Adjust Modifier Settings: Depending on your version of Blender and the complexity of your objects, you may need to adjust the solver from \"Fast\" to \"Exact\" to get better results with complex shapes.
- Apply the Modifier: Once you are satisfied with the preview, apply the modifier to make the operation permanent. Applying the modifier will permanently alter the mesh of the primary object based on the selected Boolean operation.
- Clean Up the Mesh: After applying the modifier, it\"s common to have some unnecessary vertices or faces. Enter Edit Mode (Tab) and use tools like Merge by Distance or Clean Up to refine the mesh and improve its topology.
- Experiment with Complex Combinations: Don\"t be afraid to combine multiple Boolean operations on a single object or use them in conjunction with other modifiers for even more complex shapes. This can lead to unique and interesting designs.
Using the Boolean modifier can significantly enhance your 3D modeling workflow in Blender, enabling the creation of detailed and complex shapes with ease. Practice with different operations and settings to master this powerful tool.
_HOOK_
Utilizing the Merge Tool for Precise Control
The Merge tool in Blender is a critical feature for 3D modeling, enabling artists to combine vertices, edges, or faces with precision. This tool is vital for cleaning up models, connecting separate pieces, and refining mesh topology. Follow these steps to effectively use the Merge tool:
- Select the Vertices, Edges, or Faces: In Edit Mode, select the mesh elements you wish to merge. This can be done by right-clicking to select individual vertices, edges, or faces, or by using box select (B key) for a broader selection.
- Choose the Merge Option: With your selection made, access the merge options by pressing M. A menu will appear with several merging choices, including merging at the first or last selected, at the center, at the cursor, or by collapse.
- Merge at Center: Selecting \"At Center\" will merge the selected elements at the midpoint of their combined location. This option is ideal for symmetrical modifications or when you want to consolidate multiple vertices into a single, centered vertex.
- Merge at Cursor: Choosing \"At Cursor\" merges the selected elements at the position of the 3D cursor. This method provides high precision in placing the merge point, useful for specific modeling requirements.
- Merge by Distance: \"By Distance\" removes overlapping vertices by merging vertices that are within a certain distance of each other. This option is useful for cleaning up the mesh and reducing vertex count without significantly altering the model\"s shape.
- Adjust the Merge Distance (if necessary): When using \"By Distance\", you can adjust the merge threshold in the tool\"s options. This allows for finer control over which vertices are merged based on their proximity.
- Use the Collapse Option for Complex Merges: The \"Collapse\" option is particularly useful for merging all selected elements into a single entity without regard to their initial positions, ideal for creating singular points from complex shapes.
Utilizing the Merge tool allows for significant improvements in model topology and geometry. By mastering these techniques, you can achieve cleaner, more professional models, enhancing both the aesthetics and functionality of your 3D creations.

Advanced Techniques: Shape Keys and Modifiers
Blender\"s shape keys and modifiers offer advanced control over your 3D models, allowing for intricate animations and detailed shape transformations. These techniques are essential for creating dynamic models and animations. Here\"s how to utilize them effectively:
- Understanding Shape Keys: Shape keys are used to store different positional data for the vertices of a mesh. They allow for smooth transitions between different shapes, making them ideal for facial expressions, morphing objects, or any animation requiring shape variation.
- Creating a Basis Shape Key: First, ensure your object is selected and switch to the Object Data Properties tab. Click the \"+\" button in the Shape Keys panel to add a new shape key. This initial key is the \"Basis\" and represents the mesh\"s default shape.
- Adding Shape Keys: After creating the basis key, additional shape keys can be added. Each new key represents a variation of the mesh. Adjust the vertices in Edit Mode to define the new shape. Switching between shape keys in Object Mode allows you to preview the transformations.
- Animating Shape Keys: Shape key animation is achieved by keyframing the \"Value\" slider for each shape key. This slider controls the influence of a shape key, allowing for smooth transitions between shapes over time.
- Using Modifiers for Advanced Effects: Modifiers such as Subdivision Surface, Solidify, and Array can be used in conjunction with shape keys to add complexity and detail to your models without permanently altering the mesh.
- Modifier Stack Order: The order of modifiers in the stack is crucial. Generally, shape keys should be applied before most modifiers to ensure the intended effects are maintained across transformations.
- Combining Shape Keys and Modifiers: For dynamic effects, combine shape keys with modifiers like the Armature for character rigging. This combination allows for detailed character animations with realistic movements and expressions.
- Practical Applications: These advanced techniques are particularly useful in character design, animation, and any project requiring detailed control over mesh deformation and movement.
Mastering shape keys and modifiers can significantly elevate the quality and complexity of your 3D projects in Blender. Practice these techniques to bring your animations and models to life with precise control and creativity.
Common Pitfalls and How to Avoid Them
Combining objects in Blender is a process that, while powerful, comes with its own set of challenges. Understanding these common pitfalls can help you avoid mistakes and create more efficient, high-quality models. Here are some typical issues and how to navigate them:
- Non-Manifold Geometry: When objects are combined without attention to their geometry, it can result in non-manifold edges, which can cause issues with modifiers, rendering, and 3D printing. To avoid this, ensure that all vertices are merged properly and that no internal faces exist within your combined object.
- Loose Parts: After combining objects, loose parts can remain, leading to unexpected results in editing or animation. Use the \"Select -> Loose Parts\" option in Edit Mode to identify and either delete or integrate these parts properly into your model.
- Inconsistent Normals: Combining objects with flipped or inconsistent normals can create shading issues. To fix this, select all faces in Edit Mode and use \"Mesh -> Normals -> Recalculate Outside\" to unify the direction of the normals.
- Overlapping Vertices: Overlapping vertices can occur when objects are joined but not merged at the vertices. This can lead to visual artifacts and issues with modifiers. Use the \"Merge by Distance\" tool in Edit Mode to remove duplicate vertices.
- Material and Texture Conflicts: Combining objects with different materials or textures can lead to conflicts. Consolidate or simplify materials before combining or use the \"Data Transfer\" modifier to harmonize textures and materials across the combined object.
- Excessive Vertex Count: Joining complex objects can significantly increase the vertex count, potentially slowing down your workflow. Consider using the \"Decimate\" modifier to reduce the vertex count without drastically altering the appearance of your model.
- Animation and Rigging Issues: When combining objects that are intended for animation, it\"s crucial to consider how this will affect rigging and deformation. Plan your combination process to ensure that it complements the rigging and animation workflow, possibly keeping certain parts separate for easier manipulation.
By being mindful of these common pitfalls and implementing the suggested solutions, you can enhance your Blender projects, ensuring a smoother workflow and higher quality models. Always take the time to review your combined objects for any potential issues and correct them early in the process.
Optimizing Your Workflow When Combining Objects
Efficiency is key in 3D modeling, especially when working with complex scenes or numerous objects in Blender. Combining objects smartly can significantly enhance your workflow, saving time and system resources. Here are steps and tips for optimizing your object combination process:
- Plan Your Scene Structure: Before combining objects, plan the structure of your scene. Identify which objects can be combined without affecting the functionality or animation. A good structure minimizes the need for future adjustments and simplifies the modeling process.
- Use Layers or Collections: Organize your objects into layers or collections. This not only keeps your project organized but also makes it easier to manage visibility and selectivity when combining objects.
- Combine Objects Logically: Combine objects that share a common material or are part of the same logical group (e.g., parts of a building). This reduces the complexity of material assignments and simplifies the scene.
- Employ Modifiers Wisely: Use modifiers like Boolean, Array, and Mirror effectively. Applying modifiers before combining can reduce the manual workload and facilitate a non-destructive workflow, allowing for easy adjustments.
- Optimize Geometry Before Combining: Before joining objects, clean up unnecessary geometry. Remove duplicate vertices with \"Merge by Distance\", and ensure your meshes are as optimized as possible to maintain performance.
- Keep a Non-Destructive Workflow: Whenever possible, maintain a non-destructive workflow by using instances or duplicates of your original objects. This way, you can make changes to the original object that automatically update across all instances.
- Batch Combine Where Appropriate: For objects that do not require individual manipulation, consider combining them in batches. This is particularly useful for static objects in the background or elements that do not contribute significantly to the scene\"s dynamics.
- Use the Correct Tools for Joining: Blender offers various tools for combining objects, such as Join (Ctrl+J), Boolean modifiers, and Parenting. Choose the method that best suits your needs to ensure efficiency and maintain control over the final result.
- Regularly Save and Version Your Work: Ensure you save your project frequently and maintain versions. This practice is crucial, especially after combining objects, to prevent data loss and to experiment with different combinations without affecting the main project.
Optimizing your workflow when combining objects in Blender not only speeds up the modeling process but also enhances the quality of your projects. By implementing these strategies, you can achieve a more organized, efficient, and flexible modeling environment.
Real-World Applications: From 3D Printing to Animation
Combining objects in Blender is not just a fundamental skill for 3D artists; it\"s a gateway to a multitude of real-world applications across different industries. Understanding how to effectively combine objects can lead to advancements in 3D printing, animation, game development, architectural visualization, and more. Here\"s how:
- 3D Printing: In 3D printing, combining objects is crucial for creating single, manifold models that can be printed without errors. Techniques such as Boolean operations ensure that the final model is structurally sound, with no floating parts or non-manifold edges, which are essential for a successful print.
- Animation and Film: For animators and filmmakers, combining objects allows for the creation of complex scenes and characters. By merging objects, artists can simplify animation processes, reduce rendering times, and create more detailed and dynamic scenes, enhancing the storytelling aspect.
- Game Development: In game development, combining objects can optimize game performance. By reducing the number of individual objects in a scene, developers can lower draw calls, which are crucial for running games smoothly on various hardware specifications.
- Architectural Visualization: Architects and visualizers use Blender to combine objects for creating detailed models of buildings and interiors. This technique allows for the efficient management of large projects, enabling rapid iterations and realistic visualizations of architectural designs.
- Virtual Reality (VR) and Augmented Reality (AR): In VR and AR, combining objects helps in creating immersive environments with optimized performance. This is vital for maintaining high frame rates and ensuring a seamless user experience in virtual or augmented realities.
- Product Design and Prototyping: Designers utilize object combination in Blender for prototyping products. This allows for the exploration of complex designs, the assembly of parts, and the visualization of how different components interact, significantly speeding up the design process.
Mastering the skill of combining objects in Blender opens up a world of possibilities for 3D artists, designers, and developers. By applying these techniques, professionals can push the boundaries of creativity and innovation, bringing their visions to life in the most efficient and impactful way.
_HOOK_
READ MORE:
Additional Resources and Tutorials
Finding the right resources and tutorials can significantly enhance your ability to combine objects in Blender, pushing your 3D modeling skills to new heights. Whether you\"re a beginner looking to understand the basics or an advanced user seeking to refine your techniques, a wealth of information is available. Here\"s how to find valuable learning materials:
- Official Blender Documentation: The Blender Foundation offers comprehensive guides and tutorials on its website. This is a great starting point for understanding the core functionalities of combining objects and using modifiers.
- Online Learning Platforms: Websites like Udemy, Coursera, and LinkedIn Learning host courses on Blender that range from beginner to advanced levels. These platforms often provide step-by-step tutorials on combining objects, along with other 3D modeling techniques.
- YouTube Channels: Many experienced Blender artists share their knowledge on YouTube, offering free tutorials that cover a wide range of topics, including object combination, texturing, rigging, and animation. Channels like Blender Guru, CG Geek, and Darrin Lile are popular among Blender users.
- Blender Community Forums: Participating in forums such as Blender Artists Forum or the Blender subreddit can provide access to a community of users eager to share advice, techniques, and critiques that can help improve your object combining skills.
- Books and eBooks: There are several comprehensive books and eBooks available that focus on Blender, offering in-depth tutorials and projects. These can be particularly useful for users who prefer a structured learning path.
- Workshops and Meetups: Attending Blender workshops or meetups can provide hands-on experience and direct feedback from experienced users. These events are excellent for networking and learning advanced techniques through live demonstrations.
By leveraging these resources, you can continue to grow your Blender skills, mastering the art of combining objects and beyond. Remember, the key to improvement is consistent practice and the willingness to explore and experiment with new techniques.
Mastering the art of combining objects in Blender opens endless possibilities for creativity and innovation in 3D modeling. Embrace these techniques to transform your ideas into stunning visualizations and bring your digital dreams to life.


:format(webp)/cdn.vox-cdn.com/uploads/chorus_asset/file/24475764/render_to_image_finished.png)