Topic blender modeling tips: Discover the secrets to mastering Blender modeling with our essential tips, designed to
Discover the secrets to mastering Blender modeling with our essential tips, designed to enhance your skills and creativity. Unlock the full potential of your 3D projects with expert strategies and insights.
Table of Content
- What are some advanced modeling techniques for Blender?
- Top Tips for Blender Modeling
- Additional Resources
- Additional Resources
- Introduction to Blender Modeling
- Getting Started with Blender
- Understanding Blender\"s Interface and Tools
- YOUTUBE: Quick Powerful Blender Modeling Tips to Improve Your Skills
- Essential Modeling Techniques in Blender
- Advanced Modeling Tips for Professional Results
- Optimizing Workflow and Efficiency in Blender
- Common Pitfalls in Blender Modeling and How to Avoid Them
- Using Modifiers and Add-ons to Enhance Your Models
- Texturing and Rendering Tips for Realistic Models
- Incorporating Rigging and Animation into Your Models
- Staying Updated with Blender’s Latest Features
- Learning Resources and Communities for Blender Enthusiasts
- Conclusion: Mastering Blender Modeling
What are some advanced modeling techniques for Blender?
Here are some advanced modeling techniques for Blender:
- 1. Edge Slide: Use the edge slide tool to easily move edges along the surface of your model, helping to refine shapes and details.
- 2. Sculpting Tools: Utilize Blender\'s sculpting tools to add finer details and create organic shapes with ease.
- 3. Subdivision Surface Modifier: Use the subdivision surface modifier to smooth out your model and increase its level of detail.
- 4. Proportional Editing: Enable proportional editing to make changes to your model while automatically adjusting surrounding vertices for a more natural look.
- 5. Retopology: Practice retopology techniques to create clean, optimized geometry for your models, especially useful for animation and rendering.
READ MORE:
Top Tips for Blender Modeling
- Don’t Duplicate, Instance Instead: Use Alt+D to instance objects in Blender, allowing any changes made to one to propagate to all instances, saving time and resources.
- Master Common Mesh Tools: Understanding and becoming proficient with Blender\"s mesh tools is crucial for effective modeling and ensuring clean topology.
- Use Modifiers Wisely: Modifiers are powerful tools that can automate tasks and enhance your models non-destructively. Familiarize yourself with their uses for efficient modeling.
- Keyboard Shortcuts: Learning and using Blender’s keyboard shortcuts can significantly speed up your workflow and make modeling tasks more manageable.
- Focus on Clean Topology: Maintain a low vertex count and strive for clean topology to make future modifications and detailing easier and more efficient.
- Experiment with Sculpting Tools: Once you have the basic shape and proportions, use Blender\"s sculpting tools to add detailed textures and features to your model.
- Repeat Last Action: Use the shortcut Shift + R to repeat your last action, a handy tip for speeding up repetitive tasks in your modeling process.
- Learn from Tutorials: There\"s no better way to improve your skills than by learning from the vast array of tutorials available, catering to all levels of experience.
- Practice Regularly: Like any skill, regular practice is key. Challenge yourself with new projects and experiment with different techniques and tools.
- Stay Updated: Blender is constantly evolving. Stay updated with the latest versions and features to make the most out of the software.

Additional Resources
- Blender Official Tutorials
- Online Forums and Communities
- YouTube Channels Dedicated to Blender Modeling
- Books and E-Books on Blender Techniques
With dedication and the right approach, these tips will help you master Blender modeling and unlock your creative potential. Happy modeling!

Introduction to Blender Modeling
Blender modeling is a powerful facet of the Blender software, offering a vast array of tools and techniques for creating detailed 3D models. Whether you are new to 3D modeling or looking to enhance your skills, understanding the fundamentals of Blender modeling is essential for producing high-quality work.
- Understanding Blender\"s Interface: Familiarize yourself with Blender\"s user interface to navigate efficiently and access essential tools.
- Basic Modeling Techniques: Learn the foundational techniques of modeling, including mesh creation, editing, and manipulation.
- Advanced Modeling Tips: Explore advanced techniques such as sculpting, texturing, and rigging to bring your models to life.
- Optimizing Workflow: Discover tips for speeding up your modeling process, using modifiers, and leveraging Blender\"s powerful shortcuts.
- Common Pitfalls and How to Avoid Them: Gain insight into common modeling challenges and how to overcome them.
Blender modeling is not just about creating shapes but also about understanding the principles of 3D design, from topology to texture. With practice and patience, you can harness the power of Blender to create stunning 3D models and animations.

_HOOK_
Getting Started with Blender
Blender\"s interface is customizable, featuring predefined workspaces for specific tasks such as modeling, animation, and sculpting. Users can switch workspaces via a dropdown menu, tailoring the environment to their workflow. Panels within each workspace provide access to tools and settings, which can be rearranged for efficiency.
To customize Blender\"s interface, access the Preferences through the Edit menu, allowing adjustments to themes, keymaps, and add-ons. A vast array of keyboard shortcuts streamlines navigation and tool access, enhancing productivity.
For 3D modeling, Blender offers object creation and manipulation tools, essential transform tools for moving, rotating, and scaling, and diverse modeling modes like Edit, Object, and Sculpt Mode for comprehensive model control. Learning these basics opens up Blender\"s extensive capabilities in animation, visual effects, and beyond.
Working with materials and textures is facilitated by the Node Editor, where users can apply shader-based materials to objects. UV unwrapping is necessary for accurate texture application, with Blender supporting various texture formats. Procedural textures can be created for dynamic effects.
Animation in Blender involves setting up scenes, defining object states with keyframes, and utilizing armatures for character animation. Understanding this workflow is crucial for creating compelling animations.
Starting with Blender encompasses mastering its interface, modeling tools, materials, and animation capabilities, setting a foundation for exploring its full potential in 3D creation.
Understanding Blender\"s Interface and Tools
Blender\"s interface might seem daunting at first, but it\"s designed to provide you with all the tools you need for professional modeling, animation, and rendering. This section will guide you through the basics of Blender\"s interface and the essential tools for modeling.
Getting to Know the Blender Interface
The Blender interface is divided into several areas, each dedicated to a specific aspect of the 3D creation process. Here are the key areas you\"ll need to familiarize yourself with:
- 3D Viewport: This is the main area where you\"ll spend most of your time, viewing and editing your 3D models.
- Timeline: Located at the bottom of the screen, the Timeline allows you to control animations.
- Outliner: The Outliner, usually on the right, shows a hierarchical list of all objects in your scene.
- Properties: Also on the right, the Properties panel gives you access to all the settings for your objects, materials, and world settings.
Essential Tools for Modeling
Blender offers a wide range of tools for modeling, from basic shapes to complex sculpting tools. Here are some essential tools to get you started:
- Selection Tools: Blender provides various ways to select objects and parts of objects, including box select, circle select, and lasso select.
- Transform Tools: Move, rotate, and scale your objects with precision using the transform tools.
- Extrude: Use the extrude tool to extend surfaces from your mesh, creating new geometry.
- Loop Cut and Slide: This tool allows you to add more geometry by creating loops around your mesh, which is essential for adding detail.
- Modifiers: Modifiers like Subdivision Surface, Mirror, and Boolean can drastically speed up your modeling process by automating tasks.
Customizing the Interface
One of Blender\"s strengths is its highly customizable interface. You can drag and split panels to create a workspace that suits your workflow. Additionally, Blender\"s themes allow you to change the color scheme of the interface to reduce eye strain during long modeling sessions.
Shortcut Keys
Mastering shortcut keys in Blender can significantly speed up your modeling process. Here are a few essential shortcuts:
- G: Move
- R: Rotate
- S: Scale
- E: Extrude
- CTRL + R: Loop Cut and Slide
Remember, the key to becoming proficient in Blender is practice and exploration. Spend time getting to know the interface and experimenting with the tools, and you\"ll soon find your workflow becoming more efficient and intuitive.

Quick Powerful Blender Modeling Tips to Improve Your Skills
Techniques: Discover innovative and creative techniques that will take your skills to the next level. This video showcases expert tips and tricks that will enhance your performance and help you achieve incredible results. Efficiency: Learn how to streamline your processes and maximize productivity with this insightful video on efficiency. Gain valuable strategies and tools to work smarter, not harder, and accomplish tasks with speed and precision.
10 Essential Tips to Improve Your Workflow in Blender
Check Out My Playlist Free ADD-ONS & GENERATORS ...
Essential Modeling Techniques in Blender
Mastering the essential modeling techniques in Blender sets the foundation for creating detailed and complex 3D models. Whether you are a beginner or looking to refine your skills, these techniques will help you enhance your modeling workflow and achieve professional results.
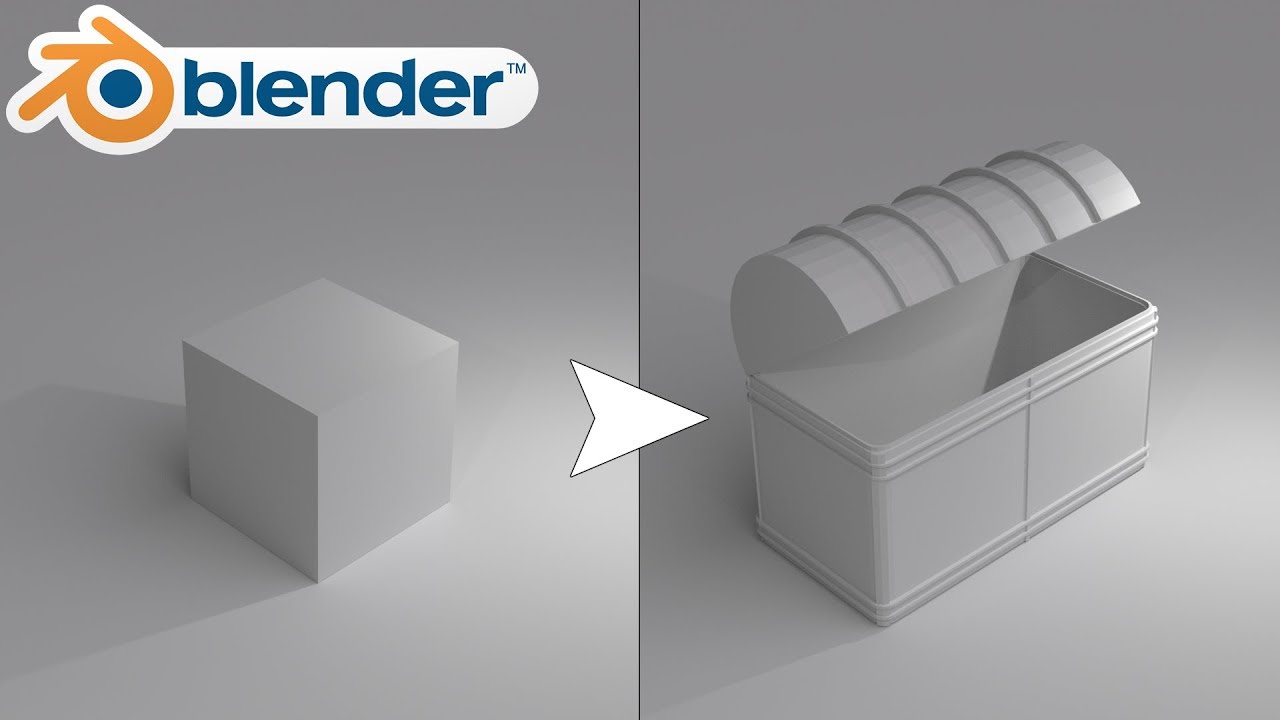
- Box Modeling: Start with a simple cube and modify it into the shape of your model. Add more details by subdividing the mesh and shaping it to your desired form. This technique is great for creating organic shapes like characters and creatures.
- Edge Modeling: Focus on creating the outline of your model first. Add edges to define the basic shape, and then fill in the faces. This method offers more control over the topology of your model and is ideal for mechanical or man-made objects.
- Extrusion: Use the extrude tool to pull out shapes from an existing mesh. This technique is essential for adding complexity and details to your model. It can be used for creating everything from architectural features to character clothing.
- Loop Cuts: Add loop cuts to introduce new edges into your model. This is crucial for controlling edge flow and adding detail in specific areas. Proper use of loop cuts can help in creating smooth and clean topology, especially around areas that need to deform.
- Modifiers: Blender\"s modifier stack offers powerful tools for non-destructive modeling. Use modifiers like Subdivision Surface to smooth your model, Boolean for complex shapes, or Mirror for symmetrical objects. Modifiers can drastically speed up your workflow and allow for easy adjustments.
- Sculpting: For organic models, Blender\"s sculpting tools can add fine details that are hard to achieve with traditional modeling techniques. From subtle skin textures to intricate clothing folds, sculpting can breathe life into your models.
Understanding and applying these techniques will significantly improve your modeling process in Blender. Practice with different methods and tools to discover what works best for your project. Remember, there\"s no one-size-fits-all approach in 3D modeling, so experiment and refine your skills to develop your unique style.
Advanced Modeling Tips for Professional Results
When advancing your skills in Blender modeling, it\"s crucial to adopt techniques that push your work from good to great. Here are some expert tips to achieve professional-grade models:
- Master the Subdivision Surface Modifier: This modifier is key for creating smooth, high-resolution models. Start with a low-poly base and increase complexity gradually. Pay attention to edge flow for better control over the shape and details.
- Utilize Proportional Editing for Organic Shapes: Proportional editing allows for smoother transitions and manipulations in your models. It\"s especially useful for organic objects, helping you achieve more natural-looking curves and features.
- Implement Retopology Techniques: For high-poly models or 3D scans, retopology is essential. It involves creating a new, more efficient mesh over your detailed sculpt. This process is vital for animation-ready models and reducing render times.
- Explore Hard Surface Modeling Tricks: Use bevels and supporting edge loops to maintain sharp edges in mechanical or man-made objects. Boolean operations can also be powerful for creating complex intersections and shapes.
- Experiment with Advanced Sculpting Brushes: Beyond the basics, Blender\"s sculpting tools offer specialized brushes for intricate details. Familiarize yourself with brushes like Crease, Clay Strips, and Grab to add sophistication to your models.
- Optimize Your Workflow with Custom Hotkeys: Efficiency is key in professional modeling. Customize Blender\"s hotkeys to suit your workflow, enabling quicker access to frequently used tools and functions.
- Integrate Texturing and Shading Early On: Start thinking about textures and materials in the early stages of modeling. This approach helps in visualizing the final product and ensures that your model supports the desired surface qualities.
- Use Reference Images Effectively: High-quality reference images are invaluable for achieving accuracy and realism. Use Blender\"s background image feature to import and align references directly in your viewport.
- Leverage Blender\"s Add-ons and Plugins: Expand Blender\"s capabilities with third-party add-ons and plugins. Tools like HardOps and BoxCutter can dramatically speed up certain modeling tasks, especially in hard surface modeling.
- Stay Updated with Blender\"s Latest Features: Blender is constantly evolving, with new features and improvements in each update. Regularly exploring these updates can provide new techniques and tools to enhance your modeling projects.
By incorporating these advanced techniques into your modeling workflow, you\"ll not only improve the quality of your models but also the efficiency and enjoyment of your Blender experience. Happy modeling!
Optimizing Workflow and Efficiency in Blender
To enhance your modeling speed and efficiency in Blender, incorporating workflow optimizations is crucial. These strategies not only save time but also improve the quality of your work. Here are actionable tips to streamline your Blender workflow:
- Customize Your Interface: Tailor Blender\"s interface to suit your needs. Arrange panels and toolbars to have the tools you use most often readily accessible, reducing the time spent searching for functions.
- Learn Keyboard Shortcuts: Blender\"s vast array of keyboard shortcuts can significantly speed up your modeling process. Memorize shortcuts for common actions to keep your workflow smooth and fast.
- Create Your Own Shortcuts: Blender allows you to assign custom keyboard shortcuts to any action. If there\"s a tool or function you use frequently that doesn\"t have a shortcut, create one for instant access.
- Use Blender Add-ons: Add-ons can greatly enhance Blender\"s functionality. From architectural tools to character rigging aids, there\"s likely an add-on that can make your specific task easier and faster.
- Implement Asset Libraries: Build a library of commonly used models, materials, and textures. This enables you to reuse assets across projects, significantly reducing creation time.
- Batch Process Repetitive Tasks: For repetitive tasks such as applying materials or rendering multiple scenes, learn how to use Blender\"s batch processing capabilities to automate these processes.
- Utilize Linked Duplicates for Repetitive Objects: Instead of duplicating objects, which increases file size, use linked duplicates (Alt+D). This method creates instances that share the same data, saving memory and allowing for simultaneous editing of all linked objects.
- Organize Your Project with Layers and Collections: Use layers and collections to manage your scene efficiently. This not only helps in organizing your project but also improves viewport performance by hiding elements not currently being worked on.
- Optimize Render Settings: Understanding and adjusting render settings can drastically reduce render times. Experiment with settings like resolution, sample rates, and light bounces to find a balance between quality and efficiency.
- Keep Learning: The Blender community is vibrant and continually evolving. Stay engaged with forums, tutorials, and courses to learn new tips and tricks that can further optimize your workflow.
By integrating these strategies into your daily use of Blender, you\"ll find that your projects can be completed more quickly and with less effort, freeing up time to focus on creativity and innovation.

_HOOK_
Common Pitfalls in Blender Modeling and How to Avoid Them
Blender modeling is a powerful process, but it comes with its own set of challenges, especially for beginners and even experienced users. Being aware of these common pitfalls can help you avoid them and improve your modeling skills:
- Ignoring Reference Images: Not using reference images can lead to inaccuracies in proportions and details. Always start with reference images to guide your modeling process for more accurate and realistic results.
- Overlooking Mesh Topology: Poor mesh topology not only affects the quality of your models but can also cause issues with animation and texturing. Focus on maintaining a clean topology with quads to ensure smooth modifications and deformations.
- Excessive Use of Boolean Modifiers: While boolean operations are useful, overuse can result in messy topology and non-manifold edges. Use them sparingly and clean up the mesh after applying them.
- Neglecting Object Scale: Working with incorrect scale can cause problems in scenes, especially when combining multiple models. Ensure your objects are properly scaled relative to each other and the Blender world.
- Underutilizing Modifiers: Modifiers can significantly speed up the modeling process and offer non-destructive editing. Familiarize yourself with different modifiers and use them to streamline your workflow.
- Ignoring Layers and Collections: Not organizing your project can lead to a cluttered workspace and inefficiency. Use layers and collections to keep your scene organized and manageable.
- Avoiding Shortcuts: Blender\"s efficiency largely comes from its shortcuts. Learning and using keyboard shortcuts can drastically speed up your modeling process.
- Forgetting to Save Frequently: Losing progress due to crashes or mistakes is frustrating. Develop a habit of saving your work frequently and using Blender\"s autosave feature.
- Overcomplicating Models: Adding unnecessary detail can increase render times and make models hard to edit. Focus on simplicity and add details only where they contribute to the overall appearance.
- Not Backing Up Files: Always keep backups of your Blender files. This protects against data loss and allows you to return to earlier versions if needed.
Avoiding these common pitfalls will help you create more efficient, high-quality models in Blender. Remember, practice and patience are key to mastering any aspect of 3D modeling.

Using Modifiers and Add-ons to Enhance Your Models
Blender\"s modifiers and add-ons are powerful tools that can significantly enhance the quality and efficiency of your modeling projects. Here\"s how to leverage these features to improve your 3D models:
- Subdivision Surface Modifier: This modifier is essential for creating smooth, high-detail models. It subdivides your mesh to give it a smoother appearance, making it ideal for organic shapes and complex surfaces.
- Solidify Modifier: Use the Solidify modifier to add thickness to your models. This is particularly useful for objects that are too thin and need more volume for realism or for 3D printing purposes.
- Boolean Modifier: The Boolean modifier allows for complex shapes by combining objects through operations like union, difference, and intersection. It\"s a powerful tool for creating intricate designs and mechanical parts.
- Array Modifier: To create repeated elements along a path or in a fixed pattern, the Array modifier is invaluable. It saves time and ensures uniformity in patterns or sequences of objects.
- Mirror Modifier: For symmetrical models, the Mirror modifier can halve your workload by mirroring a part of your model to the other side. This is especially useful for characters, vehicles, and other symmetrical designs.
- Decimate Modifier: When you need to reduce polygon count without significantly affecting the model\"s appearance, the Decimate modifier can be a lifesaver, optimizing your model for better performance or web usage.
- Add-ons for Enhanced Functionality: Explore Blender\"s extensive library of add-ons for specialized tasks. Add-ons like HardOps, BoxCutter, and Auto-Rig Pro can drastically improve your modeling, texturing, and rigging processes.
- Geometry Nodes: Use Geometry Nodes for procedural modeling. This powerful system allows you to create complex patterns, terrains, and effects through nodes, offering endless creative possibilities.
- UV Squares and Textools: For UV mapping and texturing, add-ons like UV Squares and Textools provide advanced features to straighten and organize UV maps, making texture application more efficient and accurate.
- Grease Pencil for Concept Art: The Grease Pencil tool bridges 2D drawing and 3D modeling, allowing for concept sketches, annotations, and storyboarding directly in Blender. It\"s a versatile tool for artists and animators.
By integrating these modifiers and add-ons into your workflow, you can not only enhance the visual quality of your models but also streamline the creation process. Experimenting with these tools will open up new possibilities in your 3D modeling projects.
Texturing and Rendering Tips for Realistic Models
Creating realistic models in Blender involves more than just detailed modeling; texturing and rendering play crucial roles in bringing your scenes to life. Here are some tips to enhance the realism of your models through effective texturing and rendering:
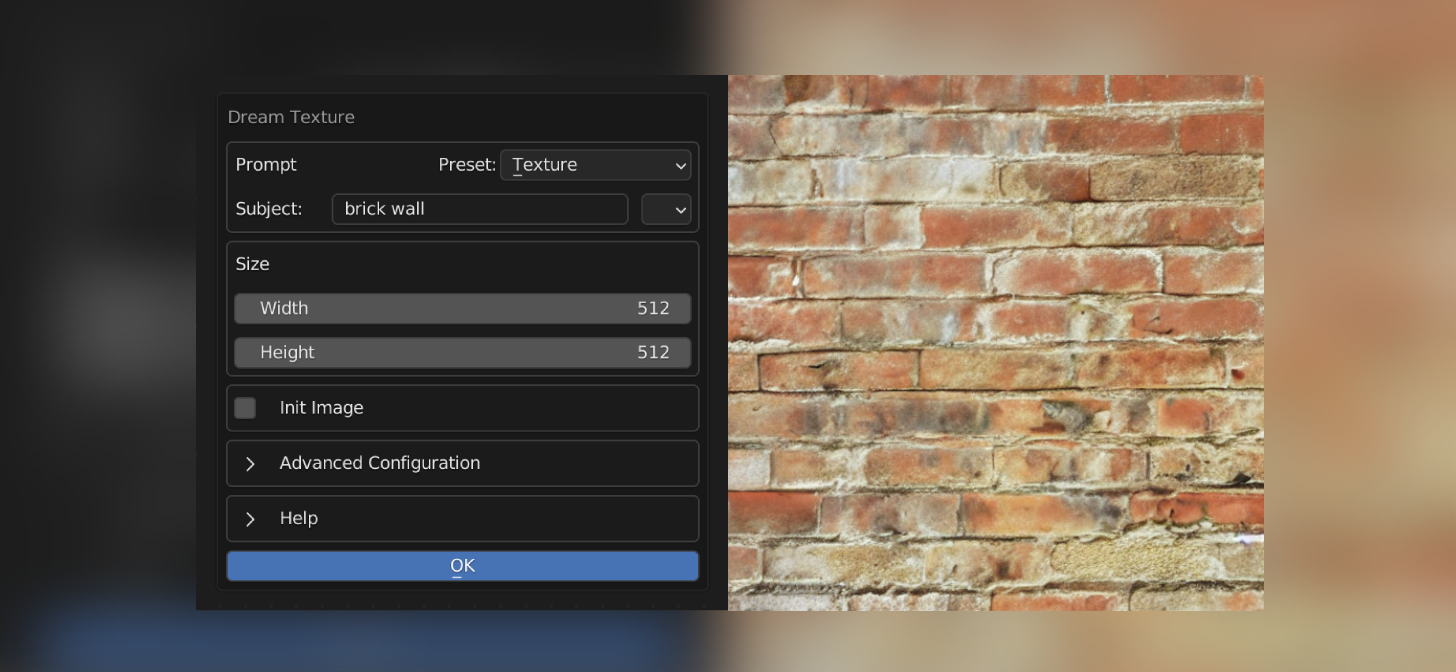
- Use High-Quality Textures: The foundation of realistic texturing is using high-resolution images. Source or create textures that offer detailed color, bump, and specular maps to add depth and realism to your models.
- Employ UV Mapping Techniques: Properly unwrap your models to ensure textures align correctly. Take advantage of Blender\"s UV editing tools to minimize seams and distortion, ensuring your textures appear natural and intended.
- Incorporate PBR Materials: Physically Based Rendering (PBR) materials reflect how light interacts with surfaces in the real world. Utilize PBR workflows in Blender to create materials that behave realistically under various lighting conditions.
- Use Normal and Bump Maps for Detail: To add surface details without increasing geometry, use normal or bump maps. These can simulate the appearance of bumps, dents, and other textures, adding realism without heavy computational costs.
- Experiment with Displacement Maps: For more pronounced textural features, displacement maps can physically alter the mesh based on texture data. This is particularly useful for organic models like terrain or character skin.
- Apply Subsurface Scattering: For materials like skin, wax, or leaves, subsurface scattering (SSS) simulates light penetrating the surface and scattering internally, softening shadows and creating a more realistic appearance.
- Optimize Lighting: Realistic rendering relies heavily on lighting. Use HDRIs for natural environmental lighting and carefully place additional light sources to mimic real-world lighting scenarios.
- Utilize Depth of Field: Depth of field (DoF) adds realism by blurring objects that are too close or too far from the camera\"s focus point, mimicking how eyes or cameras work.
- Post-Processing Enhancements: Use Blender\"s Compositor for post-processing adjustments. Color correction, bloom effects, and contrast adjustments can significantly enhance the final render\"s realism.
- Render in Cycles: For the highest quality renders, use Blender\"s Cycles render engine. It\"s a physically based renderer capable of producing photorealistic images, albeit with longer render times compared to Eevee.
By applying these texturing and rendering techniques, you can significantly enhance the realism of your Blender models. Remember, realism often lies in the details, so patience and attention to texture and light interaction will yield the best results.
Incorporating Rigging and Animation into Your Models
Bringing your Blender models to life through rigging and animation can be a rewarding experience. This process allows you to animate characters, objects, and scenes, adding dynamism and interactivity. Here are steps and tips for successfully incorporating rigging and animation into your Blender models:
- Understand the Basics of Rigging: Rigging is the process of creating a skeleton (armature) for a model so it can move. Start by learning how to place bones in your model accurately to mimic real-world or imagined movements.
- Use Automatic Weights for Skinning: Skinning is the process of attaching your mesh to the rig. Using Blender\"s \"Automatic Weights\" function can give you a good starting point, which you can then refine manually for precise control.
- Learn Bone Weight Painting: Weight painting allows you to define how much influence each bone has on different parts of the mesh. Mastering weight painting is crucial for achieving realistic deformations in your animations.
- Create Inverse Kinematics (IK) for Natural Movements: IK simplifies the animation process by allowing for more natural movements with fewer keyframes. It\"s particularly useful for limbs and complex movements.
- Organize Your Rig with Layers and Naming: Keep your rig organized by using layers to separate control bones from deformation bones and naming everything clearly. This makes animating complex models much more manageable.
- Explore Blender\"s Animation Tools: Familiarize yourself with the Graph Editor, Dope Sheet, and Action Editor. Understanding these tools is essential for creating and refining animations.
- Start with Simple Animations: Begin with basic animations to get a feel for timing and motion. Practice with simple movements before moving on to more complex sequences.
- Use Reference Videos: For character animation, reference videos can be invaluable. They provide real-world examples of movement and timing that you can emulate in your animations.
- Implement Drivers for Complex Interactions: Drivers allow you to create relationships between different properties. They can be used to automate movements and create more complex interactions within your scene.
- Practice and Experiment: Rigging and animation are skills that improve with practice. Experiment with different techniques and challenges to develop your abilities.
Incorporating rigging and animation into your Blender projects opens up a world of creative possibilities. With patience and practice, you can bring your models to life in ways that static images simply cannot capture.
Staying Updated with Blender’s Latest Features
Blender is continuously evolving, with new features and improvements being added regularly. Staying updated with these changes is crucial for leveraging the full potential of Blender in your projects. Here are strategies to keep abreast of the latest developments:
- Follow Official Blender Channels: The Blender Foundation and Blender Institute regularly release updates, tutorials, and announcements. Follow their official website, blog, and social media channels to get the latest news directly from the source.
- Participate in Blender Communities: Join Blender forums, subreddits, and online communities. These platforms are great for learning about new features, exchanging tips, and finding out how others are utilizing the latest updates in their work.
- Watch Blender Tutorials and Webinars: Many experienced Blender artists and educators regularly post tutorials and webinars that cover new features and how to use them effectively. Subscribing to popular Blender tutorial channels can help you stay informed and skilled.
- Experiment with Beta Versions: Blender often releases beta versions of upcoming updates. Participating in beta testing can give you early access to new features, allowing you to experiment with them before they are officially released.
- Attend Blender Conferences and Meetups: Events like the Blender Conference and local meetups are excellent opportunities to learn from experienced users and the Blender development team. These events often showcase upcoming features and offer workshops on how to use them.
- Subscribe to Blender Newsletters: The Blender Foundation sends out newsletters that include information on updates, new features, and community highlights. Subscribing to these newsletters is an easy way to stay informed about everything happening in the Blender world.
- Read Release Notes: Whenever a new version of Blender is released, detailed release notes are published. These documents provide comprehensive information on all the new features, improvements, and bug fixes.
- Practice Regularly: Regular use of Blender is one of the best ways to familiarize yourself with its features. By integrating new tools and techniques into your workflow, you\"ll naturally stay updated through hands-on experience.
By engaging with the Blender community and resources, you can stay informed about the latest features and learn how to integrate them into your work. This proactive approach will not only enhance your skill set but also inspire creativity and innovation in your projects.
_HOOK_
Learning Resources and Communities for Blender Enthusiasts
Blender\"s vast and vibrant community offers a wealth of resources for both beginners and advanced users. Whether you\"re looking to refine your skills, learn new techniques, or connect with fellow Blender enthusiasts, there\"s a plethora of options available. Here\"s a guide to some of the best learning resources and communities:
- Blender.org: The official Blender website is the go-to place for downloading the latest version of Blender, accessing official documentation, tutorials, and forums. It\"s an essential starting point for anyone new to Blender.
- Blender Artists Community: Blender Artists is one of the largest online communities for Blender users. Here, you can find help, share your work, and discuss everything related to Blender and 3D modeling.
- BlenderNation: BlenderNation provides daily news about Blender and a wide range of tutorials. It\"s a great site to stay updated on the latest Blender news and learn new techniques.
- Blender Guru: Founded by Andrew Price, Blender Guru is a fantastic resource for tutorials that cover everything from the basics to advanced modeling, texturing, and rendering techniques.
- CG Cookie: CG Cookie offers a structured learning path for Blender with courses ranging from beginner to advanced levels. While some content is free, a subscription provides access to their entire library.
- YouTube: YouTube hosts a vast number of Blender tutorials and channels dedicated to 3D modeling, animation, and rendering. Channels like CG Geek, Ducky 3D, and Gleb Alexandrov offer tutorials that cater to all skill levels.
- Blender Stack Exchange: For troubleshooting and specific questions, the Blender Stack Exchange is a Q&A community where you can get answers from experienced Blender users.
- Reddit: Subreddits like r/blender are active communities where users share their work, tips, and resources. It\"s a great place for inspiration and feedback.
- Online Courses and Workshops: Platforms like Udemy, Coursera, and Skillshare offer comprehensive Blender courses that cover various aspects of 3D modeling, animation, and game development.
- Meetups and Conferences: Attending Blender meetups and conferences can provide valuable networking opportunities and insights from leading professionals in the industry.
With dedication and the wealth of resources available, anyone can master Blender. Explore these communities and learning platforms to enhance your skills, share your work, and connect with fellow enthusiasts around the world.
READ MORE:
Conclusion: Mastering Blender Modeling
Mastering Blender modeling is a journey of continuous learning and practice. With its vast array of tools and features, Blender offers endless possibilities for creative expression and professional growth. Whether you\"re sculpting intricate characters, designing detailed architectural models, or creating immersive environments, the path to mastery involves dedication, experimentation, and the willingness to explore new techniques. Here are key takeaways to guide you in your ongoing journey:
- Embrace the Basics: Solidify your understanding of Blender\"s fundamentals. A strong foundation in the basics will empower you to tackle more complex projects with confidence.
- Practice Regularly: Consistency is key in honing your skills. Set aside time for regular practice, experimenting with different features and tools to broaden your skill set.
- Leverage Community Knowledge: The Blender community is a treasure trove of insight and inspiration. Engage with forums, tutorials, and social media groups to learn from others and share your experiences.
- Stay Updated: Blender is constantly evolving, with new updates bringing enhancements and new features. Keep abreast of the latest developments to ensure you\"re utilizing Blender to its fullest potential.
- Challenge Yourself: Step out of your comfort zone by taking on projects that challenge you. Tackling difficult tasks is one of the most effective ways to grow and improve.
- Share Your Work: Feedback is invaluable. Share your creations with the community to gain insights, suggestions, and encouragement from fellow Blender enthusiasts.
- Teach Others: Teaching is a powerful tool for learning. By explaining concepts and demonstrating techniques to others, you\"ll deepen your own understanding and skills.
In conclusion, mastering Blender modeling is a fulfilling pursuit that requires patience, perseverance, and a passion for learning. As you continue to explore and create with Blender, remember that every challenge is an opportunity for growth, and every project brings you one step closer to mastery. Embrace the journey, and let your creativity soar.
Embark on your Blender modeling journey with confidence, armed with these expert tips. From fundamentals to advanced techniques, unlock your creative potential and transform your ideas into stunning 3D art. Let\"s shape the future of digital creativity together.