Basic Modeling in Blender: Unlock Your 3D Creativity with These Essential Tips

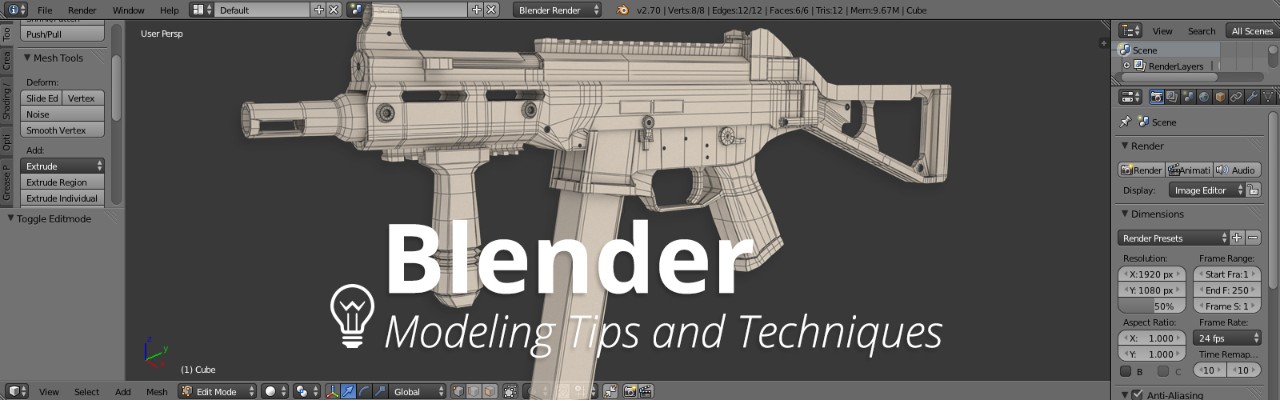
Topic basic modeling in blender: Embark on a journey to master basic modeling in Blender, transforming your creative ideas into stunning 3D models with our expert tips and essential techniques designed for beginners.

What are the basic steps for modeling in Blender?

Modeling in Blender involves creating 3D objects using various tools and techniques. Here are the basic steps for modeling in Blender:

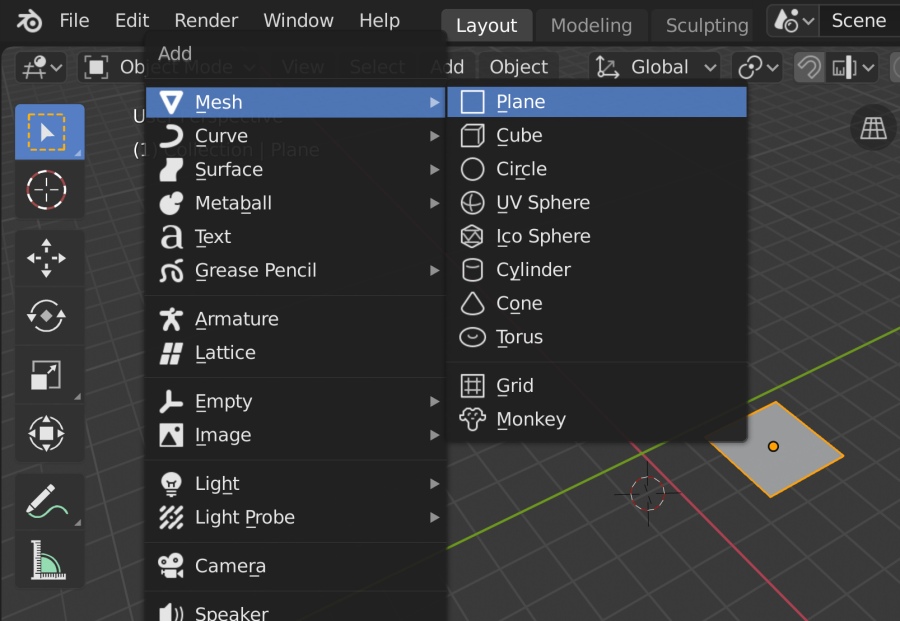
  1. Launch Blender and select the appropriate layout (Modeling, Sculpting, etc.)
  2. Start with a basic primitive shape (cube, sphere, cylinder) to serve as the foundation of your model.
  3. Use the transformation tools (move, rotate, scale) to manipulate the selected object in the 3D viewport.
  4. Enter Edit Mode to modify the object\'s geometry by selecting vertices, edges, or faces.
  5. Use tools like extrude, bevel, loop cut, and subdivide to add detail and shape to your model.
  6. Utilize modifiers to further refine your model\'s appearance (e.g., mirror, subdivision surface).
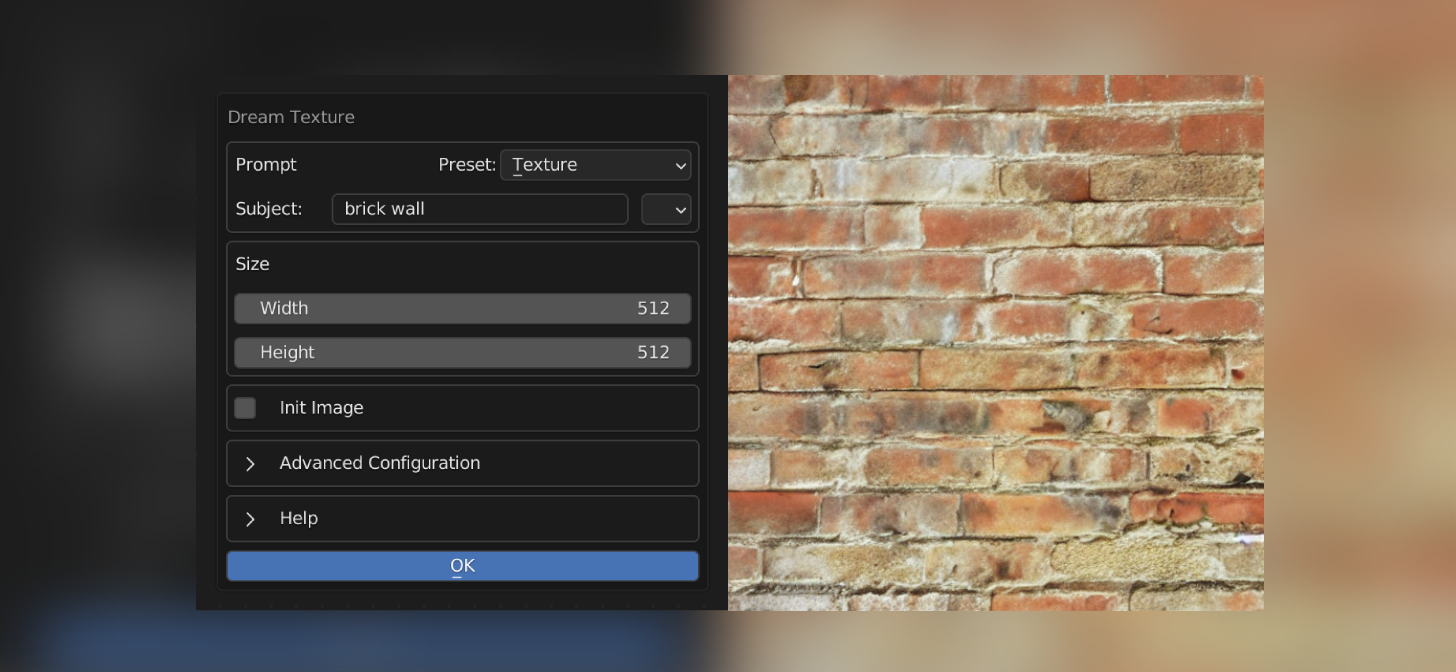
  7. Apply materials and textures to give your model color and surface properties.
  8. Preview your model using different viewport shading modes (solid, wireframe, rendered) to check its appearance.
  9. Repeat the process of tweaking and refining your model until you are satisfied with the result.
  10. Finally, save your model in the desired file format (e.g., .blend) for future use or export it for rendering or 3D printing.

Getting Started with Blender

Blender\"s interface is user-friendly but comes with a learning curve. It is important to familiarize yourself with the basic scene setup, which includes a mesh cube, a light, and a camera. Key navigation controls involve zooming in and out with the mouse wheel, and mesh shapes are defined by vertices, edges, and faces.

Getting Started with Blender

Modeling Basics

Modeling in Blender involves creating shapes and forms using vertices, edges, and faces. Blender\"s modeling tools support a variety of operations like edge slide, collapse, dissolve, grid and bridge fill, along with N-Gon support. Modifiers in Blender allow for non-destructive editing, enabling effects such as smooth shading, subdivision, and more.

Essential Techniques

  • Basic Navigation: Rotate, pan, and zoom within the 3D view using mouse controls and keyboard shortcuts.
  • Mesh Editing: Start with simple objects and learn to extrude, inset, and modify mesh geometry.
  • Modifiers: Utilize modifiers for efficient modeling processes, such as mirror modeling and subdivision surfacing.

Modeling Basics

Learning Resources

There are numerous tutorials and courses available for beginners to learn Blender. These resources cover everything from the very basics of the interface to more advanced modeling techniques, including character modeling, texturing, and lighting.

Online Tutorials and Courses

  1. Official Blender Tutorials: Short, concise videos covering every aspect of Blender\"s interface and tools.
  2. Skillshare and Udemy Courses: Comprehensive courses ranging from beginner to advanced levels, focusing on practical projects and hands-on learning.
  3. YouTube Tutorials: Free tutorials catering to absolute beginners, focusing on basic modeling techniques and simple projects.

Learning Resources

Practice Projects

Starting with simple projects is a great way to practice and solidify your understanding of Blender\"s modeling tools. Projects can range from creating basic objects like cups and tables to more complex forms like characters and environments.

ProjectDescription
Simple ObjectsPractice basic modeling techniques by creating everyday objects.
Character ModelingLearn the fundamentals of character creation, from blocking out basic shapes to adding details.

With patience and practice, Blender can become an indispensable tool in your 3D modeling arsenal. Start with the basics, make use of the vast array of online resources, and gradually challenge yourself with more complex projects to develop your skills.

Practice Projects

_HOOK_

5 Blender Models in 7 Minutes Tutorial - Polygon Runway

Tutorial: Learn step-by-step in this engaging video tutorial that covers all the basics you need to know. Explore new skills and gain valuable knowledge to enhance your expertise in an enjoyable way. Beginner: Dive into this video tailor-made for beginners, offering a friendly and accessible introduction to the subject. Build a strong foundation and boost your confidence as you embark on this exciting learning journey.

ABSOLUTE Beginner Basics Blender For Noobs

Check out my asset store! (Free Stuff to!): https://shoprobuilder.com/ For weekly Asset Packs check out our Patreon!

Modeling Basics

Modeling in Blender involves creating shapes and forms using vertices, edges, and faces. Blender\"s modeling tools support a variety of operations like edge slide, collapse, dissolve, grid and bridge fill, along with N-Gon support. Modifiers in Blender allow for non-destructive editing, enabling effects such as smooth shading, subdivision, and more.

Essential Techniques

  • Basic Navigation: Rotate, pan, and zoom within the 3D view using mouse controls and keyboard shortcuts.
  • Mesh Editing: Start with simple objects and learn to extrude, inset, and modify mesh geometry.
  • Modifiers: Utilize modifiers for efficient modeling processes, such as mirror modeling and subdivision surfacing.

Modeling Basics

Learning Resources

There are numerous tutorials and courses available for beginners to learn Blender. These resources cover everything from the very basics of the interface to more advanced modeling techniques, including character modeling, texturing, and lighting.

Online Tutorials and Courses

  1. Official Blender Tutorials: Short, concise videos covering every aspect of Blender\"s interface and tools.
  2. Skillshare and Udemy Courses: Comprehensive courses ranging from beginner to advanced levels, focusing on practical projects and hands-on learning.
  3. YouTube Tutorials: Free tutorials catering to absolute beginners, focusing on basic modeling techniques and simple projects.

Learning Resources

Practice Projects

Starting with simple projects is a great way to practice and solidify your understanding of Blender\"s modeling tools. Projects can range from creating basic objects like cups and tables to more complex forms like characters and environments.

With patience and practice, Blender can become an indispensable tool in your 3D modeling arsenal. Start with the basics, make use of the vast array of online resources, and gradually challenge yourself with more complex projects to develop your skills.

Practice Projects

Learning Resources

There are numerous tutorials and courses available for beginners to learn Blender. These resources cover everything from the very basics of the interface to more advanced modeling techniques, including character modeling, texturing, and lighting.

Online Tutorials and Courses

  1. Official Blender Tutorials: Short, concise videos covering every aspect of Blender\"s interface and tools.
  2. Skillshare and Udemy Courses: Comprehensive courses ranging from beginner to advanced levels, focusing on practical projects and hands-on learning.
  3. YouTube Tutorials: Free tutorials catering to absolute beginners, focusing on basic modeling techniques and simple projects.

Learning Resources

Practice Projects

Starting with simple projects is a great way to practice and solidify your understanding of Blender\"s modeling tools. Projects can range from creating basic objects like cups and tables to more complex forms like characters and environments.

ProjectDescription
Simple ObjectsPractice basic modeling techniques by creating everyday objects.
Character ModelingLearn the fundamentals of character creation, from blocking out basic shapes to adding details.

With patience and practice, Blender can become an indispensable tool in your 3D modeling arsenal. Start with the basics, make use of the vast array of online resources, and gradually challenge yourself with more complex projects to develop your skills.

Practice Projects

_HOOK_

Practice Projects

Starting with simple projects is a great way to practice and solidify your understanding of Blender\"s modeling tools. Projects can range from creating basic objects like cups and tables to more complex forms like characters and environments.

With patience and practice, Blender can become an indispensable tool in your 3D modeling arsenal. Start with the basics, make use of the vast array of online resources, and gradually challenge yourself with more complex projects to develop your skills.

Practice Projects

Introduction to Blender and Its Interface

Blender, a robust and free open-source 3D modeling, animation, and rendering software, stands out for its comprehensive functionality and versatility. Catering to both beginners and professionals, Blender offers an array of tools for 3D creation, including modeling, texturing, rigging, and animation.

The Blender interface might seem daunting at first glance, but it is designed to streamline the creative process. The default layout includes areas such as the 3D viewport, timeline, outliner, and properties panel, each serving a specific purpose in the 3D modeling workflow.

  • The 3D viewport is the heart of your workspace, allowing you to view and interact with your model.
  • The timeline at the bottom provides controls for animation playback and frame navigation.
  • The outliner offers a hierarchical view of all objects in the scene, making it easy to select and manage them.
  • The properties panel contains settings for the active object and scene, including materials, modifiers, and render properties.

To start modeling in Blender, you\"ll begin with basic shapes (primitives) and use tools to modify and sculpt them into more complex forms. Blender supports a wide range of modeling techniques, from simple extrusions and sculpting to advanced modifiers and simulation.

Key to Blender\"s power is its user-configurable interface. You can adjust layouts, create custom toolbars, and save setups to match your workflow preferences. Additionally, Blender\"s extensive documentation and vibrant community provide valuable resources for learning and troubleshooting.

As you become familiar with Blender\"s interface and tools, you\"ll find that your ability to bring ideas to life in 3D grows. Whether you\"re interested in creating animations, visual effects, or intricate models, mastering Blender\"s interface is your first step on a rewarding journey of digital creation.

Starting with Blender: Essential Setup Tips

Embarking on your 3D modeling journey with Blender begins with setting up the software correctly to optimize your learning and creation process. Here are essential setup tips to get you started smoothly.

  1. Download and Install Blender: Ensure you have the latest version of Blender installed from the official website to access the most up-to-date features and improvements.
  2. Customize Interface Preferences: Blender allows for customization of its interface. Navigate to Edit > Preferences to adjust themes, keymaps, and interface layouts to suit your workflow.
  3. Learn the Basics of Navigation: Familiarize yourself with the 3D viewport navigation—rotating, panning, and zooming are fundamental skills for modeling. Use the middle mouse button to rotate, shift plus the middle mouse button to pan, and the scroll wheel to zoom.
  4. Understand Object and Edit Modes: Blender operates in different modes for various tasks. Object mode is used for selecting and manipulating whole objects, while Edit mode allows for more detailed work on the object\"s vertices, edges, and faces.
  5. Explore Basic Modeling Tools: Get to know the tools available for modeling such as extrude, loop cut, and bevel. These tools are essential for creating and refining your models.
  6. Set Up a Simple Project: Start with a simple project to practice basic modeling techniques. Create a basic shape and experiment with modifying it using the tools you\"ve learned.
  7. Save Your Work Frequently: Develop the habit of saving your work frequently to prevent data loss. Use the incremental save feature to keep versions of your project as you progress.
  8. Use Blender\"s Extensive Resources: Blender has a vast amount of documentation, tutorials, and community forums. Utilize these resources to solve problems and learn new techniques.

By following these essential setup tips, you\"ll create a solid foundation for your 3D modeling projects in Blender. Remember, patience and practice are key to mastering any new skill.

Basic 3D Modeling Concepts in Blender

Understanding the fundamental concepts of 3D modeling in Blender is crucial for anyone looking to dive into the world of digital art and design. This section covers the core principles and techniques that form the backbone of 3D modeling in Blender.

  • Meshes: The basic structure of any 3D model in Blender is the mesh, which is made up of vertices, edges, and faces. These components can be manipulated to create various shapes and forms.
  • Primitives: Blender provides basic geometric shapes called primitives, such as cubes, spheres, and cylinders, which can serve as the starting point for more complex models.
  • Editing Tools: Blender offers a comprehensive set of tools for editing meshes, including extrude, loop cut, and subdivide, allowing for detailed model shaping and sculpting.
  • Modifiers: Modifiers are automatic operations that can be applied to objects to achieve non-destructive effects, such as smoothing, cutting, or deforming, enhancing the modeling process.
  • Materials and Textures: Applying materials and textures to models is essential for adding color, detail, and realism to your 3D creations.
  • Lighting and Rendering: Proper lighting and rendering techniques are crucial for bringing your models to life, highlighting details, and creating the desired atmosphere.

Starting with these basic concepts, you can begin to explore the vast capabilities of Blender, experimenting with different tools and techniques to develop your skills. Practice is key to mastering 3D modeling, so don’t hesitate to start small and gradually take on more complex projects as you become more comfortable with the software.

Core Blender Tools and Techniques for Beginners

Welcome to the exciting world of 3D modeling with Blender! As a beginner, mastering the core tools and techniques is vital for your journey. This section introduces you to the essential Blender tools and techniques that every beginner should know. Follow these steps to start your modeling projects with confidence.

Understanding the Interface

The Blender interface might seem daunting at first, but it\"s designed for efficiency. Familiarize yourself with the main areas: the 3D viewport, Timeline, Outliner, and Properties panel. The 3D viewport is where you\"ll spend most of your time, creating and manipulating objects.

Basic Tools for Modeling

  1. Move, Rotate, Scale: Use these tools to manipulate your objects in the 3D space. You can access them with the shortcuts G (move), R (rotate), and S (scale).
  2. Extrude: This tool is essential for adding volume to your models. Select a face or edge and press E to extrude.
  3. Loop Cut: Add more geometry to your models for detailed shaping. Press Ctrl+R and move the mouse over an edge to see the loop cut preview, then click to add.

Modifiers: Your Best Friends

Modifiers are automated operations that affect your object in non-destructive ways. They can simplify complex modeling tasks.

  • Subdivision Surface: This modifier smooths your model by subdividing its geometry. It\"s great for creating organic shapes.
  • Boolean: Use it to combine or subtract shapes from each other, perfect for creating complex forms.
  • Mirror: It mirrors your model across a chosen axis, saving time when creating symmetrical objects.

Shading and Smoothness

Understanding shading is crucial for presenting your models. Use the Shade Smooth option to give your objects a smoother appearance, and the Shade Flat option for a more faceted look.

Practice Projects

Start with simple projects to apply these tools and techniques. Create basic shapes and gradually add complexity. Practice using modifiers and experimenting with different shading options to see their effects.

Tips for Success

  • Experiment with different tools and modifiers to see their effects.
  • Use reference images to guide your modeling process.
  • Stay patient and practice regularly to improve your skills.

By mastering these core tools and techniques, you\"ll be well on your way to creating stunning 3D models with Blender. Remember, practice makes perfect, so keep experimenting and exploring the capabilities of Blender.

_HOOK_

Understanding and Using Blender\"s Modifiers for Modeling

Modifiers in Blender are powerful tools that can significantly streamline your 3D modeling workflow. They allow you to apply complex changes to your mesh that are non-destructive, meaning you can edit them later without altering the original geometry. This guide will introduce you to some of the essential modifiers for beginners and how to use them effectively in your projects.

What Are Modifiers?

Modifiers are operations that affect your object\"s geometry in a non-destructive way. They can be used for a wide range of tasks, from simple transformations to complex shape generation and deformation.

Key Modifiers for Beginners

  1. Subdivision Surface: Smooths your model by subdividing the mesh. It\"s perfect for creating organic shapes and adding detail without manually adding more geometry.
  2. Mirror: Mirrors your object across a specified axis. This is incredibly useful for creating symmetrical models, such as characters or vehicles.
  3. Solidify: Adds thickness to thin objects, which is essential for 3D printing or when you need to give volume to a plane or a single-sided mesh.
  4. Array: Creates copies of your object in a sequence or pattern. Great for making repetitive structures like stairs, chains, or any series of objects.
  5. Boolean: Performs operations between meshes (union, difference, intersection). It allows for complex shape creation by adding or subtracting objects from each other.

Applying Modifiers

To apply a modifier, select your object in the 3D viewport, go to the Modifiers tab in the Properties panel, and click on \"Add Modifier.\" Choose the modifier you need and adjust its settings to achieve the desired effect.

Tips for Using Modifiers

  • Stacking Modifiers: You can stack multiple modifiers on an object. The order in which they are applied can significantly affect the final result. Experiment with different combinations and orders to see how they interact.
  • Applying Modifiers: While modifiers are non-destructive, there are times you\"ll want to apply them to make their changes permanent. This is often necessary before exporting your model for 3D printing or game engines.
  • Non-Destructive Workflow: Take advantage of the non-destructive nature of modifiers for a flexible workflow. You can always go back and adjust settings as your project evolves.

Understanding and using modifiers is a crucial step in mastering Blender for modeling. They offer a powerful set of tools for creating detailed and complex models efficiently. Practice with these basic modifiers, and explore others as you become more comfortable with the software.

Step-by-Step Guide to Your First Modeling Project

Embarking on your first modeling project in Blender can be both exciting and overwhelming. This step-by-step guide is designed to help beginners navigate through their initial foray into 3D modeling. By following these simple steps, you will create a basic object in Blender, which will lay the groundwork for more complex projects in the future.

1. Setting Up Your Workspace

Open Blender and familiarize yourself with the interface. Adjust your layout to have the 3D viewport, Properties panel, and Outliner visible. These are the key areas you will be working with.

2. Starting with a Simple Shape

In the 3D viewport, start with a simple shape that will serve as the base of your model. Press Shift+A to open the Add menu and select a Mesh, then choose a shape, like a Cube or Sphere, as your starting point.

3. Modifying Your Shape

With your base shape selected, you can begin modifying it to create your desired model. Use the Scale (S), Rotate (R), and Move (G) tools to adjust your shape. Experiment with these tools to get a feel for how they work.

4. Adding Detail with Edit Mode

Switch to Edit Mode by pressing Tab. Here, you can select vertices, edges, or faces to make more detailed modifications. Use tools like Extrude (E) to add volume and Loop Cut (Ctrl+R) to add more geometry for shaping.

5. Using Modifiers for Efficiency

Modifiers can greatly enhance your modeling process. In the Properties panel, find the Modifiers tab and experiment with different modifiers, like the Subdivision Surface for smoothing or the Mirror for creating symmetrical designs.

6. Applying Materials

To give your model color and texture, switch to the Material Properties tab. Click \"New\" to create a new material, and adjust the color and specular properties to customize the appearance of your model.

7. Basic Lighting and Camera Setup

Add a light source by pressing Shift+A and selecting Light. Adjust its position to illuminate your model. Add a camera by repeating the process and selecting Camera. Position the camera to frame your model for rendering.

8. Rendering Your Model

With your model, materials, lights, and camera set up, you\"re ready to render. Go to the Render tab, and press \"Render Image\" to see your model in full detail. Experiment with different render settings to achieve the desired effect.

9. Saving Your Project

Don\"t forget to save your work regularly. Go to File > Save As to save your project. This ensures you won\"t lose your progress and can return to refine your model later.

Congratulations! You have completed your first modeling project in Blender. This basic project is just the beginning. As you become more comfortable with Blender\"s tools and interface, you can start experimenting with more complex models and techniques.

Best Practices for Efficient Modeling in Blender

To enhance your modeling efficiency in Blender, it\"s essential to adopt best practices that streamline your workflow and improve the quality of your projects. These practices are aimed at both beginners and those looking to refine their technique. Follow these guidelines to create more detailed and complex models with greater speed and less effort.

Optimize Your Workflow

  • Use Shortcuts: Blender is equipped with keyboard shortcuts for almost every action. Learning these can significantly speed up your workflow.
  • Customize Your Interface: Tailor Blender’s layout to suit your project needs. This minimizes distractions and keeps essential tools within reach.
  • Keep Your Mesh Clean: Regularly check your mesh for unnecessary vertices, edges, and faces. A clean mesh is easier to edit and deforms more predictably during animation.

Model with Precision

  • Use Reference Images: Importing reference images into Blender can guide your modeling process, ensuring accuracy and proportion.
  • Apply the Mirror Modifier: For symmetrical models, use the Mirror Modifier to reduce your workload by half while ensuring perfect symmetry.
  • Subdivision Surface Modifier: Use this modifier for a smoother finish. It’s particularly useful for organic models but remember to apply it judiciously to maintain control over your mesh.

Efficient Use of Modifiers

Modifiers are powerful tools in Blender that can automate complex processes and add detail without permanently altering your base mesh. Familiarize yourself with modifiers like Boolean for creating complex shapes, Array for duplicating elements, and Bevel for smoothing edges. Use them to add complexity to your models efficiently.

Stay Organized

  • Name Your Objects: As your scene grows, keeping track of your objects becomes crucial. Naming them descriptively helps in navigation and organization.
  • Use Layers and Collections: Organize your objects into layers and collections. This not only declutters your viewport but also makes it easier to manage visibility and render settings for groups of objects.

Practice Regularly

Like any skill, proficiency in Blender comes with practice. Regularly challenge yourself with new projects that push your boundaries. Use online resources, participate in community challenges, and seek feedback to continue improving.

By incorporating these best practices into your Blender modeling workflow, you\"ll create more sophisticated models more efficiently. Remember, the key to mastering Blender is not just understanding its tools but also developing an efficient workflow that suits your unique creative process.

Learning Resources: Tutorials, Courses, and Community Support

Blender\"s learning curve can be steep, but a wealth of resources is available to help beginners master the art of 3D modeling. Whether you prefer self-paced online tutorials, structured courses, or the support of the Blender community, there\"s something for everyone. Here are some valuable resources to kickstart your Blender education.

Online Tutorials and Guides

  • Blender Official Tutorials: The Blender Foundation offers a series of official tutorials that cover everything from the basics to more advanced techniques.
  • YouTube Channels: Numerous YouTube channels are dedicated to Blender tutorials for all skill levels. Look for channels with beginner-focused content to start with fundamentals.
  • Written Guides and Blogs: If you prefer reading, many blogs and websites provide written tutorials and guides that delve into Blender\"s various aspects.

Structured Online Courses

For those who prefer a more structured learning path, online courses offer comprehensive coverage of Blender\"s tools and techniques. Platforms like Udemy, Coursera, and Skillshare feature courses ranging from beginner to advanced levels, often created by industry professionals.

Community Support

  • Blender Artists Community: Join the Blender Artists forum to connect with other Blender users, share your work, get feedback, and ask for help with challenges you\"re facing.
  • Reddit: Subreddits like r/blender are great places to see what others are creating, ask questions, and participate in community challenges.
  • Discord Servers: There are several Blender-focused Discord servers where you can chat live with other Blender enthusiasts, share tips, and get instant help.

Books and eBooks

For a deep dive into Blender, consider picking up a book or eBook. Many titles cater to beginners and cover the fundamentals of 3D modeling, texturing, and rendering in Blender.

With these resources at your disposal, learning Blender becomes a journey of creative exploration. Remember, the key to mastering Blender is practice and persistence. Utilize these learning resources to build your skills, experiment with new techniques, and become part of the vibrant Blender community.

Practical Projects to Apply Your Skills

After getting acquainted with the basics of Blender and familiarizing yourself with its interface and tools, applying what you\"ve learned through practical projects is a great way to solidify your skills. Here are some beginner-friendly projects that you can start with. These projects are designed to cover a range of techniques, from simple modeling and texturing to more complex sculpting and animation.

1. Create a Simple Cup

A classic beginner project is modeling a simple cup. This project teaches you the basics of object modeling, applying modifiers like Subdivision Surface for smoothness, and introduces you to basic material and lighting setups.

2. Model a Low-Poly Landscape

Low-poly modeling is a style where the model is made with a minimal number of polygons. Creating a low-poly landscape can help you learn about mesh editing, applying materials, and environmental lighting.

3. Design a Character Base Mesh

Character modeling is a complex skill, but starting with a basic base mesh is a good way to get into it. This project can introduce you to the anatomy of modeling, using reference images, and the Mirror modifier for symmetry.

4. Animate a Bouncing Ball

Animation is a significant part of 3D modeling. A bouncing ball is a simple yet effective project to understand the basics of animation principles, keyframing, and the graph editor in Blender.

5. Texturing and Shading a Simple Object

Pick an object like a book or a chair and focus on applying textures and shaders. This project will help you understand UV unwrapping, texture painting, and using the node editor for materials.

6. Simple Vehicle Model

Modeling a simple vehicle, such as a car or a spaceship, introduces you to hard-surface modeling techniques. It\"s a project that can expand your skills in precision modeling, applying modifiers, and creating more complex shapes.

7. Interior Scene

Creating a basic interior scene, like a room with furniture, allows you to practice modeling various objects and assembling them into a cohesive scene. It also introduces you to more advanced lighting and rendering techniques.

Each of these projects is designed to build on the skills you\"ve learned from the previous ones, gradually increasing in complexity. Remember, the key to mastering Blender is practice. Don\"t be afraid to experiment with different features and tools as you work on these projects. The more you practice, the more comfortable you\"ll become with the software, and the more you\"ll be able to bring your creative visions to life.

_HOOK_

Advanced Tips for Next-Level Modeling in Blender

As you progress beyond the basics in Blender, there are advanced techniques and tips that can elevate your modeling skills to the next level. These tips focus on enhancing detail, efficiency, and realism in your projects. Whether you\"re working on intricate character models, complex environments, or detailed props, these strategies will help you refine your work and tackle more challenging projects with confidence.

Mastering Sculpting for Detailed Models

Sculpting in Blender is a powerful way to add intricate details to your models. Use dynamic topology (dyntopo) for flexible sculpting and the Multiresolution modifier for high-detail sculpting without losing your mesh\"s base form. Practice with various brushes to understand their effects and use masking to protect areas from changes.

Efficient Retopology Techniques

Retopology is crucial for creating animation-ready models. Use tools like the Shrinkwrap modifier and the RetopoFlow addon to create clean, efficient topology over your sculpted models. Focus on maintaining an optimal flow of edges to facilitate smooth deformations during animation.

Advanced Material and Texturing Tricks

  • Node-based Material Creation: Dive deep into Blender’s node system to create complex materials. Use nodes to layer textures, control shading, and simulate realistic surface properties.
  • UV Unwrapping and Texture Painting: Master UV unwrapping for precise texture control. Explore texture painting to add fine details directly onto your models.

Lighting and Rendering for Realism

Lighting can make or break the realism of your scenes. Experiment with HDRIs for natural environmental lighting and use Blender’s Cycles renderer for photorealistic output. Understand the principles of three-point lighting for character or object highlights.

Workflow Optimization

  • Customize Your Interface and Shortcuts: Tailor Blender’s interface and keyboard shortcuts to suit your workflow. This can significantly speed up your modeling process.
  • Use Addons and Scripts: Blender supports addons and Python scripts that can automate repetitive tasks and add new functionality. Explore the Blender Market and GitHub for tools that fit your needs.

Participate in Challenges and Collaborations

Engaging with the Blender community through challenges and collaborations can provide new insights and push your skills further. Feedback from experienced artists can help you identify areas for improvement and inspire you to try new techniques.

By incorporating these advanced tips into your Blender workflow, you\"ll not only enhance the quality of your models but also work more efficiently. Keep exploring and experimenting with Blender\"s vast toolset to discover even more ways to bring your creative visions to life.

Conclusion: Continuing Your Blender Modeling Journey

Embarking on your Blender modeling journey is an exciting step towards unlocking limitless creative potential. As you progress from beginner techniques to more advanced skills, remember that the learning process is continuous and ever-evolving. The world of 3D modeling and animation is vast, with Blender serving as a powerful tool to bring your imaginative concepts to life.

Keep Learning and Experimenting

The key to growth in Blender is consistent learning and experimentation. Dive into new projects, challenge yourself with complex models, and don\"t be afraid to step out of your comfort zone. Each project offers a unique set of challenges and learning opportunities.

Engage with the Community

Blender\"s vibrant community is one of its greatest assets. Engaging with other artists can provide invaluable feedback, inspiration, and support. Participate in forums, join Blender user groups, and share your work on social media platforms to connect with like-minded individuals.

Stay Updated with Blender\"s Evolution

Blender is continuously updated with new features and improvements. Staying updated with the latest versions and exploring new tools and functionalities can significantly enhance your modeling capabilities.

Contribute to Open Source Development

As an open-source platform, Blender thrives on contributions from its user community. Whether it\"s through developing new add-ons, reporting bugs, or supporting the Blender Foundation financially, contributing to Blender\"s development can be a rewarding way to give back to the community.

Never Stop Creating

Your Blender journey is as much about the process as it is about the outcome. Each creation is a step forward in your journey as a 3D artist. Celebrate your progress, learn from your mistakes, and never stop pushing the boundaries of your creativity.

In conclusion, your journey with Blender is a personal voyage of discovery, learning, and creation. It offers a universe of possibilities waiting to be explored. With dedication, practice, and a spirit of exploration, you will continue to grow as an artist and creator. Embrace the journey, and let Blender be your guide to the vast and exciting world of 3D modeling and animation.

Embark on a transformative journey with Blender, where each step in basic modeling opens doors to endless creativity and possibilities. Let\"s unlock your potential together, exploring the vibrant world of 3D art and animation.

FEATURED TOPIC