Blender Simple Rigging: Mastering the Basics for Stunning Animations

Topic blender simple rigging: Embark on a journey to master Blender simple rigging, a crucial skill for bringing your 3D models to life with animation. This guide is designed to equip beginners with the fundamentals, ensuring a solid foundation for creating dynamic and compelling characters.

Understanding the Basics

Before diving into rigging, it\"s crucial to position your mesh correctly in the scene. Ensuring the model is correctly aligned will facilitate easier rigging and animation. A key step is setting the origin of the model to a logical point, like the base of the feet for characters, to ensure rotations and movements are natural.

Creating Your First Rig

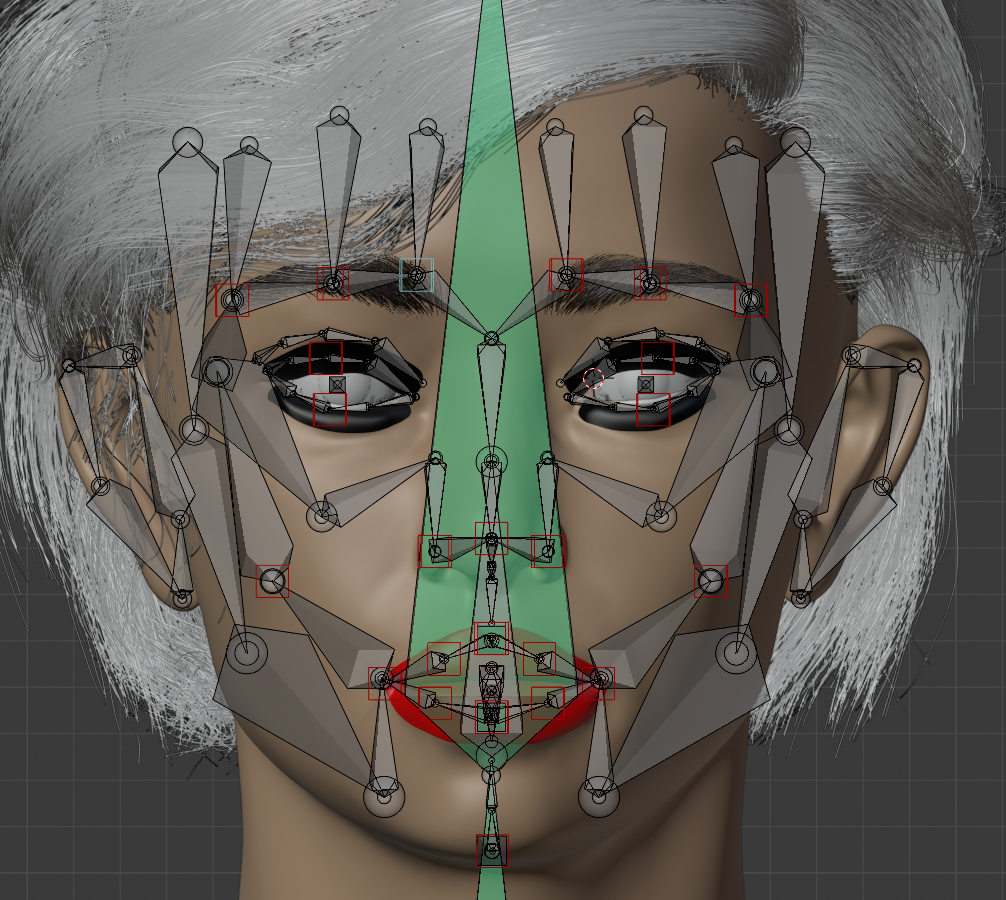
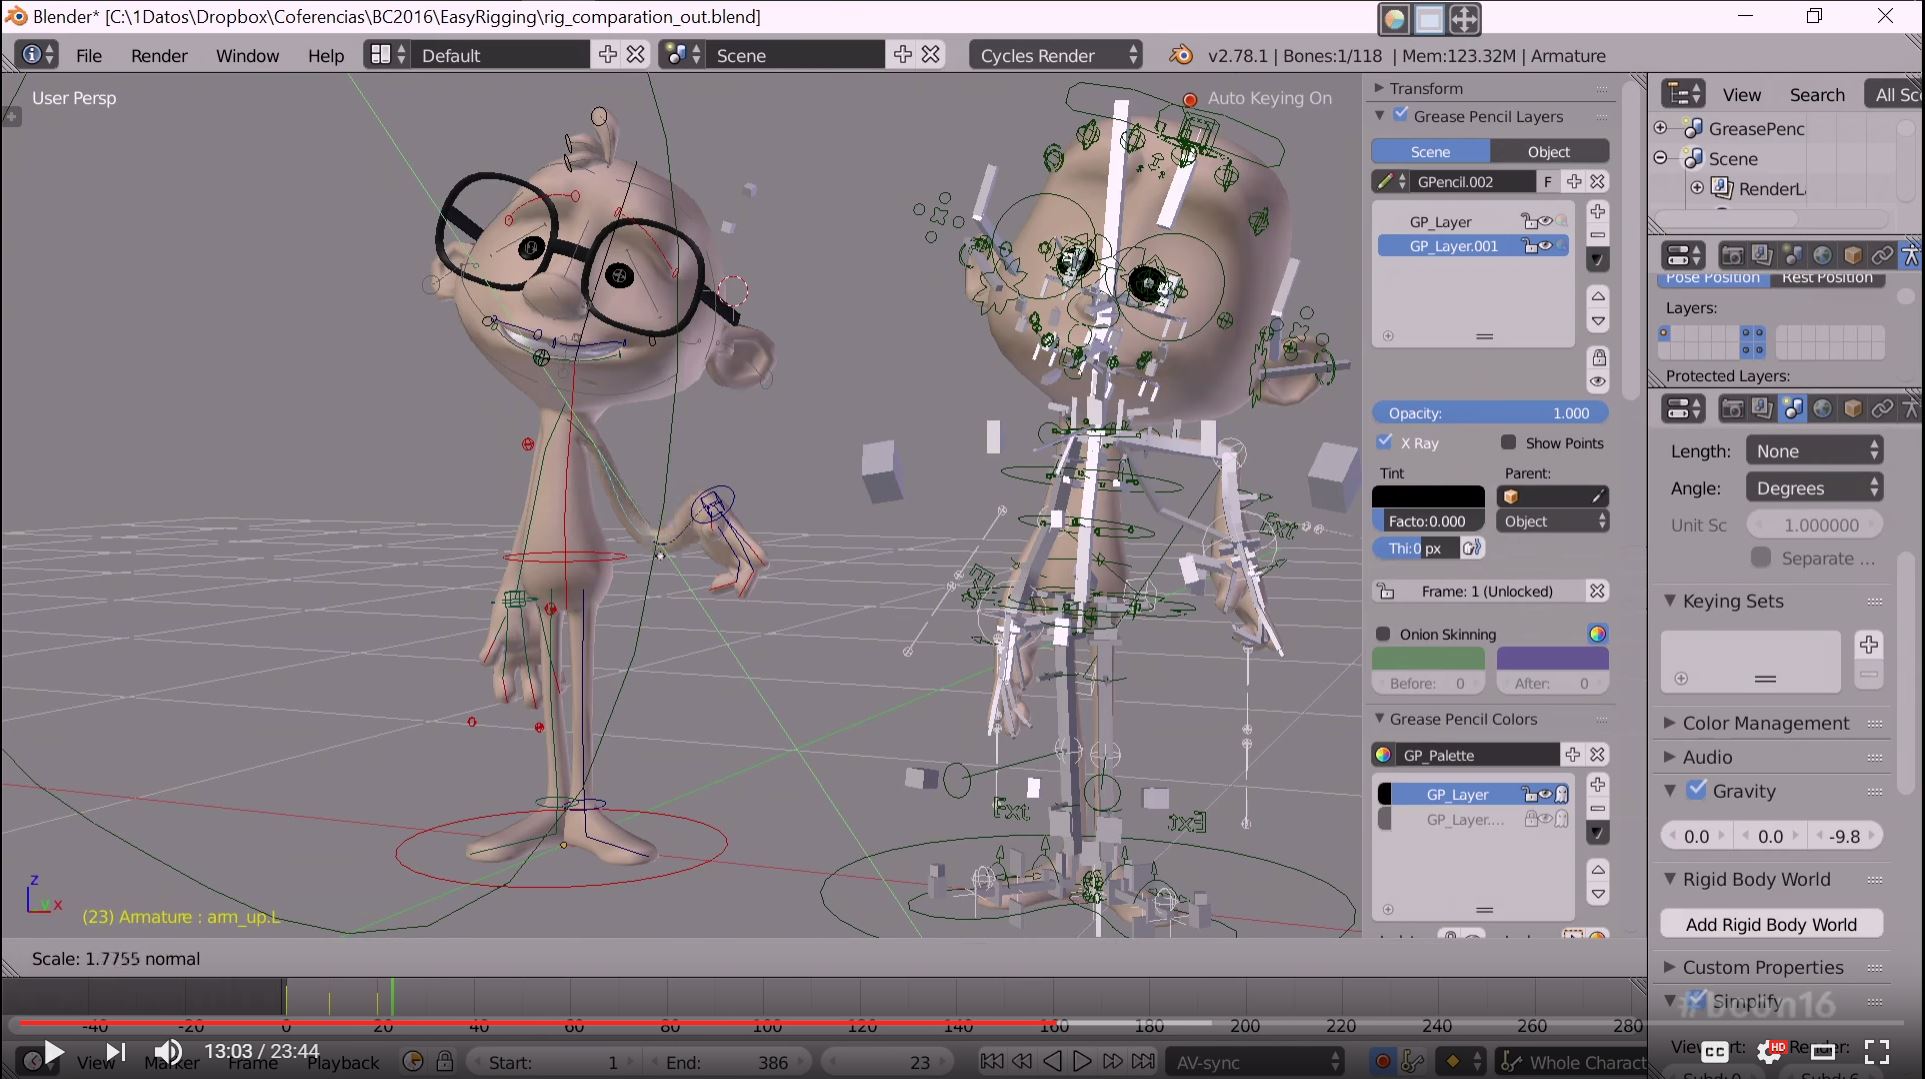
Blender uses \"armatures\" for rigging, which are essentially skeletons that drive the movement of the mesh. Start by adding an armature and positioning it within your model. Utilizing X-ray mode can help you see the armature through the model, making it easier to position bones accurately.

Understanding the Basics

Step-by-Step Guide to Rigging

  1. Preparation: Combine your models if necessary and recalculate normals to ensure the mesh behaves predictably.
  2. Adding Armature: Place the first bone at the center of the torso and enable X-ray mode to see it through the mesh.
  3. Bone Placement: Extend bones from the central armature to key points like the neck, shoulders, and hips to start shaping the skeleton.

Advanced Rigging Concepts

  • Introduction to Inverse Kinematics (IK) for more natural movements.
  • Utilizing constraints and drivers for complex animation control.
  • Weight painting for detailed mesh deformation.

Step-by-Step Guide to Rigging

Tools and Resources

Blender offers a comprehensive set of tools for rigging, including automatic skinning, easy weight painting, and bone layering for organized rigs. The community provides extensive tutorials and guides, from beginner-friendly introductions to advanced rigging techniques.

ResourceDescription
GameDev Academy GuideA beginner\"s guide to basic rigging in Blender, focusing on the initial steps and positioning the mesh.
Blender Guru TutorialComprehensive rigging tutorial covering from basic to advanced techniques, including character and facial rigging.
Instructables Rigging ProcessStep-by-step basic rigging process, ideal for understanding the fundamentals of armature and bone placement.
CG Cookie Rigging CourseDetailed course on rigging fundamentals, offering hands-on practice with multiple exercises.

Embarking on your rigging journey in Blender can seem daunting at first, but with the right resources and a bit of practice, you\"ll find it\"s a rewarding and essential skill for any 3D animator. Whether you\"re creating a simple character or a complex creature, these guidelines will help you start with confidence.

Tools and Resources

How can I rig objects in Blender in a simple manner?

To rig objects in Blender in a simple manner, you can follow these steps:

  1. Select the object you want to rig by clicking on it in the 3D viewport.
  2. Switch to the \"Object Data Properties\" tab in the right panel (it looks like a green triangle).
  3. Click on the \"Add\" button located in the \"Vertex Groups\" section to create a new vertex group for the object.
  4. With the object still selected, go into Edit Mode by pressing Tab.
  5. Select the parts of the object that you want to be controlled by the rig (e.g., a bone).
  6. In the \"Vertex Groups\" section, click on the \"Assign\" button to assign the selected vertices to the vertex group you created earlier.
  7. Exit Edit Mode by pressing Tab again and then switch to Object Mode.
  8. Create an armature by pressing Shift + A and selecting \"Armature\" from the menu. This will add a new armature object to the scene.
  9. Position the armature so that it aligns with the object you want to rig.
  10. Parent the object to the armature by selecting the object first, then the armature, and pressing Ctrl + P. Choose \"With Automatic Weights\" from the menu that appears.
  11. You can now test the rig by moving the bones of the armature and seeing how the object deforms.

Blender - Completely Rigging A Character in 5 Minutes

Character: Dive into the captivating world of character development with this engaging video. Discover how characters come to life through depth, complexity, and relatability, drawing you into their stories with every frame. Blender: Unleash your creativity with Blender in this must-watch video. Explore the endless possibilities of 3D modeling, animation, and rendering, and learn how to bring your ideas to life in stunning detail.

Simple Rigging in Blender

In this quick blender tutorial I show how to create a simple and super useful rig in Blender. If you are interested in the full process, ...

Step-by-Step Guide to Rigging

  1. Preparation: Combine your models if necessary and recalculate normals to ensure the mesh behaves predictably.
  2. Adding Armature: Place the first bone at the center of the torso and enable X-ray mode to see it through the mesh.
  3. Bone Placement: Extend bones from the central armature to key points like the neck, shoulders, and hips to start shaping the skeleton.

Advanced Rigging Concepts

  • Introduction to Inverse Kinematics (IK) for more natural movements.
  • Utilizing constraints and drivers for complex animation control.
  • Weight painting for detailed mesh deformation.

Step-by-Step Guide to Rigging

_HOOK_

Tools and Resources

Blender offers a comprehensive set of tools for rigging, including automatic skinning, easy weight painting, and bone layering for organized rigs. The community provides extensive tutorials and guides, from beginner-friendly introductions to advanced rigging techniques.

Embarking on your rigging journey in Blender can seem daunting at first, but with the right resources and a bit of practice, you\"ll find it\"s a rewarding and essential skill for any 3D animator. Whether you\"re creating a simple character or a complex creature, these guidelines will help you start with confidence.

Tools and Resources

Tools and Resources

Blender offers a comprehensive set of tools for rigging, including automatic skinning, easy weight painting, and bone layering for organized rigs. The community provides extensive tutorials and guides, from beginner-friendly introductions to advanced rigging techniques.

ResourceDescription
GameDev Academy GuideA beginner\"s guide to basic rigging in Blender, focusing on the initial steps and positioning the mesh.
Blender Guru TutorialComprehensive rigging tutorial covering from basic to advanced techniques, including character and facial rigging.
Instructables Rigging ProcessStep-by-step basic rigging process, ideal for understanding the fundamentals of armature and bone placement.
CG Cookie Rigging CourseDetailed course on rigging fundamentals, offering hands-on practice with multiple exercises.

Embarking on your rigging journey in Blender can seem daunting at first, but with the right resources and a bit of practice, you\"ll find it\"s a rewarding and essential skill for any 3D animator. Whether you\"re creating a simple character or a complex creature, these guidelines will help you start with confidence.

Tools and Resources

Introduction to Blender Rigging

Rigging in Blender is an essential step in the animation process, allowing artists to create a skeleton for their models to make them move. This introductory guide will walk you through the basic concepts and steps needed to start rigging in Blender, ensuring you have a strong foundation for more complex projects.

  • Understanding Armatures: Armatures are the backbone of rigging in Blender. They act as the skeleton that controls how your model moves. Learning to create and manipulate armatures is your first step towards mastering rigging.
  • Adding Bones: Bones are the individual components of an armature. Each bone controls a part of your model\"s mesh. You\"ll learn how to add, position, and orient bones correctly for effective rigging.
  • Parenting Mesh to Armature: Once your armature is set up, the next step is to bind your 3D mesh to it. This process, known as parenting, ensures that when you move the bones, the mesh moves with them.
  • Weight Painting: For more control over how your mesh deforms when bones move, Blender uses a system called weight painting. This allows you to define how strongly each part of the mesh is influenced by the movement of each bone.
  • Basic Animation: With your rigging complete, you\"re ready to bring your model to life. Learn the basics of keyframe animation and how to pose your rigged model.

Starting with these fundamental steps, you\"ll be well on your way to creating dynamic and believable animations in Blender. As you practice, remember that rigging is both a science and an art—requiring technical skill and creative problem-solving to achieve the best results.

Introduction to Blender Rigging

Getting Started with Blender Rigging

Blender rigging is a powerful feature that allows for the creation of flexible and dynamic animations. This section provides a step-by-step guide to help you begin your rigging journey in Blender, covering essential techniques and tools.

  1. Understanding the Basics: Familiarize yourself with Blender’s interface and the concept of rigging. Rigging is the process of creating a skeleton (armature) for a model that defines how it moves.
  2. Creating Your First Armature: Learn how to add an armature to your scene and begin placing bones within your model. This will serve as the basic framework for your character’s movement.
  3. Naming and Organizing Bones: Proper naming and organization of bones are crucial for managing complex rigs. Establish a naming convention that works for you and stick to it.
  4. Parenting Mesh to Armature: Binding your 3D mesh to the armature is done through the parenting process. This step is vital for ensuring that your mesh deforms correctly when the bones are posed.
  5. Weight Painting: Weight painting allows you to control how different parts of your mesh are influenced by the bones. This is key to achieving realistic movement and deformations.
  6. Basic Pose and Animation: With your rig in place, start experimenting with posing your model. Insert keyframes to create simple animations and see your character come to life.

These initial steps will set the foundation for your rigging projects in Blender. As you progress, you’ll discover more advanced techniques and tools that allow for even greater control and creativity in your animations.

Getting Started with Blender Rigging

Step-by-Step Guide to Your First Rig

Rigging in Blender involves creating a skeleton for your model, allowing you to animate it by manipulating bones. This guide outlines the fundamental steps to create a basic rig, suitable for beginners looking to rig a humanoid model.

  1. Start Blender and Import Your Model: Begin by opening Blender and importing the model you wish to rig.
  2. Create Your First Bone: In Object Mode, add an armature bone, placing it at your character\"s hip area to start forming the skeleton.
  3. Name Your Bones: Properly naming bones is crucial for organization and later animation. Enter Edit Mode to name your first bone (e.g., \"Hip\") and remember that Blender uses a hierarchical naming system, meaning new bones will inherit names based on their parent bone.
  4. Building the Spine: Add bones for the spine, chest, neck, and head by extruding from the hip bone upwards, ensuring each bone is correctly positioned and named (e.g., \"Spine\", \"Chest\", \"Neck\", \"Head\").
  5. Creating Arm Bones: For the arms, you\"ll need to place the cursor where the shoulder bones should start, then add and position bones for the upper arm, forearm, and hand. Each bone should be named appropriately (e.g., \"r.upperarm\", \"r.forearm\", \"r.hand\"), indicating right (r) or left (l) side.
  6. Duplicating for the Other Side: After creating one arm, duplicate the bones and mirror them to the other side, adjusting their positions and names accordingly.
  7. Legs and Feet: Similar to the arms, add bones for the upper leg, lower leg, and foot. Position these bones accurately, and ensure they are named consistently with the rest of the rig.
  8. Parenting and Weight Painting: Parent your bones to the mesh and use weight painting to define how each bone influences the mesh during animation.
  9. Final Adjustments: Review your rig, making any necessary adjustments to bone positions or weights to ensure smooth animations.

With these steps, you\"ve created a basic rig in Blender that\"s ready for animation. Experiment with moving and rotating the bones to see how they influence your model, and practice with different models to improve your rigging skills.

Step-by-Step Guide to Your First Rig

_HOOK_

Essential Tools for Effective Rigging

Blender offers a wide range of tools and add-ons to facilitate the rigging process, making it easier for artists to create detailed and functional rigs for their models. Here are some essential tools and add-ons that can significantly enhance your rigging workflow in Blender.

  1. Auto-Rig Pro: An advanced rigging addon that simplifies the creation of rigs. It features a smart rig system that auto-detects bone placement and includes auto-rigging for fingers, custom bone shapes, and a bone picker interface for easier selection in complex rigs.
  2. Rigify: Blender\"s built-in auto-rigging tool, Rigify, generates a humanoid rig and custom rigs. It provides a good starting point for most rigging needs and can be extended through Python scripting for more customized solutions.
  3. Blender Muscle Tools: For animations requiring detailed muscle movements, Blender\"s muscle system allows for the creation of muscles that dynamically deform with your character\"s movements, adding realism to animations.
  4. Shape Key Manager Pro: This tool speeds up the workflow for creating and managing shape keys, especially useful for facial rigging and expressions. It supports duplicating and mirroring shape keys while maintaining driver connections.
  5. X-Muscle System: Specifically designed for creating detailed muscle rigs, this add-on allows for the simulation of muscle movements, providing an extra layer of realism to character animations.
  6. AnimAll: A Blender add-on that extends the animation capabilities to vertices, edges, and other non-standard properties. This can be particularly useful for creating complex deformation animations without the need for bone rigs.
  7. Dynamic Parent: Simplifies the process of changing the parent of an object during an animation, making interactions between characters and objects more manageable.
  8. Jiggle and Spring Bones: These add-ons or features allow for the simulation of secondary motions like jiggling flesh, clothing, or hair, adding life to your animations with minimal effort.

Each tool or add-on serves a specific purpose in the rigging and animation process, from automating tedious tasks to adding complexity and realism to your animations. Whether you\"re rigging a simple character or a complex creature, these tools can help streamline your workflow and improve the quality of your final product.

Essential Tools for Effective Rigging

Advanced Rigging Techniques

Advanced rigging in Blender opens up a plethora of possibilities for animators, allowing for the creation of complex, lifelike characters. Mastering these techniques involves understanding and applying a range of tools and features Blender offers.

  1. Shape Keys and Drivers: Utilize shape keys for detailed deformation and expressions, especially for facial animations. Drivers can automate shape key adjustments based on bone movement or other properties, providing nuanced control over your character\"s expressions and movements.
  2. Inverse Kinematics (IK) and Forward Kinematics (FK): IK simplifies the animation of limb movement by manipulating the end effector, while FK offers precise control over each bone\"s rotation. A combination of IK and FK can be used for different parts of the character to achieve both broad and fine movements efficiently.
  3. Mesh Deform Modifier: This modifier allows for complex deformations using a cage that encompasses the character, offering another layer of flexibility in how the mesh deforms with the rig.
  4. Weight Painting: Precisely define how bones influence vertices of the mesh through weight painting, ensuring smooth and realistic movement transitions.
  5. BlenRig: BlenRig is an auto-rigging and skinning system that provides high-quality results for both body and facial rigging, used in feature films and Blender open movies. It offers a predefined body deformation system and an advanced facial rig to deliver production-level characters.
  6. Spine and Torso Controls: For natural-looking movements, advanced controls for the spine and torso are essential. Techniques include applying IK for fluid motion and using shape keys for posture adjustments, enhancing the character\"s expressiveness and realism.
  7. Constraints and Custom Controllers: Utilize Blender\"s constraints to limit or define bone behavior, ensuring believable interactions between character parts. Custom controllers can streamline the animation process, making rig management more intuitive.

These advanced techniques form the cornerstone of sophisticated rigging setups in Blender, enabling animators to bring their characters to life with an unprecedented level of detail and realism. Mastery of these methods requires practice and a solid understanding of Blender\"s rigging system but can significantly elevate the quality of your animations.

Common Rigging Challenges and Solutions

Rigging in Blender can present various challenges, especially for beginners. Understanding these challenges and knowing how to address them is key to successful rigging.

  1. Correcting Normals: Incorrect normals can cause various issues in rigging and rendering. Ensure all model normals are facing outward by using Blender\"s \"Recalculate Outside\" function.
  2. Establishing a Hierarchy: A clear hierarchy is crucial for an effective rig. Parent-child relationships between bones ensure a logical structure, facilitating more intuitive animation controls.
  3. Naming Bones: Proper naming conventions are essential for organization and efficiency. Blender\"s hereditary naming system can speed up the rigging process, but care must be taken to ensure names accurately reflect the bone\"s function.
  4. Weight Painting: Assigning the correct weights to bones can be challenging. Skinning or weight painting tells Blender which bones affect specific parts of the mesh, critical for achieving realistic deformations.
  5. Dealing with Symmetry: Rigging symmetrical body parts (like arms) can be streamlined by mirroring bones. Remember to adjust bone size and position to match the model\"s anatomy accurately.
  6. Utilizing Constraints and Drivers: These tools allow for advanced automation within your rig, from simple movements to complex transformations. Understanding how to implement constraints and drivers can significantly enhance your rig\"s functionality.

Overcoming these challenges requires practice, patience, and a solid understanding of Blender\"s rigging tools. By tackling these common issues, you can create more sophisticated and functional rigs that bring your characters to life.

Resources and Tutorials for Further Learning

Embarking on the journey of rigging in Blender opens up a world of creativity and technical skill development. Whether you\"re a beginner or looking to enhance your skills, there are numerous resources and tutorials available to guide you through the intricacies of Blender rigging. Here\"s a curated list of tutorials and learning materials to further your rigging knowledge:

  1. GameDev Academy\"s Beginner’s Guide to Rigging in Blender: A comprehensive guide that covers the essentials of preparing your model for rigging and introduces the basic concepts of armatures in Blender.
  2. Blender Guru\"s Introduction to Rigging: This tutorial by Lee Salvemini is split into three parts, covering head and neck, shoulders and arms, and advanced topics like IK leg rigs and custom bone shapes. It\"s a great starting point for beginners.
  3. Blender Studio\"s Character Rigging - Blender 2.8 Fundamentals: Offers official video series that help you get up to speed with Blender 2.8, including a section dedicated to character rigging.
  4. CG Cookie\"s Fundamentals of Rigging: A course that aims to be the only one you\"ll need to master rigging in Blender. It covers bones, tools, parenting, armature modifiers, key shortcuts, and bone constraints. The course is designed with beginners in mind and offers hands-on practice with four different rigs.

These resources provide a solid foundation in rigging, from understanding the basics to mastering advanced techniques. As you progress, remember that practice is key to becoming proficient in rigging. Happy animating!

Practical Exercises to Sharpen Your Rigging Skills

Mastering rigging in Blender is a journey that combines technical skill with creative problem-solving. To enhance your understanding and proficiency, engaging in practical exercises is invaluable. Here are some exercises derived from various resources that cover a broad spectrum of rigging challenges, ensuring a comprehensive skill set upon completion.

  1. Model Preparation for Rigging: Before diving into the rigging process, it\"s crucial to prepare your model correctly. This involves ensuring all model normals are facing the right direction, combining models into a single mesh for efficiency, and positioning the mesh properly within the scene. These foundational steps are critical for a smooth rigging workflow.
  2. Basic Rig Creation: Start by creating a basic rig, also known as an armature, and position it at the center of your model\"s torso. Utilize the X-ray mode to see through the model and connect bones to form a tree hierarchy, allowing for the movement and rotation of arms and legs. This exercise will help you understand the skeletal structure necessary for basic animation.
  3. Understanding Armatures and Constraints: Dive into the Blender 2.8 fundamentals with exercises that cover rigging intro, parenting, armatures, and various constraints including copy limit, tracking, and transform constraints. These exercises are designed to give you a strong foundation in using Blender\"s rigging tools effectively.
  4. Comprehensive Rigging Process: Follow a detailed 10-step process that guides you through creating a rig for a character. This includes naming bones properly, extruding new bones to build the spine, chest, neck, and head, as well as more complex steps like duplicating and mirroring arm bones to the other side of the body. This process will give you hands-on experience with more intricate rigging techniques.

By working through these exercises, you\"ll gain practical experience that reinforces theoretical knowledge, helping you to tackle rigging challenges with confidence. Remember, practice and patience are key to mastering rigging in Blender.

_HOOK_

Animating Your Rigged Models

Animating your rigged models in Blender opens up a world of possibilities, allowing you to bring your characters to life. Whether you\"re creating simple movements or complex sequences, Blender\"s comprehensive toolset supports a wide range of animation techniques.

Understanding Blender\"s Animation Toolset

Blender\"s animation tools include a character animation pose editor, Non-Linear Animation (NLA) for managing separate movements, forward and inverse kinematics for quick posing, and sound synchronization capabilities. These tools are designed to help you create detailed and lifelike animations.

Starting with Basic Animations

  1. Begin by familiarizing yourself with keyframing. Keyframes are the foundation of animation in Blender, defining the start and end points of any movement.
  2. Use the timeline to manage your keyframes and play back the animation. This allows you to adjust the timing and flow of movements.
  3. Experiment with Blender\"s pose editor for character animation, enabling precise control over the rig.

Advanced Techniques

For more complex animations, consider exploring inverse kinematics (IK), shape keys for facial expressions or soft body movements, and the Non-Linear Animation editor for layering and blending different actions.

Animating with Constraints and Drivers

Constraints and drivers offer advanced control over your animations. They allow you to automate movements based on other actions within the scene, offering a more dynamic and interconnected animation environment.

Utilizing Shape Keys

Shape keys are powerful for creating detailed facial expressions or morphing objects. By adjusting vertices in key positions, you can animate transitions between different states or expressions.

Motion Paths

Motion paths visualize the trajectory of an object or bone\"s movement, helping you refine the smoothness and accuracy of animations. This is particularly useful for complex movements or ensuring consistency across multiple animations.

Final Tips

  • Start simple and gradually build complexity by adding more keyframes and experimenting with Blender\"s robust animation features.
  • Use the Graph Editor to fine-tune the interpolation between keyframes for smoother transitions.
  • Remember, animation is an iterative process. Review and refine your animations with playback to achieve the best results.

With practice and exploration, you\"ll find that Blender\"s rigging and animation tools are incredibly versatile, capable of bringing any model to life with dynamic and engaging animations.

Conclusion: Next Steps in Your Rigging Journey

Mastering simple rigging in Blender is an essential skill for animators and 3D artists, setting the foundation for bringing your creations to life. As you\"ve explored the basics and dipped your toes into more advanced techniques, remember that rigging is both an art and a science. The journey from beginner to expert is filled with ongoing learning, experimentation, and refinement.

To further advance your skills, consider the following steps:

  1. Practice Rigging Various Models: Continue to challenge yourself by rigging a variety of models, from simple objects to complex characters. This will deepen your understanding and help you become more versatile.
  2. Explore Rigify: Dive into using Rigify, Blender\"s automated rigging system, to streamline your workflow. Rigify can significantly reduce the time and effort required for rigging, making it easier to rig complex models with ease.
  3. Join Blender Communities: Engage with Blender communities online to share your work, get feedback, and learn from others. Participating in forums, social media groups, and Blender events can offer invaluable insights and inspiration.
  4. Follow Advanced Tutorials: Seek out advanced tutorials that focus on specific rigging challenges or introduce new tools and techniques. This will help you stay updated with the latest rigging strategies and software updates.
  5. Experiment with Custom Bones and Constraints: As you become more comfortable with Blender\"s rigging tools, start experimenting with custom bones and constraints to create unique and efficient rigs tailored to your specific needs.
  6. Work on Personal Projects: Apply what you\"ve learned by working on personal projects. This could involve rigging and animating your own characters or recreating complex rigs from your favorite animations for practice.
  7. Contribute to Open Source Projects: Consider contributing to open source projects or Blender add-ons. This is a great way to give back to the community, improve your skills, and make a name for yourself within the Blender community.

Remember, the path to mastering Blender rigging is a journey of continuous learning and practice. Stay curious, be patient with yourself, and enjoy the creative process. Your skills will grow with every rig you build and every challenge you overcome. Happy rigging!

Embark on your Blender rigging journey with confidence and creativity. Whether you\"re animating your first character or refining advanced rigs, this guide lays the foundation for endless possibilities. Let\"s animate our dreams into reality, together.

FEATURED TOPIC