Topic blender 2d rigging: Discover the magic of Blender 2D rigging and unlock your potential to animate characters with precision and creativity. This guide offers insights into mastering rigging tools for captivating animations.
Table of Content
- Getting Started with 2D Rigging in Blender
- Key Features of Blender\"s Rigging Tools
- Advanced Rigging Techniques
- Conclusion
- Key Features of Blender\"s Rigging Tools
- Advanced Rigging Techniques
- What are the essential steps for rigging a 2D character in Blender using Grease Pencil?
- Conclusion
- YOUTUBE: Grease Pencil Rigging in Blender
- Advanced Rigging Techniques
- Conclusion
- Conclusion
- Introduction to Blender 2D Rigging
- Key Features of Blender\"s 2D Rigging Tools
- Step-by-Step Tutorial on Setting Up Your First 2D Rig
- Advanced Techniques in 2D Rigging
- Common Pitfalls and How to Avoid Them
- Case Studies: Successful 2D Rigging Projects
- Comparing Blender with Other 2D Rigging Software
- Resources for Learning More About 2D Rigging in Blender
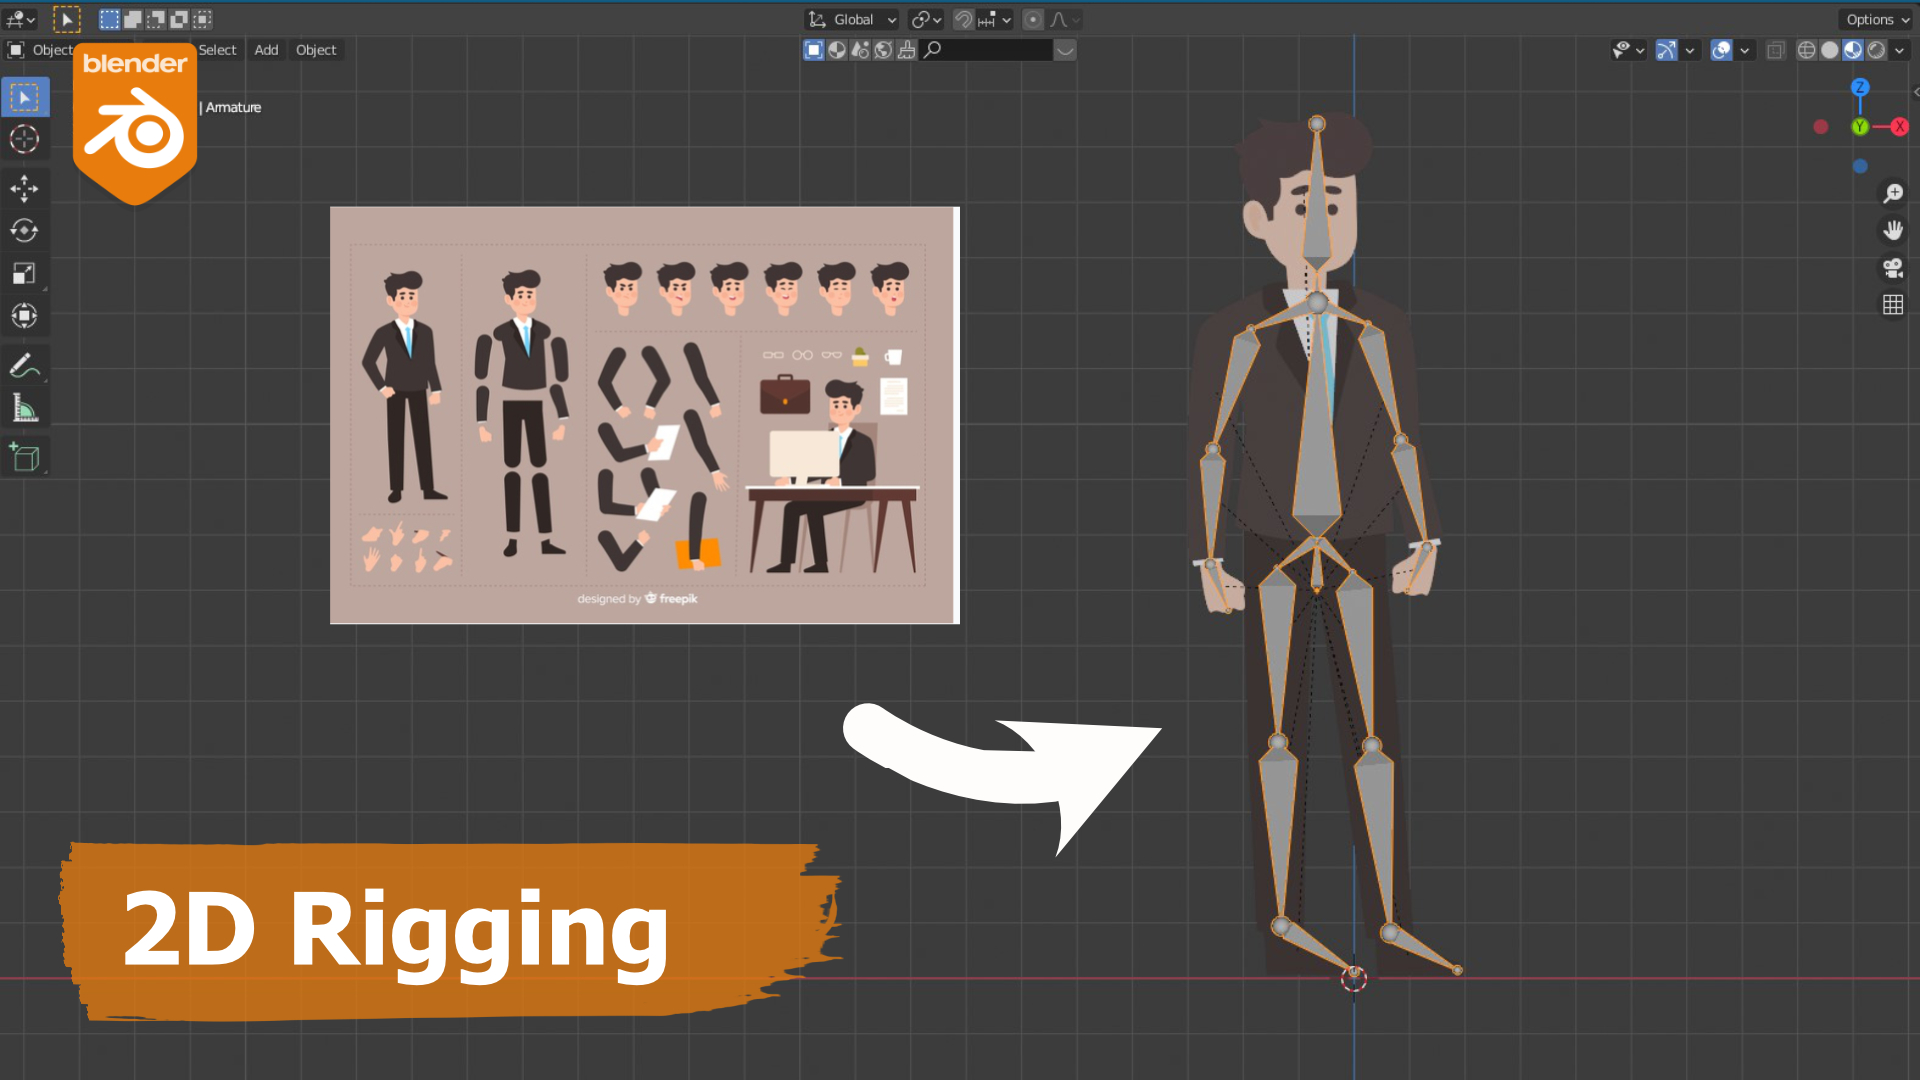
Getting Started with 2D Rigging in Blender
- Create your character in a 2D program and prepare it for rigging.
- Open Blender and clear the default scene to start fresh.
- Import your 2D character and set up the scene for rigging.

READ MORE:
Key Features of Blender\"s Rigging Tools
- Envelope, skeleton, and automatic skinning for versatile rigging options.
- Easy weight painting to define how mesh moves with bones.
- Mirror functionality for symmetrical characters.
- Bone layers and colored groups for organized rigging.
- B-spline interpolated bones for smoother deformations.
- Constraints to control object properties like location, rotation, and scale.
Advanced Rigging Techniques
For those looking to dive deeper, Blender supports advanced rigging techniques, including detailed rigging tips and tricks, scripting tricks to speed up workflow, and comprehensive guides to make rigs that satisfy animators\" needs.
Creating Cut-Out Animation
Rigging a 2D character for cut-out animation involves preparing the character, setting up the armature, and applying the necessary constraints and controls for animation. This technique allows for efficient animation processes, suitable for explainer videos and animated sequences.
Animating Your 2D Character
Once rigged, animating your character involves key-framing movements, managing transform channels, and utilizing interpolation modes for smooth animations. Blender\"s animation tools are designed to complement its rigging capabilities, providing a seamless workflow from rigging to animation.

Conclusion
Blender\"s rigging tools for 2D animation are powerful and versatile, catering to a wide range of animation styles and requirements. Whether you are a beginner or an experienced animator, Blender offers the tools and features necessary to bring your 2D characters to life.

Key Features of Blender\"s Rigging Tools
- Envelope, skeleton, and automatic skinning for versatile rigging options.
- Easy weight painting to define how mesh moves with bones.
- Mirror functionality for symmetrical characters.
- Bone layers and colored groups for organized rigging.
- B-spline interpolated bones for smoother deformations.
- Constraints to control object properties like location, rotation, and scale.

_HOOK_
Advanced Rigging Techniques
For those looking to dive deeper, Blender supports advanced rigging techniques, including detailed rigging tips and tricks, scripting tricks to speed up workflow, and comprehensive guides to make rigs that satisfy animators\" needs.
Creating Cut-Out Animation
Rigging a 2D character for cut-out animation involves preparing the character, setting up the armature, and applying the necessary constraints and controls for animation. This technique allows for efficient animation processes, suitable for explainer videos and animated sequences.
Animating Your 2D Character
Once rigged, animating your character involves key-framing movements, managing transform channels, and utilizing interpolation modes for smooth animations. Blender\"s animation tools are designed to complement its rigging capabilities, providing a seamless workflow from rigging to animation.
What are the essential steps for rigging a 2D character in Blender using Grease Pencil?
To rig a 2D character in Blender using Grease Pencil, follow these essential steps:
- Create the 2D character using Grease Pencil:
- Draw the character\'s body parts on different Grease Pencil layers.
- Ensure each body part is on a separate layer for easier rigging.
- Set up the armature for rigging:
- Add an Armature object to the scene.
- Position the bones to match the joints of the character.
- Parent the Armature to the Grease Pencil object.
- Add Deform modifiers:
- Apply the Armature modifier to the Grease Pencil object.
- Adjust the weights of the vertices to ensure smooth deformation.
- Create a bone hierarchy:
- Organize the bones in a hierarchy that makes sense for the character\'s movements.
- Set up constraints on the bones to control movement and rotation.
- Test the rig:
- Pose the character to test the rig\'s functionality.
- Adjust weights and bone positions if needed for better deformations.
Conclusion
Blender\"s rigging tools for 2D animation are powerful and versatile, catering to a wide range of animation styles and requirements. Whether you are a beginner or an experienced animator, Blender offers the tools and features necessary to bring your 2D characters to life.

Grease Pencil Rigging in Blender
Experience the magic of animation in this captivating video that brings characters to life through colorful visuals and engaging storytelling. Get ready to be transported to a world of imagination and creativity!
2D Facial Rigs Made 10 Times Easier in Blender
Discover the power of simplification in this informative video that breaks down complex concepts into easy-to-understand ideas. Streamline your learning process and gain valuable insights in a clear and concise manner.
Advanced Rigging Techniques
For those looking to dive deeper, Blender supports advanced rigging techniques, including detailed rigging tips and tricks, scripting tricks to speed up workflow, and comprehensive guides to make rigs that satisfy animators\" needs.
Creating Cut-Out Animation
Rigging a 2D character for cut-out animation involves preparing the character, setting up the armature, and applying the necessary constraints and controls for animation. This technique allows for efficient animation processes, suitable for explainer videos and animated sequences.
Animating Your 2D Character
Once rigged, animating your character involves key-framing movements, managing transform channels, and utilizing interpolation modes for smooth animations. Blender\"s animation tools are designed to complement its rigging capabilities, providing a seamless workflow from rigging to animation.
Conclusion
Blender\"s rigging tools for 2D animation are powerful and versatile, catering to a wide range of animation styles and requirements. Whether you are a beginner or an experienced animator, Blender offers the tools and features necessary to bring your 2D characters to life.

_HOOK_
Conclusion
Blender\"s rigging tools for 2D animation are powerful and versatile, catering to a wide range of animation styles and requirements. Whether you are a beginner or an experienced animator, Blender offers the tools and features necessary to bring your 2D characters to life.
Introduction to Blender 2D Rigging
Blender 2D rigging is a powerful feature within the Blender software that allows artists and animators to create detailed and flexible rigs for their 2D characters. This process involves setting up a skeleton structure that can be manipulated to animate characters in a 2D space. Rigging is a critical step in the animation process, providing the foundation for realistic and expressive movement.
- Understanding the Basics: Learn about the fundamental concepts of 2D rigging, including bones, armatures, and the grease pencil tool.
- Setting Up Your Rig: A step-by-step guide on how to create your first 2D rig, from adding bones to your character to adjusting bone properties for optimal control.
- Weight Painting: Discover how to use weight painting to fine-tune the influence of bones on different parts of your character.
- Animating Your Character: Tips and techniques for animating your rigged character, using keyframes and the dope sheet for smooth animations.
Blender\"s rigging tools are designed to be user-friendly, catering to both beginners and experienced animators. By following these steps, you\"ll be well on your way to bringing your 2D characters to life with engaging and dynamic animations.
Key Features of Blender\"s 2D Rigging Tools
Blender\"s 2D rigging tools are designed to streamline the animation process, offering a range of features that cater to both beginners and professionals. Here are some of the standout features:
- Grease Pencil Object: Allows artists to draw directly in 3D space, creating 2D art with a full 3D perspective.
- Automatic Weighting: Simplifies the process of skinning your character, automatically assigning weights to the bones.
- Bone Envelopes: Provides an easy way to define how much influence bones have on the vertices or control points around them.
- Inverse Kinematics (IK): Helps in creating more natural movements by calculating how the joints and bones move in relation to each other.
- Custom Bone Shapes: Offers the ability to customize the appearance of bones in the rig, making it easier to manage complex rigs.
- Animation Tools: A comprehensive set of animation tools, including keyframing, onion skinning, and interpolation, to bring your 2D characters to life.
These features make Blender an ideal choice for artists looking to explore 2D animation and rigging, providing a flexible and powerful platform for creative expression.
Step-by-Step Tutorial on Setting Up Your First 2D Rig
Setting up your first 2D rig in Blender can seem daunting, but with this easy-to-follow tutorial, you\"ll be animating your characters in no time. Follow these steps to master the basics of 2D rigging.
- Prepare Your Character Design: Ensure your character is designed and split into separate parts (e.g., limbs, body, head) for easier rigging.
- Create a New Blender Project: Open Blender and start a new project. Import your character design into the 2D animation workspace.
- Add Bones to Your Character: Use the \"Add\" menu to insert bones. Position them to match your character\"s joints for accurate movement.
- Parent the Bones to the Character: With the bones positioned, parent your character\"s parts to the corresponding bones, ensuring movements are connected.
- Adjust Bone Weights: Fine-tune the influence each bone has on the character parts by adjusting the bone weights for smooth animations.
- Animate Your Character: With the rig set up, you can now animate your character. Use the timeline to set keyframes for movements.
By following these steps, you will have created a basic but functional 2D rig in Blender, ready for animation. Practice and experimentation will further enhance your rigging skills.
Advanced Techniques in 2D Rigging
After mastering the basics of 2D rigging in Blender, you can elevate your animations with these advanced techniques. Enhance your rigs for more complex and nuanced movements, bringing your characters to life with greater realism and expressiveness.
- Inverse Kinematics (IK): IK simplifies the animation process by allowing for more natural movements. Set up IK chains for arms and legs to make posing easier.
- Custom Bone Shapes: Improve your rig\"s intuitiveness by creating custom bone shapes. This makes the rig easier to understand and manipulate during animation.
- Drivers and Constraints: Use drivers and constraints to automate movements and create more sophisticated animations with less manual keyframing.
- Layered Animation Techniques: Learn how to layer animations for more control over complex movements. This involves animating in passes, focusing on different aspects of movement at each pass.
- Shape Keys for Facial Expressions: Combine rigging with shape keys to animate facial expressions. This method provides fine control over facial movements for expressive character animation.
These advanced techniques require practice to master but offer a significant improvement in the quality and complexity of your animations. Experiment with these methods to discover the full potential of Blender\"s 2D rigging capabilities.
_HOOK_
Common Pitfalls and How to Avoid Them
Rigging in Blender, particularly for 2D characters, can be fraught with challenges. Awareness of these common pitfalls and knowing how to avoid them can significantly smooth your rigging process.
- Overcomplicating the Rig: Beginners often make the mistake of adding too many bones. Keep your rig as simple as possible for easier animation and management.
- Ignoring Bone Roll Angles: Inconsistent bone roll angles can lead to unpredictable deformations. Ensure uniformity by adjusting bone roll angles before weight painting.
- Improper Weight Painting: Uneven weight painting can cause mesh deformations. Use a blend of automatic weights and manual adjustments for the best results.
- Neglecting to Test the Rig: Regularly test your rig throughout the setup process. Early detection of issues can save you from complex adjustments later on.
- Forgetting to Save Your Work: Blender projects can become complex, and losing progress can be disheartening. Regularly save different versions of your project to avoid losing work.
By paying attention to these pitfalls and applying best practices, you can enhance your rigging workflow in Blender, leading to more successful and stress-free 2D character animation projects.
Case Studies: Successful 2D Rigging Projects
Exploring successful 2D rigging projects can provide valuable insights and inspiration for your own work. These case studies showcase the versatility and power of Blender\"s rigging tools when applied with skill and creativity.
- Independent Animator\"s Short Film: A solo animator created a short film featuring complex characters, utilizing Blender\"s rigging tools for expressive animations that conveyed a wide range of emotions.
- Educational Content Creation: An educational content creator developed a series of animated videos to explain scientific concepts, leveraging 2D rigging to create engaging and understandable visual explanations.
- Interactive Game Characters: A game developer used Blender for 2D character rigging, creating interactive characters with fluid movements that enhanced the gaming experience.
- Marketing Campaigns: A marketing agency implemented Blender 2D rigs for animated characters in a campaign, resulting in increased engagement and message retention among the target audience.
These case studies demonstrate the breadth of Blender\"s application in 2D rigging, from films and educational materials to games and marketing. They underline the importance of creativity, technical skill, and the powerful features of Blender in bringing 2D characters to life.
Comparing Blender with Other 2D Rigging Software
Blender stands out in the realm of 2D rigging, but how does it compare to other software? This section delves into the strengths and unique features of Blender in comparison to its competitors, highlighting what makes it a preferred choice for many professionals and hobbyists alike.
- User Interface and Accessibility: Blender boasts a user-friendly interface that, while complex, is highly customizable. This contrasts with some software that may have a steeper learning curve or less flexibility in customization.
- Cost-Effectiveness: As an open-source platform, Blender is free to use. This is a significant advantage over other 2D rigging software that often comes with high subscription fees or purchase costs.
- Community and Support: Blender has a vast, active community. Users benefit from a wealth of tutorials, forums, and user-generated content, unlike some proprietary software with limited community resources.
- Feature Set: Blender\"s comprehensive feature set for both 2D and 3D animation competes well against specialized 2D rigging software. Its continuous updates introduce new functionalities that keep it at the forefront of digital content creation tools.
- Flexibility and Integration: Blender\"s ability to handle a wide range of digital creation tasks beyond rigging, such as modeling, texturing, and compositing, allows for a seamless workflow not always possible in other 2D rigging tools.
In summary, Blender\"s combination of cost-effectiveness, a strong support community, and a rich feature set make it a compelling option for 2D rigging compared to other software. Whether for professional projects or personal endeavors, Blender provides the tools and flexibility needed to bring creative visions to life.
READ MORE:
Resources for Learning More About 2D Rigging in Blender
Embarking on the journey of mastering 2D rigging in Blender is an exciting endeavor. Fortunately, there are numerous resources available to guide you through the learning process. Here are some invaluable tools and platforms to enhance your skills:
- Blender Official Documentation: The Blender Manual offers comprehensive guides and tutorials on all aspects of Blender, including detailed sections on 2D rigging.
- Online Courses and Tutorials: Platforms like Udemy, Coursera, and YouTube host a variety of courses ranging from beginner to advanced levels, taught by experienced animators and Blender experts.
- Blender Community Forums: Engage with the Blender community through forums such as Blender Artists and the Blender Network. These platforms are great for seeking advice, sharing work, and finding solutions to specific rigging challenges.
- Books and E-books: There are several books dedicated to mastering Blender, with some focusing specifically on animation and rigging. These can serve as a structured learning path.
- Workshops and Webinars: Keep an eye out for workshops and webinars hosted by Blender professionals. These can offer deep dives into specific techniques and provide opportunities for live Q&A.
By leveraging these resources, you can systematically build your knowledge and skills in 2D rigging with Blender, moving from foundational concepts to advanced techniques and workflows.
Embark on your Blender 2D rigging journey with confidence, exploring the endless possibilities of animation. Harness these tools and tips to bring your creative visions to life, pushing the boundaries of digital storytelling.


