Blender Easy Rigging: Master Simple Techniques to Bring Your Characters to Life

Topic blender easy rigging: Unlock the secrets of Blender easy rigging to effortlessly animate your 3D models, bringing your creative visions to life with simplicity and efficiency. Dive into the world of animation with our expert guide.

Understanding Blender Rigging

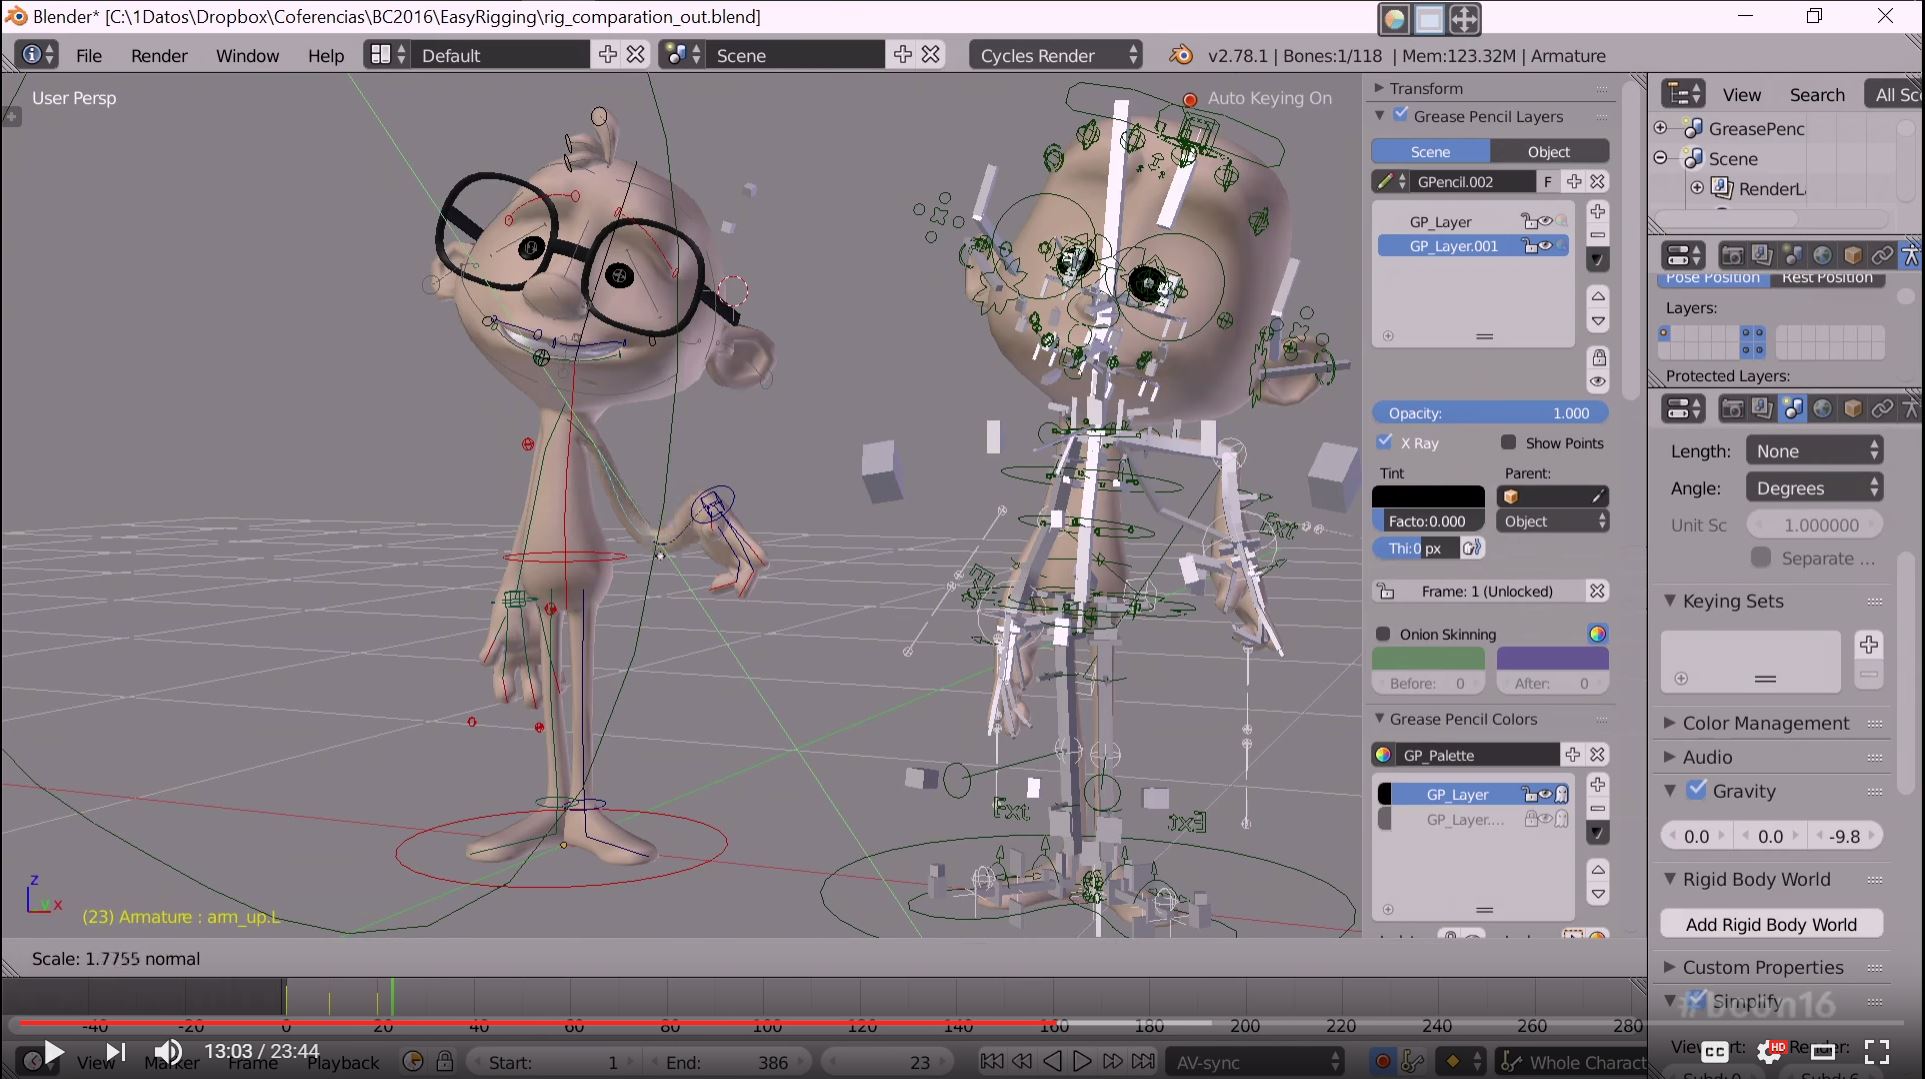
Rigging in Blender involves creating a skeleton for your 3D model, allowing for realistic movements and animations. This process is crucial for bringing your characters to life in animations, games, and simulations.

Beginner\"s Guide to Rigging

  • Introduction to basic rigging concepts.
  • Step-by-step instructions on creating your first rig.
  • Tips for effective weight painting and bone placement.

Advanced Rigging Techniques

  1. Utilizing Blender\"s Rigify addon for automated rigging.
  2. Customizing rigs with Inverse Kinematics (IK) for more dynamic animations.
  3. Integrating constraints and custom bone shapes for enhanced control.

Understanding Blender Rigging

Tools and Addons for Efficient Rigging

Blender offers a range of tools and addons to facilitate the rigging process, including:

  • Rigify for automatic rig setups.
  • Auto-Rig Pro for advanced rigging and animation retargeting.
  • Physics-based vehicle rigging addons for quick and realistic setups.

Tools and Addons for Efficient Rigging

Practical Rigging Projects

Apply your rigging skills with practical projects designed to enhance your understanding and efficiency. From simple characters to complex mechanical rigs, there\"s a project for every level.

Project TypeDifficulty LevelKey Focus
Character RiggingBeginner to IntermediateRigify, Weight Painting
Mechanical RiggingIntermediateConstraints, Custom Bones
Vehicle RiggingAdvancedPhysics-based Addons

Embark on your rigging journey in Blender with confidence, using our guide to navigate through the essentials and beyond. Happy rigging!

Practical Rigging Projects

What is the new Mixamo Blender add-on and how does it make rigging characters easier in Blender?

The new Mixamo Blender add-on is a powerful tool that simplifies the process of rigging characters in Blender. Here\'s how it makes rigging easier:

  • It offers a user-friendly interface that allows for easy character rigging, even for beginners.
  • It provides pre-built rigs and presets that can be easily applied to the character, saving time and effort.
  • The Mixamo add-on seamlessly integrates with Blender, making it convenient to use within the software.
  • It automates the rigging process, reducing the need for manual adjustments and speeding up the overall workflow.
  • The add-on also supports Mixamo animations, enabling users to easily import and apply ready-made animations to their rigged characters.

Blender - How to Rig a Character the Fastest Way - Quickie Tuts 04

Efficiency: \"Watch this video to discover the secrets to maximize your productivity and accomplish more in less time. Learn efficient strategies to streamline your tasks and reach your goals effortlessly.\" Speed: \"Curious about how to boost your speed and get things done in record time? This video will unveil effective techniques to help you work faster, increase your efficiency, and achieve success quicker.\"

Blender - Completely Rigging A Character in 5 Minutes

Alright, today I\'ll show you the ENTIRE rigging process for a game-ready character from scratch to finish, WITH advanced features ...

Tools and Addons for Efficient Rigging

Blender offers a range of tools and addons to facilitate the rigging process, including:

  • Rigify for automatic rig setups.
  • Auto-Rig Pro for advanced rigging and animation retargeting.
  • Physics-based vehicle rigging addons for quick and realistic setups.

Tools and Addons for Efficient Rigging

_HOOK_

Practical Rigging Projects

Apply your rigging skills with practical projects designed to enhance your understanding and efficiency. From simple characters to complex mechanical rigs, there\"s a project for every level.

Embark on your rigging journey in Blender with confidence, using our guide to navigate through the essentials and beyond. Happy rigging!

Practical Rigging Projects

Practical Rigging Projects

Apply your rigging skills with practical projects designed to enhance your understanding and efficiency. From simple characters to complex mechanical rigs, there\"s a project for every level.

Project TypeDifficulty LevelKey Focus
Character RiggingBeginner to IntermediateRigify, Weight Painting
Mechanical RiggingIntermediateConstraints, Custom Bones
Vehicle RiggingAdvancedPhysics-based Addons

Embark on your rigging journey in Blender with confidence, using our guide to navigate through the essentials and beyond. Happy rigging!

Practical Rigging Projects

Introduction to Easy Rigging in Blender

Rigging in Blender simplifies the process of bringing 3D models to life, allowing creators to animate characters and objects with ease. This introduction covers the essentials of rigging, from the basic concepts to practical steps for beginners and advanced users alike.

Blender\"s rigging system involves creating a skeleton, or \"armature\", for your model, which acts as a framework for movement and animation. By attaching bones to the mesh, you can manipulate your character or object in a natural and intuitive way.

  1. Understanding the Basics: Learn about bones, armatures, and how they relate to your 3D model.
  2. Setting Up Your First Rig: A step-by-step guide to creating a simple rig for beginners.
  3. Advanced Rigging Techniques: Explore Inverse Kinematics (IK), constraints, and custom bone shapes for more complex animations.
  4. Using Blender Addons: Discover how addons like Rigify can automate the rigging process, making it more efficient and less time-consuming.

Effective rigging is a balance between the technical and creative aspects of 3D animation, requiring both an understanding of anatomy and movement, as well as the technical skills to implement your vision within Blender. This guide aims to demystify rigging, making it accessible and enjoyable for artists of all levels.

  • Rigify for automated rigging, simplifying the creation of complex rigs.
  • Auto-Rig Pro for advanced features and customization options.
  • Physics-based rigging for realistic simulations of movement and interaction.

By following this guide, you will learn the foundational skills needed to rig your characters and objects effectively, opening up a world of possibilities for your 3D projects.

Introduction to Easy Rigging in Blender

Top Tools and Addons for Blender Rigging

Blender rigging can be significantly enhanced with the use of specialized tools and addons. These tools are designed to streamline the rigging process, making it more accessible and efficient for artists of all levels. Here are some of the top tools and addons for Blender rigging:

  • Rigify: Automates the rigging process, providing a comprehensive set of tools to create detailed and functional rigs without needing extensive rigging knowledge.
  • Auto-Rig Pro: Offers advanced features for rigging and animation, including automatic rigging, animation retargeting, and support for exporting to game engines.
  • Blender\"s Built-in Rigging Tools: Includes envelope, skeleton, and automatic skinning, easy weight painting, mirror functionality, bone layers, and colored groups for organization.
  • Physics-Based Vehicle Rigging Addon: Enables easy setup of realistic physics-based vehicle rigs, offering intuitive interface and advanced customization options.

These tools not only simplify the rigging process but also open up a range of possibilities for creating complex animations and simulations. Whether you\"re a beginner looking to rig your first character or an experienced animator seeking to streamline your workflow, these tools provide the necessary functionality to bring your projects to life.

Top Tools and Addons for Blender Rigging

Step-by-Step Guide for Beginners

Mastering rigging in Blender starts with understanding its fundamental concepts and procedures. This guide is designed to help beginners navigate the complex world of rigging by breaking down the process into manageable steps. Whether you\"re rigging a humanoid character or any other model, these steps will form the foundation of your rigging knowledge.

  1. Preparation: Begin by ensuring your model\"s normals are correctly aligned. This step is crucial for the rigging and animation process to work smoothly.
  2. Positioning the Model: Adjust your model\"s position in the scene to utilize Blender\"s symmetry features effectively. This will streamline the rigging process.
  3. Creating the Skeleton (Armature): Start the rigging process by adding an armature to your model. This serves as the skeleton around which the model\"s movements are built.
  4. Defining Bone Hierarchy: Develop a hierarchical structure of bones, from the main body parts down to the finer elements like fingers, to ensure realistic movement.
  5. Adjusting Bone Connections: Make sure that all bones are correctly connected and aligned with the corresponding parts of the model to facilitate accurate deformation during animation.
  6. Parenting the Model to the Armature: Link your model to the armature with automatic weights to bind the mesh to the skeleton. This allows the bones to control the model\"s movements.
  7. Testing and Tweaking: Enter pose mode to test the rigging by moving various bones. Adjust weights and bone influence as needed to achieve natural movements.

This beginner\"s guide provides a foundational overview of the rigging process in Blender. By following these steps, you\"ll be on your way to creating detailed and functional rigs that bring your 3D models to life.

Step-by-Step Guide for Beginners

_HOOK_

Advanced Techniques in Rigging

Mastering advanced rigging techniques in Blender opens up a new world of possibilities for character animation, blending artistic vision with technical skill. Let\"s delve into the sophisticated methods that can elevate your rigging to the next level.

  1. Rigify for Automated Rigging: Rigify, an addon in Blender, simplifies the rigging process by automating the creation of complex rigs. It\"s designed to save time for artists who need versatile character rigs but may not have the expertise or time to rig manually.
  2. Corrective Shape Keys: Shape keys are invaluable for correcting deformations and achieving smooth, realistic movements. They allow for adjustments in mesh deformations, enabling finer control over a character\"s expressions and actions.
  3. Weight Painting for Detailed Control: Weight painting offers precise control over how bones influence the mesh. By carefully assigning weights to bones, you can ensure naturalistic deformation, enhancing the realism of your character\"s movements.
  4. IK/FK Switching: The integration of inverse kinematics (IK) and forward kinematics (FK) allows for dynamic animation workflows. This hybrid approach provides flexibility, enabling animators to switch between IK for broad movements and FK for detailed adjustments.
  5. Constraints and Modifiers: Blender\"s constraints and modifiers further refine rigging and animation. From limiting bone movements to smoothing mesh deformations, these tools offer advanced solutions for common rigging challenges.
  6. Complex Rigging Setups: For characters that demand intricate rigging, techniques like the Mesh Deform modifier and custom control rigs using constraints can offer unparalleled control, allowing for the animation of complex characters and intricate body shapes.

These advanced rigging techniques not only enhance the animator\"s toolbox but also pave the way for more expressive and captivating character animations. By harnessing the power of Blender\"s rigging capabilities, animators can bring their most ambitious visions to life.

Advanced Techniques in Rigging

Rigify: Blender\"s Rigging Powerhouse

Rigify is an advanced rigging system offered within Blender, designed to simplify the creation of complex and functional rigs. It automates many aspects of the rigging process, enabling artists to focus more on the creative aspects of their work. Here\"s a step-by-step guide to leveraging Rigify for your projects.

  1. Enabling Rigify: Rigify is an addon that comes with Blender but is not enabled by default. Access it through Blender\"s Preferences menu under the Add-ons tab, and search for \"Rigify\" to enable it.
  2. Generating a Basic Rig: Once enabled, Rigify allows you to generate a basic rig with a simple click. This can be found in the Add menu under Armature. Choose the type of rig that best suits your character, whether humanoid or something more complex.
  3. Customizing Your Rig: Rigify is modular, meaning you can customize the generated rig to fit your specific needs. Add, remove, or adjust bones as necessary, and utilize the advanced features Rigify offers, such as automatic IK/FK switching.
  4. Weight Painting: With your rig in place, the next step is weight painting. This process defines how the mesh of your character deforms in response to the movements of the rig. Rigify\"s intuitive control system simplifies weight painting, making it accessible even to those new to rigging.
  5. Animating Your Character: With the rig setup and weight painting completed, your character is now ready to be animated. Rigify\"s rigs are designed to be easy to animate, providing a wide range of controls for facial expressions, body movements, and more.

Rigify not only speeds up the rigging process but also enhances the quality of rigs, making them more versatile and easier to animate. Whether you\"re a seasoned professional or just starting out, Rigify is a powerful tool that can help bring your characters to life.

Auto-Rig Pro: Simplifying Complex Rigging Tasks

Auto-Rig Pro is a comprehensive rigging tool for Blender, designed to automate and simplify the rigging of characters, animals, and even complex structures. Here is a detailed overview of how Auto-Rig Pro streamlines the rigging process, making it more accessible to artists of all levels.

  1. Automated Rigging: Auto-Rig Pro allows for quick and automated rigging of characters by generating a fully functional rig with just a few clicks. This not only saves time but also ensures consistency and reliability in the rigging process.
  2. Customizable Rigs: Despite its automation, Auto-Rig Pro offers extensive customization options. Users can adjust the rig to suit any character model, ensuring that the rig accurately matches the character\"s geometry and intended movements.
  3. Advanced Features: The tool includes advanced rigging features such as IK/FK switching, automatic weight painting, and facial rigging. These features provide animators with the flexibility to create complex animations with ease.
  4. Retargeting Animations: One of Auto-Rig Pro\"s standout features is its ability to retarget animations from one character to another. This is particularly useful for animators working with multiple characters or looking to reuse animations across projects.
  5. Export Options: Auto-Rig Pro supports exporting rigs and animations to various formats, including FBX and GLTF, with presets for Unity, Unreal Engine, and Godot. This makes it an ideal tool for game developers and animators looking to integrate their work into different platforms.

With its balance of automation and customization, Auto-Rig Pro is a valuable asset for anyone looking to tackle complex rigging tasks in Blender. Whether you\"re a hobbyist or a professional, Auto-Rig Pro can significantly enhance your rigging workflow, making it more efficient and enjoyable.

Common Rigging Challenges and Solutions

Rigging in Blender, while immensely powerful, can present a range of challenges, especially for beginners or those tackling complex projects. Understanding these challenges and knowing how to overcome them can make the rigging process smoother and more efficient. Here are some common rigging challenges and their solutions:

  • Inverted Normals: Incorrect normals direction can lead to various issues in rigging and animation. Use Blender\"s \"Recalculate Outside\" feature to correct the normals direction, ensuring that the model\"s faces point outward.
  • Positioning the Model: Properly positioning your model in the scene is crucial for symmetry and ease of rigging. Adjust the model\"s pivot point to its base, typically at the feet, for easier rotation and manipulation.
  • Creating a Skeleton Structure: The backbone of rigging involves creating an armature that serves as the skeleton. Start with a main root bone and extend branches for limbs, ensuring a logical hierarchy for easy animation.
  • Bone Connections: Ensuring bones are correctly connected is vital for a functional rig. Utilize Blender\"s \"Connected\" option in the bone settings to maintain the hierarchy and ease of manipulation.
  • Weight Painting Challenges: Weight painting is essential for how the mesh deforms with bone movement. Beginners often find this challenging, but practice and tutorials can help develop this skill. Blender\"s automatic weight assignment can serve as a good starting point, which can then be refined manually.
  • Automation with Rigify: For those overwhelmed by the intricacies of rigging, Blender\"s Rigify addon can automate much of the process, offering a modular system to create complex rigs with less technical hassle. Understanding the basics of armatures and bones is still recommended to make the most of Rigify.

These solutions address some of the most common hurdles encountered during the rigging process. With practice, the right tools, and a solid understanding of Blender\"s features, overcoming these challenges becomes a manageable part of the creative process.

Animating Your Rigs: Tips and Tricks

Animating rigs in Blender can be both a challenging and rewarding process. With the right approach and understanding of Blender\"s tools, you can bring your characters to life in a way that\"s both efficient and expressive. Here are some tips and tricks to help you with animating your rigs.

  • Master Keyframing: Keyframing is essential in animation. It involves marking the start and end points of any action, allowing for smooth transitions between poses. Utilize Blender\"s auto keyframe mode to streamline this process.
  • Utilize Blender\"s Animation Toolset: Blender offers a robust set of tools for animation, including a character animation pose editor, non-linear animation (NLA) for independent movement segments, and sound synchronization for lip-syncing or adding background scores.
  • Incorporate Inverse Kinematics: For more natural poses, inverse kinematics (IK) is indispensable. It simplifies the animation of complex movements by allowing you to move a chain of bones by manipulating just the end effector.
  • Experiment with Shape Keys: Shape keys are perfect for animating facial expressions or any subtle deformation. They let you transition between different shapes, adding nuance to your character\"s expressions.
  • Use Motion Paths: To visualize and refine the movement of objects or characters over time, motion paths can be incredibly helpful. They show the trajectory of movement, making it easier to adjust for more fluid motion.
  • Space Switching for Dynamic Animations: Space switching is useful for animating objects like tails or chains that require follow-through and overlapping actions. It allows for easier management of complex motion patterns.

By leveraging Blender\"s comprehensive animation and rigging toolsets, and applying these tips, you can create more dynamic and believable animations. Remember, practice and experimentation are key to mastering animation in Blender.

_HOOK_

Real-World Rigging Projects to Get Started

Embarking on real-world rigging projects in Blender can significantly enhance your skills and understanding of the software. Whether you\"re a beginner looking to grasp the fundamentals or an experienced user aiming to refine your techniques, these projects offer valuable hands-on experience. Here are some project ideas inspired by various sources to help you get started:

  • Character Rigging: Begin with basic character rigging to understand the essentials of bones, armatures, and weight painting. Creating rigs for simple characters allows you to practice and apply fundamental concepts.
  • Animating Tails, Whips, and Chains: Focus on rigging and animating objects with follow-through and overlapping actions, such as tails or chains. This introduces you to space switching and dynamic movement animation techniques.
  • Complex Character Projects: Once comfortable with the basics, advance to more complex characters or creatures. Incorporate IK/FK switching, facial rigging, and custom rig controls to bring nuanced expressions and movements to your models.
  • Vehicles and Mechanical Objects: Rigging isn\"t limited to organic forms. Try your hand at rigging vehicles or mechanical objects, like a fully rigged, textured Nissan 300zx z31. This type of project can introduce you to constraints and mechanical rigging principles.
  • Environmental Elements: Rigging environmental elements, such as plants or dynamic backgrounds, can offer a different set of challenges and rewards, expanding your rigging repertoire.

These projects provide a pathway to mastering rigging in Blender, from basic techniques to more advanced applications. Each project builds upon the last, reinforcing skills and introducing new concepts along the way.

Optimizing Your Workflow in Blender Rigging

Optimizing your rigging workflow in Blender involves understanding and implementing best practices, using efficient tools, and leveraging Blender\"s powerful addons. Here\"s how you can streamline your rigging process:

  • Start with a Solid Foundation: Ensure your model is properly prepared for rigging. This includes checking for correct normals direction, making sure the mesh is clean, and positioning your model correctly in the scene.
  • Use Procedural Rigging Tools: Tools like CloudRig, an extension of Blender\"s Rigify addon, can automate the creation of control rigs. This saves time and ensures consistency across different projects.
  • Manual Weight Painting: While procedural tools can provide a solid starting point, manual weight painting is crucial for fine-tuning the influence of bones on the mesh. Use addons like Easy Weight to make this process more efficient.
  • Leverage Corrective Shape Keys: Corrective shape keys can be used to fix deformations that cannot be solved with weight painting alone. Use the Pose Shape Keys addon to adjust your rig and weights without losing your corrective shapes.
  • Explore Blender Addons: Blender\"s community offers a wealth of addons for rigging, such as Rigify for automatic rigging, Car-Rig Pro for vehicles, and Voxel Heat Diffuse Skinning for advanced weight painting. These tools can significantly reduce the time and effort needed for rigging.

By incorporating these strategies into your rigging workflow, you can achieve more with less effort and elevate the quality of your animations. Whether you\"re working on characters, vehicles, or any other rigged elements, Blender and its addons provide the flexibility and power to bring your creations to life efficiently.

Embark on a journey to master Blender rigging with ease, transforming your 3D models into lifelike animations. Our comprehensive guide unveils the simplicity behind complex rigging techniques, empowering beginners and seasoned artists alike to unleash their creative potential.

FEATURED TOPIC