Topic blender rigging model: Unlock the secrets of Blender rigging model techniques to bring your 3D characters to life with dynamic animations and realistic movements. Master this essential skill for animation and game development.
Table of Content
- Understanding Blender Rigging
- Step-by-Step Rigging Process
- Rigging Tools and Resources
- Conclusion
- Step-by-Step Rigging Process
- Rigging Tools and Resources
- What is the process for rigging a model in Blender?
- YOUTUBE: Rigging for Impatient People - Blender Tutorial
- Conclusion
- Rigging Tools and Resources
- Conclusion
- Conclusion
- Introduction to Blender Rigging
- Essential Concepts and Components of Rigging
- Step-by-Step Guide to Rigging Your Model in Blender
- Advanced Rigging Techniques in Blender
- Common Rigging Challenges and Solutions
- Tools and Resources for Blender Rigging
- Animating Your Rigged Model
- Case Studies: Successful Blender Rigging Projects
- Continuing Your Rigging Education in Blender
- Conclusion
Understanding Blender Rigging
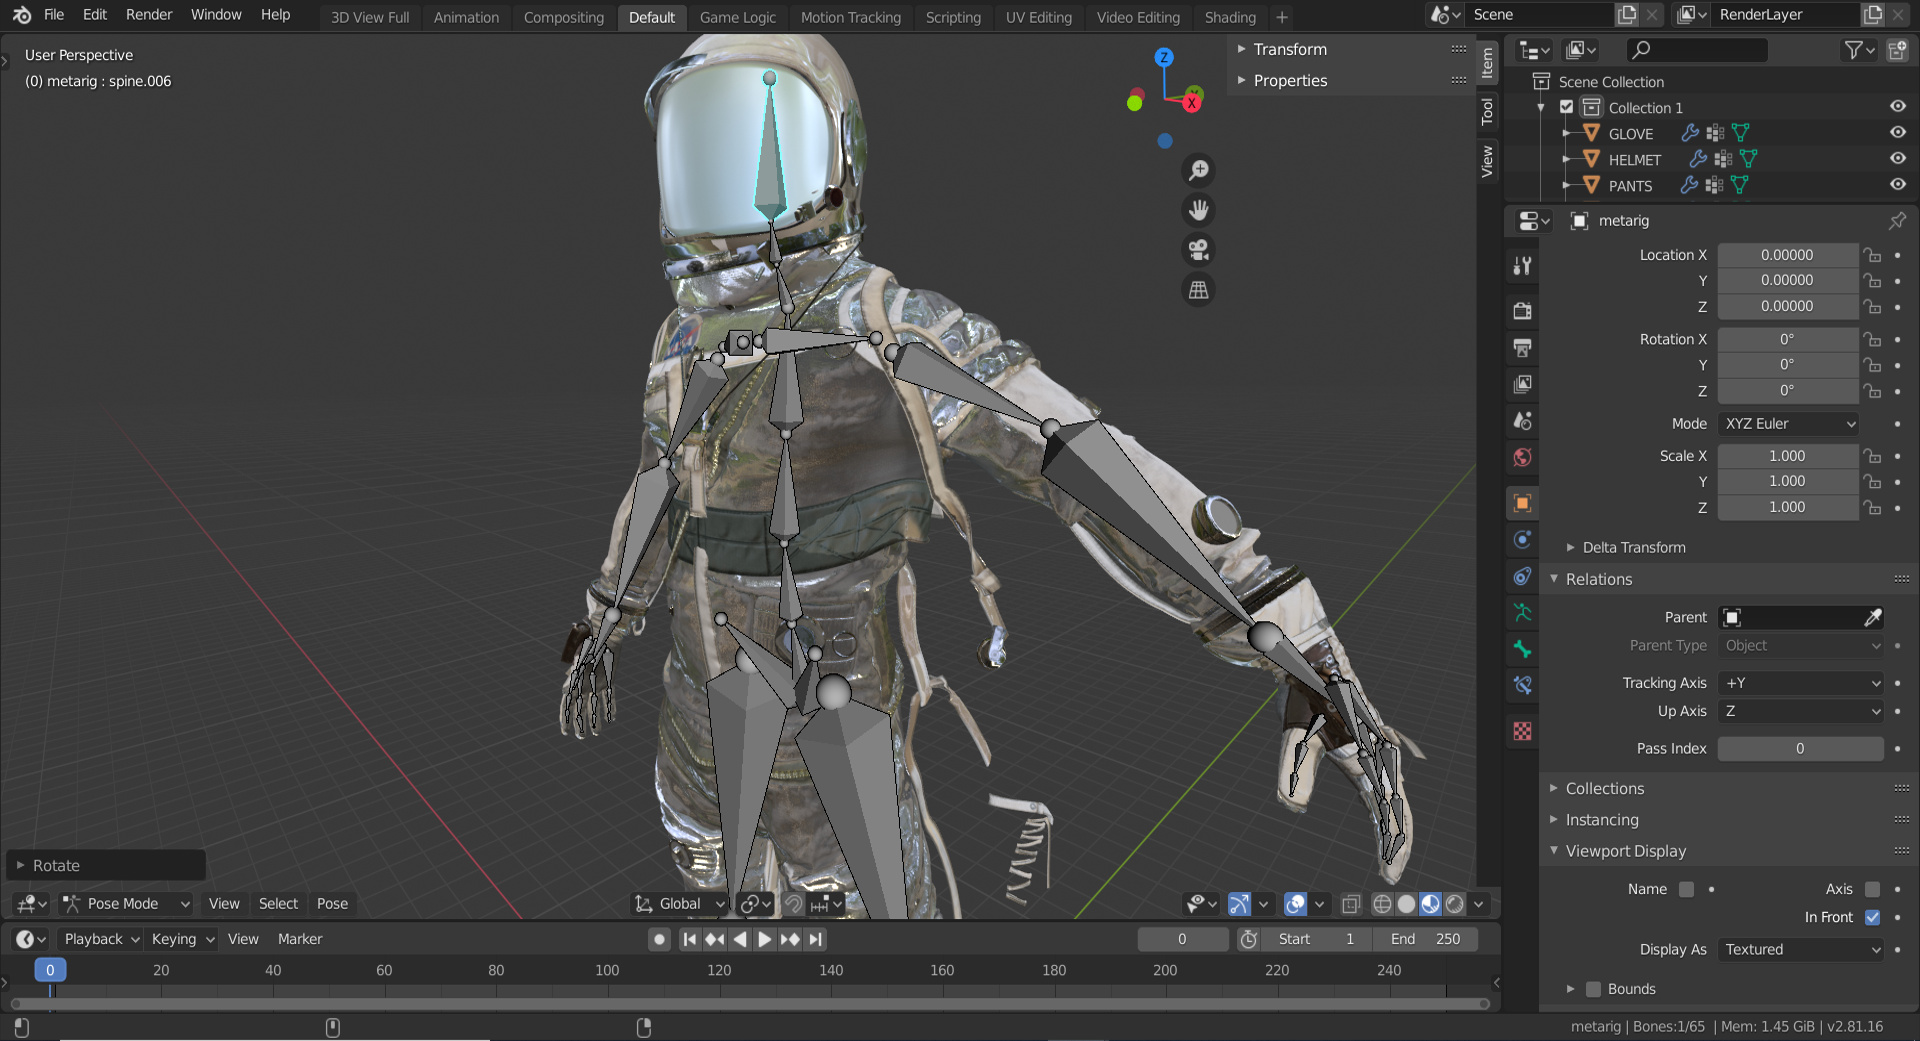
Rigging is the backbone of animation in Blender, providing the necessary framework to animate models realistically. It\"s akin to creating a puppet skeleton where each bone\"s movement can control different parts of the model. This process is not only crucial for animation but also for simulations where accurate movement and deformations are necessary.
Key Components of Rigging
- Armature: The skeletal structure that defines how a model moves.
- Bones: Individual components of the armature, each responsible for controlling a specific part of the model.
- Skinning: The process of attaching the mesh of the model to the bones of the armature.
- Weight Painting: This technique is used to define how much influence a particular bone has on different parts of the mesh.

READ MORE:
Step-by-Step Rigging Process
- Start Blender and import your 3D model.
- Create an armature by adding bones that correspond to the major parts of your model (e.g., limbs, spine).
- Position the bones accurately within the mesh for proper deformation.
- Parent the mesh to the armature with automatic weights to facilitate initial skinning.
- Refine weight painting to adjust the influence of each bone over the mesh.
- Test the rig by posing the model to ensure natural movement and deformation.
Advanced Rigging Techniques
For more complex models, Blender offers advanced rigging tools such as inverse kinematics (IK), constraints, and custom bone shapes. These features allow for more nuanced control over the model\"s movements, enabling animators to achieve more dynamic and varied animations.

Rigging Tools and Resources
Blender provides a comprehensive set of tools for rigging:
- Envelope, skeleton, and automatic skinning for easy setup.
- Easy weight painting and mirror functionality for symmetrical models.
- Bone layers and colored groups for organized rig management.
- Constraints and IK for advanced movement control.
Additionally, there are numerous online tutorials, forums, and communities dedicated to Blender rigging, offering a wealth of knowledge for both beginners and advanced users.

Conclusion
Rigging in Blender opens up endless possibilities for animating and simulating 3D models. By understanding the basics and exploring advanced techniques, you can bring your characters to life with natural and complex movements. With practice and exploration of Blender\"s rigging tools, you can master this essential skill in 3D animation and design.

Step-by-Step Rigging Process
- Start Blender and import your 3D model.
- Create an armature by adding bones that correspond to the major parts of your model (e.g., limbs, spine).
- Position the bones accurately within the mesh for proper deformation.
- Parent the mesh to the armature with automatic weights to facilitate initial skinning.
- Refine weight painting to adjust the influence of each bone over the mesh.
- Test the rig by posing the model to ensure natural movement and deformation.
Advanced Rigging Techniques
For more complex models, Blender offers advanced rigging tools such as inverse kinematics (IK), constraints, and custom bone shapes. These features allow for more nuanced control over the model\"s movements, enabling animators to achieve more dynamic and varied animations.
_HOOK_
Rigging Tools and Resources
Blender provides a comprehensive set of tools for rigging:
- Envelope, skeleton, and automatic skinning for easy setup.
- Easy weight painting and mirror functionality for symmetrical models.
- Bone layers and colored groups for organized rig management.
- Constraints and IK for advanced movement control.
Additionally, there are numerous online tutorials, forums, and communities dedicated to Blender rigging, offering a wealth of knowledge for both beginners and advanced users.

What is the process for rigging a model in Blender?
To rig a model in Blender, follow these steps:
- Open Blender and import the model you want to rig.
- Select the model and switch to the \"Object\" mode.
- Select the armature object (usually a skeleton) and position it near the model.
- Parent the model to the armature by selecting the model first, then the armature, and pressing Ctrl+P to bring up the Parent menu, then choose \"Armature Deform\" option.
- Switch to \"Pose\" mode and start adjusting the bone positions to fit the model\'s structure. You can also add more bones if needed.
- Apply weights to the model by entering \"Weight Paint\" mode and painting the influence of each bone on the model\'s mesh. This ensures that when a bone moves, the connected part of the mesh moves accordingly.
- Test the rig by moving the bones in the armature to see how the model reacts. Make adjustments as needed.
- Once satisfied with the rig, you can start animating the model by keyframing the bone movements.
Rigging for Impatient People - Blender Tutorial
Efficient: \"Discover how to boost your productivity and streamline your workflow with these efficient time-saving strategies. Watch the video to unlock the key to working smarter, not harder!\" Simple: \"Simplify your life with easy-to-follow tips and tricks that will help you achieve your goals with minimal effort. Watch the video to learn how to embrace simplicity and find success effortlessly.\"
Easy and Quick Character Rigging in Blender - Blender Basics Tutorial
Animation is a whole thing, but before you can make any animations for your game, you\'re going to need to rig your characters.
Conclusion
Rigging in Blender opens up endless possibilities for animating and simulating 3D models. By understanding the basics and exploring advanced techniques, you can bring your characters to life with natural and complex movements. With practice and exploration of Blender\"s rigging tools, you can master this essential skill in 3D animation and design.
Rigging Tools and Resources
Blender provides a comprehensive set of tools for rigging:
- Envelope, skeleton, and automatic skinning for easy setup.
- Easy weight painting and mirror functionality for symmetrical models.
- Bone layers and colored groups for organized rig management.
- Constraints and IK for advanced movement control.
Additionally, there are numerous online tutorials, forums, and communities dedicated to Blender rigging, offering a wealth of knowledge for both beginners and advanced users.

Conclusion
Rigging in Blender opens up endless possibilities for animating and simulating 3D models. By understanding the basics and exploring advanced techniques, you can bring your characters to life with natural and complex movements. With practice and exploration of Blender\"s rigging tools, you can master this essential skill in 3D animation and design.
_HOOK_
Conclusion
Rigging in Blender opens up endless possibilities for animating and simulating 3D models. By understanding the basics and exploring advanced techniques, you can bring your characters to life with natural and complex movements. With practice and exploration of Blender\"s rigging tools, you can master this essential skill in 3D animation and design.
Introduction to Blender Rigging
Rigging in Blender is a foundational skill for animators, allowing you to create a skeleton for your 3D models that facilitates animation. This section will guide you through the basics of rigging, from preparing your model to adding armatures and bones, ensuring you have a solid understanding to bring your characters to life.
- Preparing Your Model: Before rigging, it\"s essential to position your model correctly in the scene, ensuring it\"s centered and ready for the rigging process. This step involves adjusting the model\"s position to work effectively with Blender\"s rigging tools.
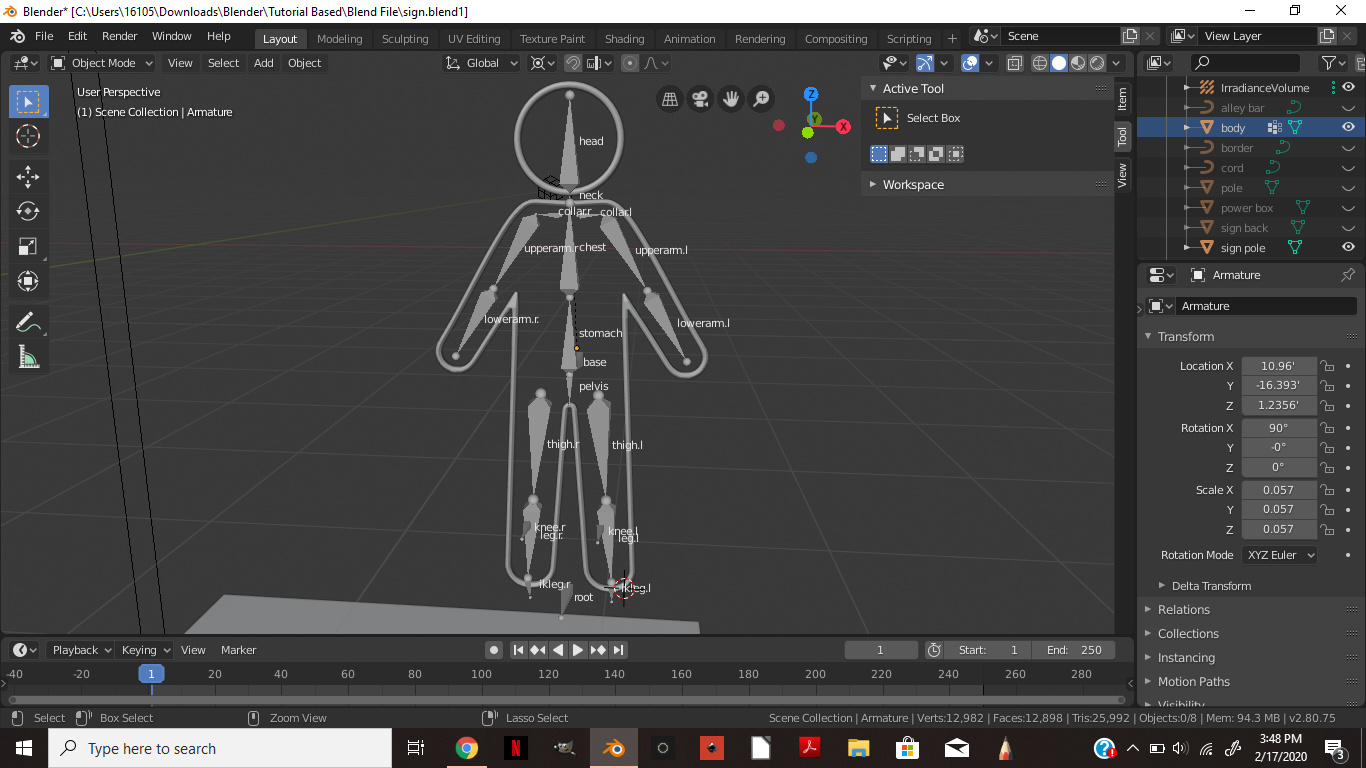
- Creating the Armature: The first step in rigging is adding an armature to your model. This involves selecting your model, entering Object Mode, and using the Shift + A command to add an armature, which serves as the skeleton for your model.
- Adding Bones: With the armature in place, the next step is to add bones. This is done in Edit Mode, where you can place the initial bone at the model\"s center, typically at the pelvis for human models, and extrude additional bones to build the skeleton.
- Parenting and Unparenting Bones: To create a more complex rig, you may need to parent certain bones to others, establishing a hierarchy within your rig. This allows for more detailed and controlled movements of your model.
- Mirroring Bones: For symmetrical models, Blender offers a mirroring function that allows you to easily duplicate and invert bones to the other side of your model, streamlining the rigging process for limbs and other paired structures.
- Naming Bones: Properly naming bones is crucial for organization and ease of animation. This step ensures you can easily identify and manipulate specific bones within your armature.
By following these steps and understanding the importance of each, you\"ll be well on your way to mastering Blender rigging. This process, while technical, is made accessible through Blender\"s intuitive interface and extensive rigging tools, including automatic skinning, weight painting, and bone constraints, allowing for both simple and complex rigs to be created with ease.
Essential Concepts and Components of Rigging
Rigging in Blender is a complex process that brings models to life, allowing them to move in realistic ways. This section delves into the essential concepts and components that make up the rigging process, ensuring a strong foundation for both beginners and seasoned artists.
- Armature: The backbone of any rig, an armature is a collection of bones arranged in a hierarchy that mirrors the character\"s skeletal structure.
- Bones: The basic elements of an armature, bones are used to deform and animate the mesh. Each bone has a parent-child relationship within the armature, influencing the model\"s movement.
- IK (Inverse Kinematics) vs. FK (Forward Kinematics): These are two methods for moving the armature. FK moves bones in a hierarchical chain, while IK allows for more natural movements by specifying the end position directly.
- Constraints: Rules that limit how bones can move, ensuring they mimic realistic motions. Constraints can control properties such as bone rotation, location, and scale.
- Weight Painting: A method to define how much influence each bone has on different parts of the mesh. This allows for smoother deformations during animation.
- Shape Keys: Used for creating facial expressions and other morphing effects. Shape keys are alternative, stored positions for vertices in the mesh, which can be blended to achieve various effects.
Understanding these components and how they work together is crucial for creating believable and lifelike animations in Blender. With practice and exploration of these concepts, artists can effectively rig and animate their 3D models, bringing their creations to vivid life.
Step-by-Step Guide to Rigging Your Model in Blender
Rigging in Blender transforms your static models into flexible, animatable characters. This comprehensive guide walks you through the entire rigging process, from the initial setup to the final adjustments, ensuring your creations are ready for animation.
- Open Blender and import your model to get started. Ensure your model is clean and optimized for rigging.
- Switch to Object Mode and select your model. Then, create an armature by pressing Shift + A and selecting Armature > Single Bone.
- Enter Edit Mode for the armature. Begin adding bones to match your model\"s anatomy, using extrusion (E key) for new bones.
- Adjust the bones\" positions and lengths to align with corresponding parts of your model. This step is crucial for realistic movement.
- With your armature in place, select your model and shift-select the armature. Press Ctrl + P and choose \"With Automatic Weights\" to parent the mesh to the armature.
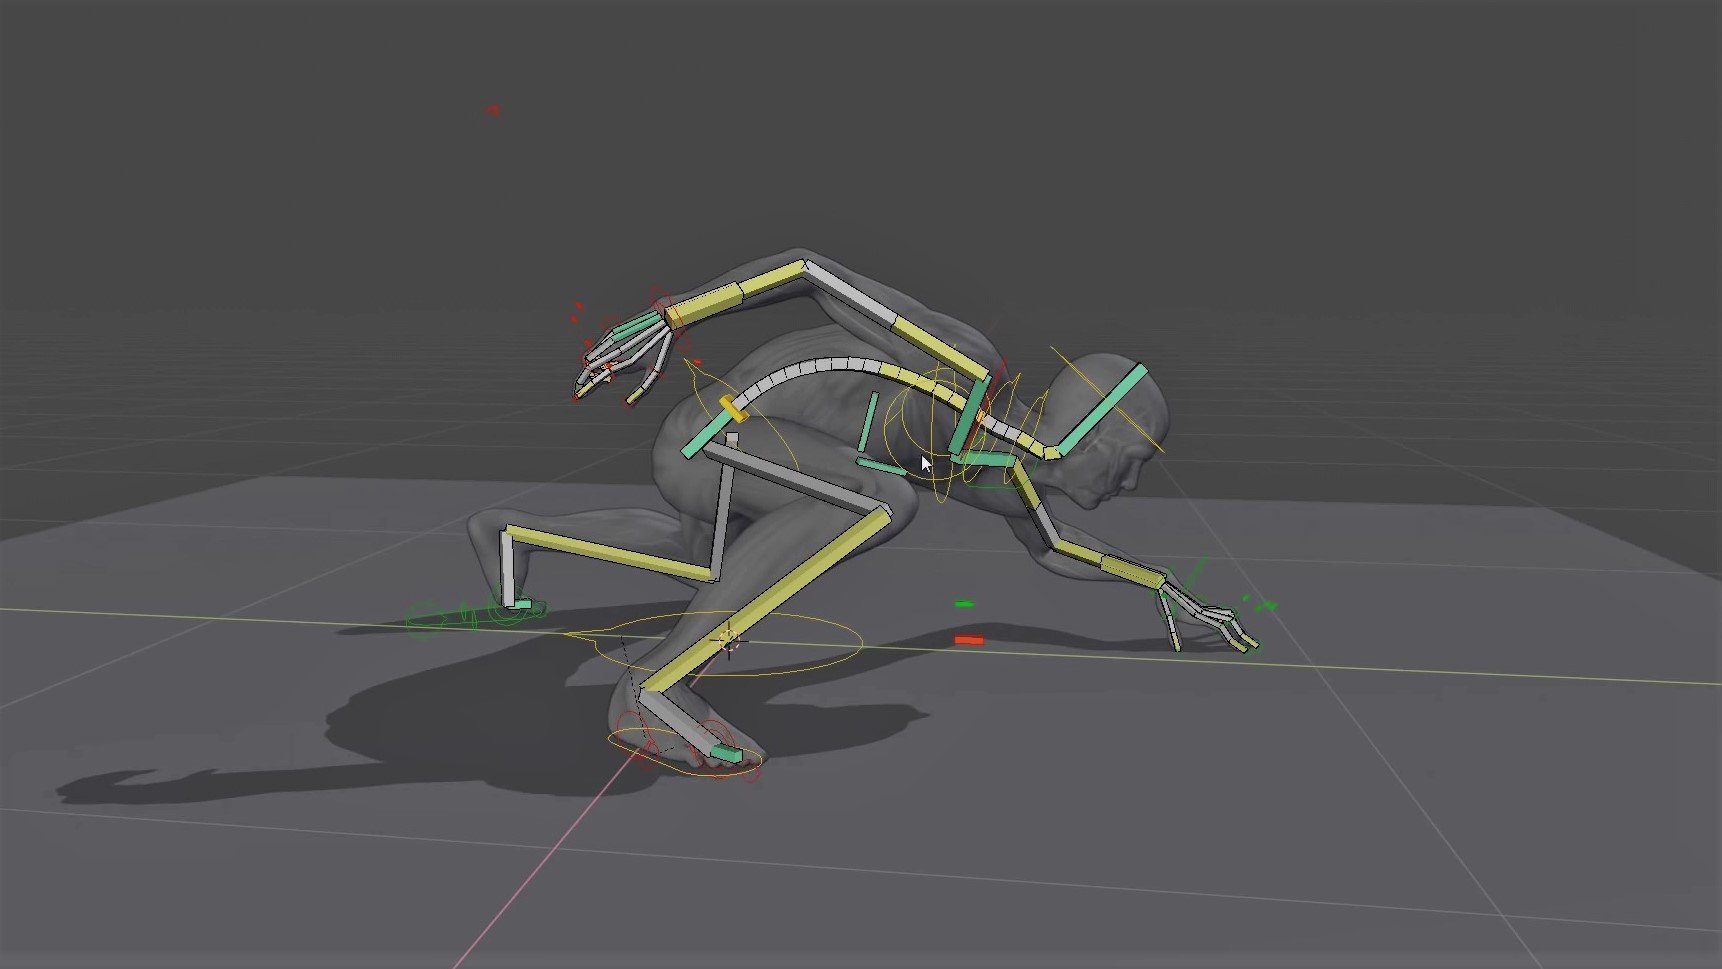
- Enter Pose Mode to test the rig. Select individual bones and rotate them to see how the model responds. Adjust the weight painting as necessary for smooth deformations.
- Refine your rig with additional bones for complex areas like the face or fingers, if required. Use weight painting to fine-tune the influence of each bone.
- Implement Inverse Kinematics (IK) constraints for natural movement, particularly in limbs, by adding IK controllers to your rig.
- Organize your rig with bone layers and groups for easier animation workflow. Label everything clearly to avoid confusion.
- Save your work frequently. Once satisfied, you can start animating your character using the rig.
This guide provides a foundation for rigging in Blender, but the complexity of your model and the specificity of your animation needs may require additional steps and adjustments. Experimentation and practice are key to mastering the rigging process.
Advanced Rigging Techniques in Blender
Blender\"s rigging system allows for a wide range of advanced techniques, enabling creators to bring the most complex characters to life. Whether you\"re working on a simple model or a detailed character, understanding these techniques can significantly enhance your animation projects.
- BlenRig 5: An auto-rigging and skinning system that offers a feature film quality rig, including an advanced facial system. It\"s designed to deliver high-quality results regardless of the user\"s level of expertise.
- Customization and Re-targeting: Advanced rigging often involves customization to fit the specific needs of a project. Techniques like re-targeting the body and facial expressions are critical for adapting a rig to different characters.
- Deformation Systems: Using predefined body deformation systems allows for more realistic movements and expressions. This includes working with mesh deform cages and refining cage deformation for optimal performance.
- Shapekeys and Weight Painting: For detailed control over facial expressions and body movements, shapekeys and weight painting are essential. These tools enable fine-tuning of how the rig influences the mesh.
- Rigging Extra Objects: Characters often interact with objects or wear clothes that need to be rigged as well. Techniques for rigging extra objects, such as clothing, are vital for creating realistic animations.
Advanced rigging in Blender is a deep and complex subject, but with tools like BlenRig and a solid understanding of Blender\"s rigging capabilities, animators can achieve professional-level results. The continuous development of Blender\"s rigging tools, along with a supportive community and comprehensive learning resources, ensures that artists have everything they need to succeed in their rigging projects.
_HOOK_
Common Rigging Challenges and Solutions
Rigging in Blender is a complex process that can lead to various challenges. Understanding these challenges and knowing how to address them can significantly improve your rigging workflow.
- Inverted Normals: If parts of your model appear inside out, use the \"Recalculate Outside\" command to correct the normals. This ensures lighting and textures behave correctly.
- Incorrect Pivot Point: Adjusting the model\"s pivot to the base of its feet can help in achieving more realistic animations, as it allows the model to rotate correctly.
- Accessories Not Following Rig: If accessories like grenades or handbags don\"t follow the rig properly, remove the Armature modifier from the accessories and parent them directly to the desired bone using \"Set Parent to Bone\" option.
- Bones Bent Incorrectly: For bones that bend in the wrong direction, delete the rigging, adjust the knee or elbow forward, and regenerate the rigging. This corrects the bending direction.
- Distorted Mesh: If the mesh distorts or doesn\"t follow the rigging properly, use Weight Paint mode to adjust the influence of bones on the mesh, ensuring smoother deformations.
Each of these solutions targets specific rigging issues, from basic setup errors to more nuanced problems like accessory rigging and bone deformations. By applying these fixes, you can overcome common hurdles and achieve a more polished and functional rig for your 3D models in Blender.
Tools and Resources for Blender Rigging
Blender offers a rich ecosystem of tools and resources designed to facilitate the rigging process, making it accessible for animators and modelers of all skill levels. From automatic rigging solutions to detailed guides and tutorials, here’s a comprehensive list of tools and resources to enhance your Blender rigging workflow.
- CloudRig: Part of the Blender Studio Rigging Tools, CloudRig is used extensively in Blender Studio projects for creating complex rigs, including CoffeeRun and Sprite Fright. It offers a modular approach to rigging, allowing for extensive customization and efficiency in rigging tasks.
- Rigify: Blender’s built-in auto-rigging system simplifies the process of creating functional rigs for characters. It provides a pre-defined set of bones and controllers, making it easier to rig biped and quadruped characters.
- COA Tools: Offers a streamlined approach for creating 2D cut-out animations within Blender. It integrates everything needed for 2D animation in one panel, providing a user-friendly interface for artists.
- RigFlex: An add-on designed to improve the movement of animated characters with soft body simulation features such as antennas, clothing, and hair, providing a simple way to add dynamic \"lag\" actions.
- Vehicles Rig Factory: This tool is tailored for creating rigs for various types of vehicles, offering templates and features that enable realistic movements and simulations for cars, motorcycles, trucks, and more.
- Shape Key Manager Pro: Aids in speeding up the shape key rigging workflow by allowing animators to duplicate and/or mirror shape keys while maintaining and targeting their drivers.
- Ragdoll Tools: Facilitates the creation of ragdolls in Blender, providing tools for generating hitboxes, editing rigid body settings, and non-destructive rig editing.
- Freeik: Enhances the rigging process with intuitive posing and animation features, offering quick pinning of bones and modification of root bones for detailed rig control.
- BlenRig: An auto-rigging and skinning system that provides high-quality rigs, including an advanced facial system, designed primarily for biped characters but planning to support more in the future.
- Voxel Heat Diffuse Skinning: This algorithm addresses some of Blender’s limitations in skinning, offering a natural way to weight vertices for a seamless character animation setup.
These tools and resources represent just a fraction of what’s available within the Blender ecosystem. Whether you’re a beginner looking to rig your first character or a professional seeking to streamline your workflow, Blender’s community and development ecosystem offer a wealth of knowledge and tools to support your projects.
Animating Your Rigged Model
Animating a rigged model in Blender involves several key steps and tools designed to bring your characters to life. Blender offers a comprehensive animation toolset that caters to various animation needs, from simple keyframing to complex walk-cycles and character animations.
- Understanding Blender\"s Animation Toolset: Begin by familiarizing yourself with Blender\"s animation features, including the character animation pose editor, Non-Linear Animation (NLA) for independent movements, forward/inverse kinematics for fast posing, and sound synchronization.
- Applying Rigging Tools: Utilize Blender\"s rigging tools such as envelope, skeleton, automatic skinning, easy weight painting, mirror functionality, and bone layers for organizing your rig.
- Using Constraints: Constraints are instrumental in controlling an object\"s properties like location, rotation, and scale. They can be static values or driven by other objects, offering indirect animation control through targets.
- Leveraging Drivers: Drivers offer a way to control property values with mathematical expressions or scripts, allowing for sophisticated animation effects tied to specific actions or conditions.
- Implementing Shape Keys: Shape keys are used for deformation, essential in facial animation and refining skeletal rigs. They provide control over the mesh shape beyond simple bone transformations.
- Exploring Motion Paths: Use Motion Paths to visualize the trajectory of points or bones over a series of frames, aiding in the precision and fluidity of movement.
Each of these components plays a critical role in animating your rigged model. By leveraging Blender\"s animation toolset, you can achieve detailed and dynamic character animations that breathe life into your 3D models.
Case Studies: Successful Blender Rigging Projects
Blender has been at the forefront of some of the most successful rigging projects, showcasing the tool\"s versatility and capability in bringing complex models to life. These case studies highlight the innovative use of Blender in various rigging projects, from educational resources to practical applications in animation and game development.
- Index 3D: Led by Gurlal Deep Singh, Index 3D provides comprehensive tutorials on hard surface modeling, rigging, and product visualization. Singh\"s unique approach to explaining Blender constraints with practical examples has made learning both easy and enjoyable.
- The Rigging Dojo: Offering in-depth training on animation and rigging in Blender, The Rigging Dojo emphasizes understanding the tools within Blender to improve and grow users\" skill sets. It serves as a pivotal learning hub for both beginners and seasoned professionals looking to master Blender rigging.
- Pierre Schiller / Activemotionpictures: With over 20 years of experience in 3D animation and VFX, Pierre Schiller has contributed significantly to the Blender community through workshops and tutorials focusing on sculpting, 2D grease pencil animation, and more.
- Jim Kroovy: Known for his work with armatures and rigging, Jim Kroovy has developed several Blender add-ons to improve the rigging process. His contributions have significantly simplified complex rigging tasks, making them more accessible to the Blender community.
- Loïc Pinsard: Specializing in advanced rigging tips, Loïc Pinsard\"s YouTube channel is a treasure trove for those looking to dive deeper into Blender\"s rigging capabilities.
These case studies not only illustrate the power and flexibility of Blender as a rigging tool but also highlight the community\"s commitment to sharing knowledge and resources. Each project or resource offers unique insights into the rigging process, providing invaluable lessons for both beginners and experts alike.
Continuing Your Rigging Education in Blender
Advancing your rigging skills in Blender is a continuous journey, enriched by a variety of resources, courses, and community contributions. Whether you\"re a beginner looking to solidify the fundamentals or an experienced rigger aiming to tackle complex projects, there\"s a wealth of knowledge available to support your learning curve.
- Online Courses: Platforms like Udemy offer comprehensive guides on Blender 3D Rigging and Animation, covering everything from basic animations and character rigging to advanced techniques such as animating tank tracks and using Blender’s particle boid system.
- CG Cookie: Dive into the fundamentals of rigging with hands-on practice through exercises designed to teach you about bones, tools, parenting, and bone constraints. This platform offers courses from beginner to advanced levels, guided by experienced instructors.
- Blender Guru: A well-known figure in the Blender community, Lee Salvemini, offers a free introductory rigging tutorial that covers head and neck animation, arm and hand rigging, IK leg rigging, and more. This resource is great for those new to Blender.
- Blender.org: The official Blender website provides an impressive set of rigging tools and detailed documentation on constraints, drivers, shape keys, and motion paths, ideal for those looking to understand the mechanics behind rigging.
- Blender Studio: For more structured learning, Blender Studio offers an introduction to rigging, including demo animations and detailed explanations of leg and inverse kinematics, feet and transform space, and comprehensive rigging techniques.
Continuing your education in Blender rigging involves exploring a variety of techniques and tools, engaging with community resources, and applying your knowledge through practical projects. With dedication and the right resources, you can elevate your rigging skills and bring your creative visions to life.
_HOOK_
READ MORE:
Conclusion
The journey through Blender rigging encapsulates a comprehensive exploration of creating a skeleton for 3D models that facilitates their animation. It\"s an integral process in animation, offering a blend of technical and artistic challenges. Through various resources, tutorials, and guides, learners can delve into rigging with a step-by-step approach, starting from understanding the basics of rigging in Blender, including armature creation, bone placement, weight painting, and utilizing shape keys for complex expressions. Advanced tutorials and courses further expand on these concepts, introducing intricate rigging techniques such as IK/FK switching, facial rigging, and the use of drivers and constraints for enhanced control over animations.
Tools like Rigify and AccuRIG simplify the rigging process, making it more accessible to beginners while saving time for advanced users. The community around Blender, including platforms like CG Cookie, GameDev Academy, and Blender Guru, provides an extensive pool of knowledge, helping animators of all levels to enhance their rigging skills. The journey doesn\"t stop with learning the basics; the vast array of resources available encourages continuous learning and experimentation, pushing the boundaries of what can be achieved with Blender rigging.
Embracing the complexities and challenges of rigging is part of the adventure in Blender. With dedication, practice, and the rich resources available, anyone can master the art of rigging to bring their 3D characters to life with realistic and compelling animations.
Mastering Blender rigging opens a world of creativity and precision in animation, enabling you to bring characters to life with realistic movements. Embrace the journey of continuous learning with Blender\"s vast resources, and transform your 3D models into animated masterpieces.


