Topic rigging a model in blender: Discover the secrets of rigging a model in Blender, transforming your 3D creations into animated masterpieces with ease and precision. Start your journey into the world of professional 3D animation today.
Table of Content
- Understanding Rigging in Blender
- Step-by-Step Guide to Rigging
- Advanced Rigging Techniques
- Conclusion
- Step-by-Step Guide to Rigging
- Advanced Rigging Techniques
- Conclusion
- How can I rig a model in Blender?
- Advanced Rigging Techniques
- YOUTUBE: Blender - Rigging a Character in 5 Minutes!
- Conclusion
- Conclusion
- Introduction to Blender and Rigging
- Getting Started with Blender for Rigging
- Understanding Bones and Armatures in Blender
- Step-by-Step Process of Rigging a Model
- Weight Painting and Its Importance
- Advanced Rigging Techniques
- Common Rigging Problems and Solutions
- Animating Your Rigged Model
- Resources for Further Learning
Understanding Rigging in Blender
Rigging in Blender involves creating a skeleton or armature that defines how the model moves. It\"s an essential step in the animation process, allowing for more realistic and complex movements.
Key Concepts
- Armature: A collection of bones used to deform a model.
- Bones: The individual elements that make up the armature.
- Skinning: The process of attaching the mesh of the model to the armature.
- Weight Painting: Defines how much influence a bone has on different parts of the mesh.

READ MORE:
Step-by-Step Guide to Rigging
- Start Blender and import your 3D model.
- Select your model and switch to Object Mode.
- Go to the Properties panel and find the Modifiers tab.
- Choose the Armature modifier and select your rigging method.
- Create bones in Edit Mode and position them within your model.
- Switch to Pose Mode to adjust bone orientations and constraints.
- Use Weight Painting to fine-tune the influence of each bone.
- Test the rig by posing the model in different positions.

Advanced Rigging Techniques
For more complex models, advanced rigging techniques such as inverse kinematics, custom bone shapes, and drivers can provide more control and realism in animations.
Tools and Features
- Envelope, Skeleton, and Automatic Skinning: Tools for quick rigging setups.
- Easy Weight Painting and Mirror Functionality: For efficient skinning and symmetry.
- Bone Layers and Colored Groups: Helps in organizing complex rigs.
- B-spline Interpolated Bones and Constraints: For smoother deformations and controlled movements.

Conclusion
Rigging is a crucial step in bringing 3D models to life in Blender. By following these guidelines and exploring Blender\"s rigging tools, animators can create detailed and realistic animations for their models. Remember, practice and experimentation are key to mastering rigging in Blender.
Step-by-Step Guide to Rigging
- Start Blender and import your 3D model.
- Select your model and switch to Object Mode.
- Go to the Properties panel and find the Modifiers tab.
- Choose the Armature modifier and select your rigging method.
- Create bones in Edit Mode and position them within your model.
- Switch to Pose Mode to adjust bone orientations and constraints.
- Use Weight Painting to fine-tune the influence of each bone.
- Test the rig by posing the model in different positions.

_HOOK_
Advanced Rigging Techniques
For more complex models, advanced rigging techniques such as inverse kinematics, custom bone shapes, and drivers can provide more control and realism in animations.
Tools and Features
- Envelope, Skeleton, and Automatic Skinning: Tools for quick rigging setups.
- Easy Weight Painting and Mirror Functionality: For efficient skinning and symmetry.
- Bone Layers and Colored Groups: Helps in organizing complex rigs.
- B-spline Interpolated Bones and Constraints: For smoother deformations and controlled movements.

Conclusion
Rigging is a crucial step in bringing 3D models to life in Blender. By following these guidelines and exploring Blender\"s rigging tools, animators can create detailed and realistic animations for their models. Remember, practice and experimentation are key to mastering rigging in Blender.
How can I rig a model in Blender?
To rig a model in Blender, you can follow these steps:
- Open Blender and import your model into the workspace.
- Select your model and switch to the \"Object Mode\".
- Click on the \"Add\" menu and select \"Armature\" to create an armature that will act as the skeleton for your model.
- Position the armature so that it aligns with the pose of your model.
- Select your model, then shift-select the armature, and press Ctrl+P to parent the model to the armature with automatic weights.
- Switch to \"Pose Mode\" and start rigging your model by moving the bones of the armature to deform the mesh.
- You can use tools like weight painting to adjust the influence of each bone on different parts of the model.
- Test the rig by moving the bones in Pose Mode to see how the model deforms.
- Make any necessary adjustments to the rigging until you are satisfied with the results.
- Once you are done, you can animate your rigged model by keyframing the movements of the bones.
Advanced Rigging Techniques
For more complex models, advanced rigging techniques such as inverse kinematics, custom bone shapes, and drivers can provide more control and realism in animations.
Tools and Features
- Envelope, Skeleton, and Automatic Skinning: Tools for quick rigging setups.
- Easy Weight Painting and Mirror Functionality: For efficient skinning and symmetry.
- Bone Layers and Colored Groups: Helps in organizing complex rigs.
- B-spline Interpolated Bones and Constraints: For smoother deformations and controlled movements.

Blender - Rigging a Character in 5 Minutes!
Character: Dive into a world where captivating characters come to life! Discover their unique personalities, motivations, and journeys in this enchanting video that will leave you feeling inspired and connected. Don\'t miss out! Armature: Witness the intricate process of creating a masterpiece with the use of armature! Marvel at the skill and precision that goes into sculpting and shaping these structures, bringing art to a whole new level. Watch the magic unfold before your eyes!
Intro to Rigging an Armature to a Character in Blender 3.0
YouTube is something I do in my spare time, so in order for me to do this full time, support the channel and brand by joining any of ...
Conclusion
Rigging is a crucial step in bringing 3D models to life in Blender. By following these guidelines and exploring Blender\"s rigging tools, animators can create detailed and realistic animations for their models. Remember, practice and experimentation are key to mastering rigging in Blender.
_HOOK_
Conclusion
Rigging is a crucial step in bringing 3D models to life in Blender. By following these guidelines and exploring Blender\"s rigging tools, animators can create detailed and realistic animations for their models. Remember, practice and experimentation are key to mastering rigging in Blender.
Introduction to Blender and Rigging
Blender is an immensely powerful 3D modeling and animation software used by professionals and hobbyists alike. It offers an extensive suite of tools for creating, editing, and animating 3D models. Rigging in Blender is a critical step in the animation process, allowing creators to transform static models into lifelike characters.
Rigging involves creating a skeleton, or armature, that can be used to manipulate a model. This skeleton consists of bones that are used to define how the model moves. With Blender\"s rigging tools, animators can create complex movements and animations that bring characters and objects to life.
- Starting with Rigging: To begin rigging in Blender, you must first understand the basics of the Blender interface and how to navigate its 3D viewport. Familiarizing yourself with Blender\"s armature system is crucial for successful rigging.
- Creating Bones: Bones are the fundamental elements of a rig. In Blender, bones can be easily created and positioned within your model to simulate a realistic skeletal structure.
- Weight Painting: Weight painting is a method used to assign how much influence each bone has on different parts of the model. This crucial step ensures that the model deforms naturally when animated.
- Adding Constraints and Controls: Blender allows for the addition of constraints and custom controls to rigs, giving animators precise control over movements and making animations more efficient.
Through the use of Blender\"s comprehensive rigging tools, including envelope, skeleton, and automatic skinning, easy weight painting, and mirror functionality, creators can achieve professional-level animations. The process of rigging might seem daunting at first, but with practice and patience, it becomes an incredibly rewarding part of 3D animation.
Getting Started with Blender for Rigging
Beginning your journey in Blender for rigging requires a foundational understanding of the software and its capabilities. Here’s a step-by-step guide to get you started on the path to mastering rigging in Blender.
- Install Blender: Ensure you have the latest version of Blender installed to take advantage of all its rigging features.
- Familiarize Yourself with the Interface: Spend some time getting to know Blender’s layout, including the 3D viewport, outliner, and properties editor.
- Import Your Model: Begin with a model that you want to rig. You can create your own model within Blender or import models from other sources.
- Learn Basic Navigation: Practice navigating around the 3D viewport using the mouse and keyboard shortcuts. Being comfortable with moving, zooming, and rotating views is crucial for efficient rigging.
- Explore Blender’s Rigging Tools: Blender offers a variety of tools for rigging, such as automatic weight painting, bone creation, and inverse kinematics. Understanding these tools will greatly enhance your rigging process.
- Start with a Simple Project: For your first rigging project, choose a simple model to work with. This will help you learn the basics without getting overwhelmed.
- Follow Tutorials: There are numerous tutorials available online that can guide you through the rigging process in Blender. These tutorials range from beginner to advanced levels and cover various rigging techniques.
- Practice Regularly: Rigging is a skill that improves with practice. Try rigging different types of models to gain experience and confidence.
By following these steps, you’ll be well on your way to becoming proficient in rigging models in Blender. Remember, patience and practice are key to mastering this complex but rewarding aspect of 3D animation.
Understanding Bones and Armatures in Blender
In Blender, bones and armatures form the backbone of character rigging, enabling animators to create complex and lifelike movements. Here\"s a comprehensive look at how to work with these essential tools.
- Bones: The fundamental units of rigging that simulate the skeletal structure of characters or objects. Each bone can be individually manipulated to control parts of the mesh.
- Armatures: Collections of bones organized in a hierarchical structure, allowing for organized and efficient animation of models. Armatures serve as the skeleton onto which the mesh is attached.
To get started with bones and armatures in Blender:
- Adding Bones: In Edit Mode, press Shift+A to add a new bone. To connect bones, use the extrude tool (E), creating a chain that mimics the skeletal structure of your model.
- Creating Armatures: An armature is created by adding bones and organizing them into a hierarchy. This hierarchy is crucial for defining the relationship between different parts of the model.
- Linking Armatures to Mesh: Once your armature is ready, select both the mesh and the armature (with the armature being active), and press Ctrl+P to parent the mesh to the armature. Choose \"Armature Deform\" for automatic weight assignment.
- Weight Painting: This process allows you to fine-tune how much influence each bone has on the mesh. Entering Weight Paint Mode, you can paint the mesh to define the weights manually, ensuring realistic movement.
- Testing Movements: Switch to Pose Mode to manipulate the bones and test how the mesh deforms. This step is crucial for ensuring your rig behaves as expected.
Understanding and utilizing bones and armatures effectively in Blender is a foundational skill for any aspiring 3D animator. With practice, you can achieve complex animations that bring your characters and models to life.
Step-by-Step Process of Rigging a Model
Rigging a model in Blender is a detailed process that allows for the animation of characters and objects. This step-by-step guide will walk you through the essentials of creating a functional rig.
- Preparation of Your Model: Before rigging, ensure your model is complete and has been properly UV unwrapped if texture mapping is required.
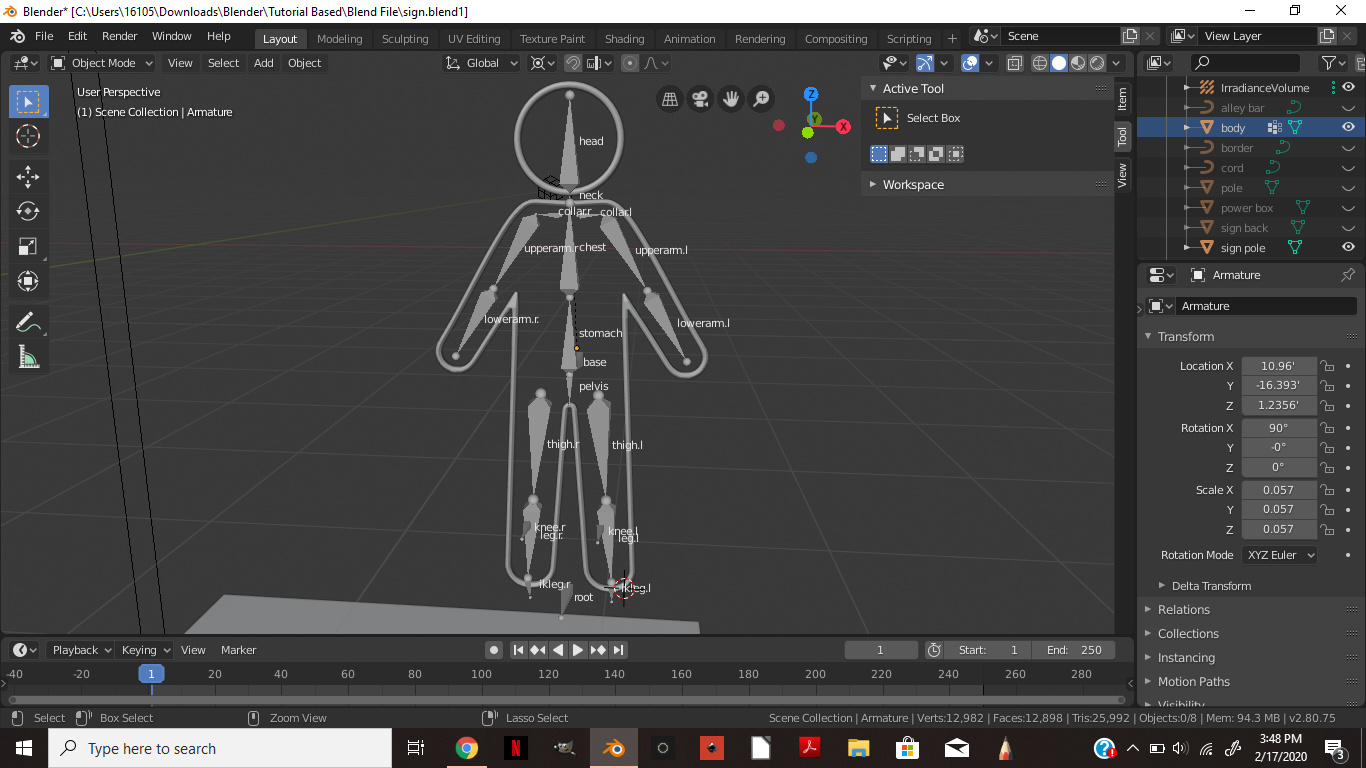
- Creating the Armature: Begin by adding an armature object to your scene. This will serve as the skeleton of your model. Use Shift+A and select Armature.
- Positioning Bones: In Edit Mode, position the bones to match the major joints of your model. This includes the spine, arms, legs, and fingers if necessary.
- Adjusting Bone Orientation: It\"s crucial that the bones\" axes align with the direction of movement for each part of the body.
- Parenting Mesh to Armature: With both the mesh and armature selected, press Ctrl+P and choose \"With Automatic Weights\" to bind the mesh to the skeleton.
- Weight Painting: Enter Weight Paint mode to adjust the influence each bone has on the mesh. This ensures that the deformation during animation looks natural.
- Adding Inverse Kinematics (IK): For more control over limb movement, add IK constraints to the limbs. This simplifies the animation process by allowing for more intuitive posing.
- Creating Control Rigs: For advanced rigs, create custom control bones that can drive the movements of the IK bones and other parts of the armature.
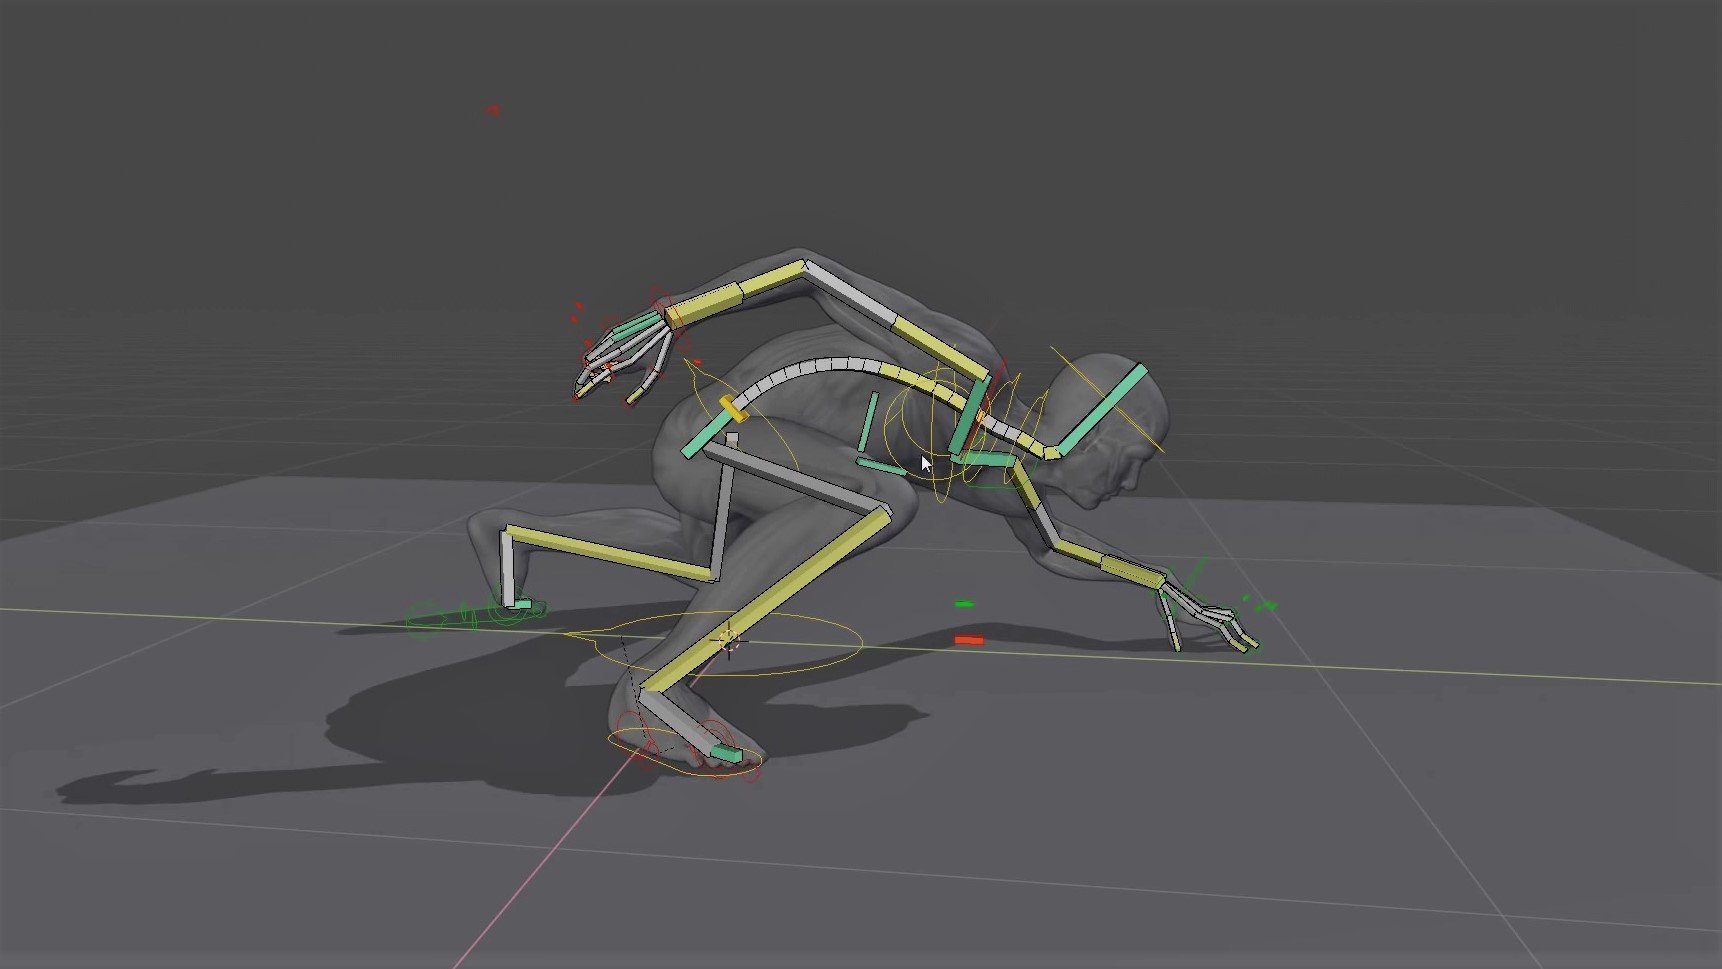
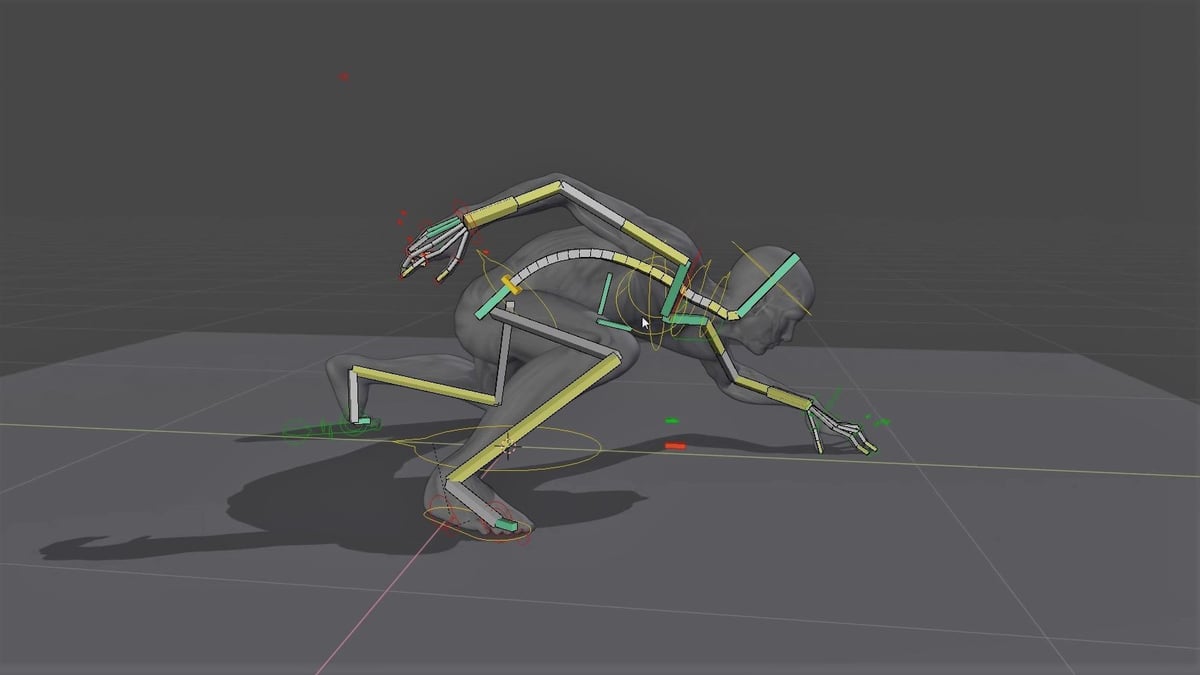
- Testing the Rig: Switch to Pose Mode and test the rig by posing the model. Look for any unnatural deformations or rigging errors and correct them as needed.
- Final Adjustments: Based on the test, make any necessary adjustments to the weights, bone positions, and constraints to refine the rig.
Following these steps will provide you with a basic yet functional rig in Blender. Practice and experimentation are key to mastering the rigging process and creating complex animations.
_HOOK_
Weight Painting and Its Importance
Weight painting is a crucial step in the rigging process in Blender, providing detailed control over how each part of your model is influenced by the bones of the armature. Understanding its importance and mastering the technique is essential for achieving realistic animations.
- Defining Influence: Weight painting allows you to visually assign how much influence each bone has on different parts of the mesh. This ensures that movements are smooth and natural.
- Customization: Through weight painting, animators can fine-tune deformations, allowing for more precise control over the animation process.
- Improving Realism: Proper weight painting is critical for adding realism to your animations. It helps in avoiding unnatural bending and twisting of the model.
To effectively use weight painting in Blender:
- Select the Mesh and Enter Weight Paint Mode: Select your character model and switch to Weight Paint mode. This mode highlights the mesh in a gradient from blue to red, indicating the influence levels.
- Choose the Bone: Select the bone you want to paint weights for. The influence of this bone on the mesh will be displayed.
- Painting Weights: Use the brush tools to paint weights on the mesh. Red indicates high influence, while blue indicates low influence. This process defines how the mesh deforms when the bone moves.
- Adjusting Weights: You can adjust the brush size, strength, and weight to fine-tune the influence on the mesh. This step is iterative and may require going back and forth to achieve the desired result.
- Testing the Deformations: After painting, it’s important to test the rig by posing the bones to ensure the mesh deforms correctly.
Weight painting is not just about assigning weights; it\"s about creating a believable and controlled movement for your models. Taking the time to properly weight paint your characters will significantly enhance the quality of your animations in Blender.
Advanced Rigging Techniques
Advancing your rigging skills in Blender opens up a world of possibilities for character animation. These sophisticated techniques enable more nuanced and dynamic movements, elevating your animations to professional levels.
- Inverse Kinematics (IK): IK simplifies the animation of limbs by allowing the animator to position the end effector (like a hand or foot), and the system automatically calculates the joint angles.
- Automatic Weighting: For a quick start, Blender offers automatic weight painting tools, but manual adjustments are often necessary for precise control over mesh deformation.
- Custom Bone Shapes: Creating custom shapes for bones can make rigs more intuitive to use, especially for animators unfamiliar with the model’s structure.
- Rigging with Constraints: Constraints can automate movements within the rig, such as making eyes follow an object or mimicking the motion of another bone.
- Facial Rigging: Advanced facial rigging involves a combination of bones and shape keys for nuanced expressions. Shape keys can be driven by bones for easier control.
- Driver-Based Automation: Drivers can automate changes in one property based on another, such as making a character’s cheeks puff when the mouth opens wide.
- BlenRig: BlenRig is an auto-rigging and skinning system that provides high-quality, flexible rigs. It\"s particularly useful for characters with complex facial animations or those requiring detailed deformation.
Mastering these advanced rigging techniques requires practice and exploration. Blender’s community and resources offer extensive tutorials and guides to help refine your rigging skills. The effort put into learning these advanced techniques significantly enhances the believability and quality of your animations.
Common Rigging Problems and Solutions
Rigging in Blender can sometimes present challenges, especially for beginners. Recognizing common problems and knowing how to solve them can make the rigging process smoother and more efficient. Here are some typical issues and their solutions:
- Incorrect Bone Weighting: If your model deforms unnaturally, it may be due to incorrect bone weighting. Solution: Use weight painting to adjust the influence of bones on the mesh more accurately.
- Bones Not Deforming Mesh: Sometimes, bones might not affect the mesh as intended. Solution: Ensure the mesh is properly parented to the armature with automatic weights, or manually assign vertex groups to bones.
- Unwanted Mesh Stretching: Mesh stretching can occur if the weights are not evenly distributed. Solution: Smooth the weights using the weight gradient tool in weight paint mode to ensure a more natural deformation.
- Inverted Normals: Inverted normals can cause parts of your model to behave oddly during deformation. Solution: In Edit Mode, select all faces and use the Recalculate Normals option to correct the direction of the mesh normals.
- Armature Layers Confusion: Managing complex rigs with numerous bones can be overwhelming. Solution: Organize your bones into layers within the armature to simplify the rig and make it more manageable.
- IK Constraints Not Behaving as Expected: Inverse kinematics constraints might not always work as anticipated, especially in complex rigs. Solution: Double-check the chain length and pole target settings for your IK constraints to ensure they are set up correctly.
Encountering issues during rigging is a normal part of the learning process. With practice and patience, solving these common problems becomes intuitive, leading to more effective and realistic rigs.
Animating Your Rigged Model
Once your model is rigged in Blender, animating it becomes an exciting journey of bringing your character to life. Here\"s how you can start animating your rigged model with some foundational steps.
- Understanding Keyframes: Keyframes are the cornerstone of animation, marking the start and end points of any movement. In Blender, you can insert keyframes for location, rotation, and scale of bones.
- Creating Your First Pose: In Pose Mode, adjust the bones to create the initial pose of your animation. Insert a keyframe by selecting the bones and pressing \"I\" to choose the properties you wish to keyframe.
- Animating Movement: Move the timeline to a new frame and adjust the bones to a new pose. Insert another keyframe. Blender will interpolate the movement between these keyframes, creating animation.
- Playback and Timing: Use the timeline to play back your animation and adjust the timing. This can involve moving keyframes closer or further apart to speed up or slow down movements.
- Adding In-Betweens: For smoother animations, add in-between frames (tweens) to refine the movement between keyframes.
- Using the Graph Editor: For more control over the animation, use Blender\"s Graph Editor to adjust the interpolation curves between keyframes, allowing for more nuanced animations.
- Looping Animations: For actions that need to repeat, such as walking, ensure your start and end keyframes create a seamless loop.
- Exporting Your Animation: Once satisfied, you can export your animation for use in games, films, or online. Blender supports exporting to various formats, including FBX and OBJ for animation.
Animating a rigged model is a rewarding process that brings your creations to life. With practice, you can achieve complex animations that convey emotions and tell stories through your characters.
READ MORE:
Resources for Further Learning
Mastering rigging in Blender is an ongoing journey. Here are some invaluable resources to further your learning and enhance your skills:
- Blender Studio: Offers official tutorials and resources, including a comprehensive introduction to rigging in Blender.
- Rigging Dojo: Provides specialized training in character rigging, including free and paid resources that cater to various skill levels.
- CG Masters: A platform offering both paid courses and free tutorials on Blender, including detailed guides on rigging.
- BlenderNation: Features tutorials, articles, and project showcases, including insights into advanced rigging techniques.
- Blender Artists Forum: A community forum where you can ask questions, share experiences, and get feedback from fellow Blender users.
- YouTube: Hosts countless tutorials from experienced riggers and animators, ranging from beginner to advanced levels.
- Udemy: Offers comprehensive courses on Blender, including detailed sections on rigging and animation for beginners and advanced users.
Exploring these resources will provide you with a wealth of knowledge and practical tips to tackle any rigging challenge in Blender. Continuous learning and practice are key to becoming proficient in rigging and animation.
Embark on a journey to master rigging in Blender, transforming your models into animated marvels. This guide equips you with the knowledge and techniques to bring your creations to life. Dive in and unleash your potential!
_HOOK_


