Topic how to make a rig in blender: Embark on a journey to bring your 3D characters to life with our guide on "How to Make a Rig in Blender," perfect for animators and artists eager to master the art of rigging in the digital world.
Table of Content
- Introduction to Rigging
- Introduction to Rigging in Blender
- Essential Tools and Interface Overview
- How to create a rig in Blender?
- YOUTUBE: Learn Blender Rigging and Animation in 1 Minute
- Step-by-Step Guide to Creating Your First Rig
- Advanced Techniques for Character Rigging
- Weight Painting and Vertex Groups Explained
- Using Inverse Kinematics for Realistic Movement
- Adding Constraints for Enhanced Control
- Facial Rigging: Bringing Characters to Life
- Tips for Rigging Non-Humanoid Characters
- Common Rigging Problems and Solutions
- Resources for Further Learning
Introduction to Rigging
Rigging in Blender is like creating a skeleton for your 3D mesh, allowing you to rotate and modify bones to animate the mesh. It starts with a central root bone from which branches extend to the shoulders, elbows, wrists, and similarly for the legs, with a separate bone for the neck.
Setting Up Your Model
- Ensure your model is positioned correctly in the scene, ideally with its feet aligned to the scene\"s ground plane.
- Combine all model parts into a single mesh if necessary, and adjust normals for better rigging.
- Set the model\"s origin to its base for more natural rotations.
Creating the Armature
Begin by adding an armature to the center of your model\"s torso and enable X-ray mode to make it visible through the model. This initial bone is the root of your rig.
- Extend bones from the root to the neck and head by selecting the top of the root bone and pressing E to extrude a new bone.
- Add bones for the spine by extruding downwards from the bottom of the root bone.
- For arms and legs, start extruding bones from the chest and hips, respectively, to create a complete skeleton.
Refining the Armature
After the basic skeleton is set up, refine it by adjusting bone placement, ensuring symmetry, and naming bones correctly for easier animation. Use Blender\"s mirroring functionality to create symmetrical arm and leg bones, and adjust their size and rotation to fit your model\"s anatomy.
Final Steps
With the armature in place, you can further refine your rig by adding constraints and using shape keys for facial animations or detailed movement. Blender offers a comprehensive set of tools for rigging, including automatic skinning, weight painting, and inverse kinematics for more natural movements.
Remember, practice and experimentation are key to mastering rigging in Blender. Start with simple models and progressively tackle more complex characters to build your skills.

READ MORE:
Introduction to Rigging in Blender
Rigging in Blender is a foundational skill for animators and 3D artists, allowing the creation of movable and posable characters. It involves setting up a skeleton, or armature, inside a model so that it can be animated. This process transforms static models into dynamic, animation-ready figures.
- Understanding the Basics: Rigging is about creating bones and assigning them to control different parts of your model. This setup is crucial for achieving realistic movement.
- Armature Setup: Begin with adding an armature object to your scene. This serves as the skeleton for your model.
- Bone Placement: Position bones strategically throughout your model, mirroring human anatomy or the desired movement structures of fantastical creatures.
- Parenting and Weight Painting: Connect your model to the armature through parenting and use weight painting to specify how much influence each bone has on different parts of the mesh.
- Animating Your Model: Once rigged, your model is ready for animation. Bones can be manipulated to pose the model, and keyframes can be set to create movement over time.
Rigging in Blender opens up endless possibilities for animating characters and objects. Whether you\"re creating a short film, a video game, or any digital content, mastering rigging is a step towards bringing your creations to life.
- For beginners, starting with simple models is recommended to grasp the basics of bone creation and manipulation.
- Exploring Blender\"s rigging tools can help you discover advanced techniques such as inverse kinematics, facial rigging, and more.
- Practice is key. Try rigging various types of characters and objects to build your skills.
Rigging might seem daunting at first, but with patience and practice, it becomes a powerful tool in the animator\"s toolkit. Embrace the learning curve, and you\"ll soon be able to bring any character to life with natural and complex movements.
Essential Tools and Interface Overview
Blender\"s comprehensive suite of tools and its intuitive interface make rigging accessible for artists of all levels. Understanding the interface and the roles of key tools is crucial for efficient rigging.
- 3D Viewport: The main area where you interact with your model. It\"s where you\"ll spend most of your time rigging and animating.
- Armature: The toolset for creating bones. Access it through the Add menu in the 3D Viewport.
- Bone Editing: Edit Mode allows for the manipulation of bones within the armature, crucial for setting up your rig correctly.
- Weight Painting: This mode enables you to define how much influence each bone has on different parts of the mesh, essential for smooth animations.
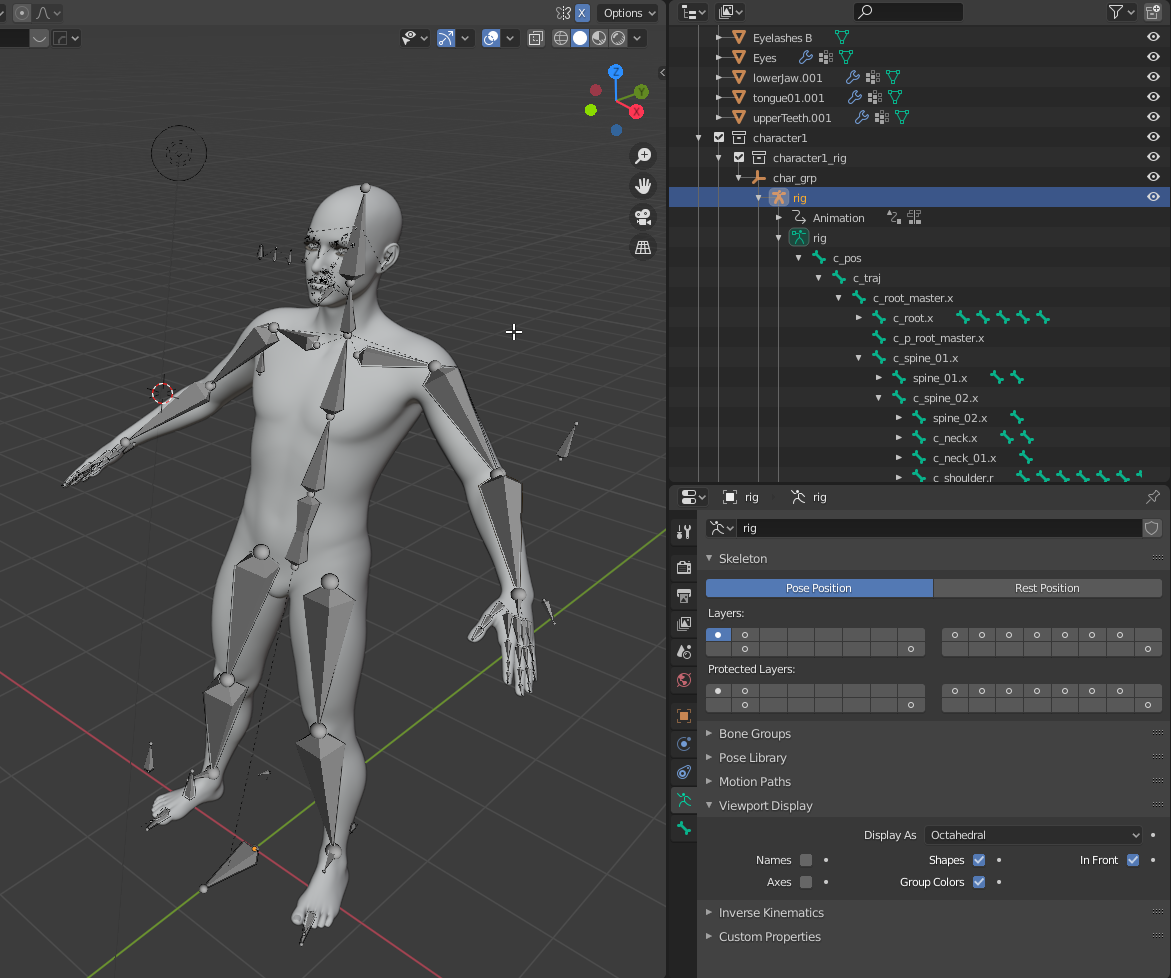
- Properties Panel: Contains data related to the active object or scene. This is where you can fine-tune the armature and bone properties.
- Outliner: Provides a hierarchical view of all scene objects, making it easy to select and manage the components of your rig.
Getting comfortable with these tools and the Blender interface will streamline the rigging process, allowing you to focus more on the creative aspects of your project.
- Start by adding an armature to your model and begin placing bones in Edit Mode.
- Switch to Weight Paint Mode to attach the mesh to the armature and define bone influence.
- Use the Properties Panel to adjust bone constraints and armature settings for optimal control during animation.
Remember, the key to mastering rigging in Blender is practice. Familiarize yourself with these tools, experiment with different techniques, and you\"ll be well on your way to creating dynamic and believable animations.
How to create a rig in Blender?
To create a rig in Blender, follow these steps:
- Open Blender and import your character model.
- Select the armature object from the Add menu (Shift + A) and choose \"Armature\".
- Position the armature at the center of your character model and scale it to fit.
- In Edit mode, add bones to the armature by extruding (E) from the existing bone structure.
- Name your bones appropriately (e.g. \"arm.L\", \"leg.R\", etc.) for easy identification.
- Adjust the bone positions and orientations to match the joints of your character.
- Apply constraints to the bones for realistic movement (e.g. IK constraint for limbs).
- Parent your character mesh to the armature with automatic weights for initial skinning.
- Test the rig by moving the bones in Pose mode to ensure the mesh deforms correctly.
- Refine the weights of the mesh by painting them in Weight Paint mode for better deformation.
- Add control objects (e.g. IK/FK switches, custom shapes) to make animating easier.
- Set up a control rig if needed for advanced animation controls.
- Save your rig as a separate file for reuse in future projects.
Learn Blender Rigging and Animation in 1 Minute
For the keyword \"Speed\": \"Get ready to be amazed by the thrilling display of speed in this video! From high-speed races to adrenaline-pumping stunts, this video will leave you at the edge of your seat.\" For the keyword \"Character\": \"Dive into a world filled with captivating characters in this video! Explore the depth of emotions, the complexity of relationships, and the journey of self-discovery through each unique character\'s story.\"
Blender Completely Rigging A Character 5 MINUTES
Alright, today I\'ll show you the ENTIRE rigging process for a game-ready character from scratch to finish, WITH advanced features ...
Step-by-Step Guide to Creating Your First Rig
Creating a rig in Blender is a pivotal skill for animators, allowing you to bring characters to life with realistic movements. Follow this detailed, step-by-step guide to create your first rig and embark on the path to animation mastery.
- Prepare Your Model: Ensure your 3D model is ready for rigging. This means it should be fully modeled, textured, and cleaned up of any unnecessary vertices.
- Add an Armature: Go to the Add menu, select Armature, and place the first bone at the base of your model. This will serve as the root bone.
- Edit Mode for Bones: Enter Edit Mode to adjust your bones\" length and orientation. Place bones according to the major articulations of your model, like the spine, arms, and legs.
- Name Your Bones: For clarity and ease of animation, name your bones according to their location and function (e.g., \"spine_lower,\" \"arm_left_upper\").
- Parent Mesh to Armature: Select your mesh, shift-select the armature, press Ctrl+P, and choose \"With Automatic Weights\" for Blender to automatically assign vertex groups to bones.
- Adjust Weight Paint: Enter Weight Paint mode to fine-tune the influence each bone has on the mesh. Areas in red indicate more influence, while blue areas indicate less.
- Test Your Rig: Pose your rig by selecting the armature, switching to Pose Mode, and moving individual bones to ensure they deform the mesh as expected.
- Add Constraints: For more advanced control, add constraints to your bones for actions like inverse kinematics, which simplifies the animation of limbs.
Creating your first rig can be a challenging but rewarding process. With practice, you\"ll be able to rig anything from simple characters to complex creatures. Remember, the key to successful rigging is understanding how your model should move and translating that into a functional bone structure.
_HOOK_
Advanced Techniques for Character Rigging
Mastering advanced rigging techniques in Blender elevates your characters from simple animations to complex, lifelike beings. Explore these methods to enhance your rigging process and bring unparalleled realism and flexibility to your animations.
- Inverse Kinematics (IK): IK simplifies the animation of limbs by allowing for natural movements with fewer controls. Set up IK chains for arms and legs to make posing characters more intuitive.
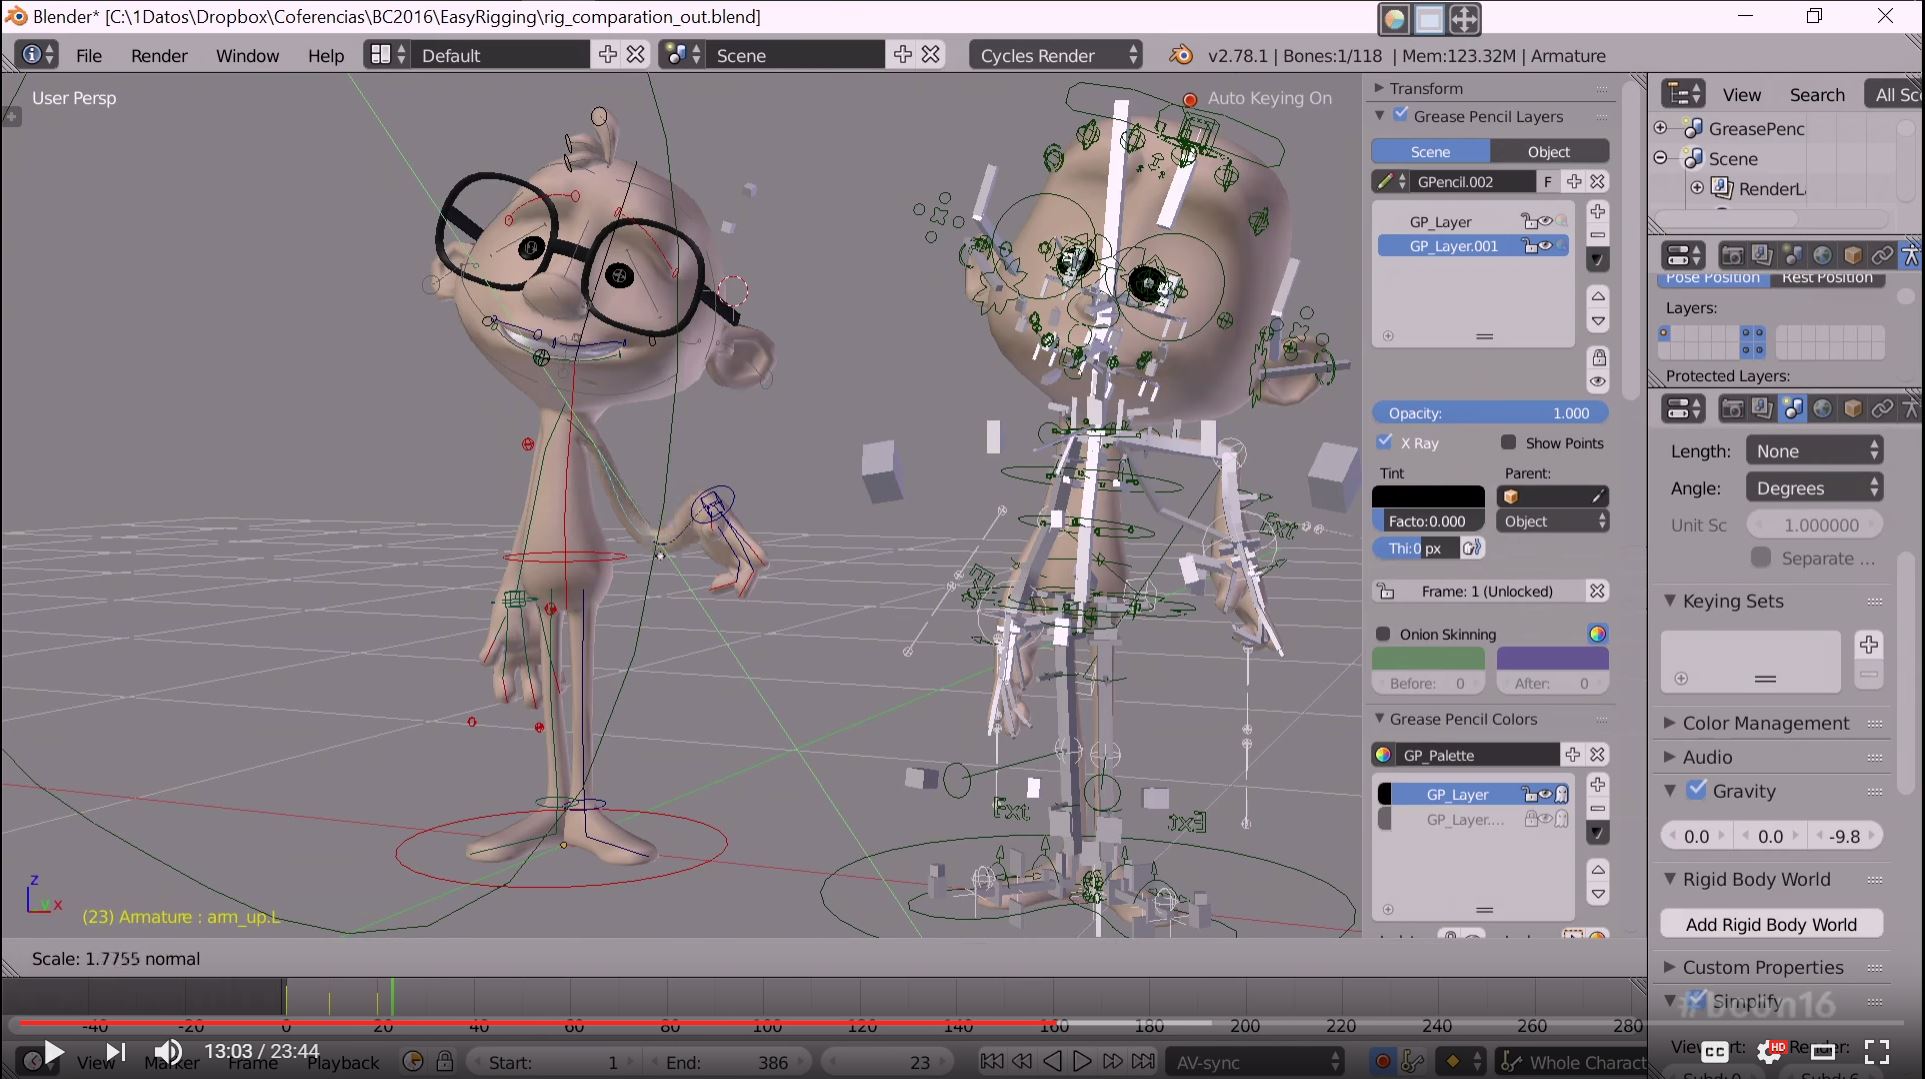
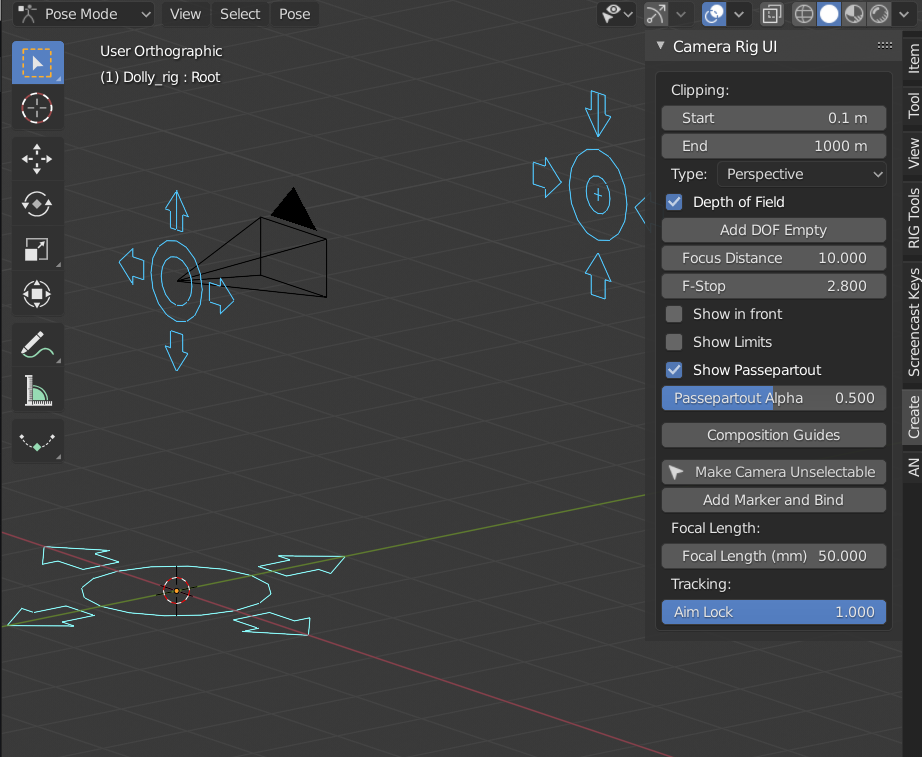
- Custom Bone Shapes: Replace generic bone visuals with custom shapes for a clearer, more user-friendly rig. This technique is especially useful for complex rigs with many controls.
- Facial Rigging: Use a combination of bones and shape keys to create expressive facial animations. This allows for detailed control over facial expressions, lip sync, and more.
- Driver-Based Controls: Drivers offer a way to automate movements and transformations based on other actions within your rig. They\"re perfect for creating complex, interconnected motions.
- Rig Layers and Groups: Organize your rig into layers and groups for easier management and animation. This is crucial for large, complex rigs with multiple components.
- Constraints for Dynamic Movements: Utilize constraints to limit or automate movements and transformations. Constraints can help simulate physical laws or create rigs that react to the environment or other characters.
By incorporating these advanced techniques into your rigs, you can achieve more dynamic, flexible, and realistic character animations. Each method requires practice and experimentation, so be patient and explore the vast capabilities of Blender to discover what works best for your project.

Weight Painting and Vertex Groups Explained
Weight painting and vertex groups are crucial components of rigging in Blender, providing the means to control how bones influence different parts of the mesh. Understanding these concepts is key to creating realistic and flexible animations.
- Understanding Vertex Groups:
- Vertex groups are collections of vertices that you can assign to specific bones.
- Each group is weighted to control the influence a bone has on the vertices within that group.
- They allow for precise control over the deformation of the mesh when it\"s posed.
- Introduction to Weight Painting:
- Weight painting is a visual method to adjust the influence bones have on the mesh.
- Vertices are colored from blue (no influence) to red (full influence), indicating the weight of the bone\"s effect.
- This method is highly intuitive, allowing for direct manipulation of weights on the model.
- Applying Vertex Groups and Weight Painting:
- Select your rigged mesh and switch to Weight Paint mode.
- Choose a bone to work with. The mesh will visually indicate the current weight distribution for that bone.
- Use the brush tools to paint weights onto the mesh, adjusting the influence of the bone.
- Create and assign vertices to groups in Edit mode for finer control over specific areas.
- Tips for Effective Weight Painting:
- Start with automatic weights and refine manually using weight painting.
- Use the Blur brush to smooth transitions between weighted and non-weighted areas.
- Regularly switch between Pose Mode and Weight Paint mode to test deformations.
Mastering weight painting and vertex group assignment is essential for creating realistic character movements. These techniques provide the foundation for detailed and nuanced control over how your model deforms in response to bone movements, enhancing the believability of your animations.
Using Inverse Kinematics for Realistic Movement
Inverse Kinematics (IK) is a powerful feature in Blender that allows for more natural and realistic movements in animation. IK simplifies the animation process by enabling the end effector of a chain of bones to drive the movements of the entire chain, making it indispensable for animating limbs and other appendages.
- Understanding Inverse Kinematics: Unlike forward kinematics (FK), where each bone in a chain is rotated individually, IK allows you to move the last bone in the chain, and the system calculates how the other bones should move to accommodate this.
- Setting Up IK:
- Select the bone where you want the IK effect to end, typically a hand or foot bone.
- With the bone selected, go to the Bone Constraints tab and add an Inverse Kinematics constraint.
- Specify the target and pole target to control the direction and rotation of the IK chain.
- Adjusting IK Properties:
- Chain Length determines how many bones up the chain the IK effect will influence.
- Use Pole Angle to adjust the bending direction of the IK chain to match your animation needs.
- Experiment with stiffness and IK limits to constrain the movement for more natural results.
- Animating with IK: Move and rotate the target to pose the IK chain. The rest of the bones in the chain will automatically position themselves to meet the target, facilitating easier and more intuitive character posing.
Implementing IK in your rigging workflow can significantly enhance the realism and efficiency of your animations. It allows for more dynamic posing and movement, especially for complex actions like walking or grabbing objects. Mastering IK takes practice, but it is an essential skill for any aspiring 3D animator.

Adding Constraints for Enhanced Control
Constraints in Blender are essential tools for refining and controlling the behavior of your rig, allowing for more sophisticated and precise animations. By defining how bones and objects relate to each other, constraints enable animators to create more complex and dynamically interactive movements.
- Types of Constraints:
- IK (Inverse Kinematics) Constraints: Simplify limb movement by controlling the end effector.
- Copy Rotation/Location/Scale: These constraints make a bone or object mimic the movement of another.
- Limit Rotation/Location/Scale: Restrict movements to certain degrees, helping maintain realism.
- Track To and Damped Track: Make an object or bone point towards another, useful for eyes or tracking targets.
- Applying Constraints:
- Select the bone or object you wish to apply a constraint to.
- In the Properties panel, go to the Constraints tab.
- Click \"Add Constraint\" and choose the type of constraint you need.
- Adjust the settings of the constraint to achieve the desired effect.
- Using Constraints Effectively:
- Combine multiple constraints for complex effects, such as a character looking around while walking.
- Use constraints to automate secondary movements, like the swinging of a tail or the bounce of hair.
- Experiment with constraint settings to find the best setup for your specific animation needs.
Adding constraints to your Blender rigs enhances both the control and quality of your animations, enabling you to achieve more realistic and complex movements with less manual keyframing. Understanding and mastering the use of constraints can significantly improve your rigging and animation workflow.

Facial Rigging: Bringing Characters to Life
Facial rigging in Blender is a nuanced process that breathes life into characters, enabling them to convey emotions and speak. This detailed guide will walk you through the basics of creating a facial rig that allows for a wide range of expressions.
- Understanding Facial Rigging: Facial rigging involves creating a series of bones (or using shape keys) that control the facial features. This can include the eyebrows, eyes, mouth, and jaw.
- Creating Bones for Facial Features:
- Start by adding small bones around the key areas of the face that you want to animate, such as the eyebrows, eyelids, corners of the mouth, and jaw.
- Ensure these bones are properly parented to the head bone so they move correctly with the rest of the head.
- Using Shape Keys for Detailed Expressions:
- Shape keys allow for precise control over mesh deformations, enabling subtle facial expressions.
- Create shape keys for different facial expressions (smile, frown, surprise, etc.) and control these through sliders in the UI.
- Weight Painting for Facial Bones: Carefully weight paint the influence of each bone on the face, ensuring smooth deformations for natural expressions.
- Setting Up Drivers: Drivers can be used to control shape keys or bone properties, enabling complex animations from simple controls. For example, a driver could link the rotation of an eye bone to the dilation of a pupil shape key.
- Animating the Face: With the rig set up, animate your character’s face by keyframing the bones and shape keys. Pay attention to natural movements and expressions to bring your character to life.
Facial rigging is an art form that requires patience and practice. By mastering the techniques of bone and shape key animation, you can create characters that express a wide range of emotions, adding depth and realism to your animations.
_HOOK_
Tips for Rigging Non-Humanoid Characters
Rigging non-humanoid characters in Blender presents unique challenges due to their diverse shapes and anatomies. Whether you\"re working on animals, fantastical creatures, or mechanical constructs, these tips will help you create effective and functional rigs.
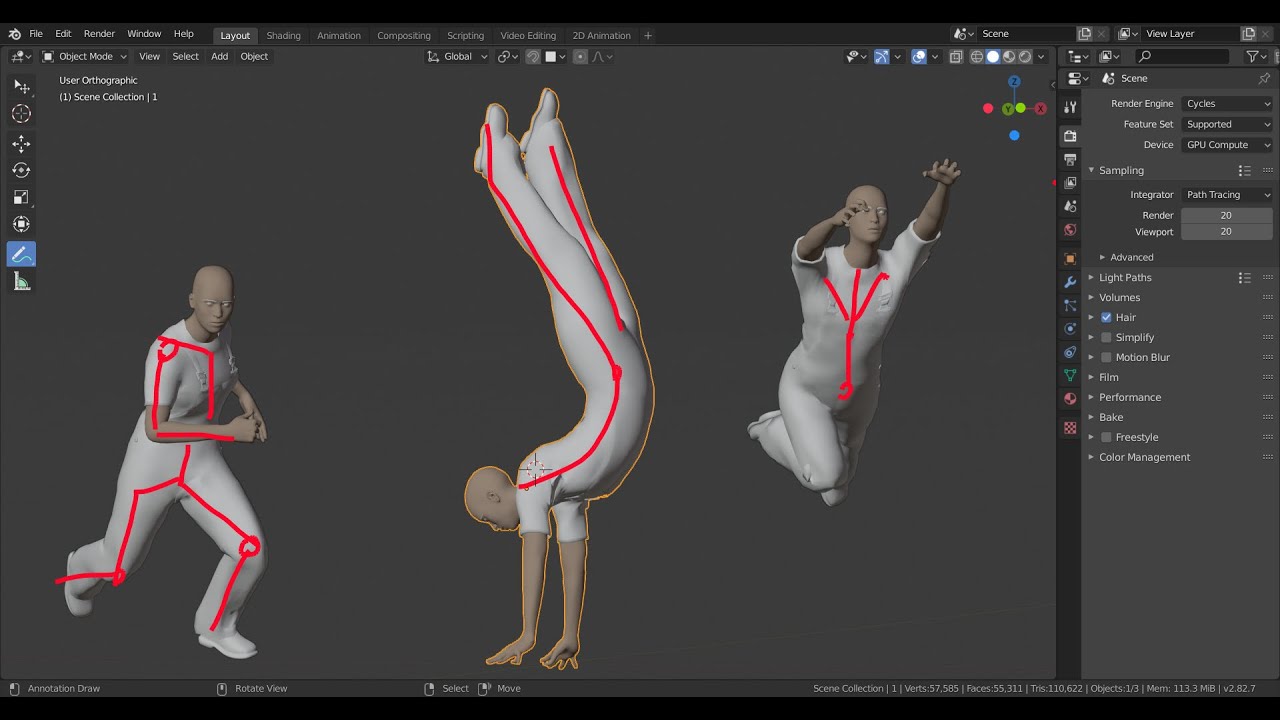
- Analyze the Anatomy: Even if your character is fantastical, understanding real-world anatomy can inform your rigging decisions. Consider how similar creatures move and structure their rigs accordingly.
- Start with Basic Bones: Begin by placing basic bones in key structural areas. For creatures with tails or tentacles, additional bones will be needed for smooth movements.
- Use Custom Bone Shapes: Custom bone shapes can help you keep track of your rig, especially in complex or unusual anatomies where standard bone shapes might not be intuitive.
- Employ IK for Limbs: Inverse Kinematics (IK) is particularly useful for non-humanoid limbs, providing more natural movements with less effort. IK can be essential for characters with many legs or long appendages.
- Experiment with Constraints: Constraints can automate movements and make your rig more manageable. They\"re especially useful for wings, tails, and other parts that move in predictable patterns.
- Consider Shape Keys for Facial Expressions: For characters with non-standard faces, shape keys can offer more control over expressions than bones alone.
- Test Rig Extensively: Non-humanoid characters might move in unexpected ways, so it\"s crucial to test your rig thoroughly to ensure it behaves as intended.
Each non-humanoid character will present unique challenges, so flexibility and creativity are key to successful rigging. By applying these tips and continuing to refine your techniques, you can bring even the most unusual characters to life.

Common Rigging Problems and Solutions
Rigging in Blender can be a complex process, often leading to a variety of challenges. Understanding these common problems and their solutions can help streamline your rigging workflow and improve the quality of your animations.
- Problem: Weight Painting Difficulties
- Solution: Use the Subtract brush to reduce the influence of bones on unintended areas of the mesh. Additionally, smooth the weights for more natural deformations.
- Problem: Bones Not Deforming Mesh Correctly
- Solution: Ensure that the armature modifier is correctly applied to the mesh and that the bones are properly parented. Check weight assignments in Weight Paint mode.
- Problem: Inverse Kinematics (IK) Constraints Not Behaving as Expected
- Solution: Verify the chain length of your IK constraint. Adjust the pole target and pole angle for correct bending. Ensure that the IK bones are correctly set up in the chain.
- Problem: Unwanted Twisting in Bones
- Solution: This issue often arises from incorrect roll values in Edit Mode. Use the Recalculate Roll feature (Ctrl+N in Edit Mode) to align bone rolls consistently.
- Problem: Rig Performance Issues
- Solution: For complex rigs, consider simplifying your armature by merging bones or using fewer deform bones. Utilize Blender\"s Simplify option to reduce viewport lag.
- Problem: Difficulty Posing Fingers or Small Appendages
- Solution: Create custom bone shapes or use rigging widgets for better control. Consider adding additional control bones for fine-tuned movements.
While rigging in Blender can present numerous challenges, most issues can be resolved with a better understanding of the software\"s tools and features. Experimentation and practice are key to developing effective solutions to these common problems.
READ MORE:
Resources for Further Learning
Mastering rigging in Blender is a journey of continuous learning and practice. Here are some invaluable resources that can help you expand your knowledge and skills in rigging and animation.
- Blender Official Documentation: The Blender Manual offers comprehensive guides on every aspect of Blender, including detailed sections on rigging and animation.
- Blender Artists Community: An active online forum where Blender users share tips, ask questions, and showcase their work. It\"s a great place to find help and inspiration.
- Blender Guru: A well-known Blender educator who offers tutorials covering a wide range of topics, including rigging.
- CG Cookie: Offers professional tutorials on Blender, including rigging and animation, suitable for both beginners and advanced users.
- YouTube Channels: Many YouTube channels provide free Blender tutorials. Searching for \"Blender rigging tutorial\" will yield numerous results, with content creators ranging from hobbyists to professional animators.
- Blender Network: Professional training and networking platform for Blender users. It\"s a great place to find courses and workshops, some of which are focused on rigging and character animation.
- Books: There are several books dedicated to mastering Blender, which include sections on rigging. Titles such as \"Blender 3D Cookbook\" and \"Learning Blender: A Hands-On Guide to Creating 3D Animated Characters\" can be particularly helpful.
Engaging with the community, following tutorials, and practicing regularly are key to becoming proficient in rigging with Blender. These resources provide a solid foundation for your learning journey.
Embarking on the rigging journey in Blender opens up a world of creativity and technical skill, empowering you to bring your 3D characters to life. With practice, patience, and the resources outlined, you\"ll master the art of animation, making your digital creations move and express in ways you\"ve only imagined.