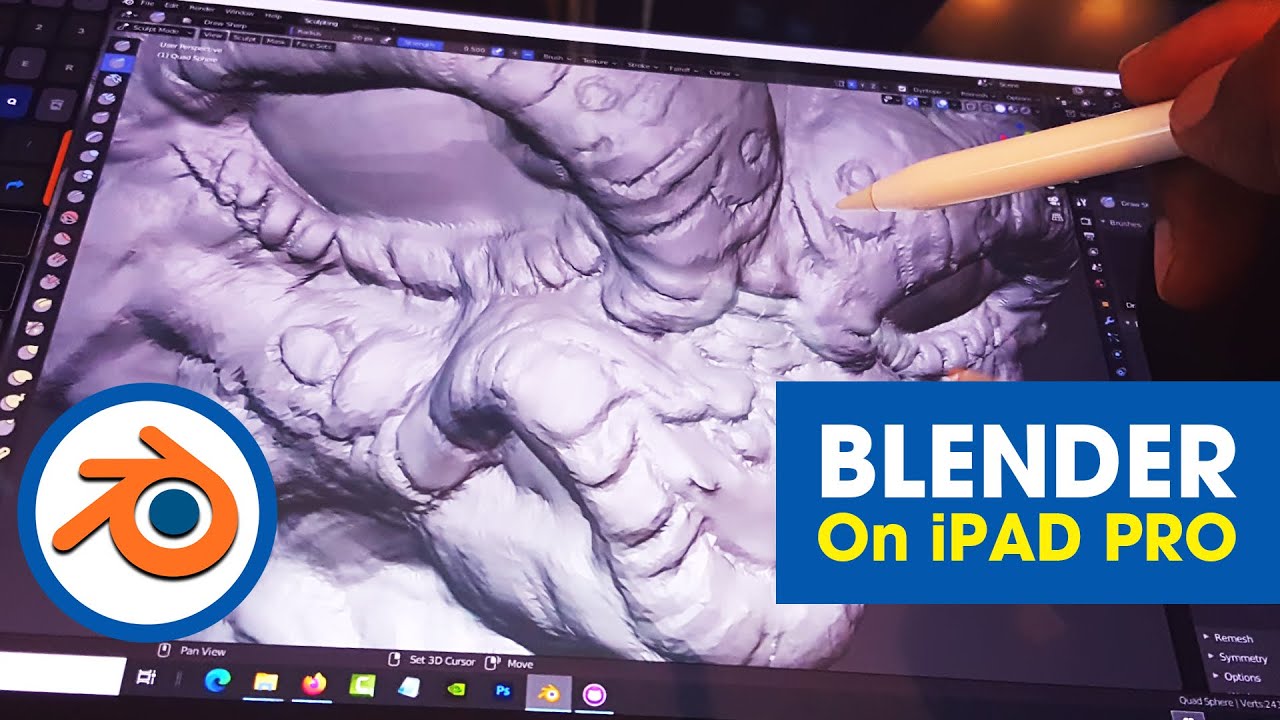
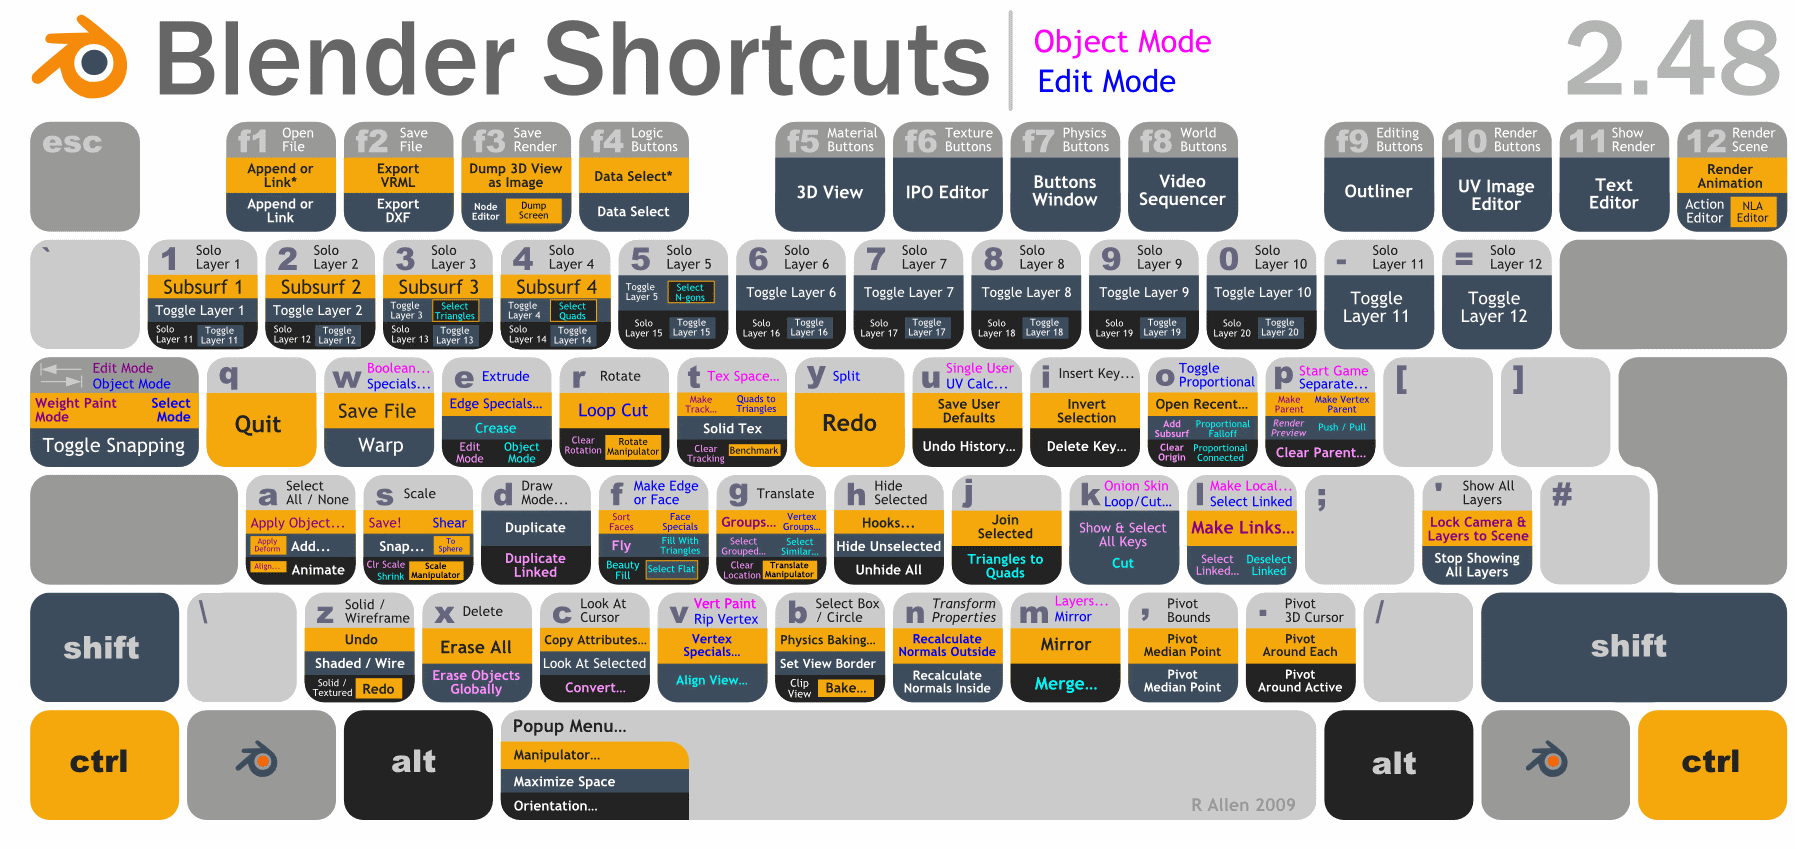
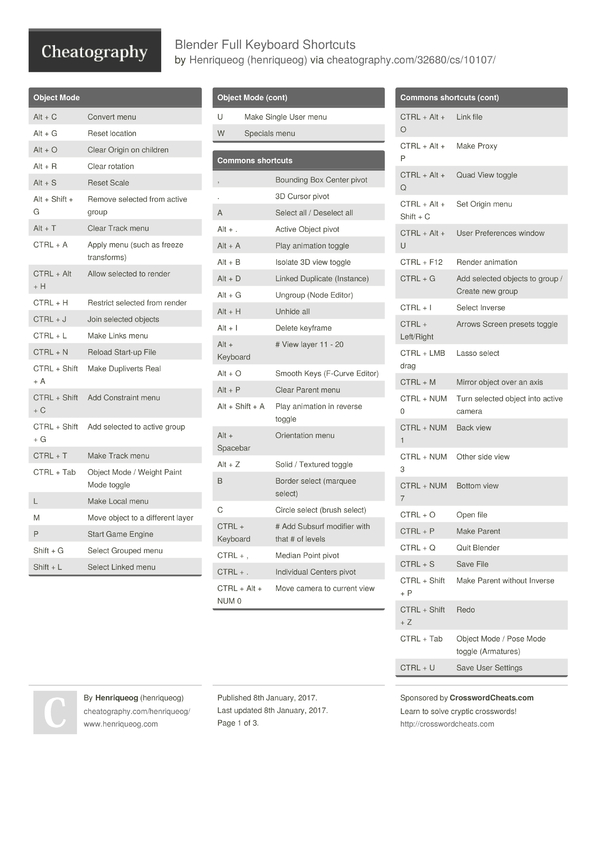
Topic blender hotkeys cheat sheet: Discover the ultimate Blender hotkeys cheat sheet, designed to elevate your 3D modeling and animation workflow to new heights of efficiency and creativity.
Table of Content
- What are the most commonly used Blender hotkeys included in a cheat sheet?
- General Shortcuts
- Modeling Shortcuts
- Viewport Navigation
- Animation Shortcuts
- Rendering Shortcuts
- Edit Mode Shortcuts
- Modeling Shortcuts
- Viewport Navigation
- Animation Shortcuts
- Rendering Shortcuts
- YOUTUBE: Blender Shortcuts Cheat Sheet Shorts
- Edit Mode Shortcuts
- Viewport Navigation
- Animation Shortcuts
- Rendering Shortcuts
- Edit Mode Shortcuts
- Animation Shortcuts
- Rendering Shortcuts
- Edit Mode Shortcuts
- Rendering Shortcuts
- Edit Mode Shortcuts
- Edit Mode Shortcuts
- Introduction to Blender Hotkeys
- Top Essential General Shortcuts for Beginners
- Advanced Modeling Shortcuts for Efficiency
- Viewport Navigation: Rotate, Pan, and Zoom Like a Pro
- Animation and Timeline Control Shortcuts
- Rendering Shortcuts: From Scenes to Final Outputs
- Edit Mode Mastery: Vertex, Edge, and Face Shortcuts
- Customizing Your Workflow with Quick Favorites
- Additional Tips for Using Hotkeys in Blender
- Conclusion: Integrating Hotkeys into Your Creative Process
What are the most commonly used Blender hotkeys included in a cheat sheet?
To create a cheat sheet for Blender hotkeys, include the following commonly used shortcuts:
- General:
- Ctrl + S - Save
- Ctrl + Shift + S - Save As
- Ctrl + Z - Undo
- Ctrl + Shift + Z - Redo
- Manipulation:
- G - Grab (move)
- R - Rotate
- S - Scale
- X, Y, Z - Lock movement to an axis
- Viewport:
- Numpad 1, 3, 7 - Front, Side, Top view
- Numpad 5 - Toggle between perspective and orthographic view
- Shift + ~ - Toggle camera view
- Modeling:
- E - Extrude
- Ctrl + R - Loop cut
- Alt + M - Merge
READ MORE:
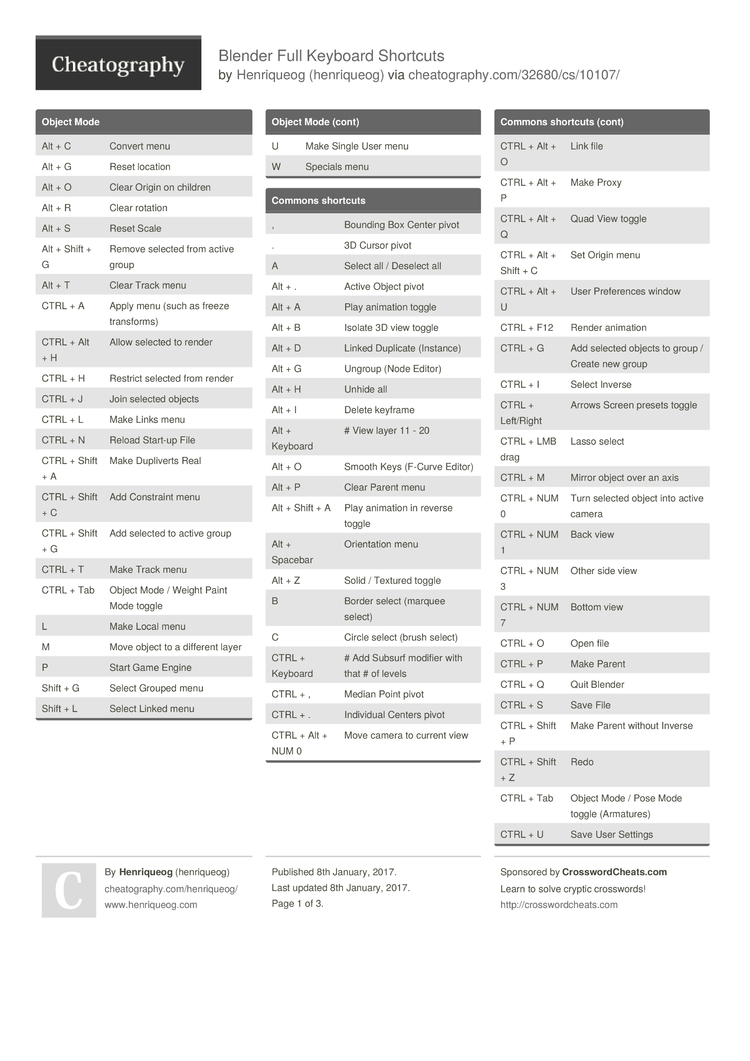
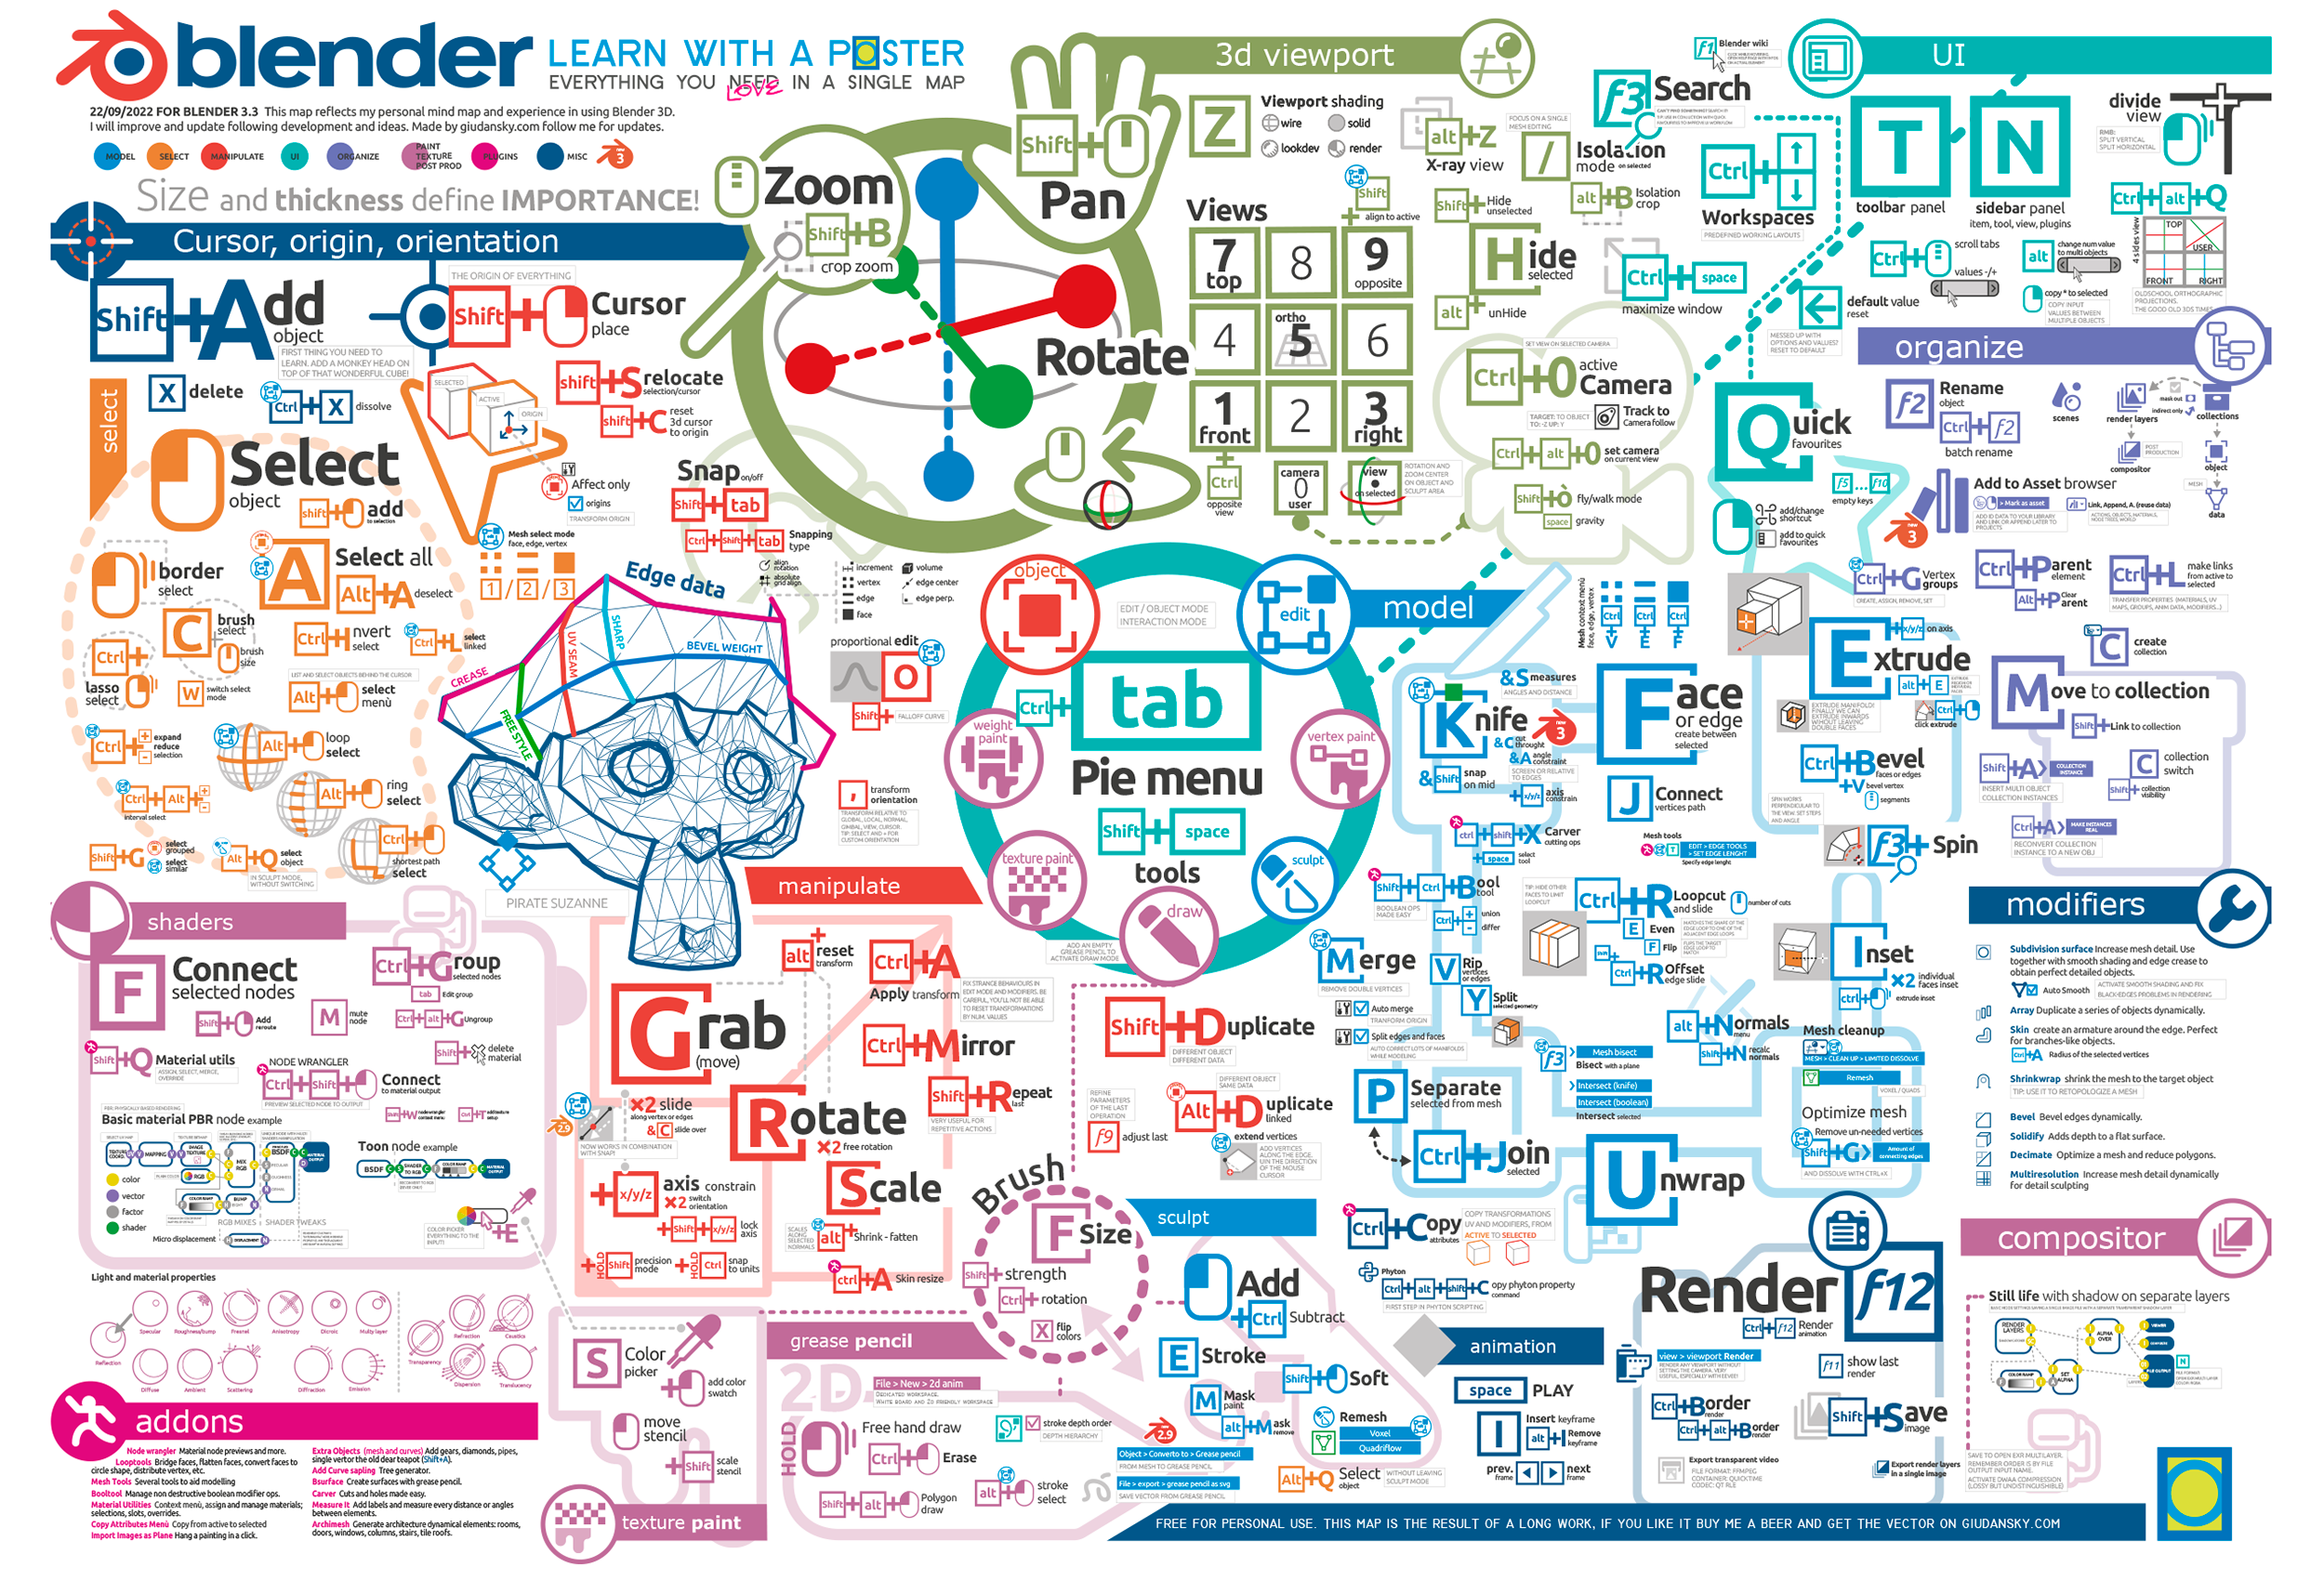
General Shortcuts
- Shift + A: Add menu
- Tab: Toggle between Edit and Object mode
- G: Grab/Move
- R: Rotate
- S: Scale
- Z: Shading menu
- F3: Search for function
- Ctrl + Z: Undo
- Ctrl + Shift + Z: Redo

Modeling Shortcuts
- Ctrl + R: Loop cut
- E: Extrude
- F: Create face/edge
- I: Inset
- X: Delete menu
Viewport Navigation
- Shift + Middle Mouse Button (MMB): Pan
- Scroll Wheel Up/Down: Zoom in/out
- MMB (drag): Rotate view
- Numpad 1, 3, 7: Front, Right, Top view
- Numpad 5: Toggle between Orthographic and Perspective view
Animation Shortcuts
- Space: Play/Pause Animation
- Shift + Left Arrow: Jump to Start Frame
- Shift + Right Arrow: Jump to End Frame
- Right Arrow: Next Frame
- Left Arrow: Previous Frame

_HOOK_
Rendering Shortcuts
- F12: Render Image
- F11: Show Last Render
- Ctrl + F12: Render Animation

Edit Mode Shortcuts
- Ctrl + E: Edge menu
- Ctrl + V: Vertex menu
- Ctrl + F: Face menu
Quick Favorites
To customize your workflow, you can add frequently used tools and shortcuts to the Quick Favorites menu by right-clicking on them and selecting \"Add to Quick Favorites\".
Modeling Shortcuts
- Ctrl + R: Loop cut
- E: Extrude
- F: Create face/edge
- I: Inset
- X: Delete menu
Viewport Navigation
- Shift + Middle Mouse Button (MMB): Pan
- Scroll Wheel Up/Down: Zoom in/out
- MMB (drag): Rotate view
- Numpad 1, 3, 7: Front, Right, Top view
- Numpad 5: Toggle between Orthographic and Perspective view
Animation Shortcuts
- Space: Play/Pause Animation
- Shift + Left Arrow: Jump to Start Frame
- Shift + Right Arrow: Jump to End Frame
- Right Arrow: Next Frame
- Left Arrow: Previous Frame
_HOOK_
Rendering Shortcuts
- F12: Render Image
- F11: Show Last Render
- Ctrl + F12: Render Animation

Blender Shortcuts Cheat Sheet Shorts
Shortcuts: Discover time-saving shortcuts that will revolutionize the way you work! Unlock the power of efficiency and productivity with these quick and easy tips in our video. Watch now and say goodbye to unnecessary wasted time! MASTER: Become a master of your craft with our expert-led video tutorial! Uncover advanced techniques, insider tips, and top strategies to elevate your skills to the next level. Don\'t miss out on the opportunity to enhance your expertise - watch now!
MASTER Blender Hotkeys In 2 Minutes
Why waste your time memorizing hotkeys instead of the 1 key to rule them all?? Learn everything you need to optimize your ...
Edit Mode Shortcuts
- Ctrl + E: Edge menu
- Ctrl + V: Vertex menu
- Ctrl + F: Face menu
Quick Favorites
To customize your workflow, you can add frequently used tools and shortcuts to the Quick Favorites menu by right-clicking on them and selecting \"Add to Quick Favorites\".
Viewport Navigation
- Shift + Middle Mouse Button (MMB): Pan
- Scroll Wheel Up/Down: Zoom in/out
- MMB (drag): Rotate view
- Numpad 1, 3, 7: Front, Right, Top view
- Numpad 5: Toggle between Orthographic and Perspective view
Animation Shortcuts
- Space: Play/Pause Animation
- Shift + Left Arrow: Jump to Start Frame
- Shift + Right Arrow: Jump to End Frame
- Right Arrow: Next Frame
- Left Arrow: Previous Frame
Rendering Shortcuts
- F12: Render Image
- F11: Show Last Render
- Ctrl + F12: Render Animation
_HOOK_
Edit Mode Shortcuts
- Ctrl + E: Edge menu
- Ctrl + V: Vertex menu
- Ctrl + F: Face menu
Quick Favorites
To customize your workflow, you can add frequently used tools and shortcuts to the Quick Favorites menu by right-clicking on them and selecting \"Add to Quick Favorites\".
Animation Shortcuts
- Space: Play/Pause Animation
- Shift + Left Arrow: Jump to Start Frame
- Shift + Right Arrow: Jump to End Frame
- Right Arrow: Next Frame
- Left Arrow: Previous Frame
Rendering Shortcuts
- F12: Render Image
- F11: Show Last Render
- Ctrl + F12: Render Animation
Edit Mode Shortcuts
- Ctrl + E: Edge menu
- Ctrl + V: Vertex menu
- Ctrl + F: Face menu
Quick Favorites
To customize your workflow, you can add frequently used tools and shortcuts to the Quick Favorites menu by right-clicking on them and selecting \"Add to Quick Favorites\".
Rendering Shortcuts
- F12: Render Image
- F11: Show Last Render
- Ctrl + F12: Render Animation
_HOOK_
Edit Mode Shortcuts
- Ctrl + E: Edge menu
- Ctrl + V: Vertex menu
- Ctrl + F: Face menu
Quick Favorites
To customize your workflow, you can add frequently used tools and shortcuts to the Quick Favorites menu by right-clicking on them and selecting \"Add to Quick Favorites\".
Edit Mode Shortcuts
- Ctrl + E: Edge menu
- Ctrl + V: Vertex menu
- Ctrl + F: Face menu
Quick Favorites
To customize your workflow, you can add frequently used tools and shortcuts to the Quick Favorites menu by right-clicking on them and selecting \"Add to Quick Favorites\".
Introduction to Blender Hotkeys
Blender, a comprehensive open-source 3D creation suite, offers a plethora of functionalities from modeling and animation to rendering and post-production. Mastering Blender\"s hotkeys can significantly expedite your workflow, enhance productivity, and unlock a more intuitive design experience. This section delves into the essence of Blender hotkeys, providing a foundational understanding for both beginners and seasoned professionals aiming to streamline their creative process.
- Why Hotkeys Matter: Hotkeys allow for rapid access to tools and functions without navigating through menus, saving precious time and effort.
- Customization: Blender offers customizable hotkeys, enabling users to tailor the software to fit their workflow preferences.
- Common Hotkeys: A basic set of hotkeys serves as the backbone for most operations within Blender, including object manipulation, scene navigation, and mode switching.
- Learning Curve: While mastering hotkeys may seem daunting at first, regular practice can make them second nature, greatly enhancing your efficiency.
Embracing the power of hotkeys is a game-changer in leveraging Blender\"s full potential. This guide aims to equip you with the knowledge to navigate Blender\"s interface swiftly, making your 3D creation journey both enjoyable and productive.
Top Essential General Shortcuts for Beginners
Embarking on your Blender journey can be overwhelming, but mastering these essential general shortcuts will significantly enhance your efficiency and ease your learning curve. Here’s a list to get you started:
- Shift + A - Opens the Add menu to create new objects.
- Tab - Toggles between Edit and Object mode, essential for modeling.
- G - Activates the Grab tool, allowing you to move objects.
- R - Enables the Rotate tool for adjusting object orientation.
- S - Engages the Scale tool, letting you resize objects.
- Z - Displays the Shading menu to switch between Wireframe, Solid, Material, and Rendered views.
- F3 - Opens the Search function to quickly find tools and commands.
- Ctrl + Z - Undoes the last action, a lifesaver for correcting mistakes.
- Ctrl + Shift + Z - Redoes an action, helping you to recover steps if you\"ve gone too far back.
These shortcuts are the foundation of navigating and creating within Blender efficiently. Practice them regularly to build muscle memory and speed up your 3D modeling and animation workflows.
Advanced Modeling Shortcuts for Efficiency
Mastering advanced modeling shortcuts in Blender can significantly streamline your 3D modeling process, allowing for quicker adjustments and more complex designs with ease. Here are some essential shortcuts aimed at enhancing efficiency for experienced users.
- Ctrl + R: Loop Cut - Adds a loop cut to your mesh, enabling precise subdivision for detailed modeling.
- Shift + E: Edge Crease - Adjusts the sharpness of edges in subdivision surface modeling, allowing for tighter control over smoothing.
- Alt + M: Merge - Combines vertices, edges, or faces to simplify geometry or create specific shapes.
- F: Make Edge/Face - Creates an edge or face between selected vertices or edges, a fundamental tool for shaping your model.
- I: Inset Faces - Creates a new face inside the selected one(s), useful for adding complexity or detail to objects.
- Ctrl + B: Bevel - Applies a bevel to edges or vertices, softening shapes and adding realism to hard-surfaced models.
- Ctrl + Shift + B: Vertex Bevel - Specifically bevels vertices, offering additional modeling flexibility.
- K: Knife Tool - Allows for precision cuts across faces, invaluable for adding detail or correcting topology.
- Alt + Right Click: Select Edge Loop - Quickly selects loops of edges, speeding up workflow during modeling.
These shortcuts are just the beginning of what\"s possible with Blender. Integrating them into your workflow can dramatically reduce modeling time and open up new creative possibilities.
_HOOK_
Viewport Navigation: Rotate, Pan, and Zoom Like a Pro
Navigating the 3D viewport efficiently is crucial for a seamless modeling experience in Blender. Mastering these shortcuts will significantly speed up your workflow.
- Rotate View: Hold the Middle Mouse Button (MMB) and drag to rotate around your scene.
- Pan View: Shift + MMB and drag to move the view horizontally or vertically.
- Zoom: Scroll the Middle Mouse Wheel to zoom in or out. Alternatively, use Ctrl + MMB and drag up or down to zoom.
- View Selected: Press Numpad . (period) to center the view on the selected object or elements.
- Front, Side, Top Views: Use Numpad 1 for front view, Numpad 3 for right side view, and Numpad 7 for top view. Add Ctrl to each for the opposite view (back, left side, and bottom).
- Switch between Orthographic and Perspective View: Numpad 5 toggles between orthographic and perspective view, providing different angles for detailed editing or a broader scene overview.
These shortcuts are the foundation for navigating Blender\"s 3D space, allowing you to move smoothly and intuitively around your projects. With practice, you\"ll find your productivity and enjoyment of 3D modeling and animation greatly enhanced.
Animation and Timeline Control Shortcuts
Effective animation requires precise control over the timeline and keyframes. Master these Blender shortcuts to streamline your animation workflow and bring your projects to life with ease.
- Spacebar: Play/Pause the animation. A fundamental shortcut to quickly see your work in motion.
- Right Arrow: Move forward one frame. Perfect for fine-tuning animations.
- Left Arrow: Move backward one frame. Allows for detailed adjustments and review.
- Shift + Right Arrow: Jump to the last frame. Useful for checking the end of your animation.
- Shift + Left Arrow: Jump to the first frame. Quickly return to the beginning of your timeline.
- Alt + A (or Shift + Space in newer versions): Play the animation from the current frame. Adapts to your workflow, whether you\"re starting mid-timeline or from a custom point.
- I: Insert keyframe menu. This shortcut opens a menu to choose the type of keyframe (Location, Rotation, Scale, etc.), which is essential for creating animations.
- Shift + D: Duplicate keyframe. Copy and paste keyframes within the timeline to replicate movements or animations.
- G: Grab/move keyframes. Adjust the timing of your animation by moving keyframes along the timeline.
- S: Scale keyframes. This allows for stretching or compressing the timing of selected keyframes, adjusting the speed of animations.
By incorporating these shortcuts into your animation process, you can work more efficiently in Blender, allowing for a smoother creative process and more dynamic results.
Rendering Shortcuts: From Scenes to Final Outputs
Mastering rendering shortcuts in Blender can significantly streamline your workflow, from setting up scenes to generating final output. These shortcuts enable quick access to rendering functions, helping you to efficiently produce high-quality visual content. Here\"s a guide to essential rendering shortcuts in Blender:
- F12 - Start Render: Initiates the rendering process of the current scene.
- Ctrl + F12 - Start Animation Render: Begins rendering of an animation sequence, processing each frame as per the timeline settings.
- Shift + Z - Rendered Viewport Shading: Switches the viewport display to a rendered preview, allowing you to see the effects of lighting, materials, and shaders in real-time.
- Ctrl + B - Render Border: Enables rendering of a specific portion of the viewport scene. Draw a rectangle over the area you wish to render, which is particularly useful for focusing on details without rendering the entire scene.
- Ctrl + Alt + B - Clear Render Border: Removes the render border, reverting to full scene rendering.
- Ctrl + Shift + R - Render Region (in Camera view): Similar to Render Border, but used within the camera view for precise control over the final output area.
Integrating these shortcuts into your daily workflow can save time and enhance productivity, allowing you to focus more on creative aspects of your projects.
Edit Mode Mastery: Vertex, Edge, and Face Shortcuts
Blender\"s Edit Mode is where the magic happens for modeling, allowing detailed manipulation of vertices, edges, and faces. Mastering the shortcuts for these components can greatly enhance your efficiency. Below are key shortcuts designed to streamline your modeling process in Edit Mode:
- Tab - Toggle Edit Mode: Switch between Object Mode and Edit Mode.
- Ctrl + Tab - Mesh Select Mode: Opens a menu to switch between Vertex, Edge, and Face selection modes.
- A - Select/Deselect All: Toggles the selection of all elements in the current mode.
- B - Box Select: Allows selection of multiple elements within a rectangular region.
- C - Circle Select: Enables selection of elements within a circular area, which can be resized with the mouse scroll wheel.
- L - Select Linked: Selects all elements directly linked to the currently selected element.
- Ctrl + L - Select Linked (with options): Similar to L but provides options for the type of linkage criteria.
- Ctrl + I - Invert Selection: Selects all unselected elements and deselects currently selected elements.
- G - Grab/Move: Allows you to move selected elements.
- R - Rotate: Enables rotation of selected elements around a pivot point.
- S - Scale: Scales up or down the selected elements.
- E - Extrude: Creates new geometry connected to the selected elements and moves it based on mouse position.
- F - Make Face/Edge: Creates a face or edge from the selected vertices or edges.
- Ctrl + E - Edge Menu: Brings up a context menu with options specific to edge operations, such as Mark Seam, Clear Seam, etc.
- Ctrl + F - Face Menu: Opens a menu with face-specific operations like Make Normals Consistent.
- Ctrl + R - Loop Cut and Slide: Inserts a loop cut across a mesh loop, with interactive slide.
By incorporating these shortcuts into your workflow, you\"ll find that manipulating mesh elements becomes faster and more intuitive, allowing you to focus on the creative aspects of your modeling projects.
Customizing Your Workflow with Quick Favorites
Blender\"s Quick Favorites menu is a powerful feature designed to enhance your productivity by allowing you to easily access your most used tools and shortcuts. This customizable menu can be tailored to fit your specific workflow needs, making it easier to focus on creating rather than searching for tools.
- Accessing Quick Favorites: Press \"Q\" in any editor to bring up the Quick Favorites menu. If it\"s empty, you\"ll be prompted to start adding items.
- Adding Items: To add a tool or operation to Quick Favorites, simply right-click on the tool in the toolbar or menu and select \"Add to Quick Favorites\". This can be done from almost anywhere within Blender\"s interface.
- Organizing Your Menu: You can add as many items as you need. Consider organizing your Quick Favorites by adding related tools together, such as all your modeling tools in one section and your animation tools in another.
- Using Quick Favorites: With your most-used tools now easily accessible, you can significantly speed up your workflow. This personalized menu can be quickly brought up with a single keystroke, allowing for fast switching between tools without needing to navigate through menus.
- Editing Quick Favorites: To remove items or further customize your Quick Favorites menu, simply open the menu, right-click on an item, and choose \"Remove from Quick Favorites\" or use the drag-and-drop feature to reorder items.
By effectively utilizing the Quick Favorites menu, you can create a more efficient and personalized workflow, helping you to focus on your creative process rather than tool selection.
_HOOK_
Additional Tips for Using Hotkeys in Blender
Blender\"s hotkeys are designed to streamline your workflow, making it faster and more efficient to navigate and use Blender\"s vast feature set. Here are some additional tips to help you get the most out of using hotkeys in Blender:
- Customize Hotkeys: Blender allows you to customize nearly every hotkey. This means you can tailor the hotkey setup to match your workflow preferences. To customize, go to Edit > Preferences > Keymap.
- Learn Hotkeys Gradually: Trying to memorize all hotkeys at once can be overwhelming. Focus on learning the hotkeys for the tools you use most often, and gradually expand your knowledge as you become more comfortable.
- Use the Hotkey Reference: Keep a hotkey reference handy. Whether it\"s a physical cheat sheet, a PDF, or a webpage, having a reference can help you quickly learn and recall hotkeys.
- Practice with Projects: Practical application is one of the best ways to learn. Use hotkeys while working on real projects to reinforce your memory and increase your speed.
- Context Matters: Remember that Blender\"s hotkeys can change depending on the context (e.g., Object Mode vs. Edit Mode). This context sensitivity allows for a more efficient workflow once mastered.
- Use Pie Menus: Pie menus can be accessed with hotkeys and are a fast way to select from multiple options. Explore and customize pie menus to speed up your selection process.
- Quick Favorites: Use the Quick Favorites menu (Q key) to access your most-used tools quickly. You can add any tool to this menu by right-clicking on it and selecting \"Add to Quick Favorites\".
- Hotkey Layers: Some hotkeys work in combination, such as pressing G to grab an object, then X, Y, or Z to restrict movement to a specific axis. Experiment with these combinations to discover efficient ways to manipulate objects.
By incorporating these tips into your workflow, you can greatly enhance your efficiency and creativity in Blender. Remember, proficiency with hotkeys comes with time and practice, so be patient and keep experimenting.
READ MORE:
Conclusion: Integrating Hotkeys into Your Creative Process
Integrating hotkeys into your creative process in Blender is not just about memorizing keyboard shortcuts; it\"s about enhancing your workflow to make it more intuitive, efficient, and ultimately creative. Hotkeys offer a faster way to access tools and functions, reducing the need to navigate through menus and panels, which can interrupt your creative flow. Here are some final thoughts on making the most of hotkeys in your Blender projects:
- Personalize Your Hotkeys: Customize the hotkeys based on the tools you use the most. Blender\"s flexibility allows you to tailor the interface and controls to suit your workflow, making it a powerful feature to leverage.
- Incremental Learning: Start with the basics and gradually incorporate more hotkeys as you become comfortable. There\"s no need to learn everything at once. Focus on one area, like modeling or animation, and expand from there.
- Practice Regularly: The key to mastering hotkeys is consistent practice. Use them in your everyday projects to build muscle memory. Over time, this will speed up your workflow significantly.
- Keep a Cheat Sheet Handy: Having a hotkey cheat sheet nearby can be a helpful reference until you\"ve memorized the shortcuts you need. You might even discover new hotkeys that can aid your workflow.
- Share Knowledge: The Blender community is vast and supportive. Sharing your hotkey setups or learning from others can be a great way to discover new ways to streamline your creative process.
- Balance is Key: While hotkeys are powerful, it\"s important to balance their use. Not every function needs a hotkey, and over-reliance can sometimes complicate rather than simplify. Use hotkeys where they offer the most benefit to your workflow.
In conclusion, integrating hotkeys into your creative process in Blender is a journey of personalization and practice. By taking the time to learn and customize your hotkeys, you can unlock a more efficient and enjoyable modeling, animation, or rendering experience. Embrace the learning curve, and let hotkeys elevate your creative potential in Blender.
Embrace the power of Blender with our comprehensive hotkeys cheat sheet, designed to boost your efficiency and creativity. Unleash your full potential by integrating these shortcuts into your workflow, transforming how you bring your ideas to life.