Topic blender for mac tutorial: Welcome to the ultimate Blender for Mac tutorial, designed to unleash your creativity and transform your Mac into a powerful 3D art-making machine.
Table of Content
- How to use Blender for Mac?
- Getting Started with Blender on Mac
- Installing Blender on macOS
- Understanding Blender\"s Interface and Preferences for Mac Users
- Basic 3D Modeling Techniques in Blender for Mac
- Texturing and Rendering on Mac with Blender
- Animating in Blender for macOS Users
- YOUTUBE: Blender Tutorial 1 - Movement on a Mac How To
- Using Blender\"s Sculpting Tools on Mac
- Blender\"s Metal GPU Rendering on macOS
- Advanced Modeling Tips for Mac Users in Blender
- Blender Add-ons and Customizations for macOS
- Optimizing Blender Performance on Mac
- Resources and Communities for Learning Blender on Mac
How to use Blender for Mac?
Step-by-Step Guide: How to Use Blender for Mac
- Visit the official Blender website and download the latest version of Blender for macOS.
- Once the download is complete, locate the downloaded file and double-click on it to start the installation process.
- Follow the on-screen instructions to install Blender on your Mac.
- After the installation is complete, launch Blender by locating it in your Applications folder or by searching for it in Spotlight.
- Upon launching Blender, you will be presented with the Blender interface. Familiarize yourself with the different panels, views, and tools available.
- To start a new project, click on \"File\" in the top-left corner of the Blender window and select \"New\" from the dropdown menu. Alternatively, you can use the shortcut \"Ctrl + N.\"
- Begin creating your 3D models, animations, or other projects using Blender\'s various tools and features. You can find detailed tutorials and guides on the Blender website, official documentation, and online communities.
- As you work on your project, remember to save it regularly by clicking on \"File\" and selecting \"Save\" or \"Save As.\" Choose a location on your Mac to save the file.
- Blender supports different file formats for importing and exporting your projects. To import objects or assets, click on \"File\" and select \"Import.\" To export your work, click on \"File\" and choose \"Export.\"
- Once you have completed your project, you can render it by clicking on the \"Render\" tab and adjusting the desired settings.
- Finally, when you are satisfied with your work, you can save the rendered image or animation by clicking on \"File\" and selecting \"Save\" or \"Save As.\"
Note: These steps provide a general overview of how to use Blender on a Mac. For advanced techniques and specific tasks, it is recommended to explore Blender\'s official documentation, online tutorials, and user forums.
READ MORE:
Getting Started with Blender on Mac
Embarking on your 3D design journey with Blender on a Mac is an exciting venture. This section will guide you through the initial steps to get Blender up and running on your macOS, ensuring a smooth start.
- Download Blender: Visit the official Blender website and download the latest version compatible with macOS.
- Install Blender: Open the downloaded file and drag Blender into your Applications folder. Follow any on-screen instructions to complete the installation.
- Configure Preferences: Launch Blender and navigate to the Preferences. Tailor the settings to suit your Mac\"s specifications and your personal preferences, especially under the Input and Interface tabs.
- Explore the Interface: Familiarize yourself with Blender\"s interface. Pay attention to the 3D viewport, outliner, and properties panel, which are essential for creating your projects.
- Practice Navigation: Learn how to navigate the 3D viewport using your mouse and keyboard shortcuts. Practice zooming, panning, and rotating the view to comfortably explore your 3D scenes.
- Start a Simple Project: Begin with a basic project to get a feel for Blender\"s workflow. Add a mesh object, like a cube, and experiment with modifying its shape and size.
- Save Your Work: Learn how to save your projects by going to File > Save As. Remember to regularly save your progress to avoid losing your work.
By following these steps, you\"ll set a solid foundation for your journey into 3D modeling, animation, and rendering with Blender on your Mac.

Installing Blender on macOS
Installing Blender on your Mac is a straightforward process. Follow these step-by-step instructions to ensure Blender is properly set up and ready for your creative projects.
- Download Blender: Go to the official Blender website (blender.org) and navigate to the download section. Choose the version that is compatible with macOS. Click on the \"Download\" button.
- Open the Downloaded File: Locate the downloaded file, which should be a .dmg file, in your Downloads folder. Double-click on it to open.
- Install Blender: A window will appear showing the Blender icon and the Applications folder. Drag the Blender icon into the Applications folder. This will copy Blender to your Applications, completing the installation.
- Verify Security Permissions: Depending on your macOS security settings, you might need to allow apps downloaded from identified developers. If prompted, go to System Preferences > Security & Privacy and click \"Open Anyway\" next to the Blender alert.
- Launch Blender: Open your Applications folder and double-click on Blender to start it. You might see a verification process the first time you open it, which is normal.
- Configure Initial Settings: Upon first launch, Blender might ask you to configure initial settings like language and default units. Adjust these according to your preference.
With Blender now installed on your macOS, you\"re all set to dive into the world of 3D modeling, animation, and rendering.
Understanding Blender\"s Interface and Preferences for Mac Users
Blender\"s interface might seem daunting at first, but with a little guidance, Mac users can quickly become comfortable navigating and customizing it to fit their workflow. This section breaks down the essentials of Blender\"s interface and how to adjust preferences for an optimal experience on macOS.
- Interface Overview: Blender\"s interface is divided into several areas, including the 3D Viewport, Timeline, Outliner, Properties Panel, and Tool Shelf. Familiarize yourself with each area\"s function to streamline your workflow.
- Customizing the Layout: Blender allows you to customize the layout to suit your project needs. You can drag the edges of any area to resize it, or click and drag on the corner to split an area into two. This flexibility is ideal for setting up your workspace just the way you like it.
- Preferences: Access Blender\"s Preferences by navigating to Blender > Preferences in the menu. Here, you can adjust themes, input devices, and other settings to optimize Blender for your Mac.
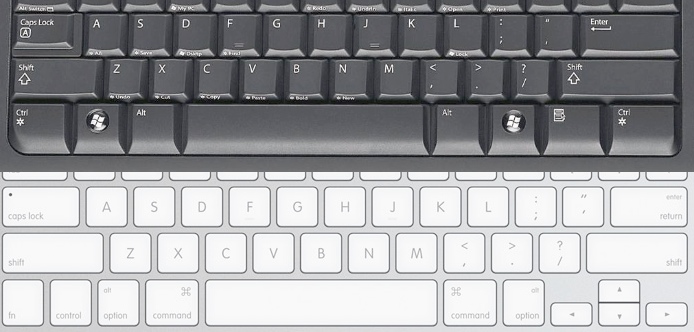
- Keymap Customization: Mac users may want to customize the keymap to better suit the Mac keyboard. In the Preferences window, go to the Keymap tab to make adjustments. This is particularly useful for commands that rely heavily on keyboard shortcuts.
- Enabling Add-ons: Blender\"s functionality can be extended with add-ons. In the Preferences window, switch to the Add-ons tab to browse and enable available add-ons. Some add-ons are specifically beneficial for Mac users, offering enhanced compatibility and features.
- System Settings: In the System tab of the Preferences window, Mac users should pay attention to the Memory & Limits and OpenGL settings. Adjust these to match your Mac\"s hardware capabilities for the best performance.
- Saving Preferences: After customizing your preferences, remember to save them by clicking on the Save Preferences button at the bottom of the Preferences window. This ensures your settings are retained each time you open Blender.
By understanding and tailoring Blender\"s interface and preferences, you can create a more efficient and comfortable environment for your 3D projects on a Mac.

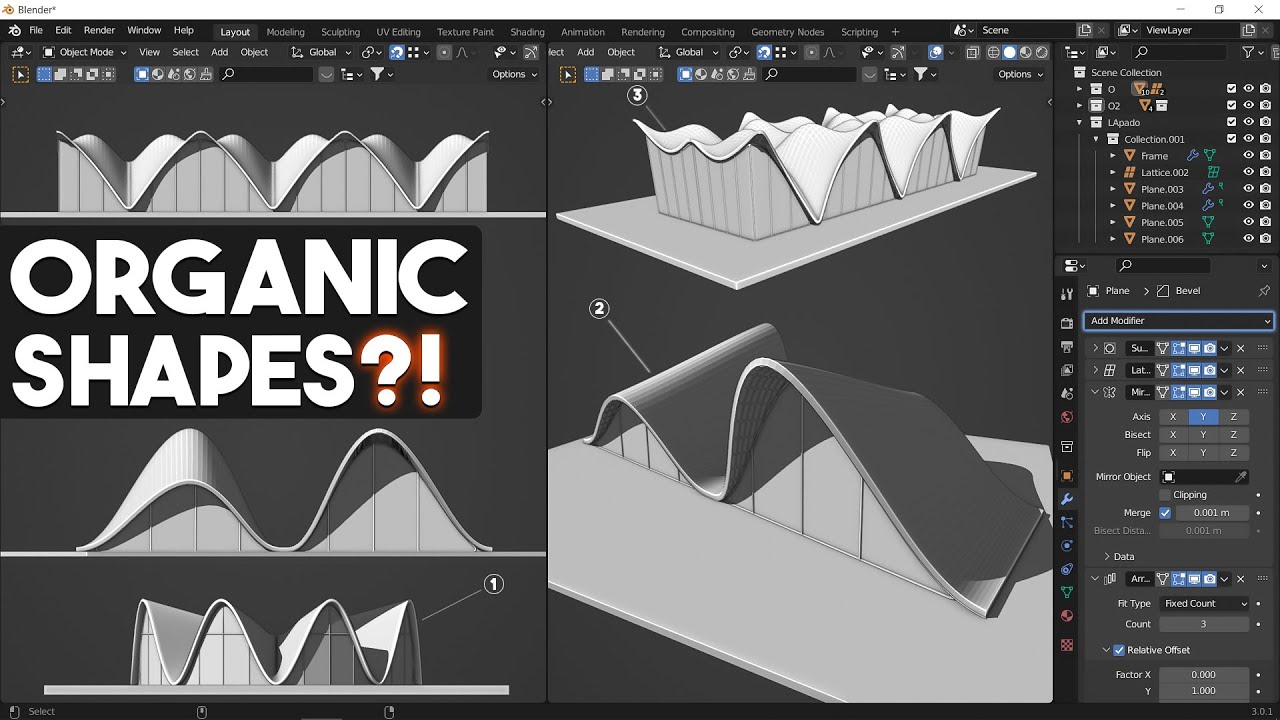
Basic 3D Modeling Techniques in Blender for Mac
3D modeling is a foundational skill in Blender, allowing you to create complex models from simple shapes. This section introduces basic 3D modeling techniques tailored for Mac users, guiding you through the creation of your first 3D object.
- Starting with a Basic Shape: Begin by adding a basic shape (mesh) to the 3D viewport. Use the Add menu in the 3D viewport or the shortcut Shift+A to select a mesh, such as a cube or sphere, as your starting point.
- Editing Mode: Enter Edit Mode by selecting your object and pressing Tab. In Edit Mode, you can manipulate the vertices, edges, and faces of the object.
- Selecting Components: Use right-click to select vertices, edges, or faces. Shift+right-click allows you to select multiple components. On a Mac trackpad, you might use a two-finger tap or configure preferences for selection.
- Transform Tools: Learn to use the transform tools – Grab (G), Rotate (R), and Scale (S) – to modify your object. These tools are essential for shaping your 3D models.
- Extrusion: Extruding is a powerful technique to extend your model. Select a face or edge and press E to extrude it, creating new geometry.
- Loop Cuts: Add more geometry to your model for detailed shaping with Loop Cuts. Press Ctrl+R and click and drag on your model to add a loop cut.
- Smoothing Surfaces: For smoother surfaces, use the Smooth tool or set the shading to Smooth in the Object Data properties.
- Applying Modifiers: Modifiers like Subdivision Surface can add complexity and smoothness to your model without permanent changes to the mesh. Access modifiers in the Properties panel.
- Practice with Simple Projects: Start with simple modeling projects, such as creating everyday objects, to practice these techniques. Incremental learning will build your skills more effectively.
Mastering these basic techniques will prepare you for more advanced 3D modeling projects in Blender on your Mac, opening up a world of creative possibilities.
_HOOK_
Texturing and Rendering on Mac with Blender
Texturing and rendering are crucial steps in bringing your 3D models to life. This section will guide Mac users through the process of applying textures and executing renders in Blender, ensuring your creations look as realistic and polished as possible.
- Unwrapping Your Model: Begin by unwrapping your model to create a UV map. This process projects your 3D model onto a 2D plane, allowing you to apply textures accurately. In Edit Mode, select all faces and choose UV > Unwrap.
- Applying Textures: With your UV map ready, move to the Shading workspace. Use the Node Editor to create a new material and connect a texture node (such as an Image Texture) to the material\"s Base Color input.
- Editing Textures: Fine-tune your textures in the UV/Image Editor. You can scale, rotate, and move the UV layout to ensure the texture aligns correctly with your model.
- Lighting Your Scene: Good lighting is essential for a realistic render. Add lights to your scene from the Add menu, experimenting with different types (e.g., Point, Sun, Spot) and settings to achieve the desired effect.
- Choosing a Render Engine: Blender offers several render engines, including Eevee (real-time) and Cycles (ray-traced). Select the one that best fits your project needs in the Render Properties panel.
- Rendering Settings: Adjust your rendering settings in the Render Properties panel. This includes resolution, sampling rates, and performance settings. Mac users should ensure these settings match their hardware capabilities for optimal rendering times.
- Executing the Render: With everything set up, press F12 to start rendering your scene. You can also use the Render > Render Image menu option.
- Post-Processing: After rendering, you may wish to adjust colors, brightness, or add effects. Use Blender\"s Compositor for post-processing to enhance your final image.
By following these steps, you\"ll be able to texture and render stunning images and animations in Blender on your Mac, giving your 3D projects the quality and realism they deserve.
Animating in Blender for macOS Users
Animation brings your creations to life. This section is dedicated to macOS users looking to explore the dynamic world of animation in Blender. Follow these steps to start animating your models with ease and creativity.
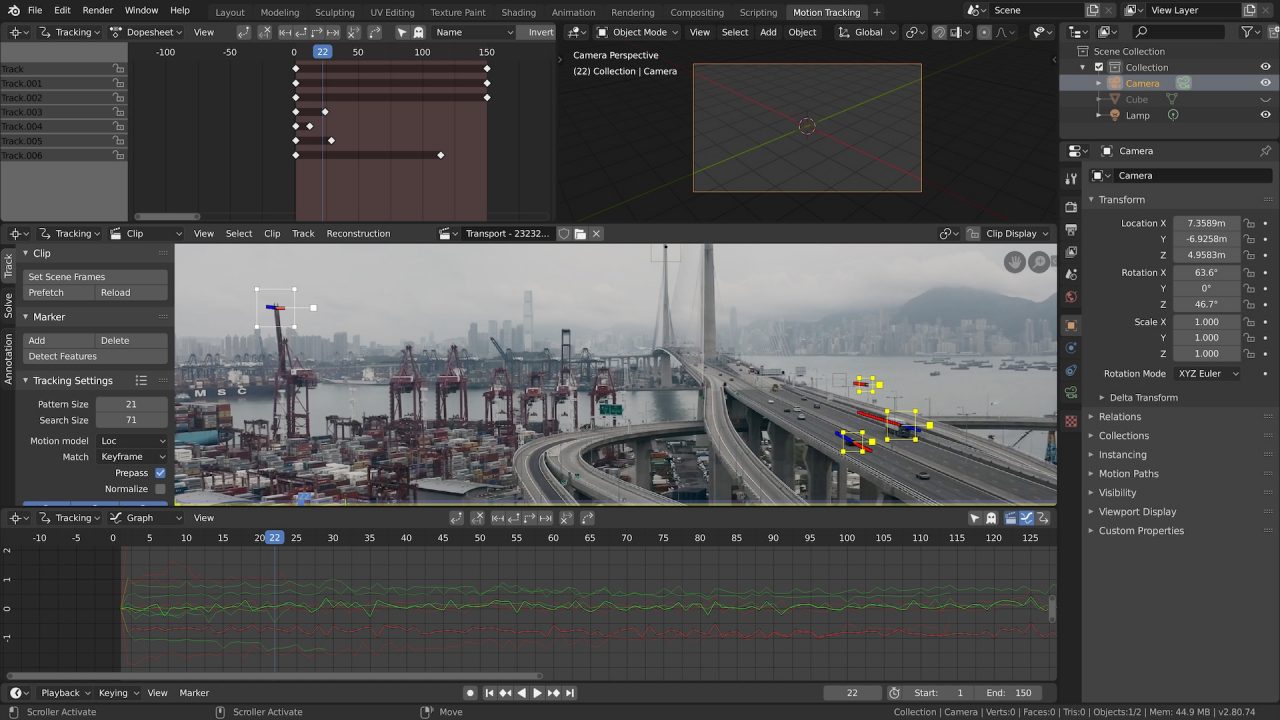
- Understanding Keyframes: Keyframes are the cornerstone of animation in Blender. They define the start and end points of any movement. To insert a keyframe, select your object, choose a frame in the timeline, press I, and select the property to animate (e.g., location, rotation).
- Timeline and Dope Sheet: The Timeline and Dope Sheet are your main tools for managing animations. Use them to view and edit keyframes and animation sequences.
- Animating with Bones: For character animation, create an armature (skeleton) and parent your mesh to it with automatic weights. Pose the bones and insert keyframes to animate your character.
- Animating Materials and Lights: Blender allows you to animate not just movement but also changes in materials and lights. Select a material or light, change its properties (such as color or intensity) at different frames, and insert keyframes to create dynamic effects.
- Using the Graph Editor: The Graph Editor gives you detailed control over the interpolation of keyframes, allowing you to refine the timing and velocity of animations for smoother or more dynamic movements.
- Shape Keys for Facial Animation: Create shape keys for your model to animate facial expressions or other detailed deformations. Shape keys are particularly useful for morphing objects between states.
- Previewing Animations: Use the Play button in the Timeline to preview your animations. Adjust the playback range as needed to focus on specific sequences.
- Rendering Animations: To render your animation, go to the Render Properties panel, set your output settings (format, frame rate, resolution), and click Render > Render Animation or press Ctrl+F12.
With practice, these steps will enable you to create compelling animations in Blender on your macOS device, from simple object movements to complex character animations.

Blender Tutorial 1 - Movement on a Mac How To
Mac: Are you ready to discover the incredible world of Mac? From its sleek design to its powerful performance, this video will show you why Mac is the ultimate choice for all your digital needs. Get ready to be amazed!
Blender 3D Create a 3D Isometric BEDROOM in 15 minutes Beginner Tutorial
Bedroom: Transform your bedroom into a tranquil oasis with this inspiring video. Learn the secrets to creating a perfect sanctuary where you can unwind and recharge. From cozy décor ideas to innovative storage solutions, this video is a must-watch for anyone looking to create their dream bedroom.
Using Blender\"s Sculpting Tools on Mac
Blender\"s sculpting tools allow artists to shape their models like clay, offering a tactile and intuitive way to create detailed forms. This guide will help macOS users navigate and utilize Blender\"s sculpting capabilities to their fullest.
- Entering Sculpt Mode: Select your object and switch to Sculpt Mode from the mode menu in the 3D viewport. This mode provides access to sculpting tools and brushes.
- Choosing Brushes: Blender offers a variety of brushes for different sculpting needs, such as the Draw, Clay, Smooth, and Grab brushes. Experiment with these brushes to understand their effects on your mesh.
- Dynotopo for Dynamic Topology: Enable Dynotopo (Dynamic Topology) in the Sculpt menu to add geometry dynamically as you sculpt. This is useful for creating highly detailed models without worrying about the initial mesh density.
- Symmetry Sculpting: For symmetrical models, like characters, activate the symmetry option under the Symmetry/Lock panel. This ensures that changes on one side are mirrored on the other.
- Adjusting Brush Settings: Fine-tune your brush settings in the Tool panel to control the brush size, strength, and falloff. These adjustments can significantly impact the sculpting process.
- Using Masks: Masks allow you to protect certain areas of your model from being affected by sculpting. Use the Mask brush to paint protected areas.
- Remeshing: After significant sculpting, you may need to remesh your model to create a more uniform topology. Use the Remesh tool in the Sculpt menu for this purpose.
- Sculpt Layers: For non-destructive sculpting, use Sculpt Layers to apply changes on top of your base mesh. This allows for easy adjustments and variations without altering the original model.
- Stylized Sculpting Techniques: Explore stylized sculpting techniques such as creating sharp creases or smooth transitions to add character and detail to your models.
With these techniques, macOS users can fully leverage Blender\"s sculpting tools to create intricate and expressive 3D models, enhancing their digital artistry.

Blender\"s Metal GPU Rendering on macOS
Blender\"s integration with Metal GPU rendering on macOS significantly enhances rendering speeds and efficiency, leveraging the power of Apple\"s graphics technology. This section guides you through enabling and optimizing Metal GPU rendering for Blender on macOS.
- Checking Compatibility: Ensure your Mac supports Metal and that you have a compatible graphics card. Most modern Macs with Apple silicon or recent AMD GPUs are Metal-capable.
- Updating Blender: Download the latest version of Blender to ensure you have the most current support for Metal GPU rendering. Updates often include optimizations and new features for macOS users.
- Enabling GPU Rendering: Go to Blender\"s Preferences, then the System tab. Under Cycles Render Devices, select \"Metal\" to enable GPU rendering. This option only appears if a compatible GPU is detected.
- Configuring Render Settings: In your project, open the Render Properties panel and select Cycles as the render engine. Adjust the Device setting to GPU Compute to utilize Metal GPU rendering.
- Optimizing Performance: Experiment with render settings such as tile size and sampling rates to find the best balance between render quality and speed. Smaller tiles are generally better for GPU rendering.
- Testing and Comparing: Conduct test renders to compare the performance and output quality between CPU and GPU rendering. This helps in understanding the impact of Metal GPU rendering on your specific projects.
- Utilizing Render Farms: For larger projects, consider using cloud-based render farms that support Blender\"s Metal GPU rendering, offering a way to further reduce rendering times.
- Staying Informed: Follow Blender and macOS updates for any improvements or changes to Metal GPU rendering capabilities. Community forums and tutorials can also offer tips and optimizations.
Leveraging Metal GPU rendering in Blender on macOS not only accelerates the rendering process but also allows for more complex scenes and higher quality outputs, making it a game-changer for 3D artists and animators using Mac.

Advanced Modeling Tips for Mac Users in Blender
For Mac users looking to elevate their Blender modeling skills, mastering advanced techniques is key. This section delves into sophisticated strategies to enhance your 3D models, streamline your workflow, and bring professional polish to your creations.
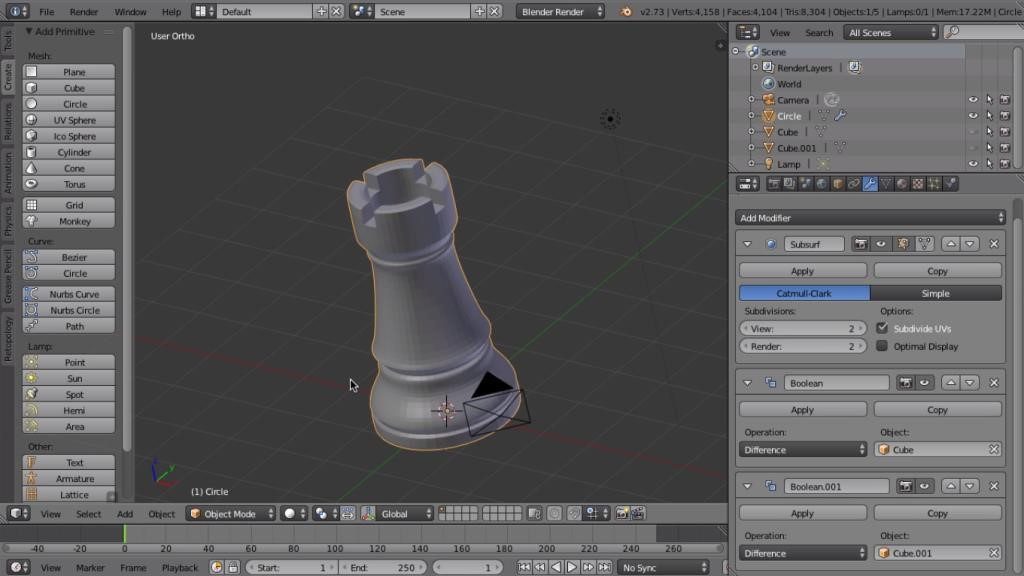
- Utilizing Modifiers: Leverage the power of modifiers such as Boolean, Mirror, and Array to create complex shapes and patterns with efficiency. Modifiers can be stacked and combined for dynamic effects.
- Topology and Edge Flow: Pay attention to topology and edge flow for models intended for animation. Use tools like the Knife (K) and Loop Cut (Ctrl+R) to add precision to your mesh\"s topology for smoother deformations.
- Non-Destructive Modeling: Embrace non-destructive modeling practices by using modifiers and shape keys to make changes that can be easily adjusted or reverted, preserving the original mesh.
- Custom Brushes for Sculpting: Create or import custom brushes in Sculpt Mode to add unique textures and details to your models. Experiment with brush settings to achieve various effects.
- Retopology Tools: For high-detail sculpts, use Blender\"s retopology tools to create a low-poly version of your model that maintains the original\"s shape and detail. This is essential for animation and game asset creation.
- UV Unwrapping and Texture Painting: Master UV unwrapping techniques for complex models to ensure textures are accurately applied. Use Blender\"s texture painting tools to add fine details and realism to your models.
- Lighting and Materials: Experiment with advanced lighting setups and material nodes to achieve realistic or stylized looks. Understanding how light interacts with surfaces can greatly enhance the believability of your scenes.
- Efficient Workflow Tips: Customize your Blender interface and learn keyboard shortcuts to speed up your workflow. Use collections and layers to organize your scene and manage visibility.
- Continuous Learning: Stay updated with the latest Blender features and plugins. The Blender community is a great resource for tutorials, assets, and advice that can inspire and improve your work.
By incorporating these advanced techniques into your Blender toolkit, you\"ll be able to tackle more complex projects with confidence, pushing the boundaries of your creativity on your Mac.
_HOOK_
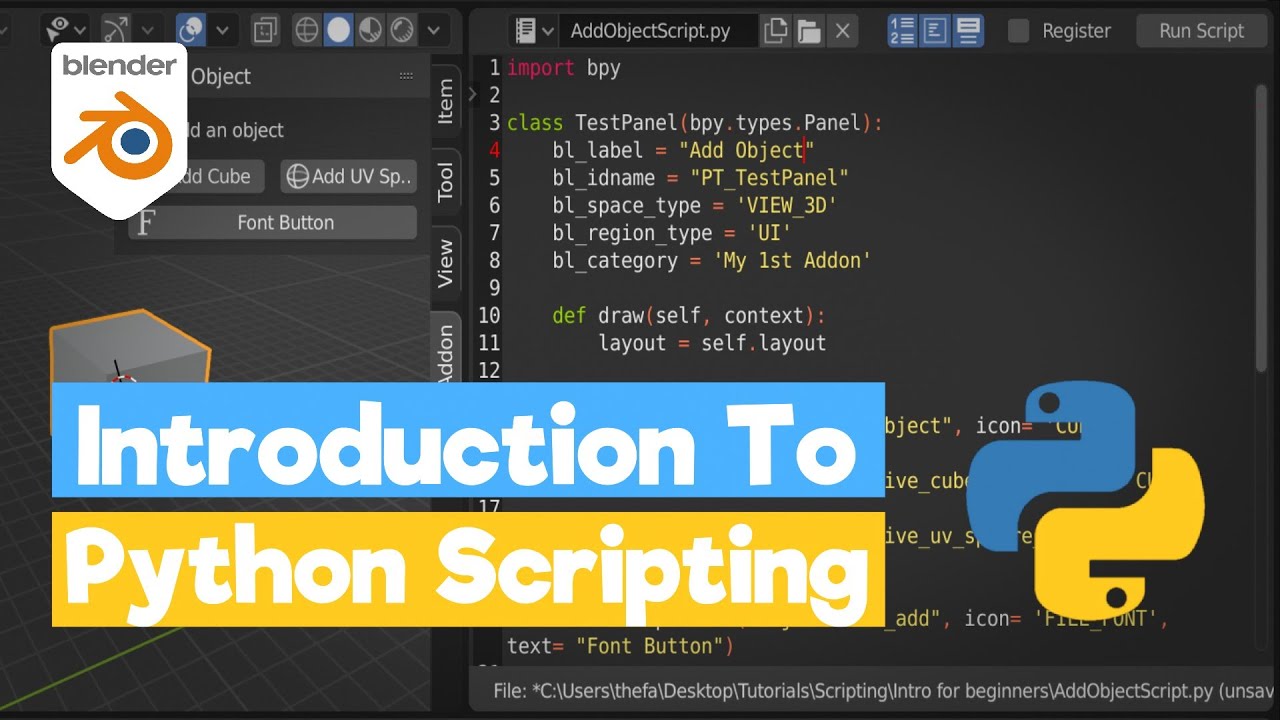
Blender Add-ons and Customizations for macOS
Enhancing Blender with add-ons and customizations can significantly improve your modeling, animation, and rendering workflow on macOS. This section highlights essential add-ons and customization tips for Blender users on Mac, aiming to boost productivity and creativity.
- Installing Add-ons: To install an add-on, go to Blender Preferences > Add-ons, click \"Install,\" and navigate to the downloaded add-on file. Ensure the add-on is compatible with your version of Blender.
- Recommended Add-ons for Mac Users:
- Node Wrangler: Enhances the shader workflow, providing quick access to nodes and their properties.
- LoopTools: Offers advanced mesh editing tools for creating and modifying geometry with precision.
- BlenderKit: Access a vast library of free models, materials, and brushes directly within Blender.
- Hard Ops: A toolkit for hard surface modeling that simplifies complex tasks and improves efficiency.
- Customizing Keyboard Shortcuts: Tailor Blender\"s keyboard shortcuts to fit your workflow. In Preferences, navigate to the Keymap tab and adjust shortcuts as needed. This is especially useful for adapting shortcuts that are more intuitive for Mac keyboard layouts.
- Interface Tweaks: Customize the Blender interface by adjusting themes and layout. Create a workspace that suits your project needs and preferences for a more comfortable and efficient environment.
- Optimizing Blender for Mac Hardware: Adjust Blender\"s memory and performance settings in Preferences > System to better match your Mac\"s hardware, optimizing rendering times and overall responsiveness.
- Using Metal for Rendering: Ensure you\"re utilizing Metal for GPU rendering to take full advantage of macOS\"s graphics capabilities, leading to faster render times and a smoother Blender experience.
- Staying Updated: Regularly check for Blender updates and new add-ons. Updates can provide important performance improvements and new features that enhance compatibility with macOS.
With these add-ons and customizations, Blender becomes even more powerful on macOS, allowing you to tailor the software to your specific needs and workflow, pushing the limits of your creative potential.

Optimizing Blender Performance on Mac
Maximizing Blender\"s performance on a Mac involves tweaking settings and adopting practices that enhance efficiency. This section covers strategies to ensure Blender runs smoothly, enabling you to focus on creativity without hardware limitations slowing you down.
- Update Your Mac and Blender: Ensure both your macOS and Blender are up to date. Updates often include performance improvements and bug fixes that can enhance stability and speed.
- Adjust Blender Preferences: In Blender\"s Preferences, under the System tab, adjust settings to optimize for your specific hardware. For Macs with discrete GPUs, ensure Blender is set to use the GPU for rendering.
- Manage Scene Complexity: Keep your scene as simple as possible. Use layers or collections to manage visibility and render only what\"s necessary. Consider simplifying meshes and using lower-resolution textures for work in progress.
- Optimize Render Settings: Adjust render settings for efficiency. This includes reducing samples for test renders, using denoising, and selecting appropriate resolution and aspect ratios for your project needs.
- Utilize Proxies and Simplify for Animation: For complex animations, use proxy models or the Simplify option in the Render settings to lower the detail during playback, improving real-time performance.
- Close Unnecessary Applications: Ensure no unnecessary applications are running in the background that could consume CPU and memory resources, dedicating as much of your Mac\"s capabilities to Blender as possible.
- Hardware Considerations: For older Macs, consider upgrading hardware components where possible, such as increasing RAM or moving to an SSD if you\"re not already using one, to improve overall performance.
- Leverage Blender\"s Metal GPU Rendering: Take advantage of Blender\"s support for Metal on compatible Macs to speed up rendering times and improve viewport performance.
- Regularly Save and Backup: Regular saving and using Blender\"s incremental save feature can prevent data loss and avoid the need to redo work, saving time in the long run.
By implementing these optimization tips, you can significantly improve your Blender experience on Mac, making it a more powerful tool for your 3D modeling, animation, and rendering projects.
READ MORE:
Resources and Communities for Learning Blender on Mac
Embarking on the journey of learning Blender on a Mac is exciting, and numerous resources and communities can support your growth. This section highlights the best places to find tutorials, advice, and inspiration for mastering Blender on macOS.
- Official Blender Tutorials: Start with Blender.org\"s own tutorials. They offer comprehensive guides for beginners to advanced users, tailored to the latest Blender features and updates.
- Blender Artists Community: Join the Blender Artists forum to connect with fellow Blender users. It\"s a great place to ask questions, share your work, and receive feedback.
- Blender Network: The Blender Network connects Blender professionals and enthusiasts. It\"s an excellent resource for finding Blender jobs, collaborators, and professional training.
- YouTube Channels:
- Blender Guru: Offers tutorials that range from beginner to advanced levels, focusing on specific techniques and projects.
- CG Geek: Provides in-depth tutorials and project walkthroughs, with tips on optimizing Blender usage on various operating systems, including macOS.
- Online Courses and Workshops: Platforms like Udemy, Coursera, and Skillshare feature structured Blender courses that cater to all skill levels. These can be especially helpful for structured learning.
- Blender Stack Exchange: A Q&A site for Blender users where you can find answers to specific technical questions or troubleshooting advice for Blender on Mac.
- Meetups and User Groups: Search for local or virtual Blender meetups and user groups. These gatherings are invaluable for networking, learning from peers, and staying motivated.
- Social Media Groups: Facebook and Reddit have active Blender communities where members share their work, tutorials, and tips. Look for groups specifically focused on Blender for Mac users.
- Blender Conference Videos: Watch presentations and workshops from the annual Blender Conference. These sessions cover a wide range of topics and showcase the work of talented Blender artists.
With the support of these resources and communities, learning Blender on a Mac can be a rewarding and enriching experience, opening doors to endless creative possibilities.
Embark on your Blender journey with confidence, leveraging the power of your Mac to unlock limitless creative possibilities. Dive into the resources provided, join vibrant communities, and transform your visions into reality with Blender.