Topic how to make a logo on blender: Discover the art of logo creation with Blender, a powerful tool that transforms your ideas into stunning 3D logos. This guide will take you through the steps to unleash your creativity and design a logo that stands out.
Table of Content
- How can I create a logo using Blender?
- Starting with Blender
- Advanced Techniques
- Advanced Techniques
- Introduction to Blender for Logo Design
- Preparing Your Workspace in Blender
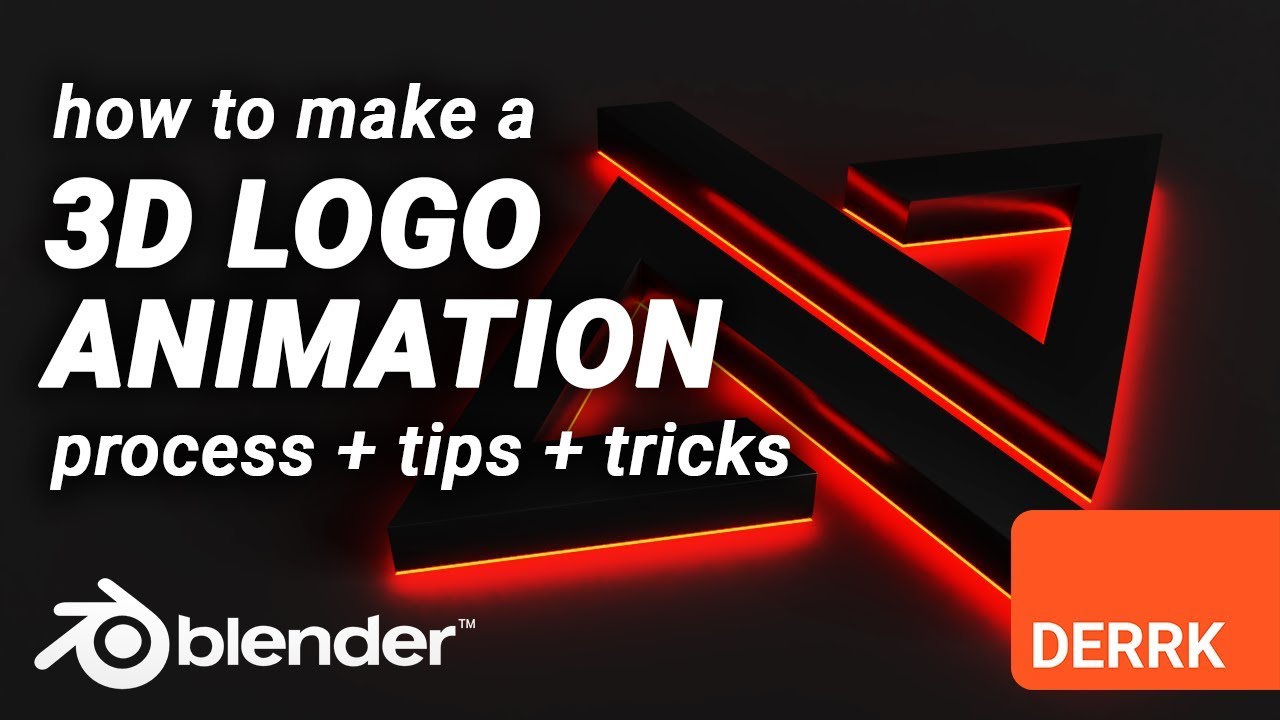
- YOUTUBE: Creating a 3D Logo from a 2D Image with Blender Tutorial
- Importing and Setting Up Your 2D Logo in Blender
- Converting 2D Images to 3D Models
- Adding Textures and Colors to Your Logo
- Animating Your Logo for Maximum Impact
- Rendering and Exporting Your Final Logo
- Advanced Techniques for Professional Results
- Tips and Tricks for Efficient Workflow
- Common Mistakes to Avoid in Blender Logo Design
How can I create a logo using Blender?
To create a logo using Blender, follow these steps:
- Open Blender and set the viewpoint to Z.
- Click on Add → Image → Reference in the upper left-hand corner.
- Add the saved image of your logo. If the image is tilted, adjust it as needed.
- Use Blender\'s tools to trace and recreate the logo in a 3D format.
- Add color, texture, and effects to enhance the logo\'s appearance.
- Modify the lighting and environment settings to achieve the desired look.
- Once satisfied with the logo, you can render it in Blender for the final output.
READ MORE:
Starting with Blender
Begin by launching Blender and preparing your workspace. Remove the default plane and set your view to accommodate the logo creation process.
Importing Your 2D Logo
- Select \"Background Image\" from the View menu and use the \"Use Background Image\" option to load your logo file into Blender.
- Adjust the scale of your logo to suit your needs by pressing \"S\" and then scaling up until it\"s sufficiently large for manipulation.
Creating 3D Models from 2D Images
- Use the Add→Image→Reference option to place your image within the scene.
- Trace the contours of your image with Bezier curves for precision.
Animating Your Logo
For a dynamic touch, animate your logo by revealing it piece-by-piece. Keep the animation concise, ideally under 10 seconds, and consider adding a quality sound design for impact.
Advanced Techniques
Explore more advanced techniques such as morphing shapes and creating seamless transitions for a professional finish.
Final Touches
Once your logo is modeled and animated, you can experiment with lighting, textures, and backgrounds to enhance the final product. Spend time refining your logo to ensure it stands out.
Introduction to Blender for Logo Design
Blender, an open-source 3D creation suite, offers powerful tools for logo design, allowing artists and designers to bring their visions to life. This section introduces the basics of using Blender for creating logos, covering everything from setting up your project to finalizing your design for presentation.
- Getting Started with Blender: Understand Blender\"s interface and how to navigate the software to begin your logo design project.
- Importing Your Logo: Learn the process of importing your 2D logo into Blender, setting it up as a background reference for your 3D modeling.
- Modeling Techniques: Explore various techniques to convert your 2D logo into a 3D model, including tracing with Bezier curves and extruding shapes.
- Texturing and Coloring: Discover how to add colors and textures to your logo, making it more vibrant and visually appealing.
- Lighting and Rendering: Understand how to effectively light your scene and render your logo to achieve professional-quality results.
- Animation Basics: If you\"re looking to animate your logo, get an introduction to Blender\"s animation tools and how they can be used to add motion to your design.
This comprehensive guide will provide you with the foundational knowledge needed to start creating logos in Blender, from importing your initial design to applying the finishing touches that will make your logo stand out.

_HOOK_
Preparing Your Workspace in Blender
Setting up your workspace correctly in Blender is a crucial step towards creating an efficient and productive environment for logo design. This process involves adjusting settings, importing your design, and preparing for modeling or animation.
- Launch Blender and create a new project to start with a clean slate.
- Adjust your view settings to align with your design needs, focusing on the 3D viewport where your logo will be developed.
- Import your 2D logo as a reference image by navigating to Add→Image→Reference. This will serve as a guide for your 3D modeling.
- Organize your tool shelf and properties panel to have quick access to the tools and settings you\"ll use most frequently.
- Set up your camera and lighting to preview how your logo will appear in its final rendered form, adjusting angles and intensity as needed.
By preparing your workspace with these steps, you\"ll ensure that everything you need is readily accessible, allowing you to focus on the creative process of designing your logo in Blender.
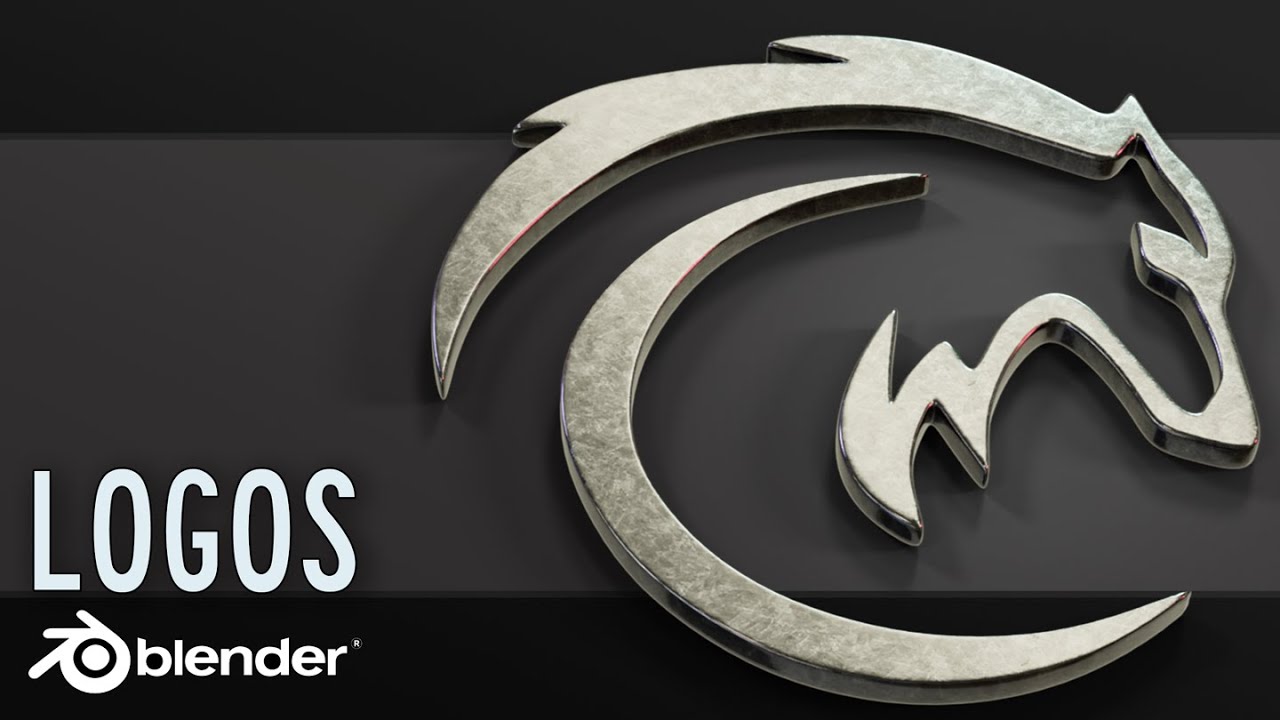
Creating a 3D Logo from a 2D Image with Blender Tutorial
Unleash your creativity with this engaging Blender tutorial! Learn step-by-step how to master the powerful software and create stunning 3D designs. Get ready to expand your skills and dive into the world of digital artistry!
Creating a 3D Logo from a 2D Image with Blender Tutorial
Unleash your creativity with this engaging Blender tutorial! Learn step-by-step how to master the powerful software and create stunning 3D designs. Get ready to expand your skills and dive into the world of digital artistry!
Importing and Setting Up Your 2D Logo in Blender
Importing your 2D logo into Blender is the first step in transforming it into a 3D masterpiece. This process involves several key steps to ensure your logo is ready for 3D modeling and animation.
- Start by opening Blender and selecting \"File\" > \"Import\" to choose the file format of your 2D logo. If your logo is in a vector format like SVG, you may need to use a third-party tool to convert it to a compatible format.
- Once imported, adjust the logo\"s scale, rotation, and position to fit your design vision. Use the \"S\" key to scale, \"R\" to rotate, and \"G\" to grab and move the object.
- Set the logo as a background image or reference by going to the \"Add\" menu and selecting \"Image\" > \"Reference\". This will allow you to trace or model directly over your 2D logo.
- Adjust the opacity of the reference image as needed to comfortably model your 3D logo without the reference image overpowering your view.
- If necessary, use the \"Trace Bitmap to Vector\" function in a software like Inkscape to convert your logo into a format that can be easily imported into Blender for 3D modeling.
Following these steps will ensure your 2D logo is perfectly set up in Blender, making it ready for the next stages of 3D modeling and animation.
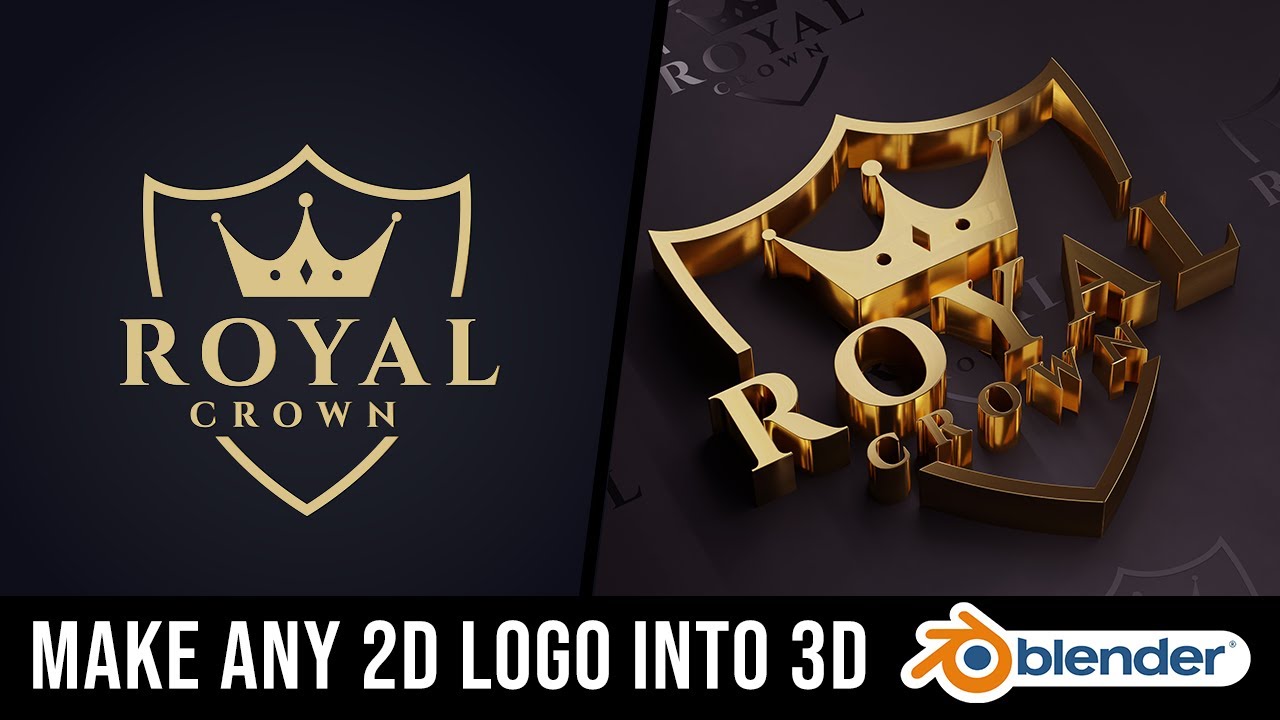
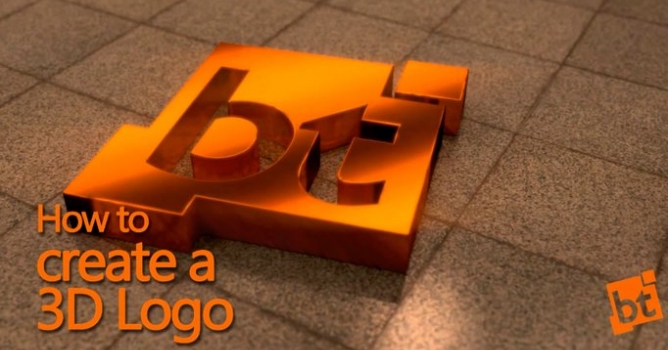
Converting 2D Images to 3D Models
Transforming a 2D logo into a 3D model in Blender is a creative process that brings depth and dynamism to your design. Follow these steps to elevate your logo from a flat image to a vivid 3D model.
- Open your project in Blender and ensure your 2D logo is imported as a reference image.
- Use the \"Add\" menu to create a new mesh object that you\"ll mold into the shape of your logo. Choose a plane as a starting point for simpler logos or a more complex shape for detailed logos.
- Switch to Edit Mode to begin shaping your mesh to match the contours of your logo. Utilize tools like extrude (E), scale (S), and rotate (R) to manipulate your mesh.
- To add depth to your logo, select parts of your mesh and extrude them along the Z-axis. This will transform your flat image into a 3D object.
- Apply modifiers, such as the Subdivision Surface modifier, to smooth out the geometry and refine the shapes of your logo.
- For logos with text, consider using Blender\"s text tool to create 3D text objects that can be converted into meshes and manipulated just like any other 3D object.
- Once your logo\"s shape matches your vision, you can further enhance it by adding materials, textures, and lighting to bring out its colors and details in a 3D space.
This conversion process is both an art and a science, requiring patience and creativity. By following these steps, your 2D logo will soon stand out as a polished, professional 3D model in Blender.

Adding Textures and Colors to Your Logo
Bringing your logo to life with textures and colors in Blender enhances its visual appeal and helps convey your brand\"s message. This section guides you through applying textures and colors to your 3D logo efficiently.
- Start by selecting your logo model in Object Mode. Navigate to the Properties panel and find the Material tab.
- Click on \"New\" to create a new material. Here, you can choose the base color for your logo. Utilize the color picker or input specific color values to match your brand colors.
- To add a texture, switch to the Texture tab within the Material properties. Click on \"New\" and select the type of texture you want to apply, such as Image or Movie for a custom texture file.
- Adjust the texture settings to correctly map it onto your logo model. You may need to tweak the mapping coordinates and scaling to ensure the texture fits perfectly.
- For advanced texturing, consider using UV mapping to wrap your texture around the logo model accurately. This method requires unwrapping the model in Edit Mode and adjusting the UV layout in the UV/Image Editor.
- Experiment with different shaders and effects to create unique looks for your logo. Blender\"s node-based material system allows for complex and dynamic material setups.
Adding textures and colors is a critical step in finalizing your logo design, allowing you to achieve the desired look and feel that represents your brand or project uniquely.

Animating Your Logo for Maximum Impact
Animating your logo in Blender adds a dynamic and engaging element to your brand identity. Follow these steps to create an animation that captures attention and communicates your message effectively.
- Begin by setting up your 3D logo model in the desired starting position for your animation. Ensure all elements are correctly placed and ready for animation.
- Open the Timeline window at the bottom of the Blender interface to manage your animation frames. Decide on the length of your animation, keeping it concise to maintain viewer interest.
- Use keyframes to animate your logo\"s movement. Position your logo at the start frame, insert a keyframe, then move to the end frame, adjust your logo\"s position, orientation, or scale, and insert another keyframe.
- Incorporate camera movements to enhance the animation. Animate the camera to move around or zoom in on your logo by setting keyframes for the camera in the same way as for the logo.
- Add lighting effects to create depth and highlight important features of your logo. Keyframe the intensity or color of lights to change over time for dramatic effect.
- Consider adding a simple background or scene that complements your logo but doesn\"t detract from it. This can be animated lightly, such as a subtle gradient shift.
- Render your animation. Choose your output settings in the Render tab, ensuring the resolution, frame rate, and file format match your needs. Click Render Animation to create your final animated logo.
With these steps, your animated logo will not only represent your brand but also tell a story that resonates with your audience, making it unforgettable.
_HOOK_
Rendering and Exporting Your Final Logo
Rendering and exporting your logo in Blender is the final step in bringing your design to life. This section outlines the process to ensure your logo is ready for use across various media.
- Ensure your logo design is complete, and all elements are correctly positioned. Double-check textures, colors, and lighting to make sure they meet your expectations.
- Go to the Render tab in the Properties panel. Here, you can adjust the render settings, including resolution, frame rate, and the output format that suits your project needs.
- Choose the render engine. Blender offers several options, including Eevee for fast, real-time rendering, and Cycles for more photorealistic results.
- Before rendering the entire project, perform a test render of a small section of your logo to ensure the settings produce the desired outcome.
- Once satisfied with the test render, proceed to render the entire logo. Click on the \"Render\" menu and select \"Render Image\" for still logos or \"Render Animation\" for animated logos.
- After rendering, save your logo file. For still images, go to \"Image\" > \"Save As\" and choose your preferred file format (e.g., PNG, JPEG). For animations, Blender automatically saves the files in the designated output folder as per your render settings.
- If you need different sizes or formats of your logo for various uses, consider rendering multiple versions or using an image editing software to adjust the exported files accordingly.
By following these steps, you can render and export a professional-quality logo ready for branding, marketing, and multimedia use.
Advanced Techniques for Professional Results
Mastering advanced techniques in Blender can elevate your logo designs, providing a professional edge that sets your work apart. Explore these sophisticated methods to enhance your logos.
- Node-Based Material Creation: Utilize Blender\"s powerful node editor to craft complex materials that react realistically to light and environment, giving your logo a cutting-edge appearance.
- Particle Systems for Effects: Implement particle systems to add special effects such as smoke, fire, or glowing trails that can animate around or emanate from your logo for dynamic presentations.
- Sculpting for Fine Detailing: For logos that require intricate details, use Blender’s sculpting tools to add textures and details that a standard mesh might not capture, providing a handcrafted look.
- Physics Simulations: Incorporate physics simulations to create natural movements and interactions within your logo animations, such as cloth fluttering or liquid dynamics for memorable effects.
- Compositing for Final Polish: Use Blender’s compositing nodes to blend various elements of your logo together, adjust colors, add blur effects, or incorporate other post-processing enhancements for a polished finish.
- Advanced Animation Techniques: Beyond basic keyframing, explore nonlinear animation, shape keys for morphing effects, and rigid body dynamics to bring your logo to life in unique ways.
By integrating these advanced techniques, your Blender logo projects will not only showcase your technical skills but also your creative vision, making your designs stand out in any digital or print format.
Tips and Tricks for Efficient Workflow
Enhancing your workflow in Blender can save time and improve the quality of your logo designs. These tips and tricks are designed to streamline your process from start to finish.
- Use shortcuts to speed up your workflow. Familiarize yourself with Blender\"s keyboard shortcuts for actions like scaling (S), rotating (R), and moving (G) objects.
- Organize your project with layers and collections. This helps in managing different elements of your logo, especially if it\"s complex or involves animation.
- Customize your user interface to suit your workflow. Blender allows you to adjust and save your layout, giving you quick access to the tools you use most.
- Implement non-destructive editing techniques, such as using modifiers or shape keys, which allow you to make changes without permanently altering the base geometry.
- Save versions incrementally. This practice can be a lifesaver, allowing you to return to previous versions if needed.
- Preview your work frequently. Use Blender\"s rendering preview to get a quick look at how your logo will appear, helping you make adjustments on the fly.
- Use Blender\"s add-ons and scripts to automate repetitive tasks or add functionality. There are many community-developed tools available that can enhance your productivity.
By incorporating these tips into your Blender workflow, you can create logos more efficiently, giving you more time to focus on the creative aspects of your designs.
READ MORE:
Common Mistakes to Avoid in Blender Logo Design
Avoiding common mistakes in Blender can significantly improve the quality of your logo designs. Be mindful of these pitfalls to ensure a smooth design process and professional results.
- Ignoring Reference Images: Not using or inaccurately setting up reference images can lead to proportion and scaling issues in your design.
- Overcomplicating the Model: Adding unnecessary complexity to your logo can make it difficult to recognize and render, especially at smaller sizes.
- Neglecting Lighting and Shadows: Poor lighting setup can result in a flat or unappealing appearance, lacking depth and texture.
- Using Default Materials and Textures: Relying solely on Blender\"s default materials and textures may result in a generic look that lacks brand identity.
- Forgetting to Optimize Meshes: Overlooking mesh optimization can lead to unnecessarily high polygon counts, causing longer render times and potential performance issues.
- Skipping Test Renders: Not performing test renders throughout the design process can lead to unexpected results in the final output.
- Avoiding Learning Shortcuts: Not utilizing Blender\"s keyboard shortcuts can slow down your workflow significantly.
By steering clear of these common mistakes, you can create more effective, efficient, and visually appealing logos in Blender.
Embarking on your Blender logo design journey opens up a world of creative possibilities. With patience and practice, you\"ll master the art of transforming simple ideas into impressive, professional logos that leave a lasting impression.