Topic how to make a logo with blender: Discover the secrets to crafting a stunning logo using Blender, the powerful free 3D software. This guide will walk you through the steps to transform your ideas into a professional-looking logo.
Table of Content
- How can I create a logo using Blender software?
- Step-by-Step Guide
- Additional Tips
- Additional Tips
- Introduction to Blender and Logo Design
- Essential Tools and Setup in Blender for Logo Creation
- YOUTUBE: How to Make 3D Logo from 2D Image | Blender Tutorial
- Step-by-Step Guide: From Concept to 3D Logo
- Tracing Your Logo with Bezier Curves in Blender
- Transforming 2D Images into 3D Models
- Texturing and Material Application for a Realistic Look
- Lighting and Camera Setup for the Perfect Render
- Rendering Your Logo for High-Quality Outputs
- Animating Your Logo for Added Impact
- Exporting Your Logo for Various Uses
- Advanced Tips and Tricks for Professional Results
- Common Mistakes to Avoid in Blender Logo Design
- Conclusion and Further Resources
How can I create a logo using Blender software?
To create a logo using Blender software, follow these steps:
- Open Blender and select the appropriate workspace for your project.
- Create a new project or open an existing one where you want the logo to be placed.
- Import any reference images or sketches that you have for the logo design.
- Use the tools in Blender to create the shapes and elements of your logo. You can use the various modeling tools to sculpt the logo according to your design.
- Add colors, textures, and effects to enhance the visual appeal of the logo.
- Experiment with different lighting setups to see how your logo looks in various conditions.
- Once you are satisfied with the design, render the logo in Blender to get a high-quality image or animation of your logo.
- Export the final logo in the desired file format for use in various media platforms.
READ MORE:
Step-by-Step Guide
Starting with Blender
- Open Blender and clear the default scene.
- Set your viewpoint to the Z axis for a top-down view.
- From the \"Add\" menu, select \"Image\" then \"Reference\" to import your logo image.
- If your image is not aligned, adjust the rotation to 0 in the Object Properties.
Tracing the Logo
- Use Bezier curves to trace the contours of your logo image accurately.
- Ensure to place the curves closely following the image\"s edges for a clean topology.
Converting to 3D
- Select all the traced curves.
- Convert them into a 3D mesh by extruding or using the solidify modifier.
- Adjust the thickness to give your logo the desired 3D effect.
Refining and Rendering
- Apply smoothing to your logo mesh to refine edges and surfaces.
- Set up lighting and camera angles to highlight your logo\"s features.
- Choose a background that complements your logo for the final render.
- Render your logo using Blender\"s render engine for a professional finish.
Additional Tips
- Experiment with different materials and textures to enhance your logo\"s appearance.
- Consider animating your logo for an even more impactful presentation.
- Use Blender\"s compositing tools to fine-tune the final output.
Creating a logo in Blender allows for a high degree of customization and creativity. By following these steps and tips, you can produce a professional-looking 3D logo tailored to your or your client\"s needs.
Introduction to Blender and Logo Design
Blender is a powerful, open-source 3D creation suite that supports the entirety of the 3D pipeline—modeling, rigging, animation, simulation, rendering, compositing, and motion tracking, even video editing, and game creation. Advanced users employ Blender\"s API for Python scripting to customize the application and write specialized tools; often these are included in Blender\"s future releases. Blender is well suited for individuals and small studios who benefit from its unified pipeline and responsive development process. Examples from many Blender-based projects are available in the showcase.
Logo design in Blender is a process that involves conceptualization, design, and refinement. Blender offers a range of tools for 3D modeling, rendering, and animation that can be used to create dynamic and visually appealing logos. This section will guide you through the steps of creating a logo in Blender, from the initial setup to the final rendering.
- Understanding the Blender Interface: Familiarize yourself with Blender\"s user interface to navigate and use its features effectively.
- Importing Your Logo Design: Learn how to import your logo design into Blender and prepare it for 3D modeling.
- Modeling Your Logo: Detailed steps on how to model your logo in 3D, including extrusion and modification techniques.
- Applying Materials and Textures: Enhance your logo with materials and textures for a professional finish.
- Lighting and Rendering: Set up lighting to highlight your logo\"s design and render it for final output.
- Animation Tips: If desired, learn how to animate your logo for use in videos and presentations.
With Blender, your creativity is the limit. Whether you\"re looking to create a simple 3D logo or an elaborate animated sequence, Blender provides the tools necessary to bring your vision to life. This guide will help you leverage Blender\"s capabilities to design and render a professional-grade logo.
_HOOK_
Essential Tools and Setup in Blender for Logo Creation
Creating a logo in Blender requires an understanding of its fundamental tools and the initial setup process. This section outlines the crucial steps and tools needed to start creating your logo.
- Initial Setup:
- Open Blender and create a new project.
- Clear the default cube and select a camera view that suits logo design, typically the top view (numpad 7).
- Importing the Design:
- Use the \"Add\" menu to import your 2D logo as an image reference. This helps in tracing and modeling.
- Adjust the image\"s placement and scale to match the scene\"s dimensions.
- Modeling Tools:
- Utilize Blender\"s Bezier curves and drawing tools for precise tracing of your logo\"s outlines.
- Extrude the traced paths to create a 3D model of your logo.
- Materials and Textures:
- Explore Blender\"s material editor to apply colors, textures, and shaders to your logo.
- Adjust the material properties to achieve the desired appearance.
- Lighting and Rendering:
- Set up appropriate lighting to enhance your logo\"s three-dimensionality.
- Choose a rendering engine (e.g., Cycles or Eevee) and configure the render settings for high-quality output.
This foundational setup is essential for anyone looking to utilize Blender for logo creation. By familiarizing yourself with these tools and techniques, you\"ll be well-prepared to bring your logo designs to life in a 3D environment.
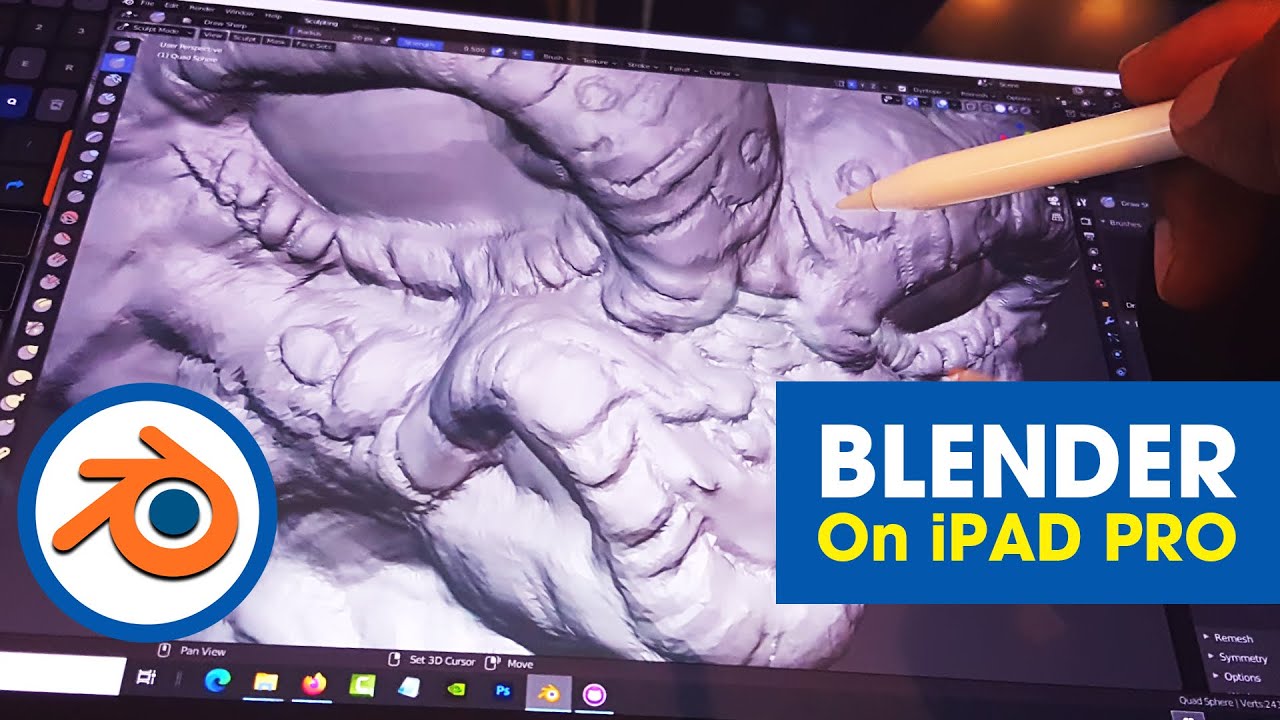
How to Make 3D Logo from 2D Image | Blender Tutorial
\"Immerse yourself in the captivating world of 3D logos with our visually stunning video. Watch as intricate designs come to life in glorious three-dimensional detail, showcasing the artistry and creativity behind each unique creation.\"
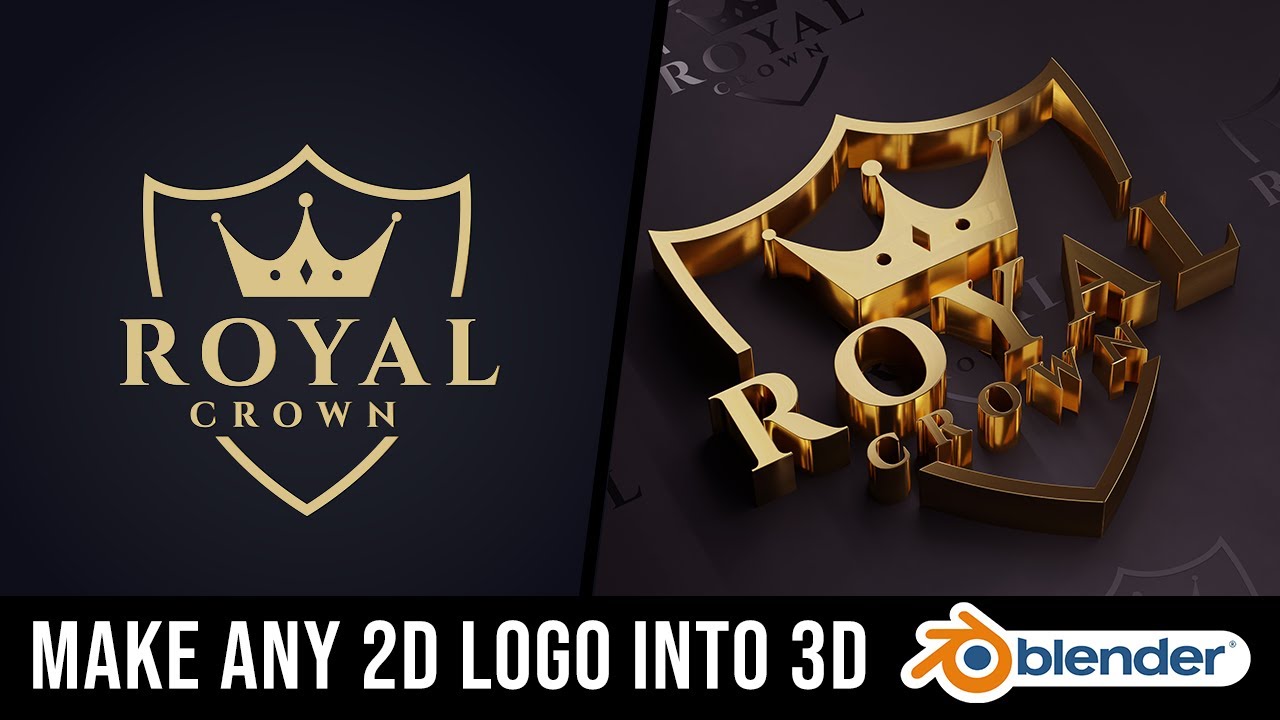
Blender Tutorial: How to Make 2D Logos Into 3D Logos
\"Unlock the secrets of Blender with our step-by-step tutorial video that will elevate your skills to new heights. Learn how to master this powerful software and create awe-inspiring 3D animations with ease.\"
Step-by-Step Guide: From Concept to 3D Logo
Transforming a concept into a 3D logo with Blender involves a series of steps designed to guide even beginners through the process of 3D logo creation. Follow this comprehensive step-by-step guide to bring your logo idea to life.
- Conceptualization:
- Start with a clear concept or idea of your logo.
- Sketch your logo design on paper or digitally to refine your concept.
- Preparation in Blender:
- Open Blender and set up your workspace by removing the default cube and adjusting the camera view.
- Import your logo sketch or image as a reference using the \"Add\" menu.
- Tracing the Logo:
- Utilize Bezier curves or the grease pencil to trace over your reference image, outlining the key features of your logo.
- Creating the 3D Model:
- Extrude the traced outlines to add depth and create a 3D model of your logo.
- Adjust the model\"s geometry for accuracy and aesthetics.
- Applying Materials and Textures:
- Select materials and textures that best represent your logo\"s design and brand identity.
- Apply these materials to your 3D model to enhance its visual appeal.
- Lighting and Rendering:
- Set up lighting to highlight the best features of your logo.
- Choose a rendering engine and adjust settings for optimal output quality.
- Render your logo to produce the final image or animation.
- Final Adjustments and Export:
- Make any necessary adjustments to your logo based on the rendered output.
- Export your logo in the desired format for use in digital or print media.
This guide provides a foundational approach to 3D logo creation in Blender, enabling you to turn your logo concepts into professional-grade 3D models. With practice and exploration of Blender\"s vast toolset, your logo designs will reach new dimensions of creativity and impact.

Tracing Your Logo with Bezier Curves in Blender
Tracing your logo with Bezier curves in Blender is a crucial step in converting your 2D design into a 3D model. This method allows for precise control over the shape and details of your logo. Follow these detailed steps to effectively trace your logo using Bezier curves.
- Preparing Your Reference Image:
- Start by importing your logo as a reference image into Blender.
- Adjust the image\"s opacity for easier tracing.
- Setting Up Bezier Curves:
- Select the Bezier curve tool from the toolbar.
- Begin tracing the outline of your logo. Place anchor points at the start and end of each curve.
- Use the handles to adjust the curve\"s shape to match your logo\"s design.
- Completing the Trace:
- Continue adding and adjusting Bezier curves until the entire logo is traced.
- Connect the curves to form a complete outline of your logo.
- Converting Curves to a 3D Model:
- Once tracing is complete, convert the Bezier curves into a mesh.
- Extrude the mesh to add depth and create a 3D model of your logo.
Tracing with Bezier curves is a meticulous process that requires patience and precision. However, mastering this technique will enable you to create detailed and accurate 3D models of your logos in Blender, setting a strong foundation for further modeling and rendering tasks.
Transforming 2D Images into 3D Models
Converting 2D images into 3D models in Blender opens a realm of creative possibilities for logo design. This process involves several key steps that leverage Blender\"s powerful modeling tools. Follow this guide to transform your flat images into detailed 3D models.
- Preparing the 2D Image:
- Choose a clear, high-contrast image of your logo for easier conversion.
- Import the image into Blender as a reference to guide your modeling.
- Setting Up the Scene:
- Adjust the view to a comfortable angle, typically the front or top perspective.
- Ensure your reference image is scaled correctly within the scene.
- Modeling from the Image:
- Use Blender\"s Add menu to create a plane or curve that matches the basic shape of your logo.
- Edit the vertices, edges, and faces to outline your logo\"s design.
- Extruding and Refining Shapes:
- Extrude the 2D shapes to add depth and create a 3D form.
- Refine the shapes using Blender\"s sculpting tools for more detail.
- Applying Materials and Textures:
- Select materials that reflect your logo\"s colors and style.
- Apply textures if needed to enhance the logo\"s appearance.
- Final Adjustments and Rendering:
- Adjust the lighting and camera angle to best showcase your logo.
- Render the scene to create a high-quality image or animation of your 3D logo.
By following these steps, you can effectively turn any 2D image or sketch of a logo into a 3D model using Blender. This process not only adds depth and dimension to your designs but also allows for more dynamic presentations and applications of your logo.

Texturing and Material Application for a Realistic Look
Applying textures and materials is a crucial step in achieving a realistic look for your 3D logo in Blender. This process involves selecting and modifying materials and textures that enhance the visual appeal of your logo. Follow these steps to apply textures and materials effectively.
- Understanding Materials:
- Materials define the color, texture, and reflectivity of your object.
- In Blender, use the Shader Editor to create and edit materials.
- Selecting Textures:
- Textures add detail to your materials. Choose textures that complement your logo\"s design and concept.
- Use Blender\"s Texture Paint mode to paint textures directly onto your 3D model.
- Applying Materials:
- Select your logo model and go to the Material Properties tab.
- Create a new material and adjust its settings, such as Base Color, Specular, Roughness, and more, to achieve the desired effect.
- Adjusting Lighting:
- Proper lighting is essential to showcase the materials and textures.
- Experiment with different lighting setups to highlight the best features of your logo.
- Rendering:
- Once satisfied with the materials and textures, render your logo to see the final look.
- Adjust the render settings in Blender for the best quality and resolution.
By carefully selecting and applying materials and textures, you can significantly enhance the realism and attractiveness of your 3D logo. This step is vital in creating a logo that stands out and conveys your brand\"s message effectively.
_HOOK_
Lighting and Camera Setup for the Perfect Render
Setting up the right lighting and camera angles is essential to highlight the best features of your 3D logo in Blender. This process can significantly impact the final look and feel of your logo. Follow these steps to ensure your render looks perfect.
- Understanding Lighting Basics:
- Begin by exploring different lighting setups. Blender offers various light sources such as point, sun, area, and spotlights.
- Experiment with the position, intensity, and color of the lights to see how they affect your logo.
- Adding a Three-Point Lighting Setup:
- This classic setup involves a key light, fill light, and back light to create depth and dimension.
- Adjust the setup to avoid harsh shadows or overly bright spots on your logo.
- Configuring the Camera:
- Position the camera to frame your logo effectively. Consider the angle and distance that best showcase your logo\"s design.
- Adjust the camera\"s focal length and depth of field for creative effects.
- Previewing and Adjusting:
- Use Blender\"s Render Preview mode to get a quick look at how your lighting and camera setup affects the final render.
- Make adjustments as needed to perfect the lighting and composition.
- Final Render Settings:
- Before rendering, ensure your render settings are optimized for quality and efficiency.
- Choose the appropriate resolution, sampling rates, and file format for your final output.
With careful attention to lighting and camera setup, you can create a compelling and visually striking render of your 3D logo in Blender. These steps will guide you through creating a render that stands out and truly represents your brand.
Rendering Your Logo for High-Quality Outputs
Rendering your logo in Blender is the final step in the logo creation process, where your 3D model is converted into a high-quality image or animation. This stage is crucial for achieving a professional and polished look. Follow these steps to ensure your logo render is of the highest quality.
- Choosing the Right Render Engine:
- Blender offers multiple render engines like Eevee and Cycles. Eevee is faster but less realistic, while Cycles provides high-quality, photorealistic renders but takes more time.
- Setting Up Render Properties:
- Access the Render Properties tab and adjust settings like resolution, frame rate (for animations), and sampling for optimal quality.
- Optimizing Lighting and Materials:
- Ensure your lighting setup and material properties are finalized, as they significantly impact the render\"s appearance.
- Camera Positioning:
- Position your camera to capture the best angle of your logo. Consider using depth of field for a more dramatic effect.
- Previewing Your Render:
- Use Blender\"s Render Preview mode to get an idea of how your final render will look and make any necessary adjustments.
- Final Render:
- When satisfied with your setup, proceed with the final render. For animations, ensure your output format is set correctly.
Rendering is a blend of art and science, requiring attention to detail and patience. By carefully following these steps, you can achieve high-quality outputs that make your logo stand out, whether for digital display or print.
Animating Your Logo for Added Impact
Animating your logo can significantly enhance its impact and memorability. Blender offers robust tools for bringing logos to life through animation. This section will guide you through the process of animating your 3D logo in Blender, step by step.
- Basic Animation Concepts:
- Understand keyframes and how they are used to create animation.
- Familiarize yourself with Blender\"s Timeline and Dope Sheet for animation control.
- Setting Up Your Logo for Animation:
- Ensure your logo is fully modeled and textured before starting the animation process.
- Decide on the animation\"s purpose: introduction, emphasis, or part of a larger sequence.
- Adding Movement:
- Use keyframes to animate the position, rotation, and scale of your logo or its components.
- Consider using Blender\"s Graph Editor to refine the animation curves for smoother movement.
- Incorporating Effects:
- Add visual effects such as particle systems or smoke for a more dynamic presentation.
- Explore Blender\"s physics simulations to introduce realistic movements or interactions.
- Animating Camera and Lighting:
- Animate the camera to create dynamic shots that showcase your logo from multiple angles.
- Adjust lighting intensity or color over time to highlight different aspects of your logo.
- Rendering Your Animation:
- Choose the right render settings for animation, considering factors like frame rate and resolution.
- Render your animation using Blender\"s rendering engines for the best quality output.
Animating a logo in Blender can transform a static image into a compelling story. By following these steps, you can create an animation that not only captures attention but also enhances your brand\"s message.
Exporting Your Logo for Various Uses
After creating and rendering your logo in Blender, the next step is to export it for various uses, whether for digital media, print, or animation. This process ensures your logo maintains its quality across different platforms. Follow these steps to export your logo efficiently.
- Choosing the Right Format:
- For static images, PNG or JPEG are suitable for web use, while TIFF is better for print due to its high quality.
- For animations, consider using MOV or MP4 formats, which are widely supported across platforms.
- Adjusting Export Settings:
- In Blender, go to the output properties and select your desired file format.
- Adjust the compression settings for images or bitrate for videos to balance quality and file size.
- Exporting Images:
- Navigate to \"Render\" > \"Render Image\" for static logos.
- Choose \"Save As Image\" from the image editor, select your format, and save.
- Exporting Animations:
- For animations, go to \"Render\" > \"Render Animation\" or press Ctrl+F12.
- Blender will render the animation and save it to the specified location in your chosen format.
- Final Checks:
- Review the exported files to ensure the quality and resolution meet your requirements.
- Test the files in their intended environment, whether on a website, in a presentation, or printed material.
By following these steps, you can successfully export your logo from Blender, ensuring it is ready for any use. Properly exported logos maintain their visual integrity, making your brand look professional across all media.
Advanced Tips and Tricks for Professional Results
To elevate your logo designs in Blender to a professional level, incorporating advanced techniques can significantly enhance the final outcome. These tips and tricks are aimed at refining your workflow and improving the quality of your 3D logos.
- Non-Destructive Editing:
- Utilize modifiers for non-destructive editing, allowing you to make changes without permanently altering your base geometry.
- Shader Nodes:
- Master the use of shader nodes to create complex materials that can react dynamically to lighting and environmental changes.
- Compositing for Post-Production:
- Leverage Blender’s compositing nodes to add post-production effects, enhancing the visual appeal of your logo.
- Realistic Lighting Techniques:
- Experiment with HDR lighting and realistic shadow casting to give your logo a more lifelike appearance.
- Animation Enhancements:
- Incorporate secondary animations, such as subtle movements or environmental effects, for a more dynamic presentation.
- High-Poly Modeling for Detail:
- For close-up shots, consider using high-poly models to capture intricate details of your logo.
- Efficient Workflow Practices:
- Adopt practices like layer management and scene organization to streamline your workflow and reduce rendering times.
- Custom Scripts:
- Use Blender’s Python API to write custom scripts for repetitive tasks, saving time and ensuring consistency.
Applying these advanced techniques requires practice and experimentation but can significantly improve the quality and impact of your 3D logo designs in Blender. These strategies will help you achieve professional-grade results that stand out.
_HOOK_
Common Mistakes to Avoid in Blender Logo Design
Designing a logo in Blender is a rewarding process, but certain common pitfalls can hinder achieving a professional result. Being aware of these mistakes can help you create more effective and visually appealing logos.
- Ignoring Reference Images:
- Always use a reference image for accuracy. Skipping this step can lead to logos that do not match the original design.
- Overcomplicating the Design:
- Keep your logo design simple and scalable. Complex designs may not render well at smaller sizes.
- Forgetting about the Logo\"s Background:
- Consider how your logo will look on various backgrounds. Neglecting this can result in logos that are hard to see or clash with their surroundings.
- Improper Use of Bezier Curves:
- Bezier curves are powerful but require practice. Poor usage can lead to uneven and unprofessional lines.
- Lack of Contrast in Colors and Textures:
- Ensure there is sufficient contrast between the logo\"s colors and textures to make it stand out.
- Ignoring Lighting and Shadows:
- Lighting and shadows add depth to your logo. Incorrect settings can flatten your logo, making it less dynamic.
- Not Optimizing Render Settings:
- Poor render settings can result in low-quality outputs. Take the time to understand and adjust these settings for the best results.
- Rushing the Design Process:
- Take your time with each step of the design process. Rushing can lead to mistakes and overlooked details.
Avoiding these common mistakes will help you create a more professional and effective logo in Blender. Each step in the design process is crucial for achieving the best result.
READ MORE:
Conclusion and Further Resources
Mastering logo design in Blender is an achievable goal with patience, practice, and the right guidance. This guide has walked you through the essential steps, from initial setup to final rendering and exporting, providing a foundation for creating professional-quality logos. However, the journey doesn\"t stop here. Continuously learning and experimenting with Blender\"s vast array of tools and features can unlock even greater potential in your logo designs.
- Blender Official Documentation and Tutorials: Blender\"s official website offers comprehensive guides and tutorials that are invaluable for both beginners and advanced users.
- Online Courses and Workshops: Platforms like Udemy, Coursera, and Blender Cloud offer structured courses that range from basic introductions to specialized techniques in 3D modeling and animation.
- Community Forums and Social Media: Join Blender communities on platforms like Blender Artists Forum, Reddit, and social media groups. Sharing your work and receiving feedback can accelerate your learning process.
- YouTube Tutorials: YouTube hosts a wealth of tutorials covering every aspect of Blender. Channels like Blender Guru, CG Geek, and Ducky 3D offer tutorials specifically tailored to logo design and animation.
- Books and E-books: There are several comprehensive guides and reference books available that delve into the nuances of Blender, offering insights and tips that are not readily available online.
As you continue to explore and experiment with Blender, you\"ll find that your skills and creativity will expand in ways you hadn\"t imagined. The journey from a novice to a proficient logo designer is rewarding, filled with endless possibilities for creativity and innovation. Remember, the key to mastery is practice, experimentation, and a constant thirst for knowledge.
Embark on a creative journey with Blender to design logos that stand out. With patience and practice, transform your vision into professional 3D logos that leave a lasting impression.