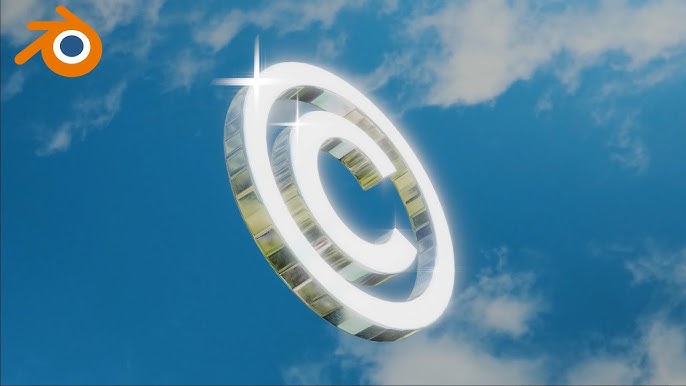
Topic how to make a 3d spinning logo in blender: Discover the art of creating a 3D spinning logo in Blender with our comprehensive guide, perfect for both beginners and experienced animators looking to enhance their digital presence.
Table of Content
- What is the best tutorial for making a 3D spinning logo in Blender?
- Getting Started
- Creating the 3D Effect
- Animating Your Logo
- Creating the 3D Effect
- Animating Your Logo
- YOUTUBE: Creating a 3D Spinning Logo in Blender Basics
- Animating Your Logo
- Introduction to Blender and 3D Logo Animation
- Setting Up Your Project in Blender
- Importing and Preparing Your Logo for 3D Animation
- Converting Your Logo into a 3D Model
- Applying Materials and Textures to Your Logo
- Animating Your Logo for a Spinning Effect
- Rendering and Exporting Your Animated Logo
- Tips for Creating Professional-Quality Animations
- Common Pitfalls to Avoid in 3D Animation
- Further Resources and Learning for Blender Animation
What is the best tutorial for making a 3D spinning logo in Blender?
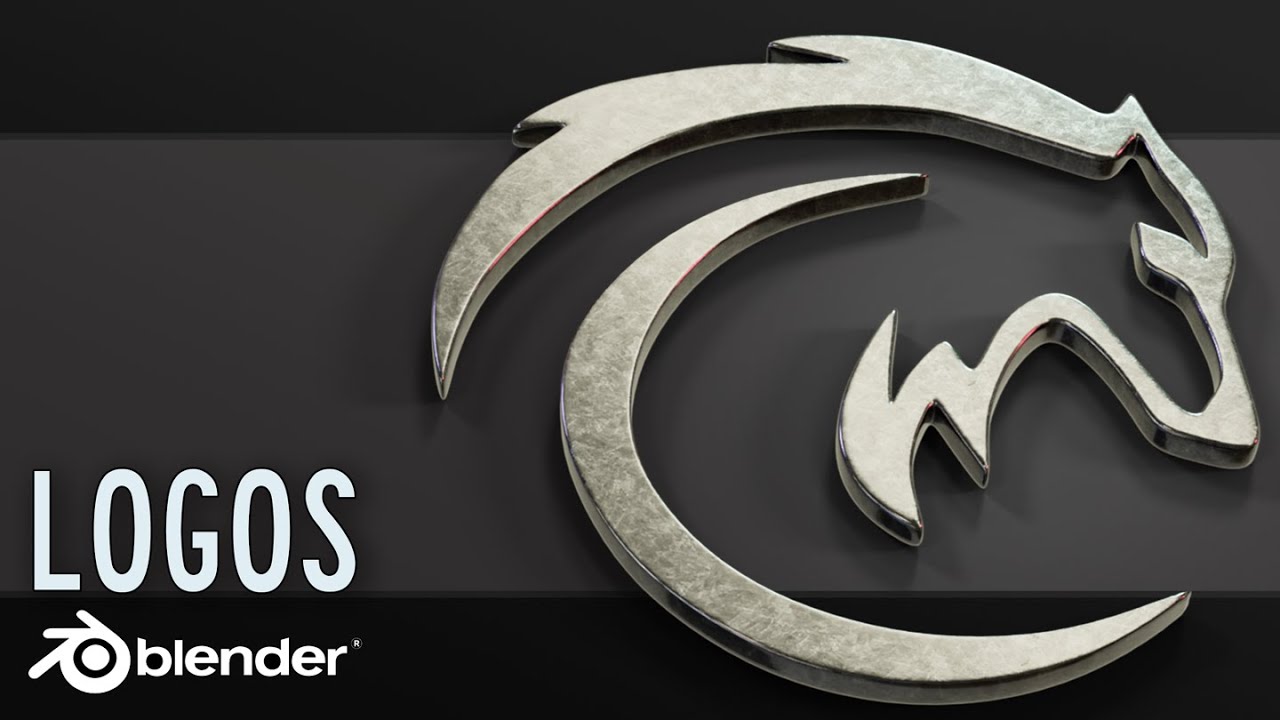
Based on the Google search results and considering the tutorials available, one of the highly recommended tutorials for making a 3D spinning logo in Blender is the \"Colorful Chrome Logo Effect in Blender 3D - Blender 3D Tutorial.\" This tutorial seems to be popular and informative based on the positive comments and engagement.
If you are interested in creating a 3D spinning logo in Blender, you can follow the steps outlined in the tutorial. Here is a general guide on how you can approach creating a spinning logo in Blender:
- Start by designing your logo or importing the logo you want to use in Blender.
- Create a 3D model of your logo by extruding the design to give it depth.
- Add materials to your logo to make it visually appealing and realistic.
- Set up the scene with appropriate lighting and camera angles for the spinning animation.
- Create keyframes to animate the spinning motion of the logo.
- Adjust the speed and rotation of the spinning animation to your liking.
- Render the animation to see the final result of your 3D spinning logo.
Remember to take your time, explore different techniques, and don\'t hesitate to experiment to achieve the desired spinning effect for your logo in Blender.
READ MORE:
Getting Started
Firstly, ensure Blender is installed on your system. You can download it from the official Blender website. The initial step involves removing the default cube and importing your logo as an SVG file. This may require enabling SVG import in Blender\"s preferences if it\"s not already available.
Preparation of Your Logo
- Begin by deleting the default cube in Blender.
- Import your logo in SVG format for the best results.
- Scale your logo appropriately to work with it easily.

Creating the 3D Effect
Transform your 2D logo into 3D by converting the SVG to a mesh and adjusting its scale. Apply the Decimate modifier to simplify the mesh without losing detail. Arrange the logo\"s layers in 3D space to maintain its original appearance.
Material and Color
Before animating, assign materials to your logo. This involves setting colors and textures to match your branding. Each part of the logo may require a unique material.

Animating Your Logo
With your 3D logo ready, the final step is to animate it. This involves setting the origin point for rotation and extruding the logo to give it depth. You\"ll then use Blender\"s animation tools to create a smooth spinning effect.
Finalizing the Animation
- Join all objects of your logo into a single object.
- Set the origin point to ensure your logo spins around its center.
- Extrude your logo to add depth, making it truly 3D.
- Use Blender\"s animation features to add rotation, adjusting the frame rate and duration to your liking.
This guide provides a foundation for creating a 3D spinning logo in Blender. For detailed steps, including how to optimize your animation and tips for rendering, refer to Blender tutorials and resources.

Creating the 3D Effect
Transform your 2D logo into 3D by converting the SVG to a mesh and adjusting its scale. Apply the Decimate modifier to simplify the mesh without losing detail. Arrange the logo\"s layers in 3D space to maintain its original appearance.
Material and Color
Before animating, assign materials to your logo. This involves setting colors and textures to match your branding. Each part of the logo may require a unique material.
_HOOK_
Animating Your Logo
With your 3D logo ready, the final step is to animate it. This involves setting the origin point for rotation and extruding the logo to give it depth. You\"ll then use Blender\"s animation tools to create a smooth spinning effect.
Finalizing the Animation
- Join all objects of your logo into a single object.
- Set the origin point to ensure your logo spins around its center.
- Extrude your logo to add depth, making it truly 3D.
- Use Blender\"s animation features to add rotation, adjusting the frame rate and duration to your liking.
This guide provides a foundation for creating a 3D spinning logo in Blender. For detailed steps, including how to optimize your animation and tips for rendering, refer to Blender tutorials and resources.

Creating a 3D Spinning Logo in Blender Basics
Tutorial: \"Unlock your creative potential with this informative tutorial video! Learn new skills, techniques, and tips from industry experts that will help you elevate your craft. Get ready to be inspired!\" Logo: \"Are you looking to create a memorable and impactful logo for your brand? Watch this video to discover innovative design ideas and strategies to craft a logo that truly represents your identity.\"
Creating a Spinning Logo in Blender
hey im here today with something a little different! Let me know if it was helpful, im still a beginner but i wanted to help still!
Animating Your Logo
With your 3D logo ready, the final step is to animate it. This involves setting the origin point for rotation and extruding the logo to give it depth. You\"ll then use Blender\"s animation tools to create a smooth spinning effect.
Finalizing the Animation
- Join all objects of your logo into a single object.
- Set the origin point to ensure your logo spins around its center.
- Extrude your logo to add depth, making it truly 3D.
- Use Blender\"s animation features to add rotation, adjusting the frame rate and duration to your liking.
This guide provides a foundation for creating a 3D spinning logo in Blender. For detailed steps, including how to optimize your animation and tips for rendering, refer to Blender tutorials and resources.

Introduction to Blender and 3D Logo Animation
Blender is a powerful, open-source 3D creation suite that supports the entirety of the 3D pipeline—modeling, rigging, animation, simulation, rendering, compositing, and motion tracking, even video editing, and game creation. Advanced users employ Blender’s API for Python scripting to customize the application and write specialized tools; often these are included in Blender’s future releases. Blender is well suited for individuals and small studios who benefit from its unified pipeline and responsive development process. Examples from many Blender-based projects are available in the showcase.
3D logo animation elevates your brand\"s presence by adding depth and movement to your logo, making it more memorable and engaging for your audience. In this guide, we will explore how to utilize Blender to create a stunning 3D spinning logo. This process involves several steps, starting from setting up your project in Blender to rendering and exporting your animated logo. Whether you\"re new to 3D animation or looking to refine your skills, this guide will provide you with the knowledge and tools needed to create professional-quality 3D logo animations.
- Understanding Blender\"s Interface: Familiarize yourself with the layout, tools, and features of Blender to navigate efficiently.
- Importing Your Logo: Learn how to import your logo into Blender and prepare it for 3D animation.
- Modeling Techniques: Convert your 2D logo into a 3D model using Blender’s modeling tools.
- Applying Textures and Materials: Enhance your logo with textures and materials for a professional finish.
- Animating Your Logo: Create a spinning effect to bring your logo to life.
- Rendering and Exporting: Render your animation and export it for use in various media.
By the end of this guide, you will have a clear understanding of how to make a 3D spinning logo in Blender, from the initial setup to the final export. Let\"s dive into the world of 3D animation and bring your logo to life!
Setting Up Your Project in Blender
Starting a new project in Blender for your 3D spinning logo animation involves a few essential steps to ensure a smooth workflow and optimal results. Follow this guide to set up your project efficiently:
- Open Blender and create a new file. Select the \"General\" workspace to begin with a versatile environment for 3D modeling and animation.
- Adjust Your Scene Settings: Before diving into the animation, configure your scene\"s dimensions, resolution, and frame rate. Go to the \"Output Properties\" tab to set the resolution to 1920x1080 for HD quality and 24 or 30 frames per second for smooth animation.
- Set Up Your Camera: The camera angle is crucial for showcasing your logo effectively. Position your camera so that the logo will be clearly visible and engaging once animated.
- Lighting Setup: Proper lighting will enhance the appearance of your 3D logo. Use the \"Shading\" workspace to add lights that accentuate the logo\"s features and textures.
- Save Your Project: Regularly save your work to avoid any loss of progress. Choose a memorable file name and location for easy access.
With your project set up, you\"re now ready to move on to importing and preparing your logo for 3D animation.
Importing and Preparing Your Logo for 3D Animation
Begin your journey into 3D animation by importing your logo into Blender. This process transforms your static image into a dynamic, animated asset. Follow these steps to ensure your logo is ready for 3D animation:
- Choose the Right File Format: Ensure your logo is in a compatible format such as SVG for vector graphics, which Blender can import directly. This ensures the highest quality and scalability for your logo.
- Importing Your Logo: In Blender, navigate to File > Import and select the appropriate file format for your logo. Once imported, your logo will appear in the 3D viewport.
- Cleaning Up the Logo: After import, it\"s crucial to inspect your logo for any unnecessary vertices or elements that might complicate the animation process. Use the edit mode to simplify and clean up your design.
- Converting to Mesh: For logos imported as SVG or another vector format, you\"ll need to convert them to a mesh. Right-click your logo and select \"Convert to Mesh\" from the curve. This step is vital for the next stages of animation.
By meticulously preparing your logo, you set the stage for a smooth transition into 3D modeling and animation, ensuring your brand\"s symbol captivates your audience in a whole new dimension.

_HOOK_
Converting Your Logo into a 3D Model
Transforming your 2D logo into a 3D model is a thrilling step towards creating an engaging spinning logo animation in Blender. Follow these detailed steps to bring your logo to life:
- Extruding Your Logo: With your logo now a mesh, select it and enter Edit Mode. Use the extrude function (E) to add depth to your logo, turning it from a flat shape into a 3D model.
- Adjusting Depth: Carefully adjust the extrusion depth to ensure your logo has the desired thickness. This depth will significantly affect how your logo looks when animated.
- Adding Solidify Modifier: For logos with intricate designs, adding a solidify modifier can help achieve a more robust 3D look. This modifier adds thickness to the model, making it look more substantial.
- Smoothing Your Model: To give your logo a polished look, apply a smoothing modifier. This will soften any harsh edges and make your logo appear more professional.
- Final Touches: Inspect your 3D model for any imperfections. Use the sculpting tools in Blender to refine and tweak your logo until it\"s perfect.
This transformation process is not just about converting shapes; it\"s about creating a dynamic, visually appealing 3D logo that will captivate your audience. With your logo now in 3D, you\"re ready to move on to texturing and animating.
Applying Materials and Textures to Your Logo
Once your logo is modeled in 3D, the next step is to bring it to life with materials and textures. This stage is crucial for adding color, depth, and realism to your animation. Follow these steps to enhance your logo:
- Select Your Logo: In the 3D viewport, select your logo model to begin applying materials.
- Access the Materials Tab: With your logo selected, go to the Materials tab in the Properties panel. Here, you can create a new material or assign an existing one.
- Customize Material Settings: Adjust the material\"s properties such as color, specularity, and roughness to match your brand\"s identity. Blender\"s node-based shader system allows for intricate material customization.
- Applying Textures: To add textures, switch to the Shading workspace. Here, you can use nodes to add and configure textures, giving your logo patterns, gradients, or specific visual effects.
- Preview Your Work: Utilize the Render Preview mode to see how your materials and textures look under various lighting conditions. Adjust as necessary to achieve the desired effect.
By carefully applying materials and textures, you elevate your logo from a simple 3D model to a visually stunning animation that captures attention and communicates your brand\"s essence.
Animating Your Logo for a Spinning Effect
Animating your logo to create a spinning effect in Blender adds dynamic movement to your brand\"s identity, making it more memorable. Follow these steps to achieve a professional spinning animation:
- Setting the Pivot Point: Ensure your logo\"s pivot point is centered. This is crucial for a smooth spinning effect. In Blender, you can set the origin to geometry center or manually place it at the desired pivot point.
- Adding Keyframes: Move to the frame where you want your animation to start. Press I to insert a keyframe and choose \"Rotation\". Move the timeline to the end frame and rotate your logo 360 degrees on the desired axis. Insert another rotation keyframe.
- Adjusting Animation Speed: Open the Graph Editor to adjust the speed of the spin. For a constant speed, ensure the slope between keyframes is linear. For acceleration or deceleration, adjust the handles accordingly.
- Looping the Animation: To create a seamless loop, copy the first keyframe and paste it slightly after the last keyframe. This ensures the animation smoothly transitions back to the start.
- Previewing Your Animation: Use the timeline to scrub through the animation and make adjustments as needed. Preview the animation in real-time by pressing the play button.
With these steps, your logo will now have an eye-catching spinning effect that can be used in videos, websites, and digital displays to enhance your brand\"s visual appeal.
Rendering and Exporting Your Animated Logo
Finalizing your 3D spinning logo involves rendering and exporting it into a video format. This makes your animated logo ready for use across various media. Follow these steps to render and export your creation:
- Setting Render Properties: Go to the Render Properties panel in Blender. Select your desired render engine (e.g., Cycles or Eevee for high-quality results). Adjust the resolution, frame rate, and other settings according to your project\"s requirements.
- Choosing the Output Format: In the Output Properties, select the file format for your animation. Formats like AVI, MPEG, or MOV are suitable for video animations. Specify the destination folder where your rendered file will be saved.
- Rendering the Animation: With your settings configured, click on Render > Render Animation or press Ctrl+F12. Blender will start processing each frame of your animation, which may take some time depending on the complexity and length.
- Reviewing the Rendered Animation: After rendering, it\"s important to review the animation for any issues. If necessary, make adjustments and re-render until you\"re satisfied with the outcome.
- Exporting the Final Product: Once you\"re happy with the rendered animation, it\"s ready to be exported. Use the file path you specified earlier to locate your animation. Your animated logo is now ready for integration into your digital content.
By carefully following these steps, you can produce a professionally rendered and exported 3D spinning logo, enhancing your brand\"s visibility and appeal.
Tips for Creating Professional-Quality Animations
Creating professional-quality animations in Blender is an art that combines creativity with technical skills. Here are some essential tips to elevate your 3D logo animations:
- Plan Your Animation: Before diving into Blender, sketch your animation idea. Planning your animation steps can save you time and help refine your concept.
- Focus on Lighting: Good lighting can make a significant difference in your animation. Experiment with different lighting setups to highlight your logo effectively and create depth.
- Use High-Quality Textures: Textures can add realism to your logo. Use high-resolution textures where possible, and consider creating custom textures to match your brand\"s unique look.
- Pay Attention to Motion Dynamics: Smooth and natural motion is key to a professional animation. Use Blender\"s graph editor to refine the acceleration and deceleration of your movements.
- Keep it Simple: Sometimes, less is more. Avoid overcomplicating your animation with too many effects, as it can distract from the main message of your logo.
- Preview Frequently: Regularly preview your animation in Blender to ensure it flows as intended. This can help identify and fix issues early in the creation process.
- Learn from Others: Blender has a vast community of users. Watch tutorials, join forums, and learn from the projects of experienced animators to improve your skills.
- Experiment and Iterate: Don\"t be afraid to try new techniques or tools within Blender. Experimentation is key to discovering unique animation styles that can set your brand apart.
By applying these tips, you\"re well on your way to producing animations that captivate your audience and showcase your brand with professional flair.
_HOOK_
Common Pitfalls to Avoid in 3D Animation
Avoiding common pitfalls in 3D animation is crucial for creating professional-quality work. Here are key mistakes to steer clear of:
- Ignoring the Basics of Animation: Don\"t jump into complex projects without a solid understanding of animation fundamentals. Principles like timing, spacing, and easing are essential for natural-looking motion.
- Overlooking the Importance of Storyboarding: Skipping the planning phase can lead to disjointed animations. Storyboarding helps you visualize and plan your project effectively.
- Neglecting Lighting and Texturing: Lighting and textures add depth and realism to your animations. Neglecting these elements can result in flat and unappealing visuals.
- Underestimating Render Times: Rendering can be time-consuming. Underestimating this can lead to rushed projects or missed deadlines. Always allocate sufficient time for rendering.
- Avoiding Feedback: Feedback is invaluable for improvement. Avoiding critiques can hinder your growth as an animator. Seek out constructive feedback regularly.
By being mindful of these pitfalls and focusing on continuous learning and improvement, you can enhance the quality of your 3D animations significantly.
READ MORE:
Further Resources and Learning for Blender Animation
Expanding your skills in Blender animation is an ongoing journey. Here are some resources to further your learning and mastery:
- Blender Official Tutorials: The Blender Foundation offers extensive tutorials on their website, covering everything from basics to advanced techniques.
- Online Courses and Workshops: Platforms like Udemy, Coursera, and Skillshare feature courses for all levels, taught by industry professionals.
- Community Forums and Groups: Joining Blender communities on platforms like Reddit, Blender Artists, and the Blender Network can provide support, feedback, and inspiration.
- YouTube Channels: Numerous channels are dedicated to Blender tutorials, offering visual guides on a variety of topics and projects.
- Books and E-books: There are several comprehensive guides and reference books available for Blender, catering to both beginners and advanced users.
With dedication and practice, utilizing these resources can significantly advance your understanding and capabilities in Blender animation.
Embrace the power of Blender to bring your brand to life with a captivating 3D spinning logo. This guide sets you on a path to unlock creative possibilities and elevate your digital presence.