Topic logo animation in blender: Discover the endless possibilities of logo animation in Blender, where creativity meets technology, empowering you to bring your brand"s identity to life in captivating, dynamic ways.
Table of Content
- What is the process for creating logo animation in Blender?
- Getting Started with Logo Animation in Blender
- Animation Techniques
- Lighting and Rendering
- Advanced Tips
- Conclusion
- Animation Techniques
- Lighting and Rendering
- Advanced Tips
- Conclusion
- Lighting and Rendering
- YOUTUBE: Create a Logo Animation in Blender & Eevee in under 7 Minutes
- Advanced Tips
- Conclusion
- Advanced Tips
- Conclusion
- Conclusion
- Introduction to Logo Animation in Blender
- Why Choose Blender for Your Logo Animation
- Preparation: Setting Up Your Workspace and Importing Logos
- Basic Animation Techniques for Beginners
- Advanced Animation Techniques for Experienced Users
- Adding Effects: Working with Physics and Particles
- Lighting and Rendering Your Animated Logo
- Integrating Animated Logos into Video Projects
- Optimizing Workflow: Tips and Tricks
- Conclusion: Bringing It All Together
What is the process for creating logo animation in Blender?
To create a logo animation in Blender, you can follow these steps:
- Import your logo: Start by importing your logo into Blender. You can use an SVG format for better quality.
- Convert logo to curves: Convert your logo to curves by selecting it and pressing Alt + C. This will allow you to manipulate the individual elements of the logo.
- Animate the logo: Use keyframes to animate different elements of the logo. You can animate things like scaling, rotation, and position to create movement.
- Add materials and lighting: Enhance the visual appeal of your logo animation by adding materials and lighting to make it more engaging.
- Render the animation: Once you are satisfied with the animation, set up the camera and render the final animation using Blender\'s rendering engine.
- Composite the animation: After rendering, you can composite the animation using Blender\'s compositor to add final touches and effects.
- Export the animation: Finally, export your logo animation in a suitable format for use in various platforms or projects.
READ MORE:
Getting Started with Logo Animation in Blender
- Understand the basics of Blender and familiarize yourself with its interface.
- Import your logo into Blender, preferably in a vector format like SVG for better scalability and quality.
- Use Blender\"s modeling tools to create a 3D version of your logo if needed.
Animation Techniques
- Start with simple animations, such as scaling or rotating your logo, to grasp basic animation principles.
- Explore more complex animations using Blender\"s physics simulations for effects like smoke, fire, or liquid.
- Utilize the animation nodes addon for procedural animations and effects.
Lighting and Rendering
- Set up appropriate lighting to enhance the look of your animated logo.
- Choose the right rendering engine (Eevee or Cycles) based on your needs for speed versus realism.
- Render your animation in a high-quality format suitable for your final delivery platform.

Advanced Tips
For those looking to push their animations further:
- Integrate your logo animation with live-action footage for a mixed media presentation.
- Experiment with Blender\"s shader nodes to create unique materials and textures for your logo.
- Keep animations concise; a shorter, well-executed animation often has a bigger impact than a longer one.
_HOOK_
Conclusion
Animating a logo in Blender is a rewarding project that can significantly enhance your brand or project\"s visual appeal. By starting with the basics and gradually exploring more advanced techniques, you can create stunning logo animations that captivate your audience.

Animation Techniques
- Start with simple animations, such as scaling or rotating your logo, to grasp basic animation principles.
- Explore more complex animations using Blender\"s physics simulations for effects like smoke, fire, or liquid.
- Utilize the animation nodes addon for procedural animations and effects.
Lighting and Rendering
- Set up appropriate lighting to enhance the look of your animated logo.
- Choose the right rendering engine (Eevee or Cycles) based on your needs for speed versus realism.
- Render your animation in a high-quality format suitable for your final delivery platform.
Advanced Tips
For those looking to push their animations further:
- Integrate your logo animation with live-action footage for a mixed media presentation.
- Experiment with Blender\"s shader nodes to create unique materials and textures for your logo.
- Keep animations concise; a shorter, well-executed animation often has a bigger impact than a longer one.
Conclusion
Animating a logo in Blender is a rewarding project that can significantly enhance your brand or project\"s visual appeal. By starting with the basics and gradually exploring more advanced techniques, you can create stunning logo animations that captivate your audience.
_HOOK_
Lighting and Rendering
- Set up appropriate lighting to enhance the look of your animated logo.
- Choose the right rendering engine (Eevee or Cycles) based on your needs for speed versus realism.
- Render your animation in a high-quality format suitable for your final delivery platform.

Create a Logo Animation in Blender & Eevee in under 7 Minutes
Discover the limitless possibilities of 3D animation with Blender, the versatile software that empowers artists to design breathtaking visuals. From intricate details to seamless motion, witness the magic of Blender in action.
Create a Logo Animation in Blender & Eevee in under 7 Minutes
Discover the limitless possibilities of 3D animation with Blender, the versatile software that empowers artists to design breathtaking visuals. From intricate details to seamless motion, witness the magic of Blender in action.
Advanced Tips
For those looking to push their animations further:
- Integrate your logo animation with live-action footage for a mixed media presentation.
- Experiment with Blender\"s shader nodes to create unique materials and textures for your logo.
- Keep animations concise; a shorter, well-executed animation often has a bigger impact than a longer one.
Conclusion
Animating a logo in Blender is a rewarding project that can significantly enhance your brand or project\"s visual appeal. By starting with the basics and gradually exploring more advanced techniques, you can create stunning logo animations that captivate your audience.
_HOOK_
Conclusion
Animating a logo in Blender is a rewarding project that can significantly enhance your brand or project\"s visual appeal. By starting with the basics and gradually exploring more advanced techniques, you can create stunning logo animations that captivate your audience.
Introduction to Logo Animation in Blender
Blender is a powerful open-source tool for creating dynamic and visually appealing logo animations. This section introduces you to the fundamental steps and considerations for animating logos in Blender, ensuring a solid foundation for beginners and a refresher for seasoned users. From importing your logo into Blender to applying the final touches for a professional look, we\"ll guide you through every step of the process.
- Understanding Blender\"s Interface: Navigate Blender efficiently and customize your workspace for logo animation projects.
- Importing Your Logo: Learn how to import various logo formats into Blender, focusing on vector graphics for scalability and quality.
- Creating a 3D Logo: Transform your 2D logo into a 3D model using Blender\"s modeling tools, preparing it for animation.
- Animation Basics: An overview of keyframe animation, allowing you to animate logo elements for dynamic effects.
- Advanced Animation Techniques: Dive into more complex animations using Blender\"s physics simulations and particle systems for unique effects.
- Lighting and Rendering: Explore lighting setups and rendering options to showcase your animated logo in the best light.
- Exporting Your Animation: Finalize your project by exporting the animated logo in formats suitable for various platforms and uses.
By the end of this section, you\"ll have a clear understanding of how to start your journey in logo animation using Blender, equipped with the knowledge to explore creative possibilities and bring your logos to life.
Why Choose Blender for Your Logo Animation
Blender is not just a 3D modeling and animation software; it\"s a comprehensive suite equipped with all the tools necessary for creating professional-grade logo animations. Here\"s why Blender stands out as the ideal choice for animating logos:
- Open Source and Free: Blender is entirely free to use, offering a robust set of features without the hefty price tag associated with other 3D software.
- Comprehensive Toolset: From modeling, rigging, and animating to rendering, Blender provides an all-in-one platform for all stages of logo animation.
- Community Support: A vast community of Blender users contributes to a rich repository of tutorials, forums, and free resources to assist newcomers and professionals alike.
- Regular Updates: Blender is continuously updated with new features and improvements, ensuring that users have access to the latest tools and technologies.
- Versatility: Capable of handling both 2D and 3D animation, Blender allows for creative flexibility in designing logo animations that stand out.
- High-Quality Rendering: With advanced rendering engines like Cycles and Eevee, Blender produces stunning, photorealistic animations.
- Animation and Effects: Blender offers powerful animation tools, including physics simulations and particle systems, to add dynamic effects to logo animations.
Choosing Blender for your logo animation projects means leveraging a powerful, versatile toolset that can bring any creative vision to life, backed by a supportive community and without financial barriers.
Preparation: Setting Up Your Workspace and Importing Logos
Preparing your Blender workspace and importing your logo correctly are crucial first steps in creating an engaging logo animation. This guide will walk you through setting up your workspace for efficiency and importing your logos into Blender for animation.
Setting Up Your Workspace
- Customize your layout to suit logo animation by organizing your tools and panels for easy access.
- Adjust your viewports to have a clear perspective and orthographic views, aiding in precise logo placement and animation.
- Enable relevant add-ons in Blender\"s preferences, such as \"Import-Export: Scalable Vector Graphics (SVG) 1.1 format\" for importing vector logos.
Importing Logos
- For vector logos: Use the SVG format to maintain quality and scalability. Import your SVG file through File > Import > Scalable Vector Graphics (.svg).
- For raster images: Convert your logo into a mesh by importing it as a reference image. Then, use Blender\"s tracing tools or manually model the logo based on the reference.
- Ensure your logo is correctly scaled and positioned within the 3D space to start animating.
By carefully setting up your workspace and importing your logos properly, you\"re laying a solid foundation for the creative process of logo animation in Blender. This preparation phase is pivotal in ensuring a smooth animation workflow and achieving professional results.
Basic Animation Techniques for Beginners
Starting with logo animation in Blender can be an exciting journey. This section breaks down basic animation techniques tailored for beginners, ensuring you grasp the core concepts and apply them effectively to your projects.
Understanding Keyframes
Keyframes are the cornerstone of animation in Blender. They mark the start and end points of any movement, allowing you to animate objects over time.
- Learn to insert keyframes for different properties like location, rotation, and scale.
- Practice moving and scaling your logo to create simple yet compelling animations.
Animating with the Timeline
The timeline is your control center for animation playback and keyframe manipulation.
- Get familiar with playing back your animation and adjusting keyframes on the timeline for precise timing.
- Use the dope sheet for a more detailed view of your animation\"s keyframes.
Introduction to Easing and Interpolation
Easing and interpolation determine how animation transitions between keyframes.
- Explore different interpolation modes like linear, bezier, and constant to see how they affect the flow of your animation.
- Adjust the easing of keyframes to make the animation appear more natural or dynamic.
Simple Animation Effects
Start experimenting with simple effects to add interest to your logo animations.
- Use the rotation and scaling features to create animations that grab attention.
- Experiment with Blender\"s modifiers like the wave or build modifier for unique effects.
By mastering these basic animation techniques, you\"ll be well on your way to creating your own dynamic logo animations in Blender. Remember, practice is key to understanding and improving your animation skills.
_HOOK_
Advanced Animation Techniques for Experienced Users
Advancing your skills in Blender for logo animation requires a deep dive into more sophisticated techniques that can truly bring your logos to life. This section covers a range of advanced strategies to elevate your logo animations.
1. Complex Shape and Path Animations
Utilize Blender\"s powerful animation tools to create complex shape and path animations. Learn to animate your logo\"s components along custom paths, adding a dynamic flow to each element of your design.
2. Using Modifiers for Creative Effects
- Boolean Modifiers: Use Boolean modifiers to create intricate cutouts and overlays, allowing for unique reveal effects.
- Displace Modifiers: Employ displace modifiers to add depth and texture to your logo elements, giving them a more three-dimensional look.
- Array Modifiers: Duplicate elements of your logo in an orderly fashion, creating patterns or sequences that enhance its visual appeal.
3. Particle Systems and Physics
Integrate particle systems and physics simulations to add realism to your animations. Create effects such as smoke, fire, or liquid simulations that interact with your logo, offering a visually stunning experience.
4. Advanced Lighting and Shading Techniques
Explore advanced lighting and shading techniques to give your logo animation a professional polish. Utilize HDRIs for realistic environmental lighting and experiment with shader nodes to achieve unique materials and textures.
5. Rigging and Morphing
Rigging elements of your logo can provide additional control over animations, allowing for more complex movements. Morphing between different logo states can also create a dynamic transition effect that captivates the viewer.
6. Camera Movements and Angles
Enhance your animation with dynamic camera movements and angles. Use tracking, panning, and zooming to guide the viewer\"s focus and add depth to your presentation.
7. Rendering and Post-Production
Finally, refine your animation with advanced rendering settings for higher quality output. In post-production, add finishing touches like motion blur, color grading, and compositing for a polished final product.
By mastering these advanced techniques, you\"ll be able to create logo animations in Blender that stand out for their creativity and professional quality. Experiment with different tools and effects to discover unique ways to animate and present logos.
Adding Effects: Working with Physics and Particles
Enhancing your logo animations with physics and particle effects can add a layer of sophistication and realism. Blender\"s physics and particle systems offer a vast array of possibilities for creating stunning visual effects. Here\"s how you can utilize these features to bring your logo animations to the next level.
Understanding Blender\"s Particle System
Blender\"s particle system allows you to create effects ranging from simple smoke and dust to complex simulations of fire, water, and more. These systems can be used to add dynamic and organic movements to your animations, making your logos come alive.
Step-by-Step Guide to Adding Particle Effects
- Setting Up Your Particle System: Begin by selecting the logo or element you want to apply the effect to. In the Properties panel, navigate to the Particles tab and click on the \"New\" button to create a new particle system.
- Configuring Particle Settings: Adjust the emission settings, such as the number of particles, emission rate, and lifespan, to suit your desired effect. You can also experiment with different physics types and forces to achieve unique behaviors.
- Customizing Particle Appearance: Use the Render settings within the particle system to change how your particles look. You can assign different shapes, textures, and materials to your particles to match your logo\"s aesthetic.
- Adding Physics and Forces: To make your particles interact with the environment, add physics modifiers like wind, turbulence, or gravity. This will allow your particles to move in more natural and interesting ways.
Creating Physics-Based Animations
Blender\"s physics engine can simulate real-world physics behaviors, which can be applied to objects in your scene. Use these features to create animations where your logo elements interact with their environment in believable ways.
- Soft Body Dynamics: Apply soft body dynamics to parts of your logo to make them behave like flexible, deformable materials.
- Rigid Body Dynamics: Use rigid body dynamics for parts of your logo that should interact with each other or the environment like solid objects.
- Fluid Simulations: Incorporate fluid simulations to create effects like liquid filling or spilling around your logo for dramatic impact.
- Smoke and Fire Simulations: Add smoke or fire simulations to your logo for a powerful and dynamic effect. This can be particularly impactful for logos that want to convey energy or transformation.
Experiment with these advanced techniques to discover new and exciting ways to present your logo. Remember, the key to effective animation is not just the technical execution but also the creativity and storytelling behind the effect.
Lighting and Rendering Your Animated Logo
Lighting and rendering are crucial steps in the animation process that bring your logo to life. This section covers advanced techniques to enhance your logo\"s appearance in Blender, ensuring your final product stands out with a professional finish.
Setting Up Your Lighting
Lighting plays a pivotal role in defining the mood and visibility of your animated logo. Follow these steps to set up effective lighting:
- Choose Your Light Sources: Start by adding light sources to your scene. Blender offers several types of lights, including Point, Sun, Spot, and Area lights. Each has unique characteristics that can influence the mood of your animation.
- Adjust Light Settings: Fine-tune the intensity, color, and direction of your lights. Consider using three-point lighting to achieve a balanced look with depth and dimension.
- Experiment with HDRIs: High Dynamic Range Images (HDRIs) can provide realistic environmental lighting with minimal setup. They are especially useful for reflecting a natural atmosphere in your animation.
Enhancing with Shadows and Reflections
Shadows and reflections add realism to your animation. Use Blender\"s Ray Tracing features to create accurate shadows and reflections that match your scene\"s lighting.
Rendering Your Animation
Rendering transforms your animated logo from a 3D model into a final video or image. Here\"s how to achieve the best results:
- Choose the Right Renderer: Blender offers two main rendering engines, Cycles and Eevee. Cycles is a ray-tracing renderer that provides photorealistic results, while Eevee is a real-time renderer for faster previews.
- Optimize Render Settings: Adjust settings like resolution, sample rate, and light bounces to balance quality and rendering time. Higher settings yield better quality but require more time and computing power.
- Use Render Layers and Compositing: Render layers allow you to render different elements of your scene separately. Compositing these layers together can enhance control over the final image, allowing for adjustments to lighting, effects, and backgrounds without re-rendering the entire scene.
Post-Processing and Effects
After rendering, you can further enhance your logo animation with post-processing effects. Blender\"s Compositor offers tools for color correction, adding blur effects, and integrating your logo animation into live-action footage or other backgrounds.
By carefully lighting and rendering your animated logo in Blender, you can achieve professional-level results that capture your brand\"s essence and engage your audience. Experiment with different techniques to find the perfect look for your project.
Integrating Animated Logos into Video Projects
Integrating animated logos into video projects can significantly enhance your brand\"s visibility and the overall quality of your content. This section outlines the steps and considerations for effectively incorporating your animated logos using Blender.
Preparing Your Animated Logo
Ensure your logo animation is rendered in a format that\"s compatible with your video editing software. Export your animation with an alpha channel if you want to overlay your logo on different backgrounds without a solid box around it.
Step-by-Step Integration Process
- Export Your Animated Logo: Render your animated logo in Blender using the appropriate settings to ensure high quality. Common formats include MOV and AVI for video, with PNG sequences being ideal for maintaining transparency.
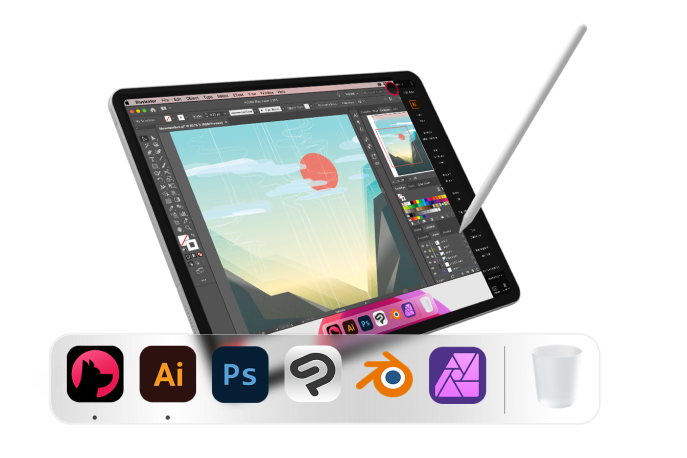
- Import into Video Editing Software: Once your logo animation is ready and exported, import it into your video editing software. Programs like Adobe Premiere Pro, Final Cut Pro, or even Blender\"s own video editing layout can handle this task.
- Overlay Your Logo: Place your animated logo over your video content. Most video editors allow you to adjust the size, position, and timing of your logo to ensure it complements your video without overshadowing it.
- Adjust Transparency and Effects: If your logo has an alpha channel, you can seamlessly integrate it into your scenes. Additionally, you can apply effects like fade in/out to make its appearance and disappearance smoother.
Best Practices for Logo Integration
- Consistency: Use your logo animation consistently across all your videos to strengthen your brand identity.
- Positioning: Place your logo in a location that is visible but not intrusive to your content. Corners are traditionally preferred.
- Timing: Introduce your logo at the beginning or end of the video, and consider briefly showing it during key moments without disrupting the viewer experience.
Integrating animated logos into your video projects not only elevates the professionalism of your content but also reinforces brand recognition among your audience. By following these steps and practices, you can effectively utilize Blender to create and incorporate high-quality animated logos into your video projects.
Optimizing Workflow: Tips and Tricks
Optimizing your workflow in Blender for logo animation can significantly enhance your efficiency and output quality. Here are some expert tips and tricks to streamline your process:
1. Planning Your Animation
Understanding what the company stands for and portraying this in your animation is crucial. Start your animation subtly to build curiosity, revealing the logo piece-by-piece. Keep the animation concise, preferably under 10 seconds, and consider ending with the logo on a black background for consistency with industry standards. High-quality sound design is also essential for complementing your visuals.
2. Using Actions and Sequences
Actions in Blender help make your animation modular, allowing you to work on and refine individual components without affecting the entire project. They also keep your animation organized, enable reuse across different parts, and allow you to experiment with various movements and timings.
3. Efficient Mode Switching
Switching between Object Mode and Pose Mode can be streamlined with keyboard shortcuts like CTRL + TAB, saving you time and keeping your focus on animation.
4. Precise Object Placement with the 3D Cursor
The 3D cursor is invaluable for positioning objects with precision. Utilize shortcuts like Shift + S for \"Cursor to Selected\" to place new objects exactly where you need them.
5. Smooth Rotation with Individual Origins
For smooth and precise rotations, use the \"Individual Origins\" option. This allows each selected object to rotate around its own origin point, offering more control over the animation process.
6. The 2D Cursor in Graph Editor
The 2D cursor in Blender’s Graph Editor acts as a reference for moving and scaling keyframe handles, improving your workflow in animation timing and effects.
7. Mastering the Breakdowner Tool
The Breakdowner tool helps create smooth transitions between keyframes, essential for fluid animation movements. It offers the flexibility to focus on specific animation aspects like translation or rotation.
8. Optimizing Scenes with Simplify
To manage complex scenes better and improve Blender\"s performance, utilize the \"Simplify\" feature to reduce polygon count in your objects, balancing between quality and processing efficiency.
9. Saving Your Workspace
Customize and save your Blender workspace to maintain a consistent setup across all projects, enhancing your productivity by having a familiar environment.
By incorporating these tips into your Blender workflow, you can achieve more efficient and high-quality logo animation projects. Experiment with these strategies to find what works best for you and continuously evolve your process.
_HOOK_
READ MORE:
Conclusion: Bringing It All Together
Embarking on the journey of logo animation in Blender opens up a vast landscape of creativity and technical prowess, allowing you to bring static images to dynamic life. As we conclude this guide, it\"s essential to recognize the power of Blender as an accessible yet potent tool for artists, designers, and enthusiasts alike. Whether you\"re a beginner taking your first steps in animation or an experienced animator refining your craft, Blender offers a comprehensive suite of features to breathe life into your logo animations.
Throughout this guide, we\"ve explored various aspects of logo animation in Blender, from setting up your workspace and importing logos to mastering both basic and advanced animation techniques. By now, you should have a solid foundation in working with physics and particles, optimizing lighting and rendering settings, and integrating your animated logos seamlessly into video projects. Moreover, the tips and tricks shared should enhance your workflow, making the animation process more efficient and enjoyable.
In animation, every detail counts, and the journey doesn\"t end here. Continuous learning and experimentation are key to mastering the art. As you progress, remember to:
- Explore the vast array of Blender tutorials and resources available online to deepen your understanding and skills.
- Practice regularly, experimenting with different effects, textures, and animation styles to discover what works best for your projects.
- Join Blender communities and forums to share your work, receive feedback, and stay updated on the latest trends and techniques in the field.
- Keep pushing the boundaries of creativity, using every project as an opportunity to challenge yourself and refine your animation skills.
Blender\"s capabilities for logo animation are only limited by your imagination. With dedication and creativity, you can transform simple logos into captivating animations that tell a story, convey brand identity, and leave a lasting impression on your audience. So, take the tools and knowledge you\"ve gained, and embark on your creative journey to bring your unique visions to life. Happy animating!
Unleash your creative potential with Blender\"s logo animation capabilities, transforming ideas into vibrant animations that captivate and inspire. Dive into the world of Blender, where imagination meets innovation, and bring your brand\"s story to life.