Topic blender logo tutorial: Discover the power of Blender for crafting stunning 3D logos with our comprehensive tutorial. Elevate your brand"s visual identity and captivate your audience with professional-grade animations and designs.
Table of Content
- What is the best tutorial for creating a logo in Blender?
- Blender Logo Tutorials
- Introduction to Blender for Logo Creation
- Getting Started with Blender: Setup and Basics
- Importing and Preparing Your Logo for 3D Modeling
- YOUTUBE: Creating a Spinning Logo in Blender
- Step-by-Step Guide to Modeling Your Logo in 3D
- Texturing and Material Application for Your Logo
- Animating Your Logo: Techniques and Tips
- Rendering and Exporting Your Animated Logo
- Advanced Blender Techniques for Logo Animation
- Resources for Further Learning and Inspiration
What is the best tutorial for creating a logo in Blender?
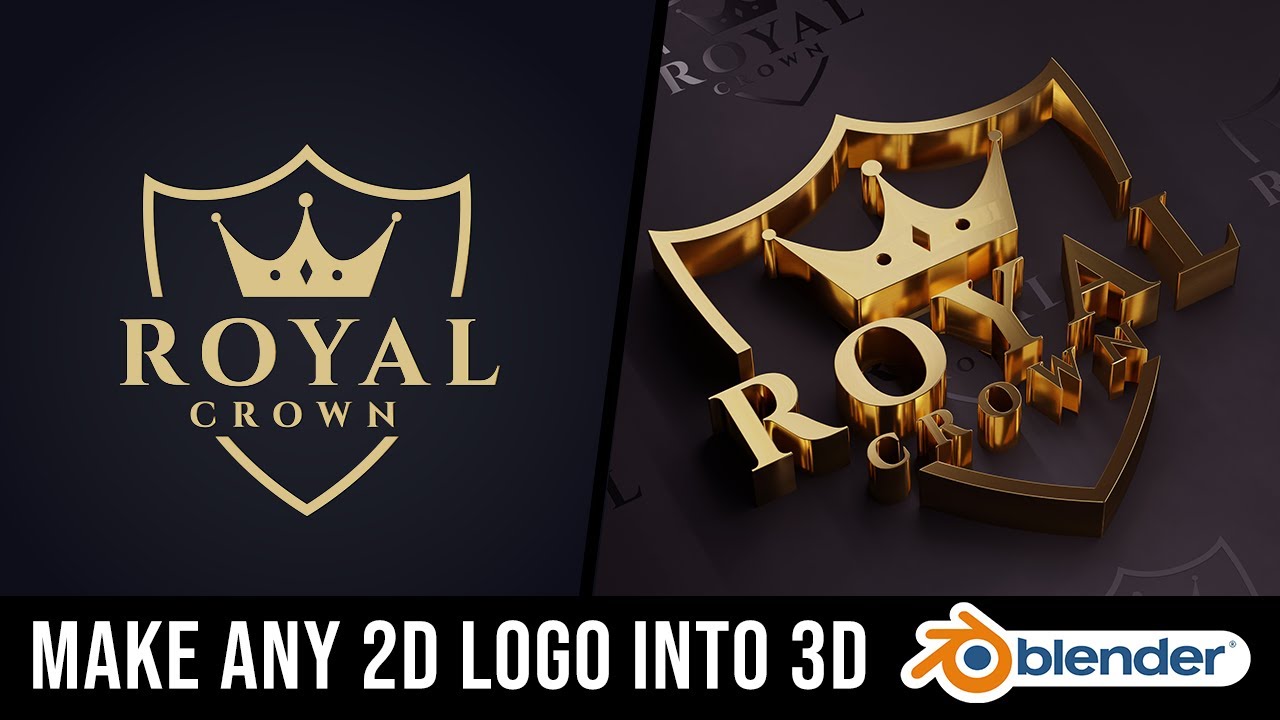
To create a logo in Blender, one of the best tutorials available is the one that teaches you how to import a 2D vector file (SVG file) and convert it into a 3D model. Here is a step-by-step guide based on the tutorial mentioned in the search results:
- Open Blender and import your 2D vector file (SVG file).
- Once the file is imported, you can extrude it to give it depth and turn it into a 3D model.
- You can then apply materials, textures, and colors to customize the look of your logo.
- Experiment with lighting and camera angles to enhance the visual appeal of your logo.
- Finally, render the logo to create a high-quality image or animation of your 3D logo.
READ MORE:
Blender Logo Tutorials
Learn how to create and animate logos in Blender with these comprehensive tutorials. From beginners to advanced users, there\"s something for everyone.
Creating and Animating Logos
- Start by removing the default plane and loading your logo as a background image for reference.
- Import 2D logo vector files into Blender, convert them into a mesh, and then model them into a 3D object.
- Explore various techniques to clean up your mesh for a better end result and professional look.
Animation Techniques
Animating your logo adds a dynamic element that can make your brand stand out. Here are some tips:
- Consider the brand\"s identity to determine the animation style—be it professional, creative, or fun.
- Start the animation subtly to capture the viewer\"s interest before revealing the logo piece-by-piece.
- Keep the animation short, ideally under 10 seconds, to maintain viewer engagement.
Advanced Techniques
For those looking to further enhance their skills, explore advanced animation techniques using geometry and shader nodes. This procedural approach allows for dynamic and versatile animations suitable for any logo or text.
Resources and Further Learning
Blender offers a wealth of tutorials for all skill levels. Whether you\"re a beginner or an experienced 3D artist, continuous learning and practice will help you master the art of logo creation and animation in Blender.

Introduction to Blender for Logo Creation
Blender is a powerful, open-source 3D creation suite that supports the entirety of the 3D pipeline—modeling, rigging, animation, simulation, rendering, compositing, and motion tracking. For logo creation, Blender offers robust tools for turning simple 2D logos into stunning 3D models and animations. This introduction will guide you through the basic steps of transforming a 2D image into a 3D logo using Blender, highlighting key features and techniques that make Blender an ideal choice for designers and animators.
- Understanding Blender\"s Interface: Familiarize yourself with Blender\"s user-friendly interface to navigate through its comprehensive toolset easily.
- Preparing Your 2D Logo: Learn how to import your 2D logo into Blender and prepare it for 3D modeling.
- Modeling Techniques: Discover the techniques to convert your 2D logo into a 3D model, including extrusion and mesh editing.
- Texturing and Materials: Explore how to add colors, textures, and materials to your 3D logo to bring it to life.
- Basic Animation: Get started with simple animation techniques to make your logo more dynamic and engaging.
- Rendering and Exporting: Learn how to render your creation and export it for use in various digital formats.
With Blender, creativity is your only limit. Whether you\"re creating a logo for your brand or working on a project for a client, Blender equips you with all the tools you need to produce professional-quality 3D logos. By the end of this guide, you\"ll have a solid foundation in using Blender for logo creation and animation, ready to explore more advanced techniques and bring your creative visions to life.

Getting Started with Blender: Setup and Basics
Embarking on your journey with Blender for creating and animating logos begins with understanding its setup and mastering the basics. This section provides a step-by-step guide to help you start your Blender project with confidence.
- Download and Install Blender: Visit the official Blender website to download the latest version. Blender is compatible with Windows, macOS, and Linux.
- Familiarize Yourself with the Interface: Blender\"s interface might seem daunting at first, but it\"s designed for efficiency. Spend some time learning about the 3D viewport, timeline, outliner, and properties panel.
- Basic Navigation: Learn how to navigate the 3D viewport using mouse controls and keyboard shortcuts. Practice zooming, panning, and rotating the view to become comfortable with 3D space.
- Adding and Modifying Objects: Discover how to add your first objects into the scene and modify them using Blender\"s various tools and modifiers.
- Importing Your Logo: Learn how to import your 2D logo into Blender. This could involve converting your logo into a format that Blender can use, such as SVG for vector graphics.
- Basic Modeling Techniques: Start transforming your 2D logo into a 3D model by extruding, scaling, and editing vertices, edges, and faces.
- Materials and Lighting: Experiment with applying materials to your logo and setting up basic lighting to enhance its appearance.
- Rendering Your First Image: Render your first image to see how your 3D logo looks. Learn about the rendering settings that affect the quality and speed of your render.
Getting acquainted with Blender\"s basics sets a strong foundation for more advanced logo creation and animation techniques. With patience and practice, you\"ll soon be ready to bring your creative visions to life in 3D.

Importing and Preparing Your Logo for 3D Modeling
Before diving into the 3D modeling process in Blender, it\"s crucial to properly import and prepare your logo. This ensures a smooth transition from a 2D image to a 3D model, enabling more efficient modeling and animation workflows. Follow these steps to get started:
- Choose the Right File Format: For best results, your logo should be in a vector format (such as SVG). This allows for clean, scalable conversions into 3D objects.
- Converting to SVG: If your logo is not already in a vector format, use a vector graphics editor like Inkscape or Adobe Illustrator to trace and convert your logo into SVG format.
- Importing Your Logo into Blender: In Blender, go to File > Import and select the SVG format. Navigate to your logo file and import it. Your logo will appear as a curve object.
- Adjusting the Scale: Vector imports often need scaling adjustments. Select your logo and use the Scale tool (S key) to resize it appropriately for your scene.
- Converting to Mesh: To model and animate your logo in Blender, convert the curve object to a mesh by selecting it, then pressing Alt+C and choosing \"Mesh from Curve/Meta/Surf/Text\".
- Preparing for 3D Modeling: Once your logo is a mesh, you can begin the modeling process. This might include extruding the logo to give it depth, adding a bevel for rounded edges, or cleaning up the topology for smoother animations.
These initial steps are crucial for a successful 3D logo project in Blender. By ensuring your logo is properly imported and prepared, you\"ll have a solid foundation for the creative process that follows.
_HOOK_
Creating a Spinning Logo in Blender
Animation: Dive into a world of whimsical characters and vibrant colors with this captivating animation video. Let your imagination soar as you witness enchanting stories come to life through the magic of animation! Design: Discover the transformative power of design in this visually stunning video! Immerse yourself in a world where creativity knows no bounds, and let the innovative designs inspire and awe you.
Step-by-Step Guide to Modeling Your Logo in 3D
Modeling your logo in 3D is a thrilling process that brings depth and dynamism to your brand\"s identity. Follow this detailed guide to transform your 2D logo into a 3D masterpiece using Blender:
- Initial Setup: Begin by importing your prepared SVG file into Blender. Ensure it\"s correctly scaled to match your vision for the 3D model.
- Extrude Your Logo: Select your logo, then extrude it to add depth. This is done by entering edit mode (Tab), selecting all vertices (A), and pressing E to extrude.
- Refine the Shape: Use the modeling tools in Blender to refine the shape of your logo. This may include adding bevels to edges for a more polished look or adjusting vertices for accuracy.
- Convert to Mesh: If your logo is still in curve format, convert it to a mesh (Alt+C) to enable more advanced modeling techniques and better control over the final product.
- Clean Up the Mesh: It\"s crucial to have a clean mesh for good animation and rendering results. Remove any unnecessary vertices, edges, or faces that could complicate the model.
- Add Materials: Once your model is ready, start applying materials to your logo. This could involve simple colors or more complex textures depending on your design needs.
- Lighting and Rendering: Set up lighting to highlight the best features of your logo. Experiment with different lighting setups to achieve the desired effect.
- Final Touches: Review your 3D logo, making any necessary adjustments to the model, materials, or lighting. Ensure that the logo accurately represents your brand and looks appealing from all angles.
This guide provides a framework for transforming your 2D logo into a 3D model with Blender. The process encourages creativity and experimentation, allowing you to produce a unique and eye-catching logo that stands out.
Texturing and Material Application for Your Logo
Applying textures and materials to your 3D logo in Blender is a critical step in bringing your design to life, enhancing its visual appeal, and ensuring it aligns with your brand\"s identity. This section will guide you through the process of texturing and material application, ensuring your logo stands out with a professional finish.
- Selecting Materials: In Blender\"s Material Properties, start by selecting a material for your logo. If none exists, create a new one by clicking the \"New\" button.
- Color and Reflectivity: Adjust the Base Color to match your brand\"s colors. Use the Specular and Roughness settings to control the reflectivity and texture of the material.
- Adding Textures: For more detailed logos, you might want to add textures. Go to the Shader Editor, and use nodes to add Image Textures or procedural textures to your material.
- UV Unwrapping: If using image textures, UV unwrap your logo model to correctly map the textures. In Edit Mode, select all faces (A), then unwrap (U) and choose a method that suits your logo\"s shape.
- Applying the Material: Once your material and textures are ready, ensure they are applied to your logo model. In Object Mode, select your logo and go to the Material Properties to assign the material.
- Testing and Adjustments: Render your logo with the applied materials and textures to test the look. Adjust the lighting and camera angle as needed to highlight the best features of your logo.
By following these steps, you can ensure your 3D logo not only represents your brand accurately but also possesses a level of polish and professionalism that captures your audience\"s attention. Experiment with different materials and textures to achieve the perfect look for your logo.
Animating Your Logo: Techniques and Tips
Animating your logo in Blender adds a dynamic layer to your brand\"s presentation, making it more memorable and engaging. Here\"s how to bring motion to your 3D logo effectively:
- Planning Your Animation: Before starting, plan out what kind of animation fits your logo and brand identity. Consider the animation\"s pace, movement, and final pose.
- Keyframe Basics: Learn to use keyframes in Blender. They are essential for creating animation by defining start and end points for movement, scaling, and rotation.
- Animating Position, Rotation, and Scale: Use the Transform properties to animate your logo\"s position, rotation, and scale over time. Insert keyframes at different points on the timeline to define these changes.
- Using Curves for Smooth Transitions: In the Graph Editor, adjust the Bezier curves of your animation for smoother transitions between keyframes.
- Adding Complexity with Modifiers: Explore Blender\"s animation modifiers like the Wave or Build modifiers to add complexity and interest to your animation.
- Camera Movement: Animating the camera can add depth to your logo animation. Keyframe the camera\"s position and rotation to create dynamic shots.
- Preview and Refine: Regularly preview your animation and make adjustments as needed. Pay attention to timing, ease of movement, and overall flow.
- Rendering Your Animation: Once satisfied, render your animation. Consider output formats and render settings that best suit your logo\"s use case, whether for web, presentation, or broadcast.
Animating your logo in Blender not only showcases your brand in a unique way but also enhances your audience\"s engagement through visually appealing effects. Experiment with different techniques to find the perfect animation style for your logo.

Rendering and Exporting Your Animated Logo
Rendering and exporting are final steps in showcasing your animated logo. This process turns your animated project into a shareable format, highlighting your brand\"s identity with professional quality. Follow these steps to render and export your logo animation in Blender:
- Setting Up Your Render: Choose your render engine (Eevee or Cycles) based on your needs. Eevee is faster and well-suited for real-time rendering, while Cycles offers photorealistic results.
- Adjusting Render Settings: In the Render Properties panel, adjust settings such as resolution, frame rate, and samples to balance quality and rendering time.
- Choosing the Output Format: For animations, select an output format like AVI, MPEG, or MOV. For stills, PNG or JPEG is recommended for their balance of quality and file size.
- Specifying Output Destination: Set the output path for where you want your rendered animation or image to be saved.
- Rendering Your Animation: Press Ctrl+F12 to start rendering your animation. Blender will process each frame, which can take some time depending on the complexity and length of your animation.
- Reviewing Your Render: Once rendering is complete, review your animation for any needed adjustments. You may need to re-render if adjustments are necessary.
- Exporting Your Animation: If you\"re satisfied with the render, your animation is now ready to be shared. Use Blender\"s File menu to export your project if needed in different formats.
Rendering and exporting your animated logo brings your project to completion, allowing you to share your brand\"s animated identity across various media. With these steps, your logo will be ready to make a lasting impression on your audience.

Advanced Blender Techniques for Logo Animation
To elevate your logo animations in Blender, incorporating advanced techniques can significantly enhance visual impact and storytelling. These methods leverage Blender\"s powerful features, offering creative freedom and sophistication in your animations.
- Geometry Nodes for Dynamic Effects: Utilize geometry nodes to create procedural animations. This allows for intricate and customizable effects that can make your logo animation stand out.
- Shader Nodes for Unique Materials: Experiment with shader nodes to develop unique material effects. This can add depth, texture, and vibrancy to your logo, making it more visually appealing.
- Particle Systems for Added Complexity: Incorporate particle systems to introduce elements like smoke, fire, or floating particles around your logo, adding a layer of complexity and interest.
- Grease Pencil for 2D Animation Integration: Blend 2D and 3D animation by using Blender’s grease pencil. This can add a hand-drawn feel to your logo animation, providing a unique blend of styles.
- Camera Tracking for Dynamic Movement: Employ camera tracking to create dynamic movements and transitions. This can make your animation more engaging and cinematic.
- Rigging and Armatures for Flexible Animation: For logos with character elements, use rigging and armatures to animate movements smoothly. This technique is great for adding personality and life to your logo.
- Advanced Lighting Techniques: Master advanced lighting techniques to set the mood and highlight your logo effectively. Playing with light and shadow can dramatically change the perception of your animation.
- High-Quality Rendering Settings: Optimize your rendering settings for high-quality outputs. Consider using Cycles renderer for photorealistic effects or Eevee for real-time rendering with impressive results.
By integrating these advanced techniques, your logo animation can achieve a professional level of quality and creativity. Blender\"s extensive toolset supports endless possibilities, encouraging you to explore and experiment with different styles and effects to create standout animations.

_HOOK_
READ MORE:
Resources for Further Learning and Inspiration
Enhancing your skills in Blender for logo animation requires practice, learning from experts, and drawing inspiration from a variety of sources. Here are valuable resources to guide you on your journey:
- Blender Official Tutorials: The Blender Foundation offers an array of tutorials for all skill levels on its official website and YouTube channel, covering everything from basic navigation to advanced animation techniques.
- Blender Guru: Known for high-quality tutorials, Blender Guru provides in-depth guides on creating stunning visuals, including logo animations, with Blender.
- CG Cookie: CG Cookie is a learning platform offering comprehensive courses on Blender, including character modeling, texturing, and animation.
- YouTube: YouTube hosts a vast community of Blender enthusiasts and professionals sharing tutorials, tips, and project breakdowns that can inspire and educate.
- Blender Artists Community: Join the Blender Artists forum to connect with other Blender users, share your projects, and get feedback from a supportive community.
- BlenderNation: BlenderNation provides daily news about Blender and a wide range of tutorials and articles, showcasing what\"s possible with Blender.
- Books and eBooks: There are numerous books and eBooks available that cover Blender in detail, from beginner guides to advanced techniques for 3D modeling and animation.
Exploring these resources will not only help you master Blender for logo animation but also keep you updated with the latest trends and techniques in the field. Whether you\"re a beginner or looking to polish your skills, there\"s always something new to learn.
Embark on your journey to mastering Blender for logo design and animation. With dedication and creativity, transform your visions into stunning 3D logos that captivate and inspire your audience. Start exploring the endless possibilities today!