Topic blender texture paint brushes: Unlock the full potential of Blender"s texture paint brushes and transform your 3D models into masterpieces with unparalleled detail and realism. Start your journey to becoming a texture painting pro today!
Table of Content
- How to create custom texture paint brushes in Blender?
- Introduction to Texture Painting in Blender
- Custom Brushes for Enhanced Creativity
- Resources for Blender Brushes
- Conclusion
- Custom Brushes for Enhanced Creativity
- Resources for Blender Brushes
- Conclusion
- YOUTUBE: Blender Secrets: Texture Painting with Custom Brushes
- Resources for Blender Brushes
- Conclusion
- Conclusion
- Introduction to Blender Texture Painting
- Essential Tools for Texture Painting in Blender
- Types of Texture Paint Brushes in Blender
- How to Create and Import Custom Brushes in Blender
- Top Resources for Downloading Blender Texture Brushes
- Step-by-Step Guide to Texture Painting with Blender Brushes
- Advanced Techniques for Texture Painting in Blender
- Common Challenges and Solutions in Blender Texture Painting
- Case Studies: Creative Uses of Texture Brushes in Projects
- Conclusion: Enhancing Your 3D Art with Texture Brushes
How to create custom texture paint brushes in Blender?
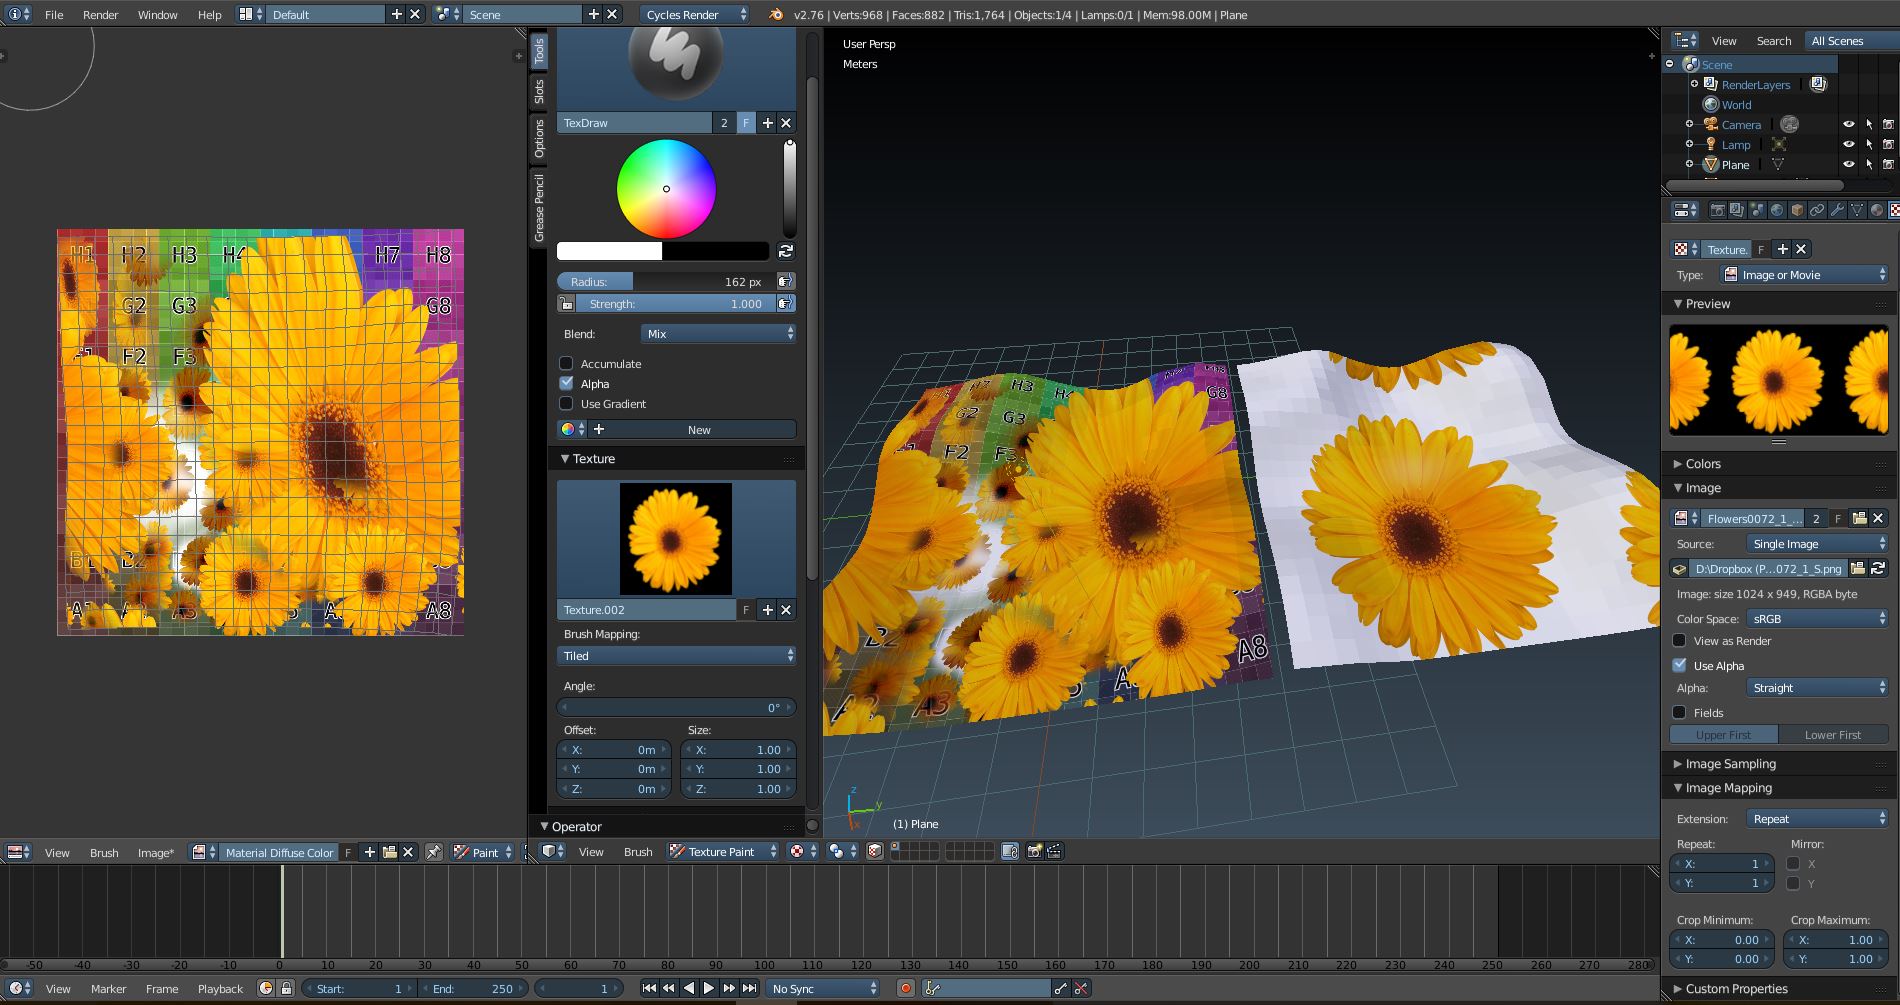
To create custom texture paint brushes in Blender, follow these steps:
- Open Blender and switch to the \"Texture Paint\" workspace.
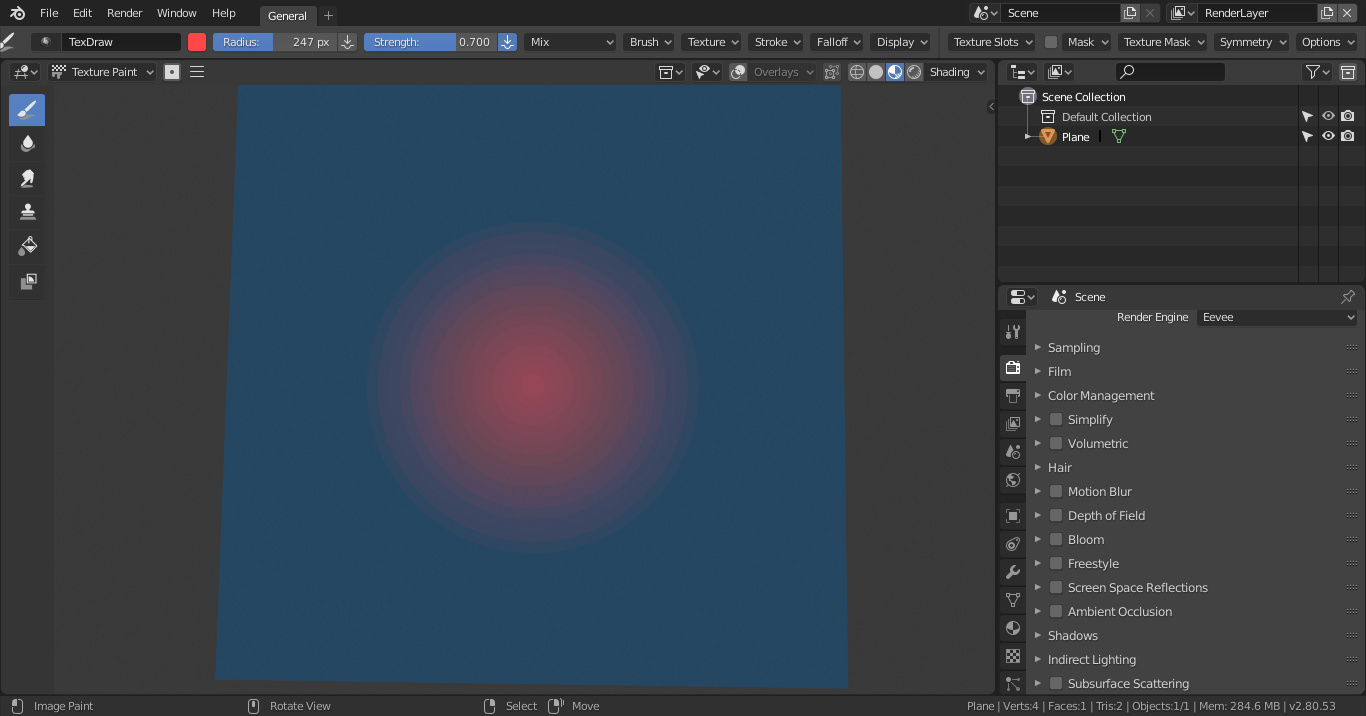
- Select the brush tool from the toolbar on the left side of the screen.
- In the brush settings panel (usually located on the right side of the screen), you can adjust various brush settings such as size, strength, texture, and more.
- To create a custom brush texture, click on the texture slot under the \"Texture\" section in the brush settings.
- Click on the \"New\" button to create a new texture.
- You can then choose to paint directly on the texture or import an image to use as a brush texture.
- Adjust the settings of the brush texture to achieve the desired effect.
- Once you are satisfied with your custom brush texture, you can save it by clicking on the icon next to the texture slot and selecting \"Save As\" to save it for future use.
- You can now use your custom texture paint brush by selecting it from the texture slot in the brush settings.
READ MORE:
Introduction to Texture Painting in Blender
Texture painting in Blender offers artists the ability to directly apply colors and textures to 3D models. This technique is essential for adding detail and realism to your creations, enabling a stylized look especially effective on low-poly models.
Getting Started with Texture Painting
- Understand the basics of texture painting and the tools available within Blender.
- Learn how to select and use different brushes to achieve various texture effects.
- Discover how to import and utilize custom brushes for more intricate designs.

Custom Brushes for Enhanced Creativity
Custom brushes in Blender allow for more detailed and creative texture work. These brushes range from sharp, soft, to textured types, enabling artists to bring their visions to life with precision and variety.
Types of Brushes
- Sharp Brushes: Ideal for creating crisp edges and fine details.
- Soft Brushes: Perfect for blending and smooth transitions.
- Textured Brushes: Enhance surfaces with realistic texture effects.
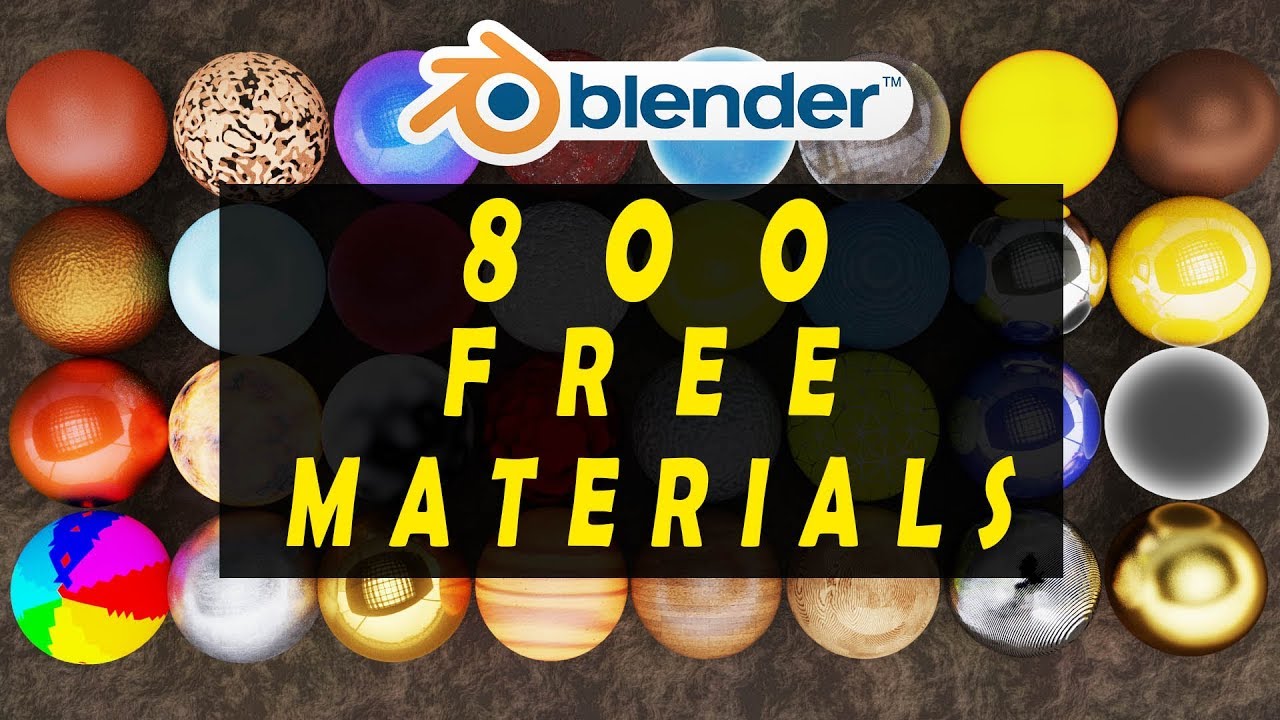
Resources for Blender Brushes
There are numerous resources available for Blender artists seeking to expand their brush collection:
- Blender community sites offer free downloads of custom brush sets.
- Professional Blender add-ons provide advanced PBR (Physically Based Rendering) tools for texture painting, including brushes for wear and tear effects.
- Online tutorials and guides are available to help integrate these brushes into your workflow.

Conclusion
With the right set of brushes and tools, texture painting in Blender opens up a world of possibilities for 3D artists. Whether you\"re working on game development, film, or personal projects, the ability to customize and enhance your models with detailed textures is invaluable. Explore the resources available and start bringing your creative visions to life.
_HOOK_
Custom Brushes for Enhanced Creativity
Custom brushes in Blender allow for more detailed and creative texture work. These brushes range from sharp, soft, to textured types, enabling artists to bring their visions to life with precision and variety.
Types of Brushes
- Sharp Brushes: Ideal for creating crisp edges and fine details.
- Soft Brushes: Perfect for blending and smooth transitions.
- Textured Brushes: Enhance surfaces with realistic texture effects.
Resources for Blender Brushes
There are numerous resources available for Blender artists seeking to expand their brush collection:
- Blender community sites offer free downloads of custom brush sets.
- Professional Blender add-ons provide advanced PBR (Physically Based Rendering) tools for texture painting, including brushes for wear and tear effects.
- Online tutorials and guides are available to help integrate these brushes into your workflow.
Conclusion
With the right set of brushes and tools, texture painting in Blender opens up a world of possibilities for 3D artists. Whether you\"re working on game development, film, or personal projects, the ability to customize and enhance your models with detailed textures is invaluable. Explore the resources available and start bringing your creative visions to life.
Blender Secrets: Texture Painting with Custom Brushes
Blending Techniques: Discover the artistry of blending techniques in this captivating video. Learn how to seamlessly merge colors and create stunning gradients that will elevate your artwork to a whole new level. Texture Masking: Unlock the secrets of texture masking and add depth and dimension to your designs. Watch as this video showcases innovative ways to incorporate textures, giving your creations a unique and visually striking appeal.
Blender Secrets: Painting Texture Masks with Custom Brushes
Manually painting a mask for edge wear can be a good alternative to using a procedural method, as it can add a bit more of a ...
Resources for Blender Brushes
There are numerous resources available for Blender artists seeking to expand their brush collection:
- Blender community sites offer free downloads of custom brush sets.
- Professional Blender add-ons provide advanced PBR (Physically Based Rendering) tools for texture painting, including brushes for wear and tear effects.
- Online tutorials and guides are available to help integrate these brushes into your workflow.
Conclusion
With the right set of brushes and tools, texture painting in Blender opens up a world of possibilities for 3D artists. Whether you\"re working on game development, film, or personal projects, the ability to customize and enhance your models with detailed textures is invaluable. Explore the resources available and start bringing your creative visions to life.
_HOOK_
Conclusion
With the right set of brushes and tools, texture painting in Blender opens up a world of possibilities for 3D artists. Whether you\"re working on game development, film, or personal projects, the ability to customize and enhance your models with detailed textures is invaluable. Explore the resources available and start bringing your creative visions to life.
Introduction to Blender Texture Painting
Blender texture painting is a powerful feature that allows artists to directly apply colors and textures to 3D models, enhancing their visual appeal and realism. This process involves using a variety of brushes to paint directly onto the surface of a model, offering a hands-on approach to texture creation. Whether you\"re working on game assets, animations, or any other 3D project, understanding how to effectively use texture paint brushes in Blender can significantly elevate your work.
Starting with texture painting in Blender requires familiarity with its interface and tools. The software provides a comprehensive set of painting tools, including brushes, color palettes, and texture slots, enabling artists to apply detailed textures and colors with precision. From basic color application to intricate detail work, Blender\"s texture painting tools are designed to accommodate a wide range of artistic needs.
- Understanding Blender\"s Texture Paint Mode: Learn how to navigate and utilize the Texture Paint mode in Blender, a dedicated workspace for painting textures directly onto 3D models.
- Choosing the Right Brushes: Blender offers a variety of brushes for different effects, such as soft shading, sharp detailing, and texture imprinting. Knowing which brush to use and when is crucial for effective texture painting.
- Customizing Brushes: Discover how to customize brushes in Blender to achieve specific textures and effects, enhancing the uniqueness of your 3D models.
- Applying Textures: Learn the process of applying textures to your models, including unwrapping UVs, choosing the right textures, and blending colors for a seamless look.
- Advanced Techniques: Explore advanced texture painting techniques, such as layering textures, using stencils, and incorporating bump and specular maps for added depth and realism.
By mastering texture painting in Blender, artists can unlock a new level of creativity and detail in their 3D projects. The ability to directly paint on models provides a direct and intuitive way to create and modify textures, offering endless possibilities for customization and refinement. Whether you\"re a beginner or an experienced Blender user, the journey into texture painting opens up a world of artistic potential.
Essential Tools for Texture Painting in Blender
Texture painting in Blender is facilitated by a suite of tools designed to help artists paint and apply textures directly onto their 3D models. Understanding these tools is crucial for effective texture painting, as they enable the creation of detailed, realistic, or stylized textures on models. Here are the key tools and features you should know:
- Texture Paint Mode: The primary workspace for texture painting in Blender, offering a comprehensive environment for applying textures.
- Brushes: A wide range of brushes is available, each with unique properties and effects, such as blending, softening, sharpening, and adding texture.
- Color Palette: Essential for selecting and managing colors during the painting process, allowing for color blending and custom color creation.
- Texture Slots: Enables artists to work with multiple textures on the same model, facilitating complex texturing tasks.
- Layer Management: Similar to layers in photo editing software, layers in Blender allow for non-destructive editing and finer control over the texturing process.
- Masking: Masking tools help in protecting specific areas of the model from being painted, allowing for precise control over texture application.
- Stencil Mode: Allows for the use of images as stencils, enabling precise application of textures and patterns.
- UV/Image Editor: A critical tool for managing UV maps and textures, ensuring that textures align correctly on the model.
These tools, combined with Blender’s intuitive interface and robust functionality, make texture painting a powerful and flexible process for 3D artists. Whether creating textures for game assets, animations, or other visual projects, mastering these essential tools will enhance your ability to bring your creative visions to life.
Types of Texture Paint Brushes in Blender
Blender offers a versatile range of texture paint brushes, each designed to fulfill specific artistic needs and techniques in the texture painting process. These brushes enable artists to achieve a variety of effects, from fine detailing to broad strokes. Understanding the types and uses of these brushes is essential for maximizing the potential of your texture painting projects.
- Draw Brush: Ideal for basic painting and color application, offering a straightforward way to apply color or texture to a model.
- Soften Brush: Used to blur or soften hard edges and transitions between colors, enhancing the realism of textures.
- Smear Brush: Allows for the smudging of colors and textures, useful for creating organic transitions or blending different parts of the texture.
- Clone Brush: Enables copying of textures from one part of the model to another, perfect for repairing or duplicating areas of texture.
- Fill Brush: Quickly fills large areas with color or texture, saving time on broad color applications.
- Masking Brush: Used to protect certain areas of the model from being painted, offering precise control over where textures are applied.
- Texture Brush: Allows the application of predefined textures, adding complexity and detail to surfaces with minimal effort.
- Stencil Brush: Utilizes images as stencils to apply intricate designs and patterns directly onto the model’s surface.
Each brush in Blender\"s texture painting toolkit can be customized further, adjusting its size, shape, strength, and dynamics to suit the specific needs of your project. This flexibility enables artists to experiment and create unique, detailed textures that breathe life into their 3D models.
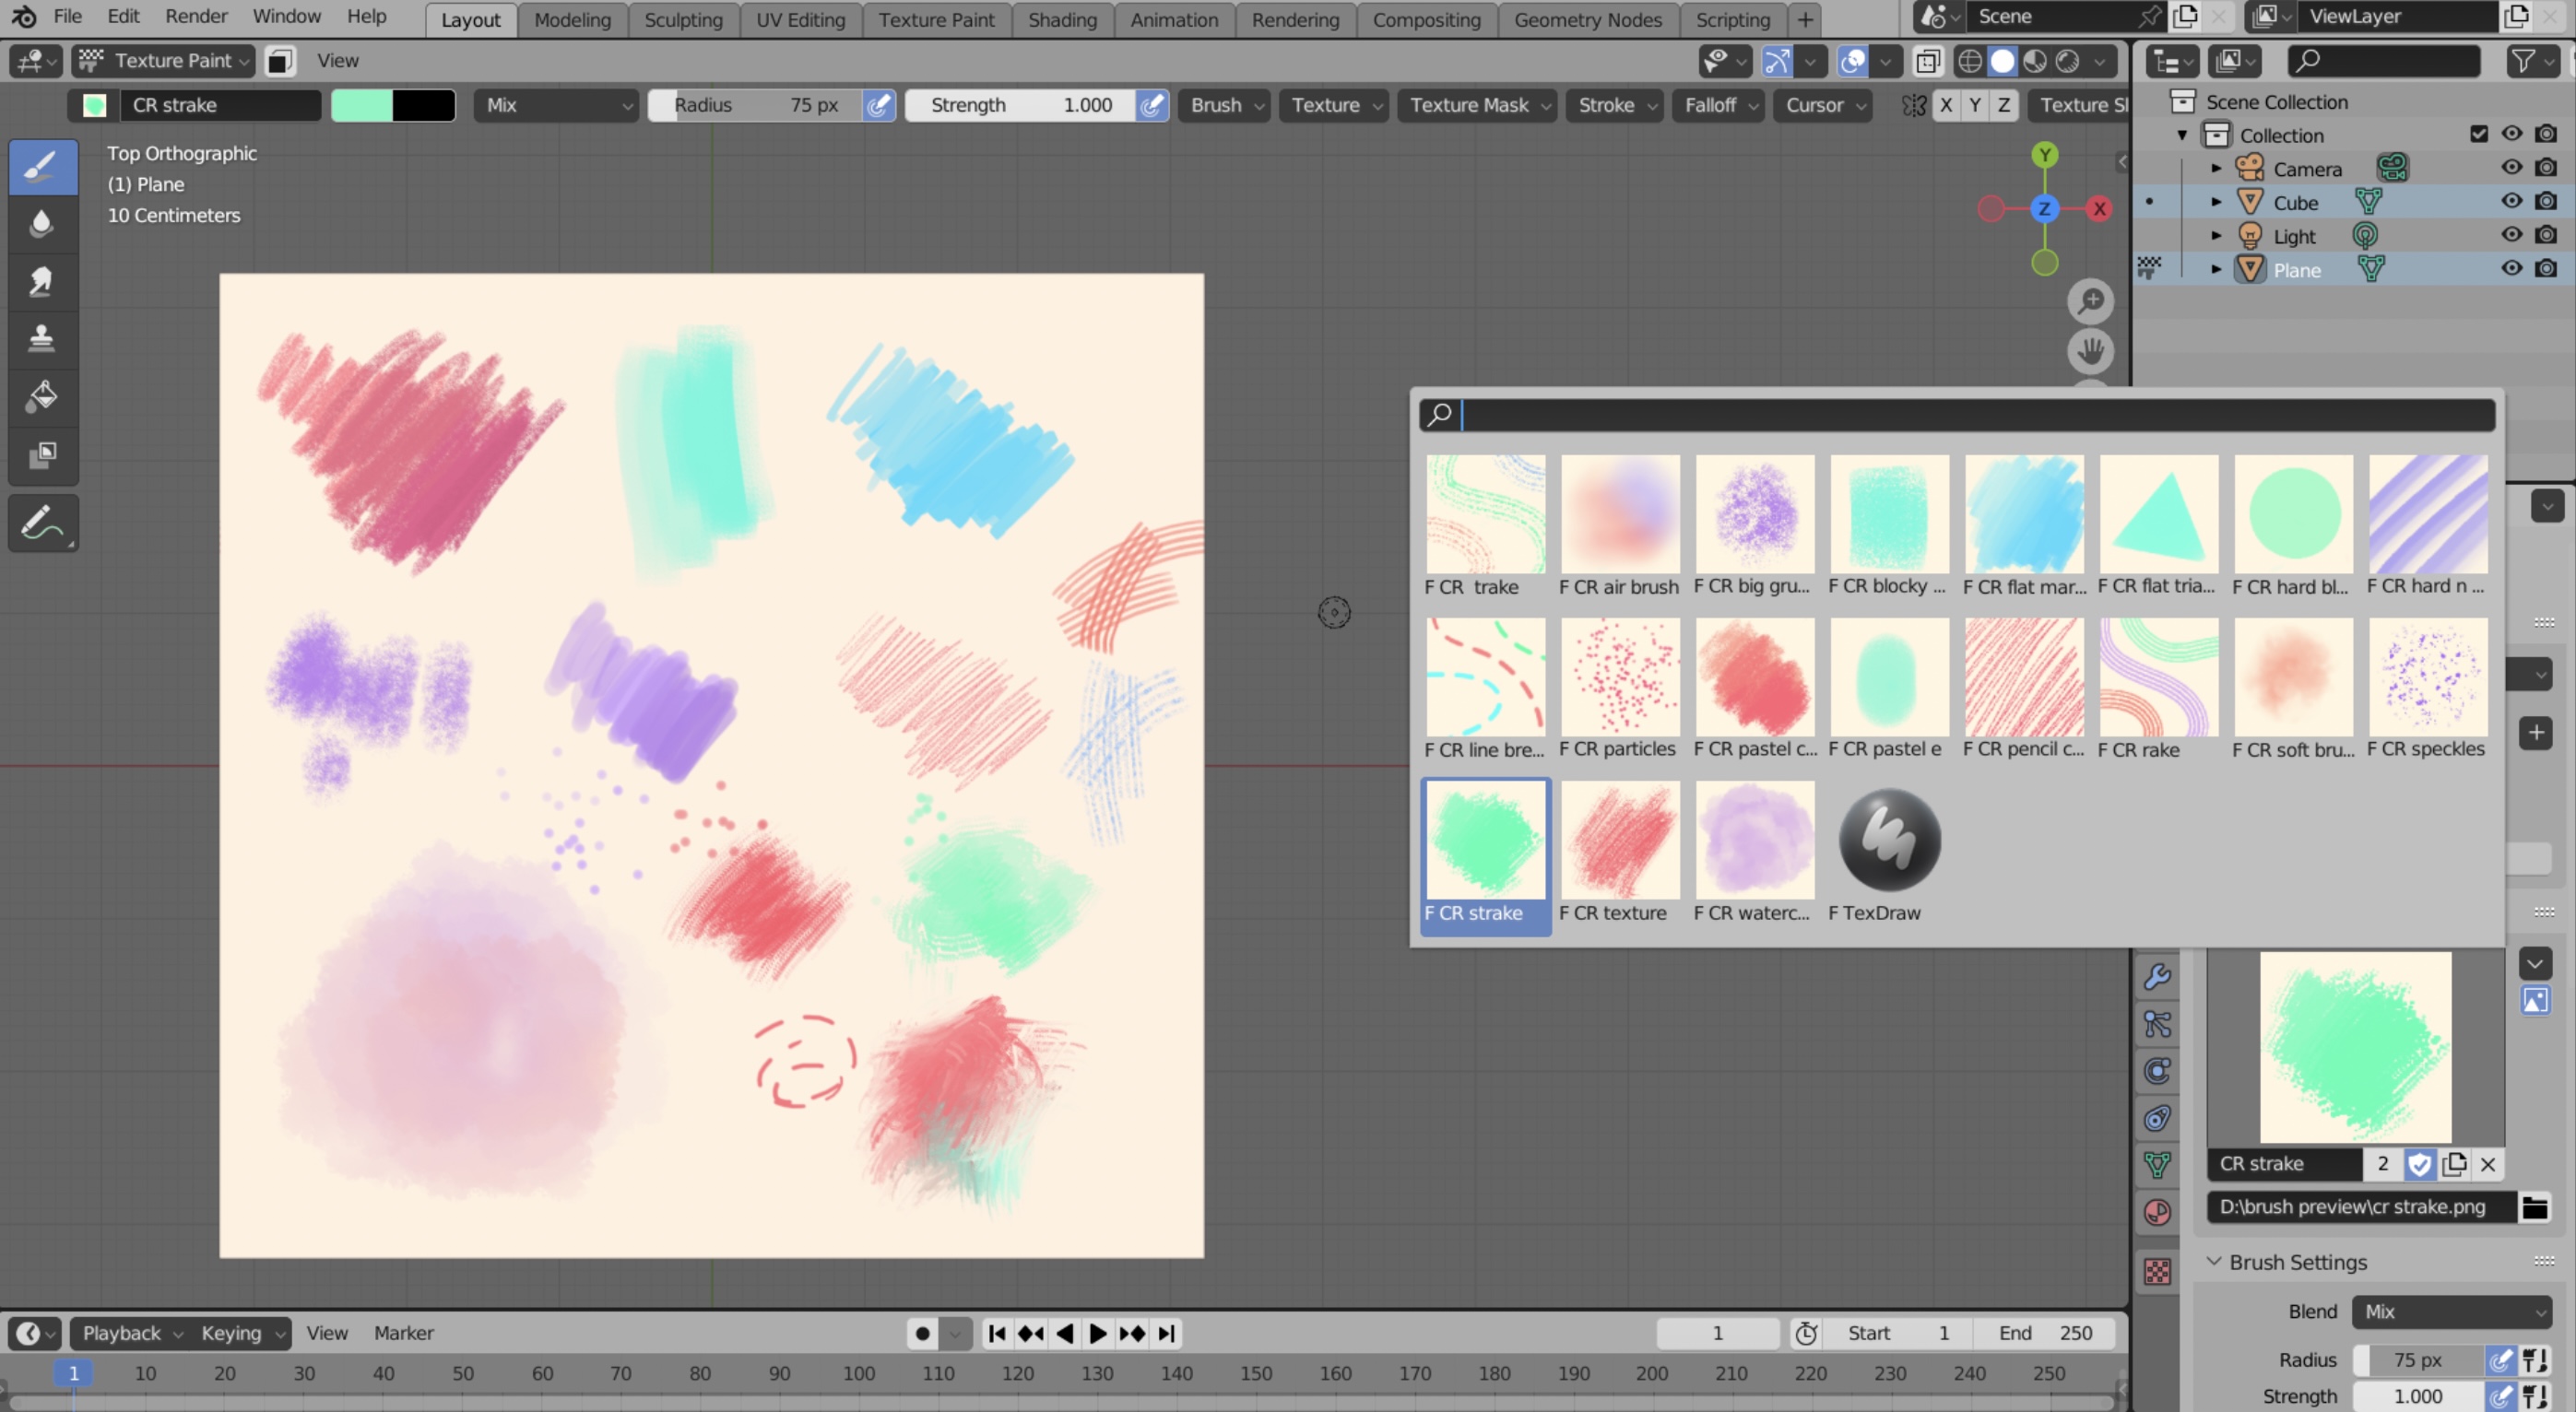
How to Create and Import Custom Brushes in Blender
Creating and importing custom brushes in Blender opens up new possibilities for artists to personalize their texture painting workflow. This process allows for unique textures and effects that can significantly enhance your 3D models. Here’s how to do it:
- Creating Custom Brushes:
- Open Blender and switch to Texture Paint mode.
- Select the Brush tool and choose a brush that closely matches the effect you want to customize.
- Adjust the brush settings (size, strength, jitter, etc.) to achieve the desired effect.
- Save the brush by clicking on the \"+\" next to the brush selector and give it a unique name.
- Importing Custom Brushes:
- Custom brushes can be created using external image editing software (like Photoshop or GIMP) by designing a brush texture and saving it as a PNG file.
- In Blender, go to the Texture Paint mode and select the Brush tool.
- In the Tool settings, find the Texture panel and click \"New\".
- Open the Texture properties tab, click \"Open\" and select the PNG file you created.
- Adjust the mapping and influence settings to suit your needs.
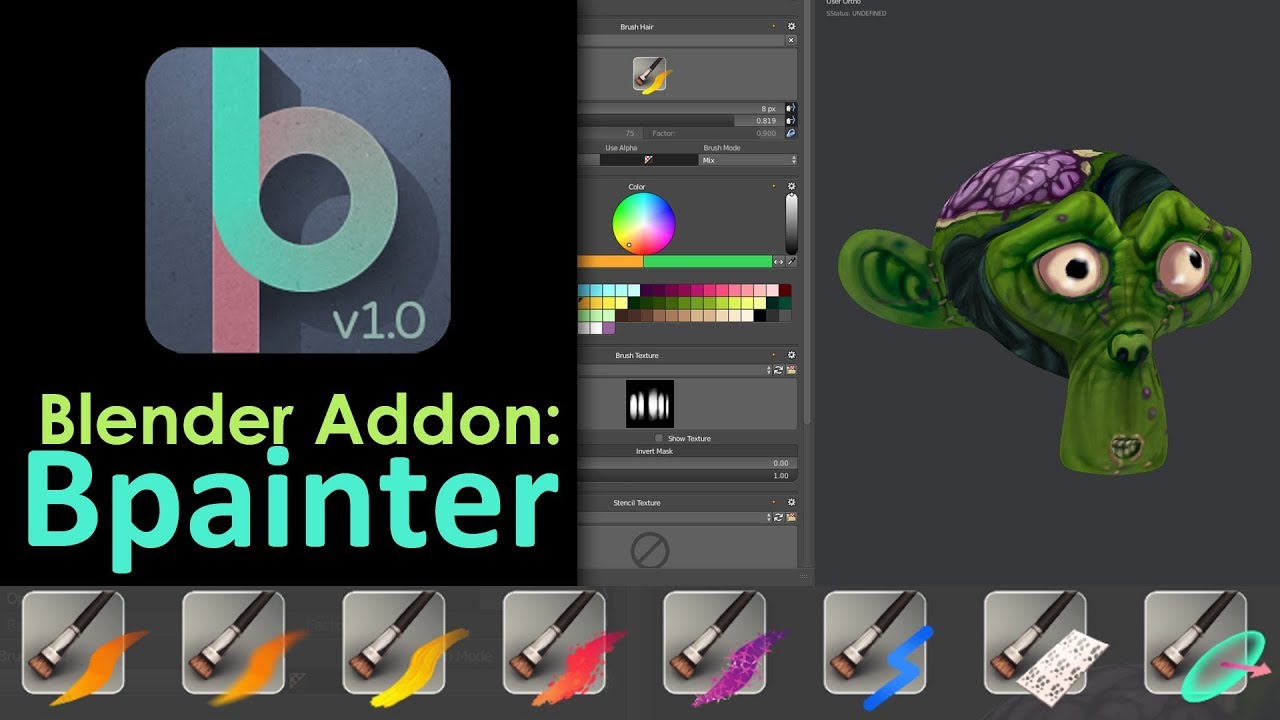
- Using Blender Add-ons for Custom Brushes: Blender’s community offers various add-ons that can enhance your texture painting toolkit with unique brushes. To install these add-ons:
- Download an add-on that includes custom brushes.
- In Blender, go to Edit > Preferences > Add-ons > Install, and select the downloaded file.
- Enable the add-on and access the new brushes from the Texture Paint mode.
By creating and importing your own brushes, you can achieve highly specific textures and effects, making your 3D models stand out. Whether you’re aiming for realism or stylized looks, custom brushes are a key tool in your Blender texture painting arsenal.
_HOOK_
Top Resources for Downloading Blender Texture Brushes
Finding the right texture brushes can significantly enhance your texture painting workflow in Blender. Below are some of the best resources where you can download high-quality Blender texture brushes for your projects.
- Brusheezy - Offers a wide range of free Blender texture brushes under creative commons, open source, and more. This platform is ideal for artists looking for a diverse set of brushes to add detailed textures to their 3D models.
- Blend Swap - A community-driven site where you can find small packs of texture paint brushes designed specifically for Blender. These brushes are perfect for creating hand-painted textures and can be easily appended to your projects.
- BlenderNation - Features a collection of personal Blender brushes shared by artists, along with an add-on to manage them. This resource simplifies the sculpting workflow in Blender, making it easier to install and use the brushes in your projects.
- 80.lv - Hosts collections of brushes created by 3D artists known for their hand-painted style artworks. These brushes are designed to work seamlessly with Blender\"s internal texture paint mode, allowing for efficient 3D painting without the need to export textures to external editors.
- ArtStation - Provides a super mega package of hand-painted alpha designs and patterns, dubbed \"THE KING OF ALPHA RESOURCES.\" Ideal for game development, this resource offers a vast array of brushes to create intricate textures and patterns.
- BlenderKit - Offers both free and paid 3D brushes for Blender, suitable for modeling, sculpting, and texture painting directly within Blender. This resource allows artists to add personal touches to their visualizations and develop unforgettable characters.
Each of these resources offers unique brushes that cater to various texturing needs, from detailed fabric textures to hard surface patterns. By exploring these platforms, you can find the perfect brushes to bring your 3D art to life.
Step-by-Step Guide to Texture Painting with Blender Brushes
Texture painting in Blender allows artists to add colors, patterns, and textures directly onto their 3D models. This step-by-step guide will walk you through the process of texture painting using Blender brushes, from setup to final touches.
- Preparing Your Model: Start by UV unwrapping your model to ensure textures map correctly onto the surface. This process converts the 3D surface into a 2D representation that can be painted on.
- Accessing the Texture Painting Panel: In Blender, switch to the Texture Paint workspace from the top menu. This workspace provides tools and panels specifically designed for texture painting.
- Adding a Base Color: Before applying detailed textures, add a base color to your model. This acts like a primer, providing a uniform background for subsequent layers of texture.
- Selecting Brushes: Blender offers a variety of brushes for different texture effects. Choose the appropriate brush based on the texture you want to achieve, such as a soft brush for subtle shading or a stencil brush for precise patterns.
- Painting on Your Model: With your brush selected, you can start painting directly onto your 3D model. Use the brush settings to adjust the size, strength, and color of your strokes. Experiment with different brushes and techniques to create complex textures.
Throughout the painting process, regularly rotate and zoom in on your model to ensure even coverage and detail accuracy. Texture painting in Blender is a powerful way to bring your 3D models to life, adding depth and realism through detailed textures.
Advanced Techniques for Texture Painting in Blender
As you become more comfortable with basic texture painting in Blender, exploring advanced techniques can further enhance your work and bring new levels of detail and realism to your models. Here are some sophisticated strategies to consider:
- Layered Textures: Utilize Blender\"s ability to create multiple texture layers within a single material. This approach allows for complex compositions, blending different textures to achieve more detailed and varied effects.
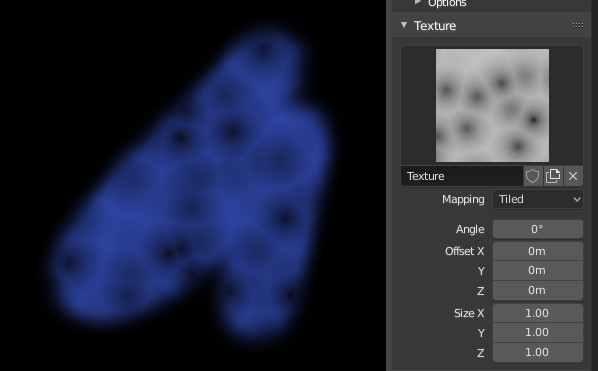
- Stencil Mode: Use stencil mode for precise control over where textures are applied. This technique is particularly useful for adding intricate patterns or logos to specific areas of your model without affecting the surrounding areas.
- Texture Masks: Implement texture masks to selectively hide or reveal parts of a layer. This can be invaluable for creating weathering effects, transitions between materials, or adding damage to surfaces.
- Custom Brushes: Create or import custom brushes to achieve unique textures and strokes. Experiment with different brush settings to simulate natural media, such as blending, scattering, and texture dynamics.
- Projection Painting: For complex shapes or to wrap textures around multiple surfaces, projection painting allows you to paint over a 2D projection of your 3D model. This method is great for ensuring continuity across seams.
- Baking Textures: After painting, bake your textures to optimize performance and make them easily usable in game engines or other 3D applications. This step finalizes your texture work and prepares it for export.
- Non-Destructive Workflow: Incorporate non-destructive techniques by using Blender\"s node-based materials. This allows for adjustments and tweaks without permanently altering the original texture files, offering flexibility throughout the creative process.
By mastering these advanced techniques, you can push the boundaries of texture painting in Blender, adding unparalleled depth and realism to your 3D projects.
Common Challenges and Solutions in Blender Texture Painting
Blender\"s texture painting feature is a powerful tool for artists, but it can sometimes present challenges. Understanding these common issues and their solutions can streamline your texturing workflow and enhance your projects.
- Texture Painting Mode Not Active: Ensure the texture painting mode is active by selecting your model, navigating to the Properties panel, and clicking on the \"Texture Paint\" button in the \"Materials\" section. Check that the active texture is available; otherwise, the object will appear pink, indicating no texture is currently applied.
- Brush Strokes Not Appearing: If brush strokes aren\"t visible, adjust the brush size, opacity, and hardness to ensure they are set within a visible range. Also, verify the brush stroke method settings and ensure you have selected the paint tool, not a different tool like smear.
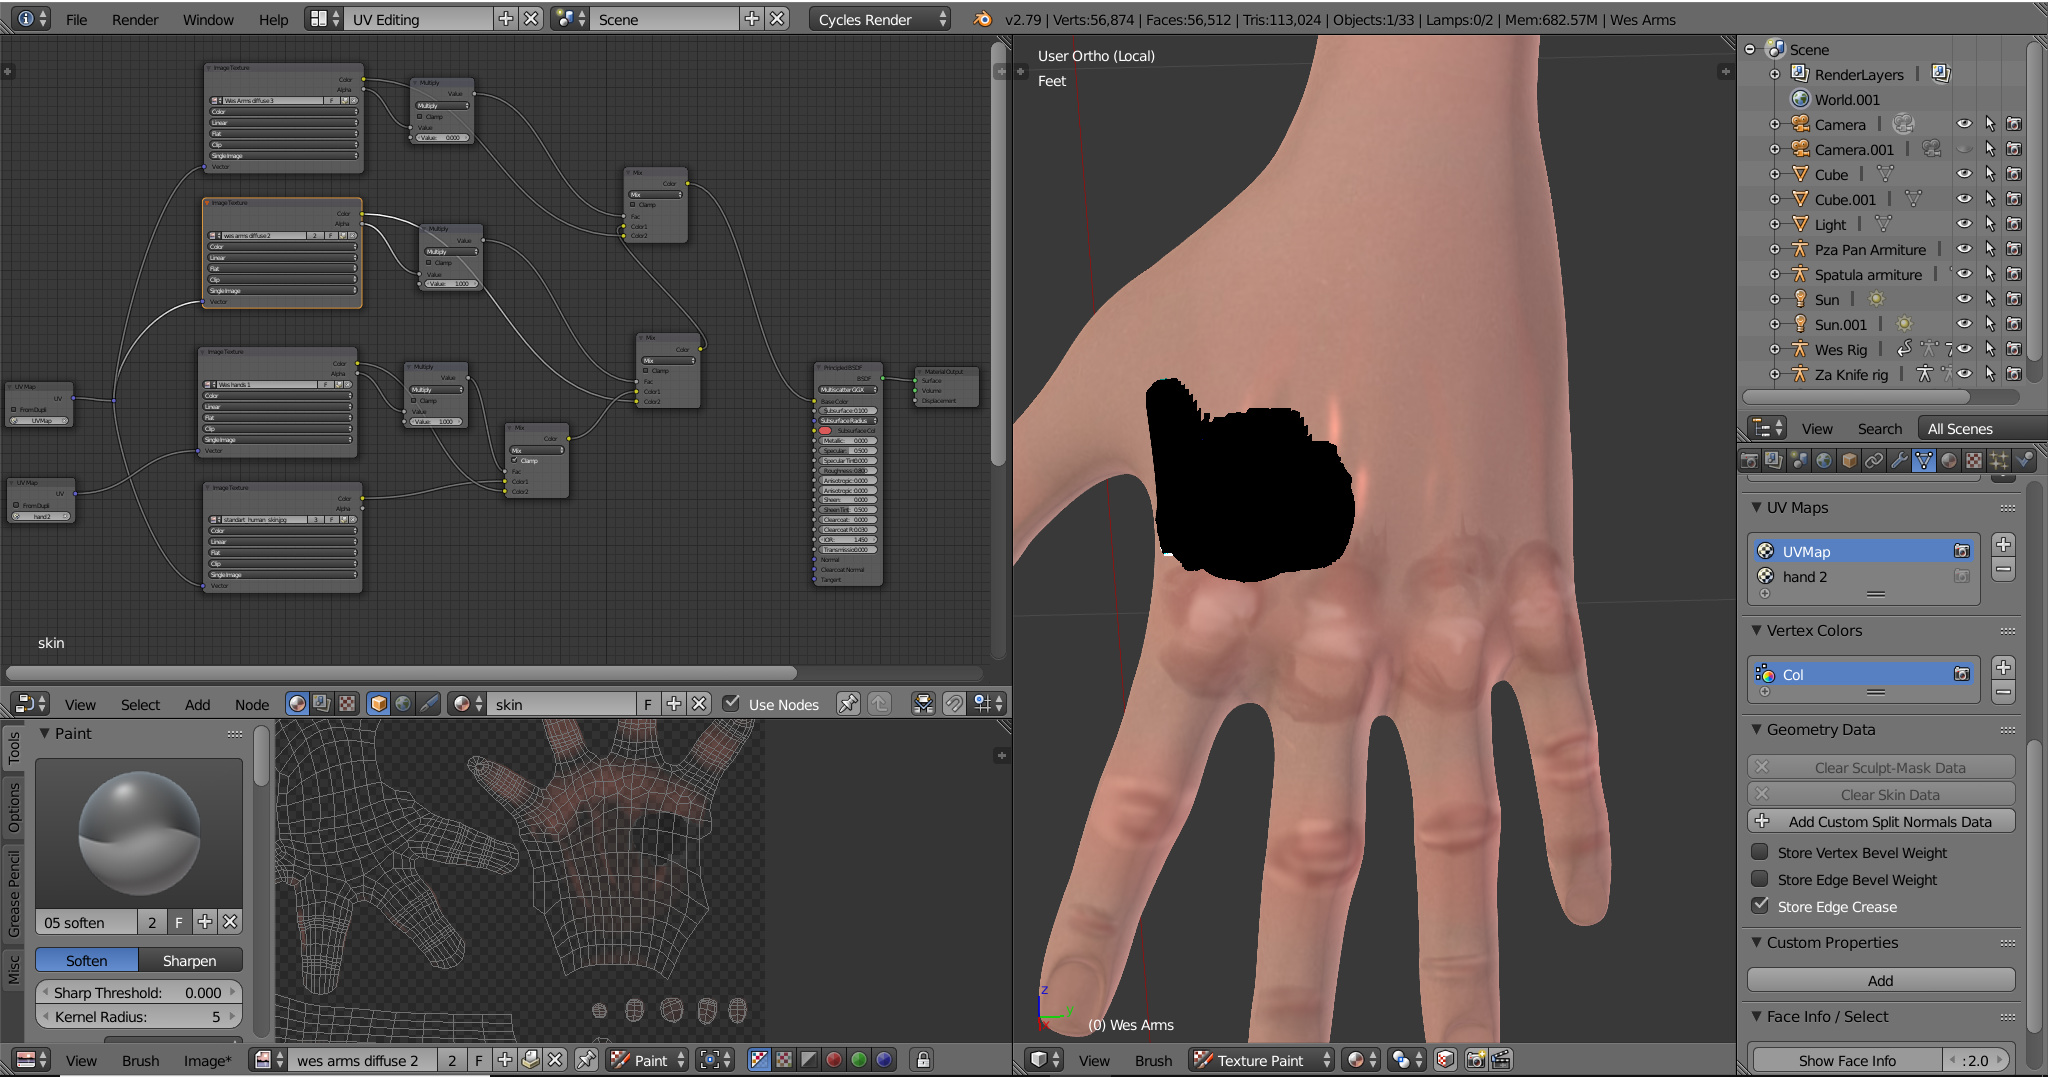
- Painting Not Visible After Rendering: Confirm the material setup is correct and that the painted texture is used within the material. In the Shader editor, ensure the \"Image Texture\" node is connected properly to the shader node. For Cycles rendering, check that \"Viewport Shading\" is set to \"Rendered\" mode.
- Painted Texture Appears Distorted: This issue often relates to UV mapping. Enter Edit mode to adjust and arrange UV islands correctly, ensuring they are not overlapping, stretched, or distorted. Small adjustments to the UV layout may solve the issue without needing to rebake the texture.
- Texture Showing as One Solid Color: This typically indicates a UV mapping issue, where all UVs converge to a single point, creating a \"UV Black Hole.\" Navigate to the UV editing workspace, select your model, and unwrap your UVs again to resolve this.
By tackling these common challenges with the provided solutions, you can ensure a smoother texture painting process in Blender. With practice, these troubleshooting steps can help you overcome obstacles and achieve the desired results in your 3D modeling projects.
Case Studies: Creative Uses of Texture Brushes in Projects
Texture brushes in Blender have revolutionized the way artists approach 3D art and design. By integrating custom and diverse textures, artists can elevate the realism and artistic quality of their projects. This section explores several case studies where texture brushes have been pivotal in creating visually stunning and innovative works.
1. Realistic Character Creation
One notable project involved the creation of a highly realistic character model for a video game. The artist utilized a combination of skin texture brushes to achieve lifelike skin pores and wrinkles. By painting textures directly onto the 3D model, they managed to add depth and realism that was critical to the character\"s believability in the game environment.
2. Architectural Visualization
In the field of architectural visualization, texture brushes have been used to add realism to building materials. A project highlighted the use of brick and wood texture brushes to enhance the façade of a residential building model. These brushes added subtle variations and imperfections to surfaces, mimicking the natural wear and tear of real-world materials.
3. Environmental Design
Another impressive application of texture brushes is in environmental design. For a fantasy landscape project, artists used a variety of foliage and ground texture brushes to create diverse ecosystems. From lush forests to arid deserts, the texture brushes provided the necessary tools to paint detailed ground surfaces, leaves, and tree barks, adding depth and life to the scene.
4. Clothing and Fabric Detailing
Clothing and fabric detailing in character models have seen significant improvements with the use of fabric texture brushes. In a fashion design project, designers used these brushes to add realistic textures to garments, such as denim jeans and wool sweaters. This technique allowed for the simulation of fabric weaves, enhancing the overall realism of the clothing.
5. Custom Prop Design
Custom prop design is another area where texture brushes shine. A project involved creating detailed textures for a medieval weapon collection. Using metal and leather texture brushes, the artist was able to impart age, wear, and authenticity to the weapons, making them look battle-worn and historically accurate.
These case studies exemplify the transformative impact of texture brushes in Blender on various aspects of 3D art and design. Through creative application, artists can achieve unparalleled realism and artistic expression, pushing the boundaries of what is possible in digital art.
_HOOK_
READ MORE:
Conclusion: Enhancing Your 3D Art with Texture Brushes
Texture brushes in Blender offer a versatile and powerful toolset for enhancing the realism, depth, and artistic flair of your 3D projects. By skillfully applying these brushes, artists can transform flat surfaces into vivid landscapes, add character to models, and bring scenes to life with intricate details. The creative possibilities are endless, from simulating natural elements like wood and stone to crafting fantastical environments that captivate the imagination.
Mastering the use of texture brushes requires practice and experimentation. Begin by familiarizing yourself with the basic brush types available in Blender, and then explore the creation and importation of custom brushes to expand your artistic toolkit. Utilizing top resources for downloading texture brushes can also provide fresh inspiration and elevate your work to new heights.
Remember, the key to effective texture painting lies in understanding the interplay of light, shadow, and color. Experiment with blending modes, brush strengths, and layering techniques to achieve the desired effect. Don\"t be afraid to combine digital painting with procedural textures and shaders for more complex and nuanced finishes.
As you grow more confident in your skills, challenge yourself with advanced techniques and consider how texture painting can be used to solve common challenges in 3D modeling and animation. Look to case studies and the work of other artists for inspiration, and always keep experimenting with new ideas and approaches.
In conclusion, texture brushes are an indispensable part of the 3D artist\"s palette, offering a bridge between the technical precision of 3D modeling and the expressive potential of painting. Whether you\"re working on a personal project or a professional assignment, investing time in mastering texture brushes can significantly enhance the quality and impact of your art. Embrace the creative journey, and let your imagination lead the way to stunning, textured masterpieces.
Unlock the full potential of your 3D art with Blender texture paint brushes, transforming your creations with depth, realism, and vivid detail. Embrace the artistry in every stroke and elevate your projects to new heights.