Topic blender add edge loop: Discover how to enhance your 3D models in Blender by adding edge loops, a fundamental technique for increasing mesh detail and achieving more complex, realistic designs with precision and ease.
Table of Content
- What is the shortcut key for adding an edge loop in Blender?
- Creating Edge Loops
- Removing Edge Loops
- Selection Techniques
- Conclusion
- Removing Edge Loops
- Selection Techniques
- YOUTUBE: Blender Basics 14: Bevel, Insert Edge Loop, and Edge Slide
- Conclusion
- Selection Techniques
- Conclusion
- Conclusion
- Introduction to Edge Loops
- How to Add an Edge Loop
- Adjusting Edge Loops
- Removing Edge Loops
- Common Issues and Solutions
- Advanced Techniques for Edge Loop Control
- Case Studies: Practical Applications of Edge Loops
- Optimizing Your Workflow with Edge Loops
- Additional Resources and Tools for Learning
- Conclusion: Enhancing Your 3D Modeling Skills
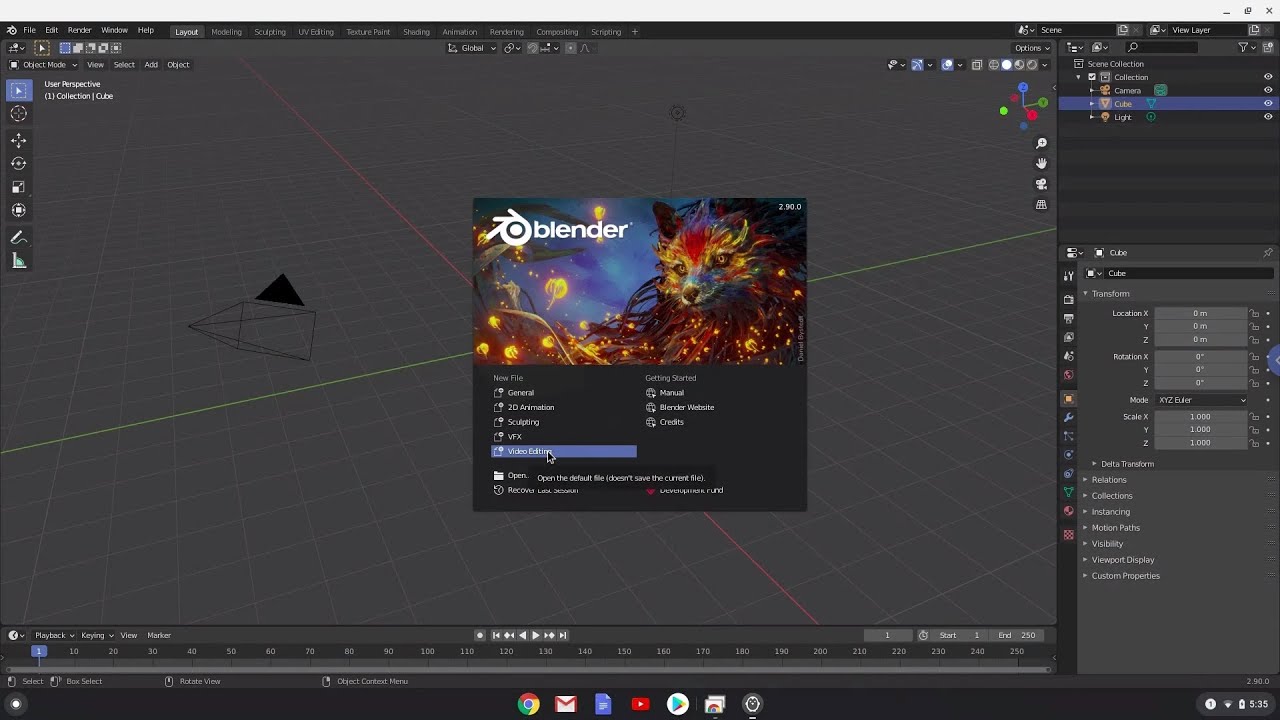
What is the shortcut key for adding an edge loop in Blender?
The shortcut key for adding an edge loop in Blender is Ctrl + R. Here is a step-by-step guide on how to add an edge loop using this shortcut:
- Select the mesh object you want to add an edge loop to in Blender.
- Enter Edit Mode by pressing Tab on your keyboard.
- Place your cursor on the edge where you want to add the loop.
- Press Ctrl + R on your keyboard. This will display a purple loop across the selected edge.
- Move your mouse to position the loop where you want it and click to confirm the placement.
- You can also use the scroll wheel to add multiple edge loops at once.
- To exit the edge loop tool, press Esc or right-click.
- Once you are satisfied with the placement of the edge loop, you can continue editing your mesh or object.
READ MORE:
Creating Edge Loops
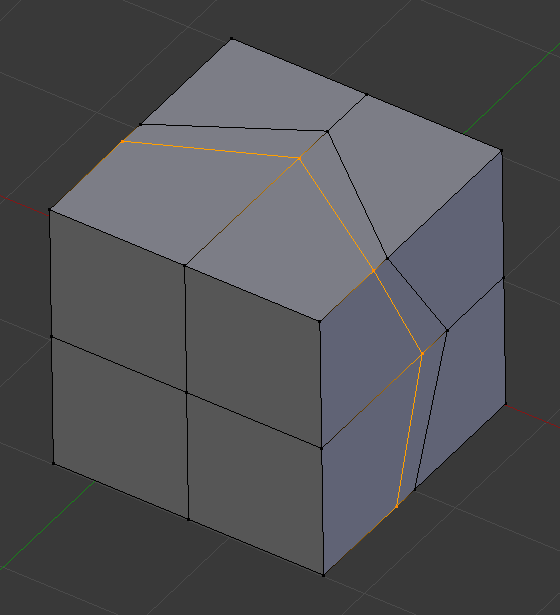
To add an edge loop, enter Edit Mode and use the loop cut tool. Press Ctrl+R, hover over the model where you wish to add the loop, and click. You can adjust the number of cuts with the mouse wheel. This action inserts equidistant loops along the model, crucial for detailed modeling work.
Adjusting Edge Loops
Post-creation, a panel allows parameter adjustments, including the number of loops. Use this feature to fine-tune your model\"s geometry to your specific needs.

Removing Edge Loops
To remove an edge loop, select it with Alt+Click and dissolve it by pressing X and choosing \"Dissolve Edges\". This method maintains the model\"s integrity while removing unwanted detail.
Multiple Edge Loops Removal
For removing several loops, select them while avoiding adjacent loop selection to prevent geometry issues. This technique streamlines model simplification.

Selection Techniques
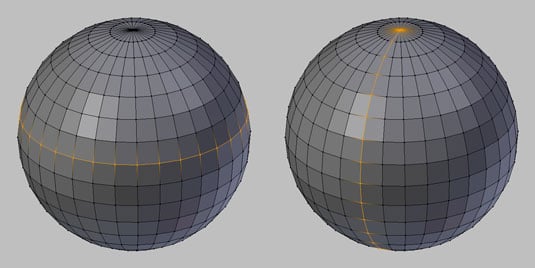
Selecting edge or face loops is straightforward. For edge loops, use Alt+Click in edge select mode. For face loops, switch to face select mode and use the same key combination. These selections are essential for editing complex models efficiently.
Advanced Selections
- Edge Rings: Select perpendicular loops to the edge with Ctrl+Alt+Click.
- Boundary Loops: Accessible via the select menu, useful for selecting edges around a selection.
- Loop Inner Region: Selects the area inside a boundary loop, with options to select larger areas.

Conclusion
Understanding and utilizing edge loops in Blender is crucial for adding detail and realism to your models. By mastering these techniques, you can significantly enhance your 3D modeling skills.

_HOOK_
Removing Edge Loops
To remove an edge loop, select it with Alt+Click and dissolve it by pressing X and choosing \"Dissolve Edges\". This method maintains the model\"s integrity while removing unwanted detail.
Multiple Edge Loops Removal
For removing several loops, select them while avoiding adjacent loop selection to prevent geometry issues. This technique streamlines model simplification.
Selection Techniques
Selecting edge or face loops is straightforward. For edge loops, use Alt+Click in edge select mode. For face loops, switch to face select mode and use the same key combination. These selections are essential for editing complex models efficiently.
Advanced Selections
- Edge Rings: Select perpendicular loops to the edge with Ctrl+Alt+Click.
- Boundary Loops: Accessible via the select menu, useful for selecting edges around a selection.
- Loop Inner Region: Selects the area inside a boundary loop, with options to select larger areas.
Blender Basics 14: Bevel, Insert Edge Loop, and Edge Slide
Discover the sleek and modern world of beveling in our video tutorial! Learn how to add depth and dimension to your designs with this essential technique that will take your projects to the next level.
How to Add EdgeLoops in Blender Fast and Easy
Dive into the fascinating world of edge loops with us in our informative video! Explore how this key concept in 3D modeling can help you create smooth and detailed surfaces in your digital creations.
Conclusion
Understanding and utilizing edge loops in Blender is crucial for adding detail and realism to your models. By mastering these techniques, you can significantly enhance your 3D modeling skills.
Selection Techniques
Selecting edge or face loops is straightforward. For edge loops, use Alt+Click in edge select mode. For face loops, switch to face select mode and use the same key combination. These selections are essential for editing complex models efficiently.
Advanced Selections
- Edge Rings: Select perpendicular loops to the edge with Ctrl+Alt+Click.
- Boundary Loops: Accessible via the select menu, useful for selecting edges around a selection.
- Loop Inner Region: Selects the area inside a boundary loop, with options to select larger areas.

Conclusion
Understanding and utilizing edge loops in Blender is crucial for adding detail and realism to your models. By mastering these techniques, you can significantly enhance your 3D modeling skills.

_HOOK_
Conclusion
Understanding and utilizing edge loops in Blender is crucial for adding detail and realism to your models. By mastering these techniques, you can significantly enhance your 3D modeling skills.
Introduction to Edge Loops
Edge loops are a pivotal aspect of 3D modeling in Blender, offering unparalleled control over the topology of your models. Essential for both beginners and advanced users, understanding edge loops allows for the creation of more detailed and realistic models by adding extra geometry in strategic locations. This technique is crucial for defining shapes, enhancing mesh details, and supporting smooth deformations for animations. By mastering edge loops, you unlock a new level of precision and flexibility in your 3D modeling projects.
- Edge loops follow a path around a model, creating a loop that enhances model detail and topology.
- Adding an edge loop involves selecting a ring of faces or edges and inserting a new loop that subdivides these faces.
- They are particularly useful in areas requiring additional detail or support for animations, such as facial expressions or joint movements.
Understanding the fundamentals of edge loops not only improves the quality of your models but also streamlines your workflow, making it easier to edit and refine your projects. In the following sections, we\"ll delve into how to add, adjust, and remove edge loops, alongside tips for optimizing their use in your 3D modeling endeavors.
How to Add an Edge Loop
Adding an edge loop in Blender is a straightforward process that significantly enhances your model\"s geometry, allowing for more detailed and precise modifications. Follow these step-by-step instructions to master this essential skill.
- Start by selecting the object you wish to edit. Ensure it is in Edit Mode by pressing Tab or selecting Edit Mode from the mode menu in the bottom left corner of the 3D viewport.
- Activate the Loop Cut tool either by pressing Ctrl+R or by selecting it from the tool shelf. Your cursor will change to indicate the Loop Cut tool is active.
- Hover over the mesh where you wish to add the edge loop. A purple preview of the loop cut will appear along the mesh, indicating where the loop will be created.
- Scroll the mouse wheel to increase or decrease the number of cuts. The preview will update to show the new edge loops.
- Left-click to place the edge loop(s) at the previewed location. After clicking, you can move the mouse to slide the loop(s) to the desired position before clicking again to finalize their placement.
- If you wish to add the loop without sliding, simply right-click instead of moving the loop, and it will be added in the center of the faces it bisects.
Edge loops are essential for adding detail, supporting mesh deformation, and creating topology that is more conducive to smooth shading and textures. By practicing these steps, you\"ll be able to add edge loops with confidence and precision, enhancing your Blender projects.
Adjusting Edge Loops
After adding an edge loop to your Blender model, fine-tuning its position can further refine your model\"s detail and form. Adjusting edge loops is a crucial step for achieving the desired mesh topology and surface smoothness. Follow these instructions to efficiently adjust edge loops in your projects.
- Select the edge loop you wish to adjust by hovering over it and using Alt+Left Click. This selects the entire loop.
- Once selected, you can slide the edge loop along its adjacent faces by pressing GG (double tap the G key). This action activates the edge slide tool, allowing you to move the edge loop while maintaining the geometry\"s overall shape.
- Move the mouse to slide the edge loop to the desired position. Use the Shift key for more precise control over the slide movement.
- If you need to adjust the edge loop\"s position numerically for precise modeling, access the loop cut and slide tool\"s options in the tool shelf or by pressing F6 immediately after creating the loop. Here, you can input exact values for the edge loop\"s position.
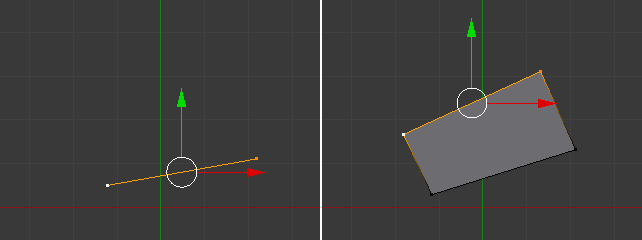
- To scale or rotate an edge loop, switch to scale (S) or rotate (R) mode after selecting the loop. This allows for more complex adjustments, such as tightening or expanding the loop, or aligning it to a specific angle.
Adjusting edge loops is vital for sculpting detailed and accurate models. Whether tweaking character facial features, refining the curvature on a vehicle, or ensuring the seamless flow of topology across organic shapes, these techniques provide the control needed for professional-grade 3D modeling.
Removing Edge Loops
Properly removing edge loops in Blender can clean up your mesh and help maintain an efficient topology. Follow these steps to remove edge loops without disrupting the surrounding geometry.
- Select the edge loop you want to remove. You can do this by entering Edit Mode (Tab), then holding Alt and clicking on an edge in the loop.
- Once selected, press X to bring up the delete menu.
- Choose \"Dissolve Edges\" from the menu. This option removes the selected edges without creating holes in your mesh, as it intelligently merges adjacent faces.
If you encounter areas where dissolving an edge loop creates unexpected results, such as n-gons (faces with more than four edges) or distorted geometry, you may need to manually adjust the surrounding vertices, edges, and faces to maintain a clean topology.
- To refine the mesh after removing edge loops, use tools like Vertex Slide (Shift+V) for minor adjustments without altering the overall shape.
- For more complex adjustments, consider using the Knife Tool (K) to manually redefine edge flow, or the Connect Vertex Path tool (J) to create new edges that better suit your model’s topology.
Understanding when and how to remove edge loops is crucial for maintaining a clean and efficient 3D model. With practice, you\"ll be able to make these adjustments quickly and ensure your models are optimized for both performance and aesthetics.
_HOOK_
Common Issues and Solutions
Working with edge loops in Blender is a powerful way to enhance your models, but it can sometimes lead to issues. Here are some common challenges and how to resolve them.
- Loop Cut Does Not Complete the Circuit: This usually happens when the mesh contains non-quadrilateral faces. Ensure your model primarily consists of quads for edge loops to work effectively.
- Edges Do Not Align After Loop Cut: Snapping features or manually adjusting vertices can help. Use the \"Snap to Vertex\" feature to align edges precisely.
- Unable to Select Edge Loop: This can occur if the loop is broken or if there are n-gons. Using the \"Select Loop\" tool may help, but manual adjustment might be necessary to correct the topology.
- Excessive Geometry After Adding Loops: To prevent overcrowding of geometry, plan your edge loops wisely. Use the \"Limited Dissolve\" feature to simplify areas with unnecessary detail.
For specific issues, Blender\"s vast community forums and tutorials offer a wealth of knowledge, providing detailed solutions to almost any problem you might encounter.
Advanced Techniques for Edge Loop Control
Enhancing your modeling workflow in Blender involves mastering advanced edge loop control techniques. These strategies enable more complex and detailed designs, empowering you to achieve professional-level results.
- Edge Slide: Perfect for adjusting the spacing between edge loops without altering the overall shape of your model. Use GG after selecting an edge loop to activate Edge Slide.
- Loop Cut and Slide: This feature allows for the addition of multiple, evenly spaced edge loops. Press Ctrl+R, then scroll to increase the number of loops before clicking to confirm.
- Beveling Edge Loops: Beveling adds geometry around an edge loop, creating additional loops for more control over roundness and detail. Select an edge loop and press Ctrl+B to bevel.
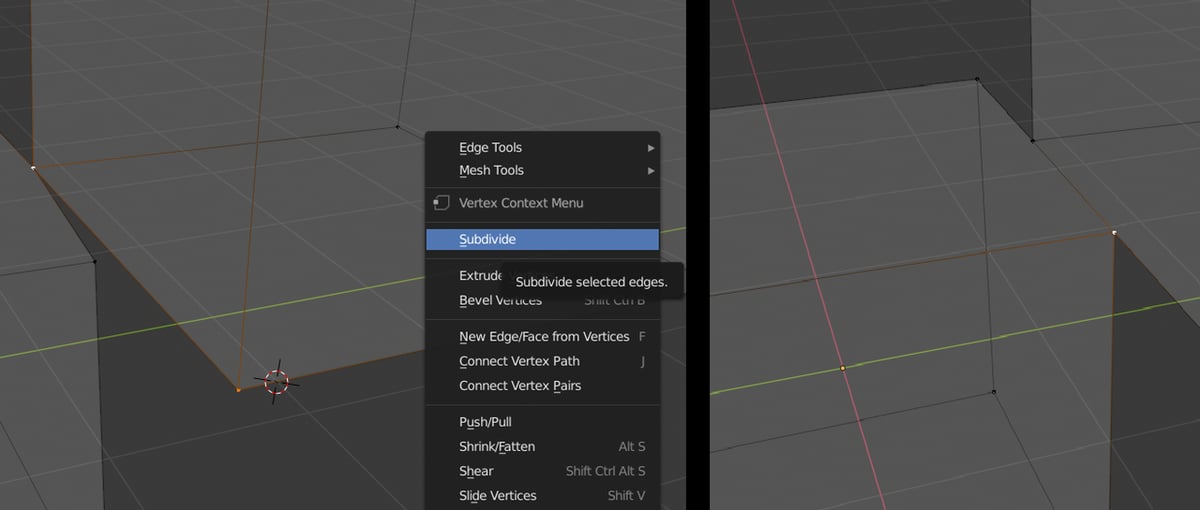
- Subdividing Edge Loops: For adding detail to specific areas of your model, use the Subdivide tool. Select an edge loop, right-click to open the context menu, and choose Subdivide.
- Edge Loop Selection Techniques: Advanced selection techniques, such as Select Loop Inner-Region or Select Boundary Loop, provide precise control over which edges are modified.
Implementing these techniques requires practice but significantly enhances your ability to create intricate and detailed models. As you become more comfortable with these tools, you\"ll discover new ways to refine your workflow and elevate the quality of your projects.
Case Studies: Practical Applications of Edge Loops
Edge loops play a crucial role in 3D modeling, impacting everything from the basics of mesh topology to the intricacies of animation-ready models. This section explores practical applications through case studies, showcasing the versatility and necessity of edge loops in professional workflows.
- Character Modeling: For character models, edge loops are essential around joints for smooth deformations during animation. Properly placed edge loops follow the muscle structure and facial expressions, allowing for realistic movement and rigging.
- Hard Surface Modeling: In hard surface modeling, such as vehicles or machinery, edge loops help define sharp edges and smooth surfaces. They are crucial for adding detail and controlling subdivision levels.
- Environmental Design: Edge loops facilitate the creation of natural landscapes or architectural elements, allowing for detailed terrains, buildings, and interior spaces that are optimized for rendering.
- Texturing and UV Mapping: Strategically placed edge loops aid in efficient UV unwrapping and texturing, ensuring textures follow the model\"s geometry naturally, without stretching or distortion.
- Optimization for Gaming: In game design, edge loops are used to reduce polygon count without sacrificing detail, crucial for maintaining performance while achieving visually stunning models.
These case studies illustrate the critical role edge loops play across various disciplines within 3D modeling and animation. By mastering edge loop placement and adjustment, artists can significantly enhance the quality and functionality of their models, regardless of the project scope or industry.
Optimizing Your Workflow with Edge Loops
Efficient use of edge loops can significantly streamline your modeling process in Blender. This section offers strategies to optimize your workflow, making your modeling more productive and less time-consuming.
- Plan Your Edge Loops: Before diving into modeling, visualize or sketch out where your main edge loops will go, especially around critical areas like joints in characters or edges in hard surface models. This planning can save you from making time-consuming adjustments later.
- Use Shortcuts: Blender offers keyboard shortcuts for almost every action, including adding and adjusting edge loops. Familiarize yourself with these shortcuts to speed up your workflow significantly. For example, Ctrl+R for adding an edge loop and GG for edge sliding.
- Keep Your Mesh Clean: Regularly cleaning up your mesh by removing unnecessary vertices, edges, and faces can prevent complications when adding or modifying edge loops. This practice keeps your topology manageable and efficient for further editing.
- Leverage Modifiers: Modifiers like Subdivision Surface can show how your model will look with additional geometry without permanently adding it. This can be useful for planning where additional edge loops are needed for defining shapes or details.
- Practice Consistent Spacing: Try to maintain even spacing between edge loops to avoid pinching or stretching in your model. Consistent spacing aids in achieving smooth surfaces and easier adjustments down the line.
By integrating these strategies into your Blender workflow, you\"ll be able to utilize edge loops more effectively, enhancing both the speed and quality of your modeling projects.
Additional Resources and Tools for Learning
Expanding your knowledge and skills in Blender, particularly with edge loops, can be significantly enhanced by leveraging a variety of resources and tools. Below is a list of recommended types of resources for deepening your understanding and refining your technique.
- Official Blender Tutorials: The Blender Foundation offers comprehensive guides and tutorials, perfect for beginners and advanced users alike. They cover a wide range of topics including basic operations, modeling, animation, and more.
- Online Courses: Platforms like Udemy, Coursera, and Lynda provide structured courses on Blender, ranging from introductory to advanced levels. These courses often include sections on modeling techniques, including the use of edge loops.
- Books: Several detailed books have been written on Blender, offering insights into its tools and techniques. Titles such as \"Blender For Dummies\" and \"The Complete Guide to Blender Graphics\" are great for learners at all levels.
- YouTube Channels: YouTube hosts a wealth of free tutorials by experienced Blender artists. Channels like Blender Guru, CG Geek, and FlippedNormals offer tutorials that include the use of edge loops for various projects.
- Blender Community Forums: Engaging with the Blender community through forums and discussion boards can provide personalized advice, tips, and solutions to specific challenges you might encounter.
- Plugins and Add-ons: The Blender community has developed numerous plugins and add-ons that can streamline aspects of modeling, including tools specifically designed to enhance edge loop manipulation.
By exploring these resources, you can build a solid foundation in Blender, learn new techniques, and stay updated on the latest tools and trends in 3D modeling.
_HOOK_
READ MORE:
Conclusion: Enhancing Your 3D Modeling Skills
Mastering the addition and manipulation of edge loops in Blender is a fundamental skill that significantly enhances your 3D modeling capabilities. Through the careful application of edge loops, you can create more detailed, realistic, and high-quality models, whether for animation, game development, or visual effects. The journey to proficiency in Blender involves continuous learning and practice, but understanding the power of edge loops is a critical step towards achieving professional-grade results.
- Practice regularly to familiarize yourself with Blender\"s interface and tools.
- Experiment with different edge loop techniques to discover how they can best serve your modeling goals.
- Engage with the Blender community to gain insights, tips, and feedback on your work.
- Stay updated with the latest Blender features and plugins that can enhance your workflow.
As you advance in your 3D modeling journey, remember that patience and perseverance are just as important as technical skills. Every model you create brings you one step closer to mastering Blender. Embrace challenges as opportunities to learn, and always strive to push the boundaries of what you can achieve with your 3D models.
Mastering edge loops in Blender opens a world of possibilities for your 3D models, enhancing detail, realism, and flexibility. Embrace this skill to elevate your creations and explore the endless potential of 3D modeling.