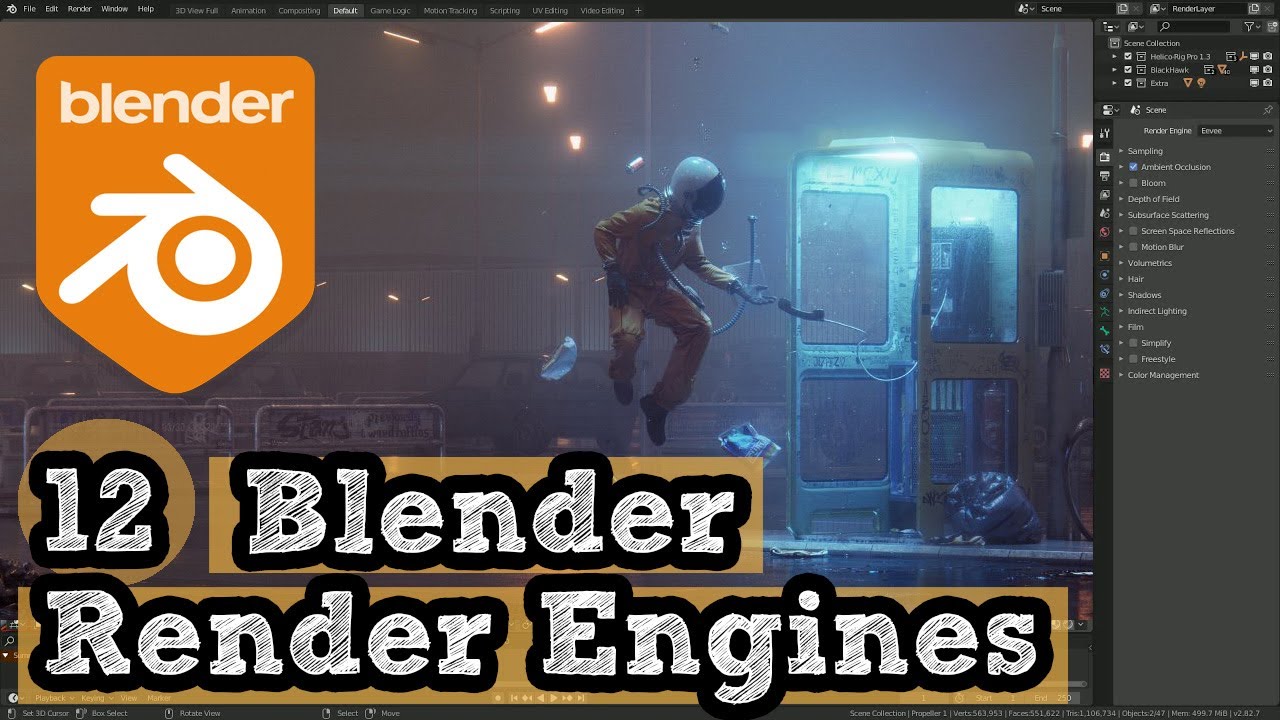
Topic blender render gpu: Discover the transformative power of Blender Render GPU, revolutionizing 3D modeling and rendering speeds for creators and professionals, and unlocking new horizons in digital art and animation.
Table of Content
- Getting Started with GPU Rendering in Blender
- Maximizing Rendering Efficiency
- Blender Rendering Engines and GPU Compatibility
- Maximizing Rendering Efficiency
- Blender Rendering Engines and GPU Compatibility
- What are the steps to enable GPU rendering in Blender?
- YOUTUBE: How to Enable GPU Rendering in Blender
- Blender Rendering Engines and GPU Compatibility
- Introduction to GPU Rendering in Blender
- Benefits of GPU Rendering Over CPU Rendering
- How to Enable GPU Rendering in Blender
- Comparing Blender\"s Supported GPUs - NVIDIA vs AMD vs Intel
- Optimizing Blender Settings for GPU Rendering
- Understanding Blender\"s Rendering Engines: Cycles and Eevee
- Advanced Techniques for GPU Rendering in Blender
- Common Issues and Solutions with GPU Rendering
- Future of GPU Rendering in Blender
- Conclusion: Maximizing Your Rendering Efficiency
Getting Started with GPU Rendering in Blender
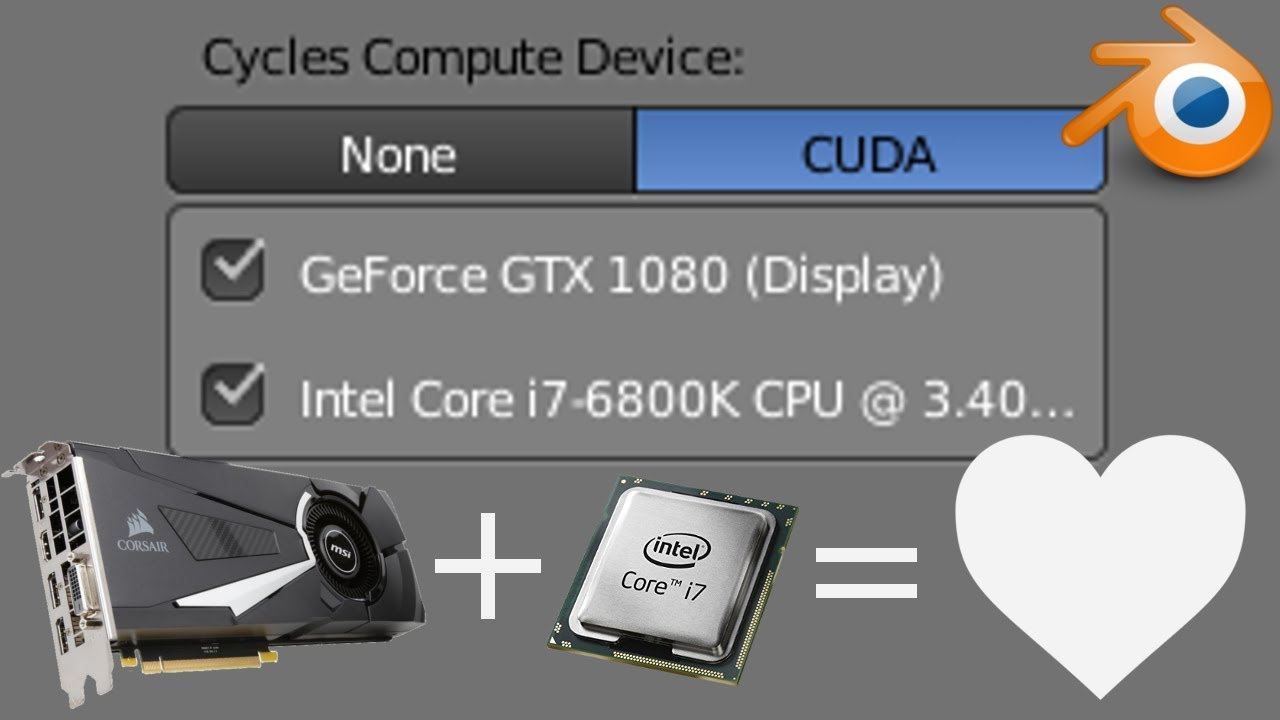
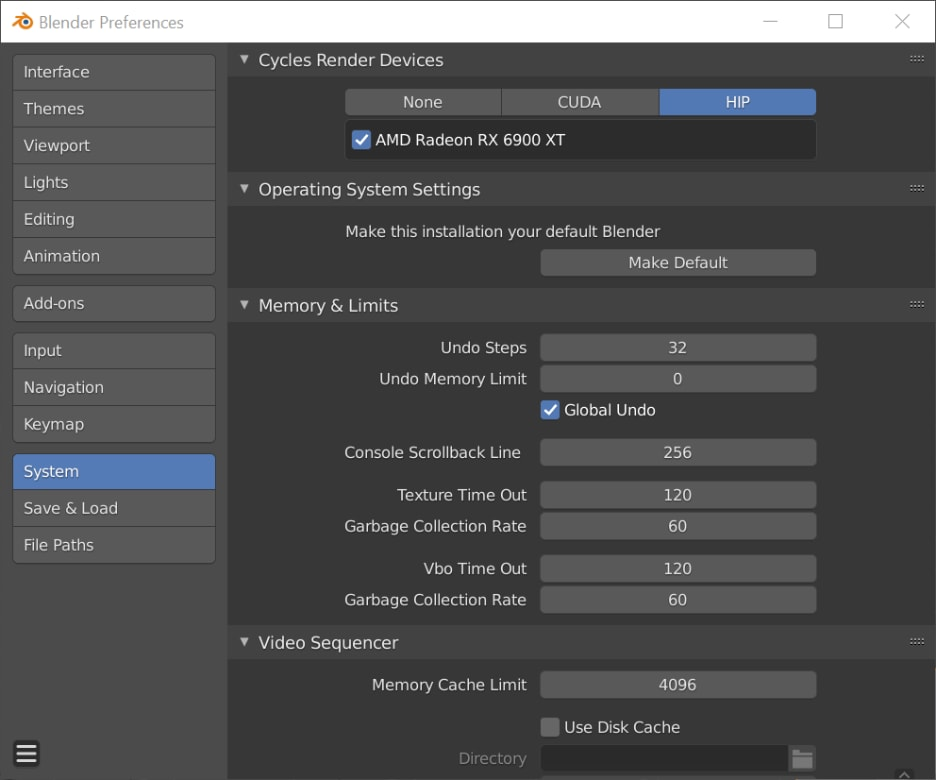
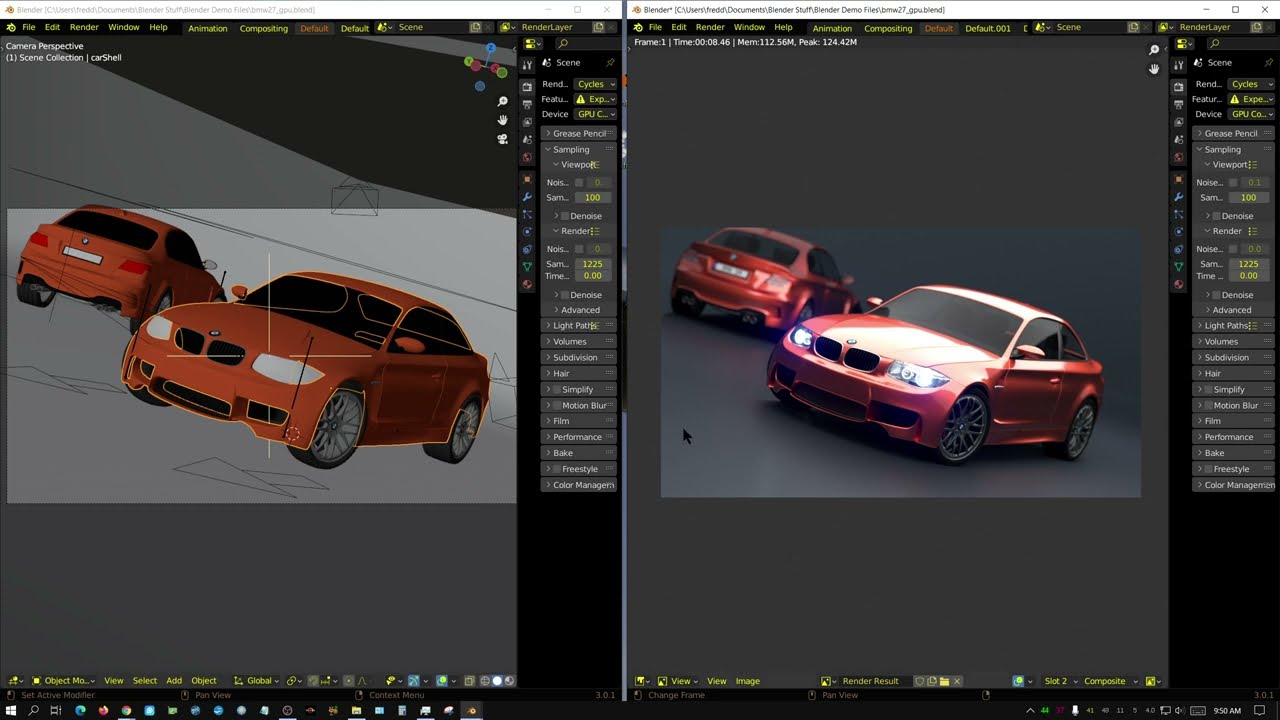
To activate GPU rendering in Blender\"s Cycles engine, navigate to Edit > Preferences, then the Systems section. Here, you can enable OpenCL for AMD and Intel GPUs or Optix for Nvidia GPUs, ensuring your device is listed and available for rendering.
Advancements in Blender 3.6
Blender 3.6 introduces ray tracing acceleration for AMD Radeon and Intel Arc cards, enhancing rendering stability and performance. With these updates, Blender\"s rendering capabilities continue to evolve, offering support for the latest in GPU technology.
READ MORE:
Maximizing Rendering Efficiency
Utilizing multiple GPUs can further enhance rendering speeds, with technologies like NVLink enabling up to 48GB of VRAM, expanding data bandwidth significantly. This approach is ideal for demanding projects, requiring high levels of detail and complexity.
Support for AMD GPUs
Blender 3.0 marked a significant improvement in AMD GPU rendering support, offering optimized performance and compatibility for AMD graphics card users.
Blender Rendering Engines and GPU Compatibility
- Cycles: Blender\"s ray-trace based production engine supports multi-core CPU and GPU rendering, including NVIDIA\"s CUDA, OptiX, and AMD\"s HIP-RT.
- Eevee: Blender\"s real-time render engine benefits from GPU acceleration for dynamic lighting and shading effects.
Choosing the Right GPU for Blender
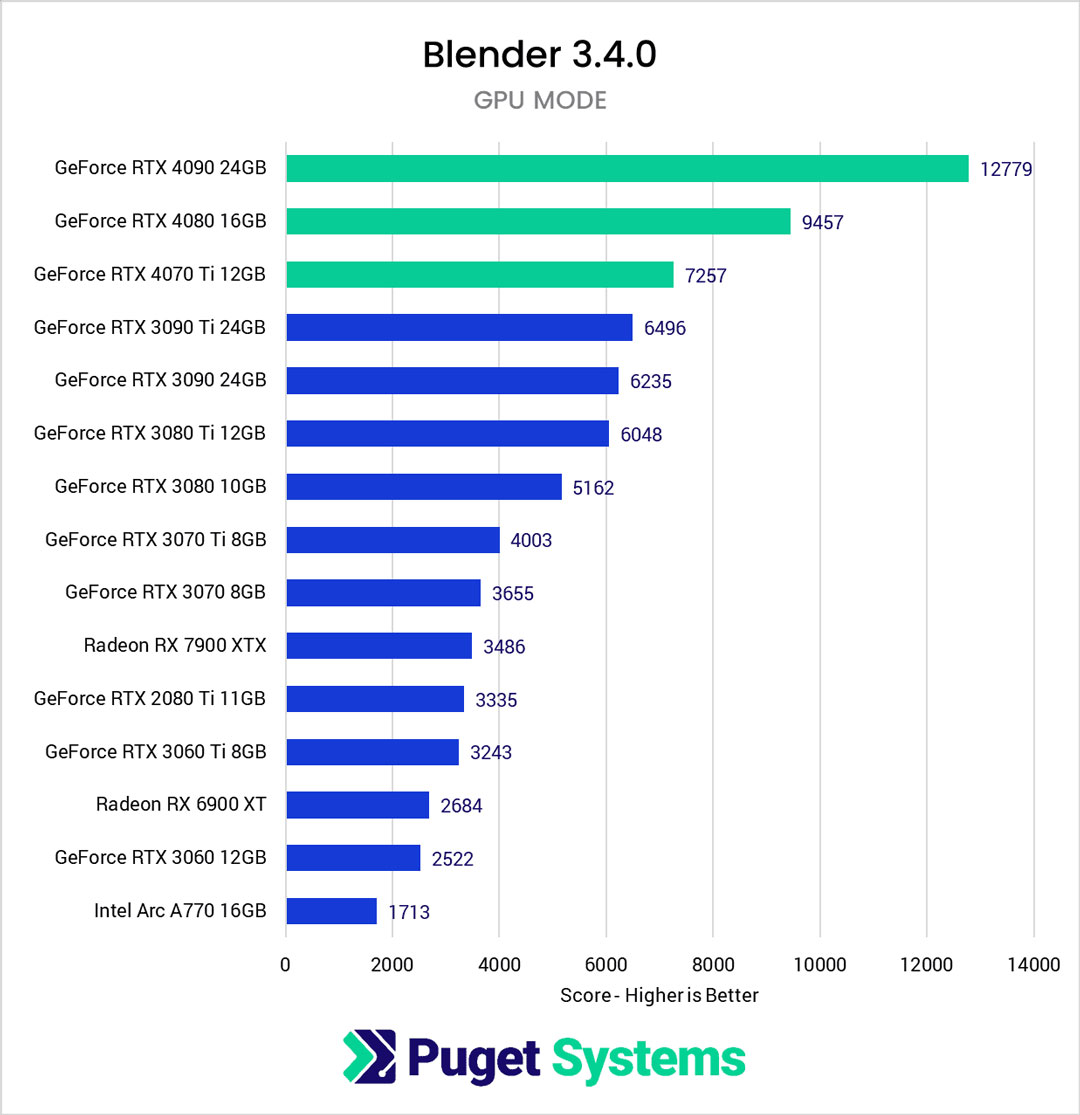
For optimal performance in Blender, selecting a GPU with sufficient VRAM and support for the latest rendering technologies is crucial. NVIDIA\"s RTX series, including the RTX 4070 Ti, offers powerful options for both budget-conscious and professional users alike.
Always ensure your system meets Blender\"s requirements and that you have the latest drivers installed to take full advantage of GPU rendering capabilities.
Maximizing Rendering Efficiency
Utilizing multiple GPUs can further enhance rendering speeds, with technologies like NVLink enabling up to 48GB of VRAM, expanding data bandwidth significantly. This approach is ideal for demanding projects, requiring high levels of detail and complexity.
Support for AMD GPUs
Blender 3.0 marked a significant improvement in AMD GPU rendering support, offering optimized performance and compatibility for AMD graphics card users.

Blender Rendering Engines and GPU Compatibility
- Cycles: Blender\"s ray-trace based production engine supports multi-core CPU and GPU rendering, including NVIDIA\"s CUDA, OptiX, and AMD\"s HIP-RT.
- Eevee: Blender\"s real-time render engine benefits from GPU acceleration for dynamic lighting and shading effects.
Choosing the Right GPU for Blender
For optimal performance in Blender, selecting a GPU with sufficient VRAM and support for the latest rendering technologies is crucial. NVIDIA\"s RTX series, including the RTX 4070 Ti, offers powerful options for both budget-conscious and professional users alike.
Always ensure your system meets Blender\"s requirements and that you have the latest drivers installed to take full advantage of GPU rendering capabilities.
_HOOK_
What are the steps to enable GPU rendering in Blender?
To enable GPU rendering in Blender, follow these steps:
- Open Blender and go to the Preferences.
- Click on the \"System\" tab.
- Under the \"Cycles Render Devices\" section, select either CUDA, OptiX, HIP, oneAPI, or Metal as your preferred rendering device.
- Once you have selected your preferred GPU option, you can start rendering using the GPU by choosing GPU Compute as the compute device in the Render Properties panel.
How to Enable GPU Rendering in Blender
Dive into the world of GPU rendering and discover the magic of graphics processing units bringing your digital creations to life with speed and efficiency. Watch our video to unlock the potential of GPU rendering today!
How to Enable GPU Compute - Graphics Card in Blender Cycles Render Engine
Unleash the power of graphic cards and witness breathtaking visuals and seamless performance like never before. Follow our video to explore the cutting-edge technology behind high-quality graphics cards and elevate your visual experience.
Blender Rendering Engines and GPU Compatibility
- Cycles: Blender\"s ray-trace based production engine supports multi-core CPU and GPU rendering, including NVIDIA\"s CUDA, OptiX, and AMD\"s HIP-RT.
- Eevee: Blender\"s real-time render engine benefits from GPU acceleration for dynamic lighting and shading effects.
Choosing the Right GPU for Blender
For optimal performance in Blender, selecting a GPU with sufficient VRAM and support for the latest rendering technologies is crucial. NVIDIA\"s RTX series, including the RTX 4070 Ti, offers powerful options for both budget-conscious and professional users alike.
Always ensure your system meets Blender\"s requirements and that you have the latest drivers installed to take full advantage of GPU rendering capabilities.
Introduction to GPU Rendering in Blender
GPU rendering in Blender utilizes the graphical processing unit (GPU) to accelerate the rendering process, offering significant speed advantages over traditional CPU rendering. This method allows for more complex scenes and higher quality renders within shorter time frames.
To enable GPU rendering in Blender, users must navigate to Edit > Preferences, then to the Systems section. Here, for AMD and Intel GPUs, OpenCL must be turned on, ensuring the GPU is listed and available. For Nvidia GPUs, Optix should be enabled. This setting makes GPU rendering accessible and optimizes Blender\"s performance for faster, more efficient render workflows.
Blender 3.6 introduced ray tracing acceleration for AMD Radeon and Intel Arc cards, marking a significant advancement in rendering capabilities. AMD\"s implementation via HIP-RT and Intel\"s through Embree have improved rendering stability and performance, making GPU rendering more reliable and faster than ever before.
- Steps to enable GPU rendering include adjusting preferences within Blender to utilize the capabilities of NVIDIA\"s CUDA, OptiX for Nvidia GPUs, or OpenCL for AMD and Intel GPUs.
- Understanding the impact of GPU rendering on workflow efficiency, project complexity, and render quality.
- Insights into the latest advancements with Blender\"s support for ray tracing acceleration, enhancing the rendering process for users with AMD Radeon and Intel Arc graphics cards.
Optimizing Blender settings for GPU rendering can significantly reduce render times, enabling artists and creators to focus more on the creative aspects of their projects. The choice between using a single GPU or multiple GPUs can further influence rendering performance, with technologies like NVLink offering expanded VRAM capabilities for demanding projects.
The evolution of GPU rendering in Blender underscores the importance of selecting hardware that meets the specific needs of 3D artists and creators, ensuring that they can achieve the best possible render quality in the least amount of time.
Benefits of GPU Rendering Over CPU Rendering
GPU rendering in Blender offers a plethora of advantages over traditional CPU rendering, making it an increasingly popular choice for 3D artists and animators. By leveraging the parallel processing capabilities of modern GPUs, Blender users can enjoy significantly faster rendering times, allowing for more iterations and faster project completion.
- Speed: GPU rendering can dramatically reduce rendering times compared to CPU rendering. This is due to the GPU\"s ability to process thousands of tasks simultaneously, making it ideal for the parallel processing demands of rendering.
- Efficiency: GPUs are designed to handle rendering tasks more efficiently, enabling artists to work on more complex scenes with higher resolution textures and more detailed models without compromising performance.
- Quality: With the ability to render scenes more quickly, GPUs allow for higher quality renders within the same time frame, including complex shading, lighting effects, and ray tracing.
- Cost-effectiveness: Although high-end GPUs can be expensive, the time saved on rendering projects can lead to a higher return on investment, especially for professionals and studios that face tight deadlines.
- Flexibility: Blender\"s support for GPU rendering is compatible with a wide range of GPUs, including NVIDIA\"s CUDA, OptiX, and AMD\"s OpenCL technologies, ensuring wide accessibility and flexibility for users with different hardware setups.
Moreover, the recent advancements in Blender, such as the introduction of ray tracing acceleration for AMD Radeon and Intel Arc cards, further enhance the benefits of GPU rendering by improving stability and performance. This makes GPU rendering an increasingly attractive option for achieving professional-grade renders in less time.
Ultimately, the choice between GPU and CPU rendering will depend on the specific needs of the project, but the advantages of GPU rendering in terms of speed, efficiency, and quality make it a compelling option for many Blender users.
How to Enable GPU Rendering in Blender
Enabling GPU rendering in Blender harnesses the power of your graphics card, providing faster rendering times and allowing for more complex scenes. Follow these steps to enable GPU rendering:
- Open Blender and navigate to Edit > Preferences.
- In the Preferences window, go to the System section.
- Under Cycles Render Devices, select the appropriate option for your GPU:
- For Nvidia GPUs, choose OptiX.
- For AMD and Intel GPUs, select OpenCL.
- Ensure your GPU is listed and check it to enable it for rendering.
- Close the Preferences window and go to the Properties panel.
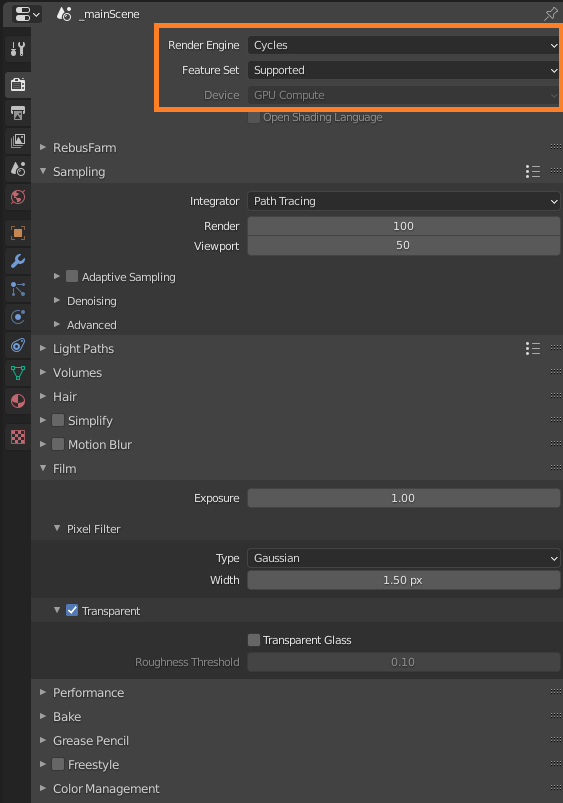
- Under the Render tab, change the Render Engine to Cycles.
- Finally, set the Device to GPU Compute.
Once these steps are completed, Blender will use your GPU for rendering, significantly reducing render times and improving your workflow. Remember, for optimal performance, ensure your graphics drivers are up to date and your Blender version supports your GPU.
_HOOK_
Comparing Blender\"s Supported GPUs - NVIDIA vs AMD vs Intel
When it comes to Blender, choosing the right GPU can significantly impact your rendering performance. NVIDIA, AMD, and Intel offer different advantages for Blender users, from speed to compatibility and efficiency. Understanding the strengths and limitations of each can help you make an informed decision for your specific needs.
- NVIDIA GPUs: Known for their CUDA and OptiX support, NVIDIA GPUs offer excellent performance for GPU rendering in Blender, especially with ray tracing and AI-accelerated features. NVIDIA\"s RTX series, including the RTX 4090, provides massive VRAM and ray tracing cores, making them ideal for complex scenes and professional work.
- AMD GPUs: AMD\"s support in Blender has significantly improved, especially with the introduction of the HIP-RT for ray tracing in recent versions. AMD GPUs, such as the Radeon RX 6000 series, offer a good balance of price and performance, with strong support for OpenCL rendering in Blender.
- Intel GPUs: The introduction of ray tracing acceleration for Intel Arc cards in Blender 3.6 marks a new era for Intel GPUs in 3D rendering. Intel\"s GPUs, including the Arc series, offer competitive performance and stability for Blender rendering, making them a viable option for users on integrated or discrete Intel solutions.
Choosing between NVIDIA, AMD, and Intel GPUs for Blender rendering involves considering factors like budget, project requirements, and the specific features you need. While NVIDIA leads in ray tracing and AI-accelerated rendering, AMD offers competitive performance at various price points. Intel\"s recent advancements provide more options for users, especially those on laptops or with integrated graphics.
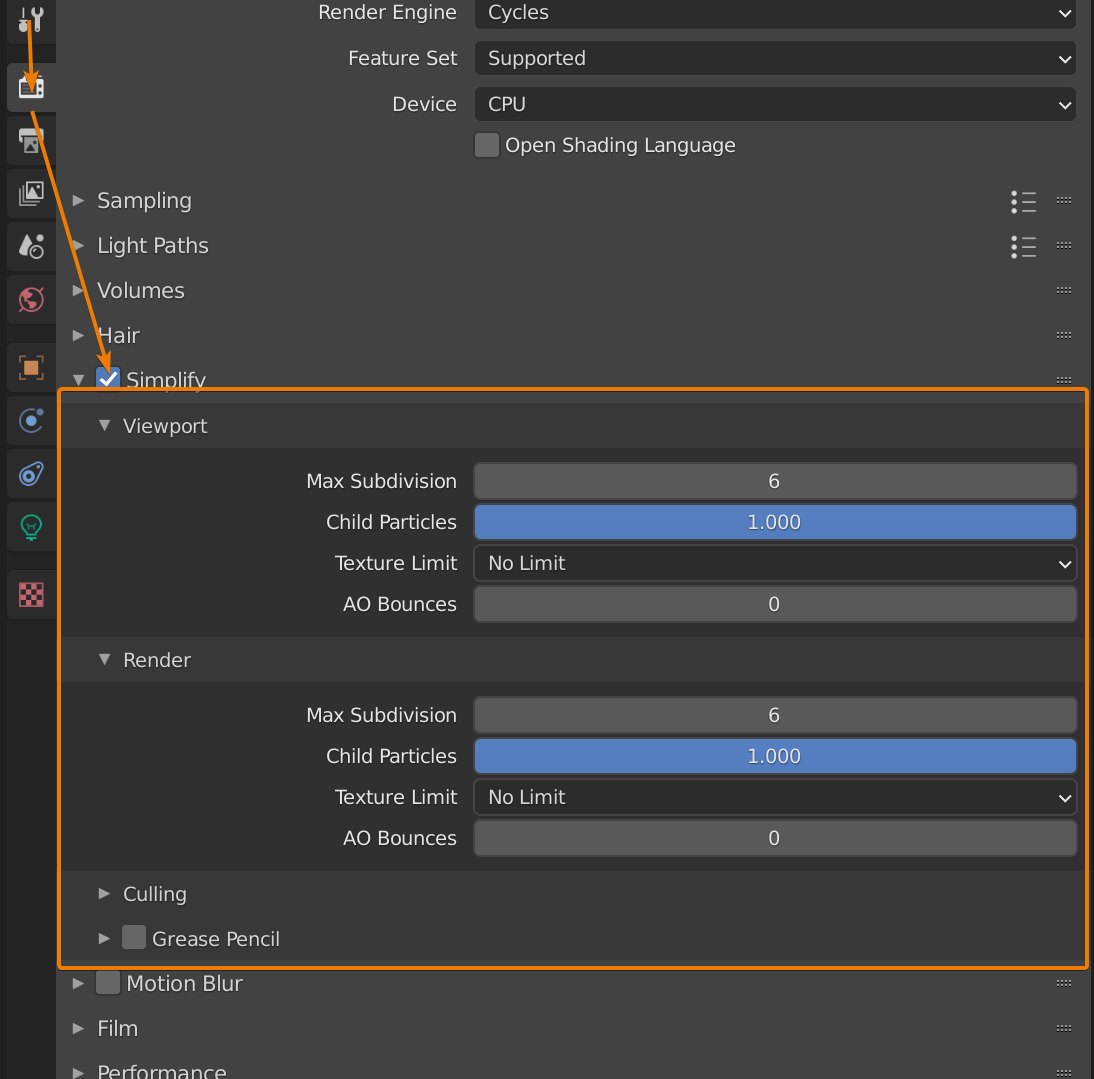
Optimizing Blender Settings for GPU Rendering
Optimizing Blender for GPU rendering involves several adjustments to ensure maximum efficiency and speed. Follow these guidelines to enhance your rendering workflow:
- Enable GPU Rendering: First, make sure GPU rendering is enabled in Blender\"s preferences under the System tab. Choose CUDA for Nvidia GPUs or OpenCL for AMD and Intel GPUs.
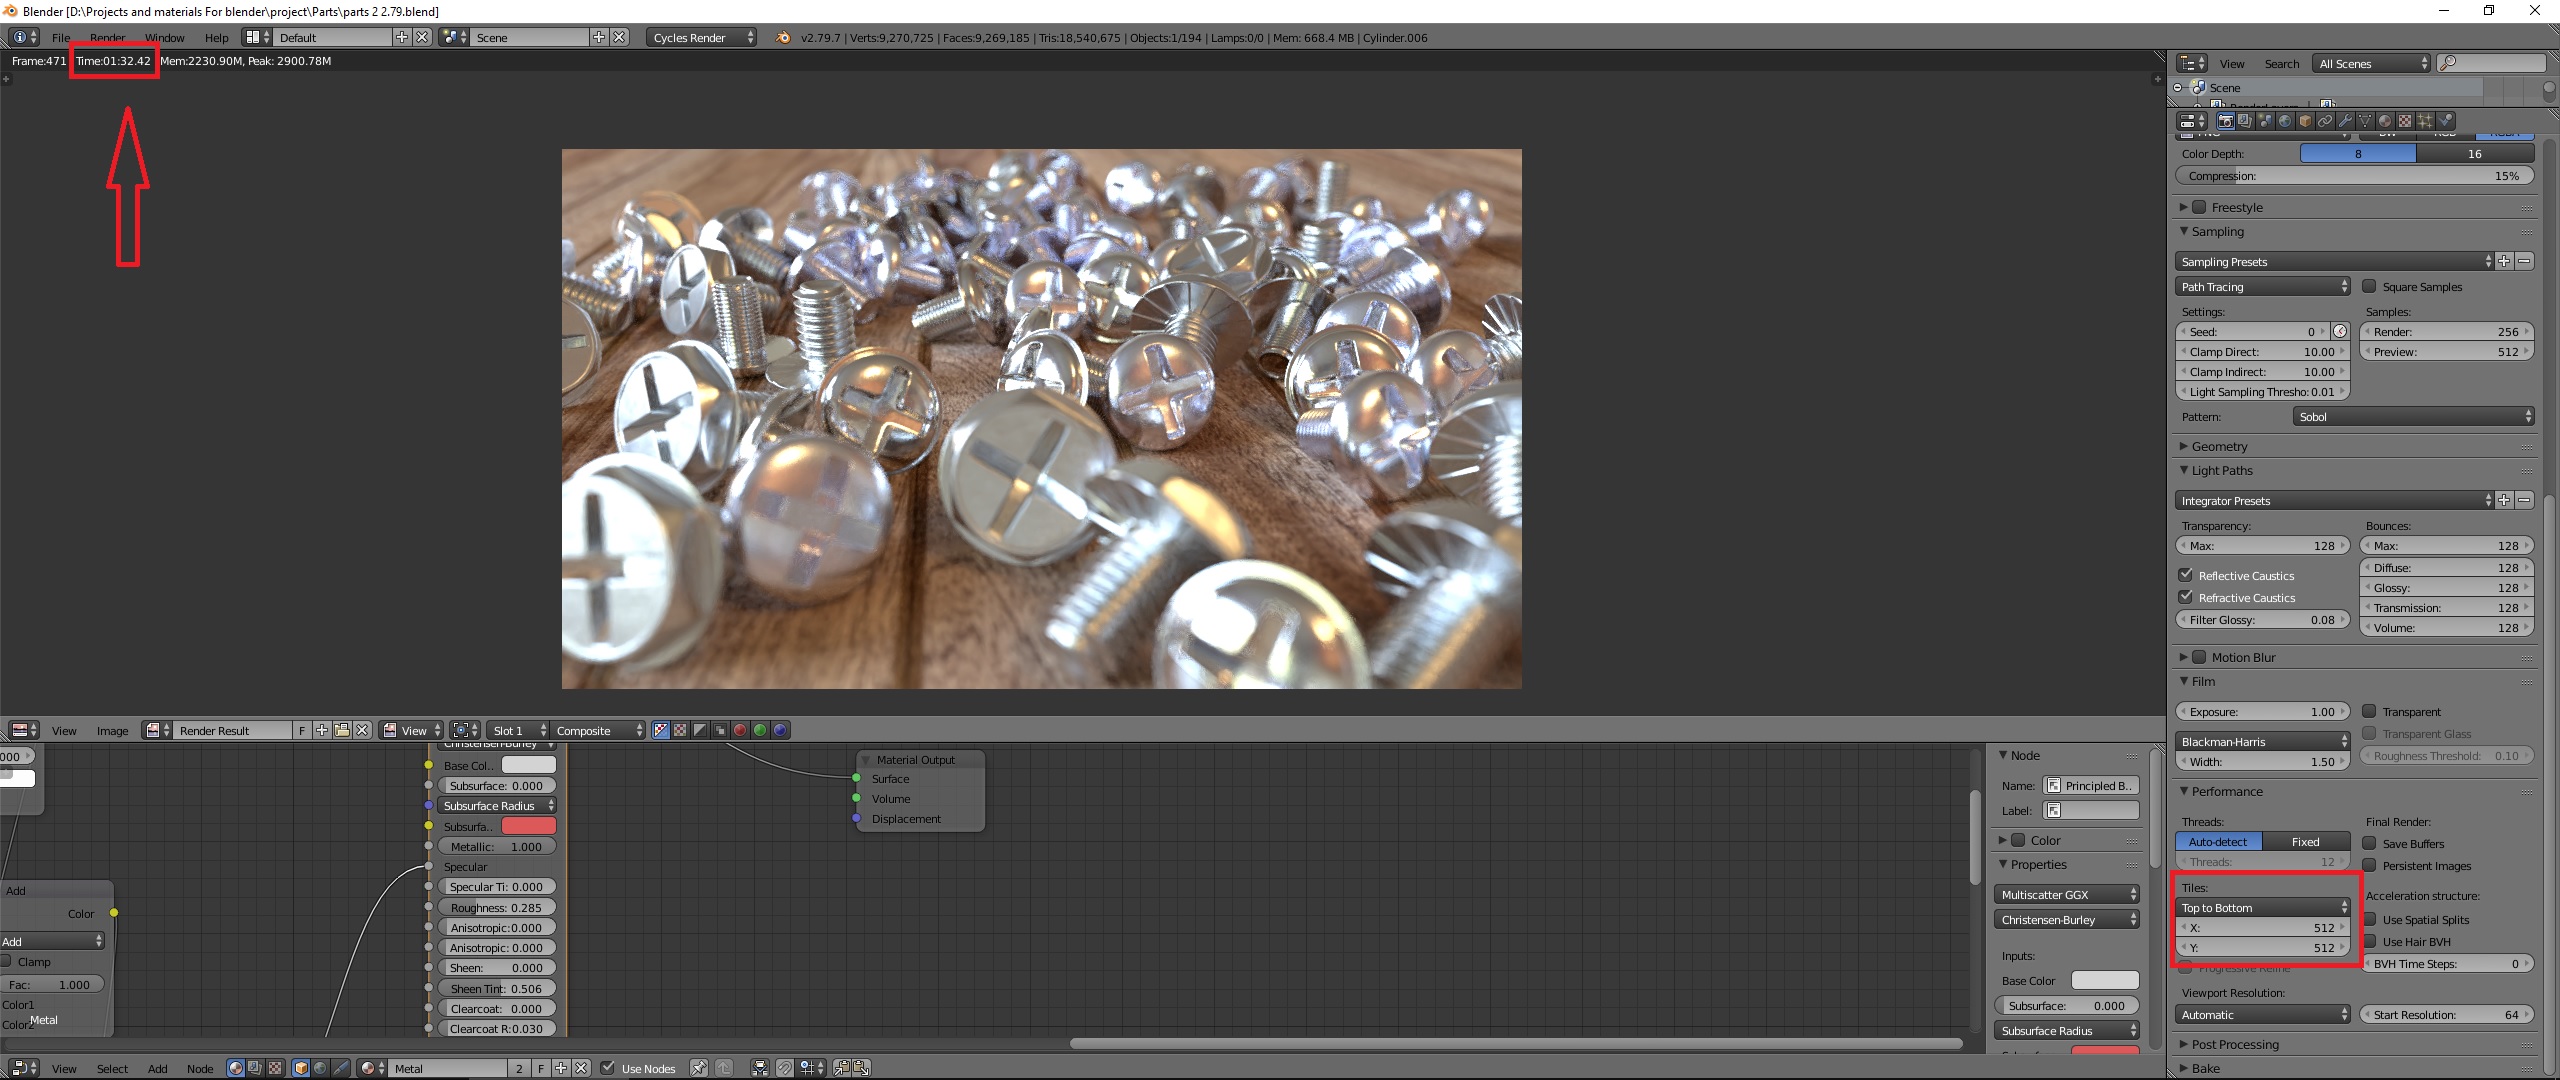
- Adjust Tile Size: GPU rendering performs best with larger tile sizes. Experiment with tile sizes in the Render settings panel; 256x256 or 512x512 are good starting points for most GPUs.
- Reduce Samples: Lower the number of render samples for previews and final renders to save time. Use denoising to maintain image quality with fewer samples.
- Optimize Scene Complexity: Simplify scenes where possible. Use modifiers wisely and limit the subdivision levels to reduce rendering times.
- Utilize Light Paths Wisely: Adjust the light paths settings to balance between render quality and speed. Reducing bounces can significantly decrease render times without a major impact on visual fidelity.
- Employ Simplified Shading in Viewport: For faster viewport performance, use simplified shading modes like \"Solid\" or \"Material\" instead of \"Rendered\" when setting up scenes.
- Use Add-ons Sparingly: Disable any unnecessary add-ons that may impact performance, especially those that are not needed for rendering.
By carefully adjusting these settings, you can greatly enhance the performance of GPU rendering in Blender, making it possible to work on more complex projects with improved efficiency.
Understanding Blender\"s Rendering Engines: Cycles and Eevee
Blender offers two powerful rendering engines, Cycles and Eevee, each with unique features and benefits tailored to different types of projects and workflows. Knowing the capabilities and best use cases for each can significantly enhance your 3D rendering experience.
- Cycles: Cycles is Blender\"s ray-tracing render engine that provides high-quality, photorealistic images by simulating the way light interacts with objects. It is highly versatile, supporting CPU and GPU rendering, and is ideal for final renders that require precise light simulations and detailed textures. Cycles is preferred for projects where realism and detail are paramount.
- Eevee: Eevee is Blender\"s real-time render engine, offering fast rendering speeds and good visual quality through rasterization. It is particularly well-suited for interactive previews, animation work, and projects where speed is more critical than absolute photorealism. Eevee\"s real-time capabilities also make it a great choice for game development and VR workflows.
Choosing between Cycles and Eevee depends on your project requirements. For photorealistic renders and projects where detail and accuracy are crucial, Cycles is the go-to choice. On the other hand, for real-time rendering, animation projects, or when you need quick feedback during the creative process, Eevee provides an efficient and visually appealing solution.
Both engines are fully integrated into Blender, allowing artists to switch between them based on the needs of their current project, making Blender a flexible tool for a wide range of 3D rendering tasks.
Advanced Techniques for GPU Rendering in Blender
Maximizing the efficiency and quality of GPU rendering in Blender involves leveraging advanced techniques and optimizations. These strategies can help achieve faster render times and more realistic results, even in complex scenes.
- Multi-GPU Rendering: Utilize multiple GPUs to divide the rendering workload, significantly reducing render times for complex scenes. Blender supports multi-GPU setups, allowing for parallel processing of render tasks.
- Render Layering: Divide your scene into multiple render layers or passes. This technique allows for more control in post-production, enabling adjustments to specific elements without re-rendering the entire scene.
- Light Path Optimization: Customize light path settings to reduce the complexity of calculations for reflections, refractions, and shadows. By limiting the number of bounces, you can decrease render times while maintaining visual quality.
- Adaptive Sampling: Use Blender\"s adaptive sampling feature to dynamically adjust the number of samples in areas of the image where less detail is needed, reducing overall render times without sacrificing image quality.
- Use Denoising: Apply denoising techniques to reduce noise in renders, allowing for lower sample counts. Blender includes built-in denoising options, such as the OptiX AI-accelerated denoiser for NVIDIA GPUs, which can dramatically improve render times and output quality.
- Shader Optimization: Optimize your materials and shaders for GPU rendering. Avoid overly complex shader nodes and use efficient textures to decrease memory usage and render times.
- Viewport Shading: Utilize Blender\"s viewport shading options to preview lighting, materials, and camera angles in real-time, significantly speeding up the iterative design process before final rendering.
By implementing these advanced techniques, Blender users can take full advantage of GPU rendering capabilities, pushing the boundaries of what\"s possible in 3D rendering and animation.
Common Issues and Solutions with GPU Rendering
While GPU rendering in Blender offers significant advantages in speed and efficiency, users may encounter some common issues. Here are solutions to address these challenges:
- Outdated Drivers: Ensure your GPU drivers are up to date. Outdated drivers can cause compatibility issues and crashes during rendering.
- Insufficient VRAM: Complex scenes require more VRAM. If you encounter memory errors, optimize your scene or consider a GPU with more memory.
- Overheating: GPUs can overheat during intensive rendering tasks. Ensure your system has adequate cooling and check GPU temperatures regularly.
- Blender Crashes: If Blender crashes during GPU rendering, try reducing the scene complexity, lowering render settings, or updating Blender to the latest version.
- Rendering Artifacts: Artifacts can appear due to incorrect settings or issues with the model. Double-check material settings, geometry, and try adjusting the light paths.
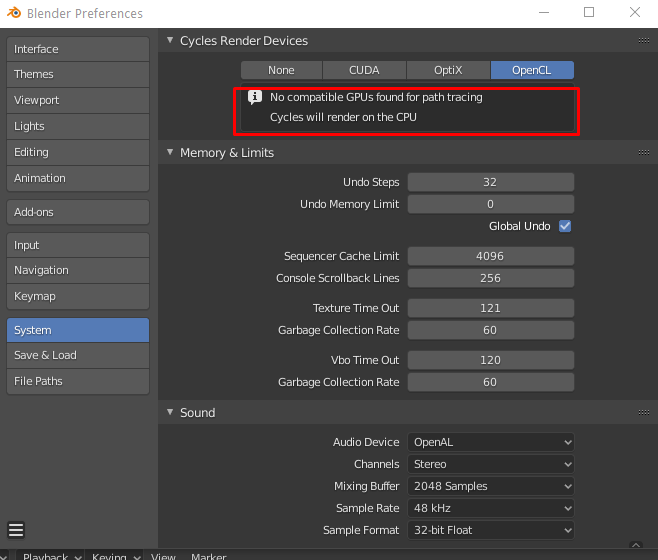
- GPU Not Recognized: If Blender does not recognize your GPU, ensure it is supported, and you have selected the correct rendering engine (CUDA for Nvidia, OpenCL for AMD).
- Slow Rendering Speeds: While GPUs are faster, improper settings can lead to slow rendering. Optimize tile size and sample rates for better performance.
Addressing these common issues can help maintain a smooth and efficient GPU rendering workflow in Blender, ensuring you get the best performance out of your hardware.
_HOOK_
Future of GPU Rendering in Blender
The future of GPU rendering in Blender is promising, with ongoing developments aimed at enhancing performance, compatibility, and rendering capabilities. Key areas of focus include:
- Migration to Vulkan: Blender plans to complete the migration to the Vulkan graphics API, promising significant improvements in performance and efficiency for GPU rendering.
- Compatibility with Metal on macOS: Efforts are underway to make Blender fully compatible with the Metal graphics API, improving performance and stability for macOS users.
- EEVEE Next and GPU-based Compositor: Future updates include the development of EEVEE Next and a GPU-based compositor, enhancing real-time rendering and post-processing capabilities.
- Ray Tracing Acceleration: Continued integration of ray tracing acceleration for AMD Radeon and Intel Arc cards, improving realism and rendering speeds.
- Support for Latest Hardware Innovations: Blender is committed to supporting the latest in GPU technology, ensuring users can leverage the full potential of their hardware for rendering.
These advancements signal a bright future for GPU rendering in Blender, offering artists and creators even more powerful tools to bring their visions to life with speed and efficiency.
READ MORE:
Conclusion: Maximizing Your Rendering Efficiency
To maximize rendering efficiency in Blender using GPU rendering, it\"s essential to understand and implement best practices and techniques tailored to your specific projects and hardware capabilities. Here are key takeaways:
- Choose the Right GPU: Selecting a GPU that meets your rendering needs and Blender\"s compatibility requirements is crucial for optimal performance.
- Stay Updated: Keeping Blender and your GPU drivers up to date ensures you benefit from the latest performance improvements and features.
- Optimize Settings: Adjusting Blender\"s rendering settings, including tile size and sampling rates, can significantly impact rendering speeds and output quality.
- Leverage Advanced Techniques: Utilizing advanced techniques such as multi-GPU setups, render layering, and adaptive sampling can further enhance rendering efficiency.
- Address Common Issues: Being proactive about common GPU rendering issues and knowing how to troubleshoot them can save time and frustration.
By integrating these strategies, you can achieve a more efficient and productive rendering workflow in Blender, allowing you to focus more on the creative aspects of your projects. As Blender continues to evolve, staying informed about new features and advancements in GPU technology will help you make the most of this powerful rendering tool.
Embrace the power of GPU rendering in Blender to transform your creative workflow, unlocking unprecedented speed and quality in your 3D projects, and pushing the boundaries of digital art and animation.