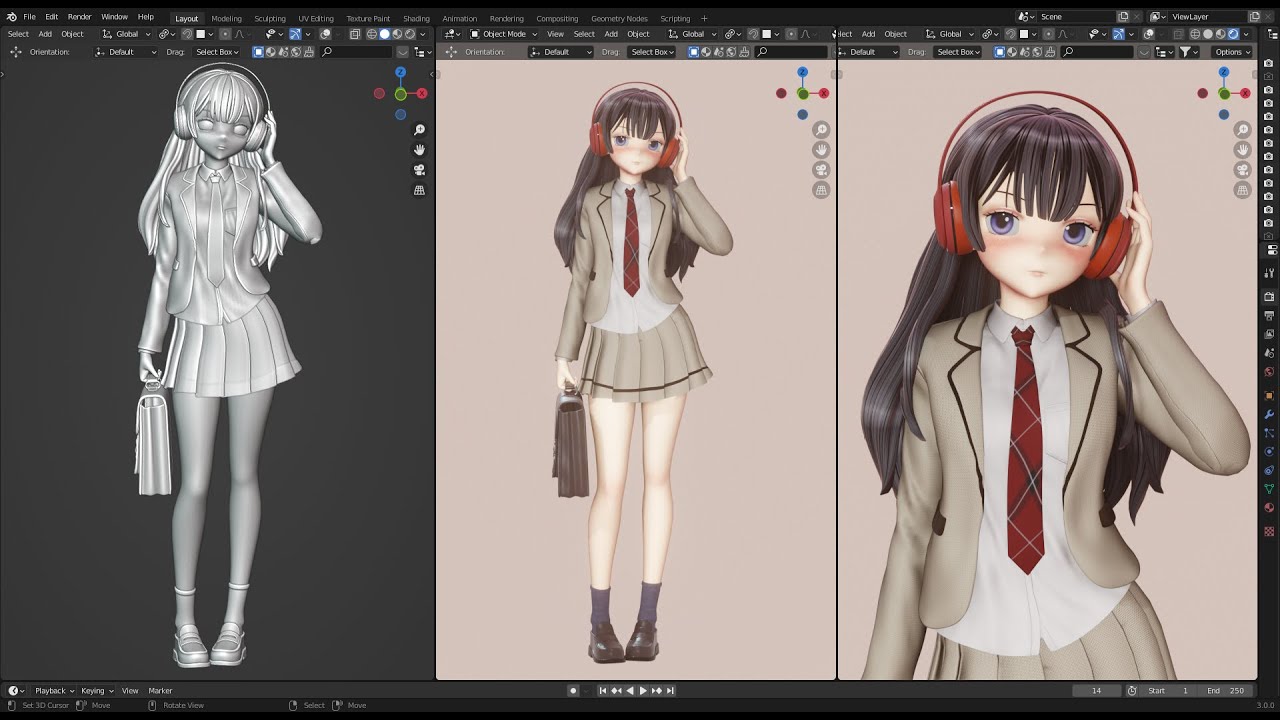
Topic blender model a car: Embark on a journey to master the art of car modeling in Blender, where creativity meets precision. This guide offers everything you need to create stunning 3D car models, from basic techniques to advanced tips.
Table of Content
- Getting Started
- Modeling Techniques
- Adding Details
- Materials and Textures
- Lighting and Rendering
- Resources
- Modeling Techniques
- Adding Details
- How do I model a car using Blender?
- YOUTUBE: Car in Blender PART I Modelling for Beginners
- Materials and Textures
- Lighting and Rendering
- Resources
- Adding Details
- Materials and Textures
- Lighting and Rendering
- Resources
- Materials and Textures
- Lighting and Rendering
- Resources
- Lighting and Rendering
- Resources
- Resources
- Introduction to Blender Car Modeling
- Choosing the Right Reference Images
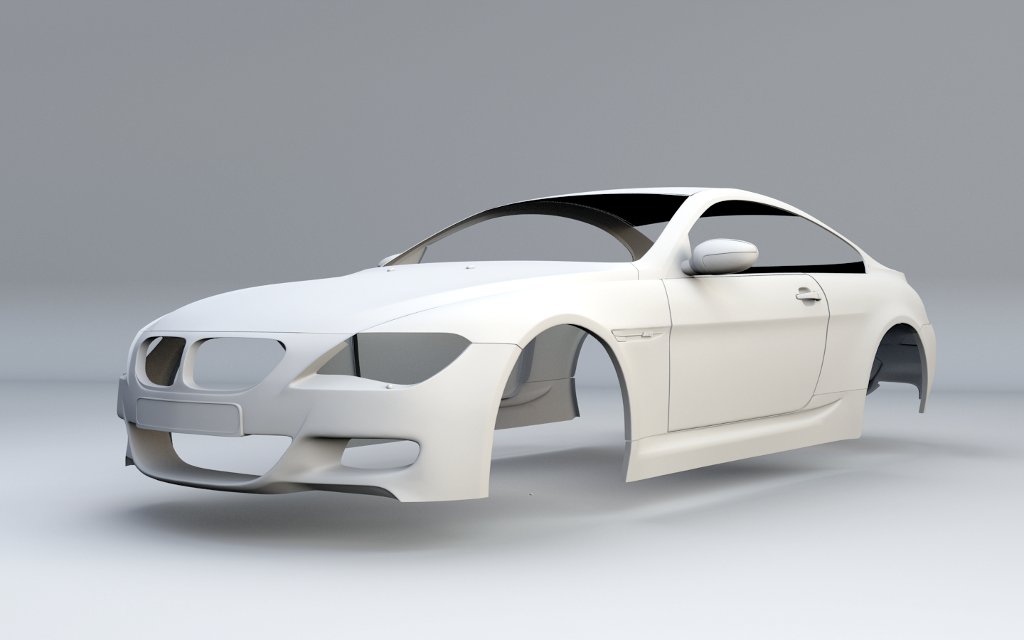
- Basic Modeling Techniques for Beginners
- Advanced Modeling Techniques for Realism
- Creating and Applying Textures
- Lighting and Rendering Your Car Model
- Adding Final Details for Realism
- Resources for Learning and Inspiration
- Tips and Tricks from the Pros
- Conclusion: Next Steps in Blender Car Modeling
Getting Started
- Begin with setting up reference images to ensure accuracy in proportions and details.
- Focus on modeling the main body of the car first, starting with the larger shapes and adding details gradually.

READ MORE:
Modeling Techniques
- Use the box modeling technique to start with a basic shape and refine it into the car’s body.
- Apply modifiers like Subdivision Surface to smooth out the model and add more detail.
- Utilize the mirror modifier for symmetrical parts of the car to save time.

Adding Details
Details such as wheels, headlights, and interior can significantly enhance the realism of your car model:
- Model individual components like wheels and mirrors separately and then attach them to the main body.
- For intricate details like grilles and vents, consider using textures and normal maps.

Materials and Textures
Assigning realistic materials and textures is crucial for achieving a lifelike appearance:
- Use Blender’s material editor to create materials for different parts of the car, such as metal for the body and rubber for the tires.
- Experiment with shaders to simulate various surface qualities, including glossiness and reflectivity.

Lighting and Rendering
Proper lighting and rendering settings are essential for showcasing your car model:
- Set up a three-point lighting system to highlight the form and details of the car.
- Choose a suitable environment or HDRI for reflections to add depth to the scene.
- Experiment with Blender’s rendering engines, such as Cycles or Eevee, for the final output.

_HOOK_
Resources
Many online resources offer free 3D car models, tutorials, and assets to help you get started:
- Free Blender Car Models on platforms like TurboSquid and CGTrader for inspiration and reference.
- YouTube tutorials cover the entire process from modeling to rendering, suitable for all skill levels.
- Blender communities and forums for feedback, tips, and additional resources.

Modeling Techniques
- Use the box modeling technique to start with a basic shape and refine it into the car’s body.
- Apply modifiers like Subdivision Surface to smooth out the model and add more detail.
- Utilize the mirror modifier for symmetrical parts of the car to save time.

Adding Details
Details such as wheels, headlights, and interior can significantly enhance the realism of your car model:
- Model individual components like wheels and mirrors separately and then attach them to the main body.
- For intricate details like grilles and vents, consider using textures and normal maps.
How do I model a car using Blender?
To model a car using Blender, you can follow these steps:
- Start by creating a low-poly base mesh in the shape of the car. You can use a cube as a starting point and shape it to closely resemble the silhouette of the car.
- Subdivide the base mesh gradually to add more details. Begin by adding basic features like the hood, roof, and sides of the car using the subdivision tools in Blender.
- Focus on each section of the car individually, such as the front, rear, and sides. Use reference images or blueprints to guide you in creating accurate proportions and details.
- Add finer details like headlights, doors, windows, and wheels to enhance the realism of the car model.
- Utilize Blender\'s modeling tools such as extrude, loop cuts, and modifiers to refine the shape and form of the car. Pay attention to the overall topology to ensure smooth surfaces and clean geometry.
- Once you are satisfied with the basic model, you can add materials, textures, and colors to give the car a realistic appearance.
- Finally, you can apply shading, lighting, and rendering techniques to showcase your car model in a visually appealing way.
Car in Blender PART I Modelling for Beginners
Modelling: Watch our captivating video showcasing the world of modeling, filled with glamour, style, and creativity. See talented individuals working the runway and posing for the camera in stunning outfits. Don\'t miss out on this exciting glimpse into the fashion industry! Tool: Dive into the world of tools with our informative and engaging video demonstration. Discover the latest innovations and best practices for using various tools to make your work easier and more efficient. Get inspired to upgrade your toolkit and enhance your skills!
Materials and Textures
Assigning realistic materials and textures is crucial for achieving a lifelike appearance:
- Use Blender’s material editor to create materials for different parts of the car, such as metal for the body and rubber for the tires.
- Experiment with shaders to simulate various surface qualities, including glossiness and reflectivity.

_HOOK_
The MOST IMPORTANT Car Modeling Tool Arijan
Check out my Patreon for the latest content: https://shorturl.at/corV4 Join my Discord: https://discord.gg/SPUhAaPpBE Connect ...
Lighting and Rendering
Proper lighting and rendering settings are essential for showcasing your car model:
- Set up a three-point lighting system to highlight the form and details of the car.
- Choose a suitable environment or HDRI for reflections to add depth to the scene.
- Experiment with Blender’s rendering engines, such as Cycles or Eevee, for the final output.

Resources
Many online resources offer free 3D car models, tutorials, and assets to help you get started:
- Free Blender Car Models on platforms like TurboSquid and CGTrader for inspiration and reference.
- YouTube tutorials cover the entire process from modeling to rendering, suitable for all skill levels.
- Blender communities and forums for feedback, tips, and additional resources.
Adding Details
Details such as wheels, headlights, and interior can significantly enhance the realism of your car model:
- Model individual components like wheels and mirrors separately and then attach them to the main body.
- For intricate details like grilles and vents, consider using textures and normal maps.
Materials and Textures
Assigning realistic materials and textures is crucial for achieving a lifelike appearance:
- Use Blender’s material editor to create materials for different parts of the car, such as metal for the body and rubber for the tires.
- Experiment with shaders to simulate various surface qualities, including glossiness and reflectivity.
Lighting and Rendering
Proper lighting and rendering settings are essential for showcasing your car model:
- Set up a three-point lighting system to highlight the form and details of the car.
- Choose a suitable environment or HDRI for reflections to add depth to the scene.
- Experiment with Blender’s rendering engines, such as Cycles or Eevee, for the final output.
_HOOK_
Resources
Many online resources offer free 3D car models, tutorials, and assets to help you get started:
- Free Blender Car Models on platforms like TurboSquid and CGTrader for inspiration and reference.
- YouTube tutorials cover the entire process from modeling to rendering, suitable for all skill levels.
- Blender communities and forums for feedback, tips, and additional resources.
Materials and Textures
Assigning realistic materials and textures is crucial for achieving a lifelike appearance:
- Use Blender’s material editor to create materials for different parts of the car, such as metal for the body and rubber for the tires.
- Experiment with shaders to simulate various surface qualities, including glossiness and reflectivity.
Lighting and Rendering
Proper lighting and rendering settings are essential for showcasing your car model:
- Set up a three-point lighting system to highlight the form and details of the car.
- Choose a suitable environment or HDRI for reflections to add depth to the scene.
- Experiment with Blender’s rendering engines, such as Cycles or Eevee, for the final output.
Resources
Many online resources offer free 3D car models, tutorials, and assets to help you get started:
- Free Blender Car Models on platforms like TurboSquid and CGTrader for inspiration and reference.
- YouTube tutorials cover the entire process from modeling to rendering, suitable for all skill levels.
- Blender communities and forums for feedback, tips, and additional resources.
Lighting and Rendering
Proper lighting and rendering settings are essential for showcasing your car model:
- Set up a three-point lighting system to highlight the form and details of the car.
- Choose a suitable environment or HDRI for reflections to add depth to the scene.
- Experiment with Blender’s rendering engines, such as Cycles or Eevee, for the final output.
_HOOK_
Resources
Many online resources offer free 3D car models, tutorials, and assets to help you get started:
- Free Blender Car Models on platforms like TurboSquid and CGTrader for inspiration and reference.
- YouTube tutorials cover the entire process from modeling to rendering, suitable for all skill levels.
- Blender communities and forums for feedback, tips, and additional resources.
Introduction to Blender Car Modeling
Blender offers an extensive suite of tools for modeling realistic cars, from vintage classics to futuristic concepts. This section will guide you through the initial steps to embark on your car modeling journey, ensuring a solid foundation for your 3D creation.
- Understanding Blender\"s Interface: Familiarize yourself with Blender\"s comprehensive interface to navigate and utilize its tools effectively for car modeling.
- Setting Up Reference Images: Learn how to import and align reference images in Blender to serve as a blueprint for your model, ensuring accuracy and proportion.
- Basic Modeling Techniques: Start with simple shapes and modify them to form the car\"s basic outline, using tools like extrude, loop cuts, and modifiers for shaping.
- Adding Details: Progress to more advanced techniques to add intricate details to your model, including doors, wheels, and interior features, to bring your car to life.
- Materials and Textures: Explore how to apply materials and textures to your car model, giving it a realistic appearance through color, reflection, and texture mapping.
- Lighting and Rendering: Conclude with an overview of lighting and rendering techniques that will showcase your car model in the best light, making it ready for presentation or integration into various projects.
This introduction aims to equip you with the knowledge and skills needed to start modeling cars in Blender, setting the stage for more advanced projects and creative exploration.
Choosing the Right Reference Images
Choosing the right reference images is crucial for accurately modeling cars in Blender. This guide will help you select and utilize reference images effectively, ensuring your model\"s proportions and details are true to life.
- Source High-Quality Images: Look for clear, high-resolution images that cover various angles of the car—front, back, side, and top views are essential for a comprehensive reference.
- Consistency is Key: Ensure all your reference images are of the same model and variant. Differences in model years or trims can lead to inaccuracies in your model.
- Utilizing Blueprints: Automotive blueprints can be incredibly valuable for getting precise dimensions and proportions. They often come in sets that include multiple views.
- Setting Up in Blender: Import your reference images into Blender and position them correctly. Use them as a background in your 3D viewport to guide your modeling process.
- Adjusting Image Transparency: To make modeling easier, adjust the transparency of your reference images in Blender so you can see your model and the reference at the same time.
With the right reference images in hand and properly set up in Blender, you\"re well on your way to creating a detailed and accurate 3D car model. Remember, the time and effort spent in this initial step can significantly enhance the quality of your final model.
Basic Modeling Techniques for Beginners
Starting with Blender for car modeling can seem daunting, but with the right approach, it becomes an engaging learning experience. This section introduces basic modeling techniques essential for beginners to create their first car model in Blender.
- Understanding Blender\"s Interface: Begin by familiarizing yourself with Blender\"s interface, focusing on the tools and features most relevant to modeling.
- Setting Up Reference Images: Import reference images of the car you wish to model. Ensure they are positioned correctly to guide your modeling process.
- Starting with Basic Shapes: Use basic shapes to block out the car\"s form. Start with a cube and modify it using extrusion and scaling to match the car\"s proportions.
- Modifying Geometry: Learn to use modifiers like the Subdivision Surface to smooth out shapes and add more geometry for detailing.
- Adding Details: Gradually add details such as windows, wheels, and the interior by creating new geometry or modifying existing shapes.
- Learning Keyboard Shortcuts: Blender\"s efficiency increases significantly with the use of keyboard shortcuts. Learn shortcuts for frequently used actions to speed up your workflow.
This foundational knowledge will not only make the process more manageable but also more enjoyable, as you start to see your car model take shape. Remember, practice and patience are key in mastering Blender\"s modeling capabilities.
_HOOK_
Advanced Modeling Techniques for Realism
To elevate your Blender car models to the next level of realism, mastering advanced modeling techniques is essential. These methods allow you to add intricate details and textures, making your models indistinguishable from real-life vehicles.
- Subdivision Surface Modeling: Utilize the subdivision surface modifier to add complexity to your model without increasing the base geometry. This technique is perfect for creating smooth and detailed surfaces.
- Hard Surface Modeling: Learn hard surface modeling techniques to accurately represent the mechanical and structured parts of cars, such as body panels and frames.
- Sculpting for Details: For high-detail components like tire treads or car seats, sculpting can be a more effective approach than traditional modeling, offering a higher degree of control over fine details.
- Topology and Edge Flow: Understanding topology and maintaining a clean edge flow are crucial for realism, especially for models intended for animation or high-quality renders.
- Realistic Lighting and Materials: Advanced texturing and shading techniques, including the use of PBR (Physically Based Rendering) materials, can significantly enhance the realism of your car models.
- Environment and Reflections: Placing your model within a realistic environment and paying attention to reflections can greatly improve the overall appearance and believability of your car model.
By incorporating these advanced techniques into your workflow, you can create stunningly realistic car models in Blender that are ready for professional use in films, games, or virtual reality experiences.
Creating and Applying Textures
Textures are what bring a Blender car model to life, adding realism through surface details and colors. This section explores how to create and apply textures effectively, enhancing the visual appeal of your 3D car models.
- UV Mapping: Begin by unwrapping your car model to create a UV map. This process translates the 3D surface of the model into a 2D representation, allowing for accurate texture placement.
- Creating Textures: Use image editing software to create or modify textures that match the look you\"re aiming for. This could include details like car paint, decals, and surface imperfections.
- Applying Textures in Blender: Once your textures are ready, apply them to your model using Blender\"s material properties. This involves setting up shaders in the node editor and assigning the texture images to the corresponding material slots.
- Adjusting Texture Settings: Fine-tune the appearance of your textures by adjusting settings such as scale, rotation, and mapping coordinates within Blender to ensure they align correctly on your model.
- Using PBR Materials: For more realistic results, utilize Physically Based Rendering (PBR) materials that simulate real-world light interaction with surfaces. These materials often come with a set of textures including base color, roughness, metallic, and normal maps.
- Previewing and Adjusting: Regularly preview your model in rendered view to assess the appearance of textures and make necessary adjustments for the most realistic look.
Mastering the creation and application of textures is a key step in producing high-quality car models in Blender, bringing them closer to reality with every detail.
Lighting and Rendering Your Car Model
Lighting and rendering are crucial steps in bringing your Blender car model to life. This section delves into techniques for setting up effective lighting and achieving high-quality renders, ensuring your car model looks as realistic as possible.
- Understanding Lighting Basics: Start by learning the fundamentals of lighting, including key light, fill light, and rim light, to highlight your model\"s form and details.
- Choosing the Right Light Types: Blender offers various light types such as point, sun, spot, and area lights. Experiment with these to find the best setup for your scene.
- Utilizing HDRI for Environment Lighting: HDRI images can provide realistic environmental lighting and reflections on your car model, enhancing its realism.
- Setting Up a Three-Point Lighting System: This classic lighting setup, consisting of a key light, fill light, and back light, is ideal for showcasing your car model.
- Exploring Blender’s Rendering Engines: Familiarize yourself with Blender\"s rendering engines, Cycles and Eevee, each offering different advantages for rendering your car model.
- Optimizing Render Settings: Adjust render settings such as samples, resolution, and light bounces to achieve a balance between render quality and speed.
- Post-Processing Techniques: Use Blender’s Compositor for post-processing to enhance your rendered image, adjusting aspects like brightness, contrast, and color grading.
By carefully planning your lighting setup and render settings, you can produce stunningly realistic renders of your car models, suitable for presentation or inclusion in your portfolio.
Adding Final Details for Realism
Final details are what transform a good Blender car model into a great one, imbuing it with the realism that sets it apart. This section covers the essential steps to add those finishing touches to your car model.
- Detailing the Interior: Don\"t overlook the car\"s interior. Adding elements like the steering wheel, dashboard, and seats can greatly enhance realism.
- Surface Imperfections: Real cars have minor imperfections. Adding subtle scratches, dents, or dust can make your model more lifelike.
- Tire Textures: Tires are often a giveaway in 3D models. Spend time on realistic tire textures, including tread details and sidewall information.
- Realistic Glass: Windows and mirrors should reflect and refract light realistically. Use appropriate shaders and consider the environment in their reflections.
- Lighting Effects: Realistic lighting, including the glow from headlights, taillights, and interior lights, adds depth and authenticity to your model.
- Environmental Interaction: How does your car interact with its surroundings? Adding shadows or reflections from the environment helps integrate your model into its setting.
Attention to these details will bring your Blender car model closer to reality, making it not just a 3D object, but a piece of art that reflects the intricacies of its real-world counterpart.
Resources for Learning and Inspiration
Whether you\"re a beginner or looking to refine your skills, numerous resources are available to help you master car modeling in Blender. From tutorials to inspiration, here\"s where you can start:
- Online Tutorials and Courses: Platforms like YouTube, Udemy, and Skillshare offer comprehensive tutorials covering every aspect of Blender, including car modeling. They range from beginner-friendly introductions to advanced techniques.
- Blender Community and Forums: Engaging with the Blender community can provide invaluable insights and feedback on your work. Websites like Blender Artists and the Blender subreddit are great places to start.
- Free Blender Car Models: Websites such as TurboSquid and CGTrader offer free 3D car models. These can serve as excellent references or starting points for your own models.
- Blender Official Documentation and Tutorials: Don\"t overlook the official Blender website, which features tutorials, guides, and an extensive manual that covers all of Blender\"s features.
- Inspirational Projects: Looking at what others have achieved with Blender can inspire your own projects. The Rookies, ArtStation, and Behance showcase stunning Blender projects, including car models.
By leveraging these resources, you can continuously improve your Blender skills and bring your creative visions to life.
_HOOK_
Tips and Tricks from the Pros
Gleaning insights from seasoned professionals can significantly elevate the quality of your Blender car models. Here are some expert tips and tricks to enhance your modeling workflow and output.
- Use Reference Images Effectively: Professionals emphasize the importance of using high-quality, multiple-angle reference images to ensure accuracy and detail in your models.
- Master the Modifier Stack: Understanding and utilizing Blender\"s modifier stack, especially the Mirror, Subdivision Surface, and Solidify modifiers, can drastically improve modeling efficiency and quality.
- Focus on Topology: Good topology is key for a realistic model, especially for those involving animation. Maintain quads for smoothness and ease of editing.
- Optimize Your Workflow: Learning and using keyboard shortcuts can significantly speed up your workflow in Blender.
- Detailing Makes the Difference: Adding small details, like seams and creases, can make your car model stand out. Use sculpting tools for finer details.
- Experiment with Shaders: For realistic materials, spend time experimenting with Blender\"s shader options. PBR (Physically Based Rendering) shaders can achieve very realistic results.
- Lighting is Crucial: Proper lighting can make or break a render. Use a combination of HDRI and three-point lighting to highlight the model\"s best features.
By incorporating these tips from the pros into your projects, you\"ll see a marked improvement in your Blender car models, pushing them closer to professional quality.
READ MORE:
Conclusion: Next Steps in Blender Car Modeling
Embarking on the journey of car modeling in Blender is both a challenging and rewarding endeavor. As you progress, your skills will grow, allowing you to tackle more complex projects with confidence.
- Practice Regularly: Like any skill, proficiency in Blender comes with time and practice. Set aside regular time to work on your modeling skills.
- Seek Feedback: Joining Blender communities and forums can provide valuable feedback on your work, helping you to improve and learn new techniques.
- Stay Updated: Blender is constantly evolving, with new features and tools being added. Keep yourself updated with the latest versions and tutorials.
- Expand Your Knowledge: Don\"t limit yourself to car modeling. Exploring other areas of Blender can provide new insights and techniques that can be applied to car modeling.
- Work on Personal Projects: Applying what you\"ve learned in tutorials to personal projects can be a great way to consolidate your knowledge and push your boundaries.
In conclusion, the journey of Blender car modeling is ongoing. With each model, you\"ll discover new challenges and opportunities for growth. Remember, the key to success is persistence, curiosity, and a willingness to explore new horizons.
Embarking on your Blender car modeling journey opens a world of creativity and precision. With practice and exploration, you\"ll unlock the full potential of your 3D artistry, bringing your automotive visions to life.