Topic vtuber model blender: Discover how to bring your virtual persona to life with "VTuber Model Blender," a comprehensive guide for beginners and pros alike to craft captivating digital characters. Start your creative journey today and unlock endless possibilities.
Table of Content
- Step-by-Step Guide to VTuber Model Creation
- How to import Vroid models into Blender for fine tuning and VR use?
- YOUTUBE: The Art of Making 3D Vtuber Models for Dummies
- Introduction to VTuber Model Creation with Blender
- Essential Tools and Equipment for VTuber Modeling
- Step-by-Step Guide to Modeling in Blender
- Advanced Techniques for VTuber Model Customization
- Rigging Your VTuber Model for Animation
- Integrating Your VTuber Model with Broadcasting Software
- Enhancing Your VTuber Model with Textures and Materials
- Animating Your VTuber Model for Expressive Performances
- Optimizing Your VTuber Model for Different Platforms
- Community and Resources for VTuber Model Creators
Step-by-Step Guide to VTuber Model Creation
1. Getting Started with Blender
- Blender offers comprehensive features for modeling, rigging, and animation, making it an ideal choice for creating VTuber models.
- Free tutorials and a 1,400-page guide are available to help beginners navigate through its functionalities.
2. Model Creation Techniques
- Begin with modeling the face using planes and vertices to match the contours of your character\"s face.
- Move on to modeling eyebrows and eyelashes by duplicating facial meshes.
- UV unwrapping and texture creation are crucial for adding details to your model.
3. Rigging and Animation
- Create shape keys for facial expressions to animate your character.
- Set up bones and adjust weights for accurate motion capture compatibility, especially if using Perception Neuron for full-body tracking.
4. Preparing for Broadcasting
After completing your model and rigging setup, export it as an FBX file to integrate with broadcasting software like Unity. This step is vital for bringing your VTuber to life during live streams or video content creation.
5. Recommended Equipment and Software
| Equipment/Software | Description |
| Webcam | Logitech C922n, designed for streamers with high-definition video streaming capabilities. |
| VR Equipment | Oculus Quest 2 offers standalone VR experience with high tracking accuracy. |
| Microphone | Kungber\"s Condenser Microphone for clear audio capture. |
| Animation Software | FaceRig, 3tene, Luppet for webcam users; Virtual Cast, V-Katsu for VR users. |
Creating a VTuber model is a journey of creativity and technical skill. With Blender\"s comprehensive tools and the right equipment, anyone can bring their virtual character to life. Remember, practice and patience are key to mastering 3D modeling and animation.

How to import Vroid models into Blender for fine tuning and VR use?
To import Vroid models into Blender for fine tuning and VR use, you can follow these steps:
- Export your Vroid model as a VRM file from Vroid Studio.
- Open Blender and make sure you have the VRM importer plugin installed. If not, you can download it from the Blender market or other sources.
- Go to File > Import > VRM and select your exported VRM file.
- Your Vroid model should now be imported into Blender with bones and shape keys ready for fine tuning.
- You can use Blender\'s tools and features to adjust the model\'s appearance, rigging, textures, and more to suit your needs.
- Once you are satisfied with the modifications, you can export the model from Blender in the desired format for VR use.
By following these steps, you can successfully import your Vroid models into Blender for fine tuning and prepare them for VR applications.
The Art of Making 3D Vtuber Models for Dummies
Tutorial: \"Learn step-by-step in this engaging tutorial video how to master a new skill effortlessly. You\'ll be amazed by the simplicity and effectiveness of the techniques demonstrated. Watch and enhance your knowledge!\" VRM: \"Dive into the immersive world of Virtual Reality Motion in this captivating video. Experience the futuristic technology firsthand and be transported to new realities. Get ready for a mind-blowing adventure!\"
From Blender to VRM Prepare your own Vtuber Model
This is meant to be a really quick overview of what\'s required for prepping VRM files for Vtubers or virtual avatars. It is not meant to ...
Introduction to VTuber Model Creation with Blender
Embarking on the journey of VTuber model creation with Blender opens up a world of creativity and personal expression in the virtual space. Whether you\"re looking to dive into the VTubing community with a unique avatar or aiming to craft detailed models for streaming, Blender offers a robust platform for both 2D and 3D character creation.
- Choosing between 2D or 3D models is a critical first step, with each offering distinct styles and levels of complexity. 3D models provide a full range of motion and are ideal for creators seeking highly dynamic characters.
- Understanding the software your model will be built for is essential, as it determines the compatibility and functionality of your avatar across different platforms and tools.
- Conceptualizing your character\"s appearance, including props and facial expressions, is crucial for ensuring your model resonates with your intended audience and personal branding.
- Rigging, or the process of adding a skeletal structure to your model, is vital for animating your character. This includes defining the motion range of limbs, facial expressions, and other character dynamics.
For those looking to dive deeper into character rigging and animation, tutorials and community resources play an invaluable role in mastering Blender\"s capabilities. From basic rigging techniques to advanced animation tutorials, the community offers a wealth of knowledge for creators at every skill level.
Live3D highlights the significance of engaging with virtual YouTuber communities and leveraging platforms like Discord, Reddit, and Twitter for support, inspiration, and collaboration. These communities not only provide valuable insights into VTubing but also offer a space to share experiences and grow together as creators.
In conclusion, creating a VTuber model with Blender is a journey of learning and creativity. By leveraging tutorials, community wisdom, and a bit of patience, anyone can bring their virtual persona to life, enriching the vibrant world of VTubing.
Essential Tools and Equipment for VTuber Modeling
Creating a VTuber model involves a blend of artistic creativity and technical prowess, utilizing a variety of tools and equipment to bring your digital persona to life. Whether you\"re delving into 2D or 3D modeling, the journey from concept to creation is both exciting and intricate.
- Software Choices: The foundation of VTuber model creation is the software you choose. Blender is renowned for its powerful 3D modeling capabilities, offering a comprehensive platform for creating detailed VTuber models. For those interested in 2D models, Live2D provides the tools to animate 2D artwork with lifelike motion.
- Commissioning Models: If crafting your own model from scratch seems daunting, commissioning a custom model is a viable alternative. Platforms like Fiverr host skilled artists capable of creating unique VTuber models, both in 2D and 3D forms, tailored to your specifications.
- Avatar Builders: For a more hands-on approach without starting from zero, avatar builders such as VRoid Studio and Daz3D offer user-friendly interfaces for customizing base avatars. These tools provide a balance between customization and ease of use, ideal for newcomers to the VTuber scene.
- Motion Capture Equipment: To bring your VTuber model to life, motion capture technology is crucial. Basic setups can utilize webcams and software like VUP Studio for anime-style avatars or Animaze for more varied character designs. Advanced creators might explore dedicated motion capture hardware for enhanced realism.
- Rigging and Animation Tutorials: Essential for animating your VTuber model, rigging tutorials guide you through the process of adding a skeleton to your model for motion. Resources like YouTube offer comprehensive tutorials on rigging using Blender, Live2D, and other tools, ensuring your VTuber can move and express emotions convincingly.
Regardless of the path you choose, the journey of creating a VTuber model is a blend of creativity, technology, and personal expression. With the right tools and a bit of patience, you can bring your virtual alter ego to vibrant life.

Step-by-Step Guide to Modeling in Blender
Creating a VTuber model in Blender is a rewarding process that allows for complete creative freedom. This step-by-step guide aims to outline the foundational steps required to bring your VTuber to life using Blender\"s powerful modeling tools.
- Getting Started: Familiarize yourself with Blender\"s interface. Understanding the basic tools and navigation controls is essential for efficient modeling.
- Sketching Your Character: Begin with a concept sketch or reference image. Having a clear vision of your VTuber\"s appearance will guide your modeling process.
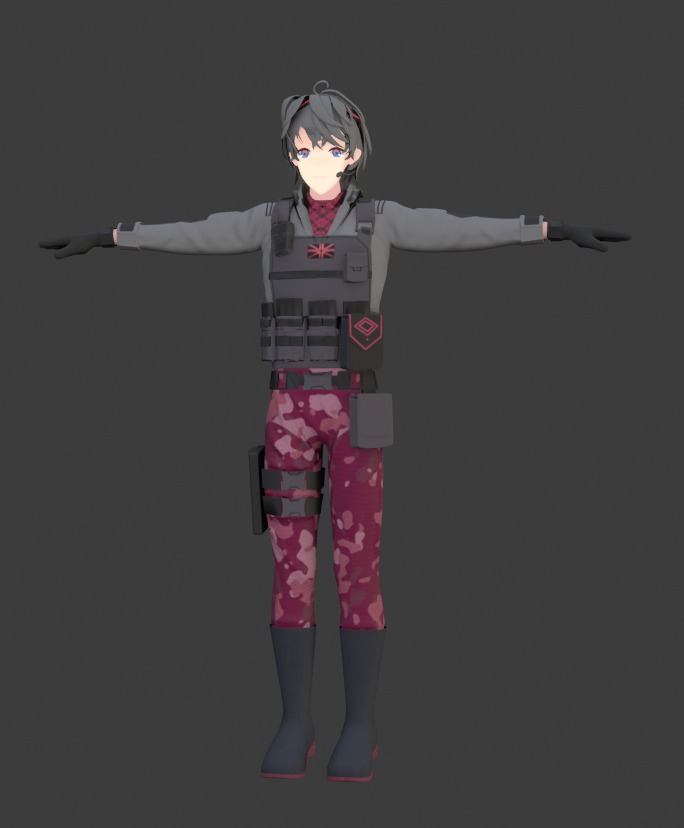
- Modeling the Base: Start creating your model by focusing on the base mesh. Use Blender\"s sculpting tools to shape the body, head, and basic facial features.
- Detailing: Once the base is complete, add details such as eyes, hair, and clothing. Utilize Blender\"s modifiers and sculpting tools to refine these elements.
- Texturing: Apply textures to your model to add colors and details. UV mapping is crucial for accurately applying these textures to your model.
- Rigging: Rigging is the process of adding bones to your model so that it can be animated. Use Blender\"s rigging tools to create a skeleton for your VTuber model.
- Weight Painting: This step involves defining how the mesh of the model deforms in relation to the rigging bones. Careful weight painting ensures smooth animations.
- Facial Rigging: For expressive facial animations, add a facial rig. This involves creating bones for the eyebrows, eyes, mouth, and other facial features.
- Testing Animations: Before finalizing your model, test the rigging and animations to ensure that the movements are natural and expressive.
- Exporting: Once satisfied with the model and animations, export your VTuber model in a format compatible with your broadcasting or streaming software.
This guide is a simplified overview aimed at getting you started with VTuber model creation in Blender. For detailed tutorials and advanced techniques, consider exploring resources such as YouTube tutorials and Blender community forums.
_HOOK_
Advanced Techniques for VTuber Model Customization
Mastering advanced techniques in VTuber model customization allows creators to infuse their characters with unique personalities and deeper levels of interactivity. These methods leverage the full power of Blender and other tools to enhance the visual and functional aspects of VTuber models.
- High-Precision Rigging: Sophisticated rigging techniques are essential for creating natural and expressive movements. Advanced rigging involves setting up complex skeletons, ensuring your model moves realistically. This includes incorporating facial rigging for nuanced expressions and body rigging for fluid motion.
- Texture Painting and UV Unwrapping: Detailed texture painting enhances the visual appeal of your model. By UV unwrapping your model\"s base, you can apply intricate textures and colors. This process allows for the creation of unique skin tones, clothing patterns, and other character details that stand out.
- Blendshapes for Facial Expressions: Utilizing blendshapes enables the creation of diverse facial expressions, crucial for conveying emotions. This technique is particularly important for 3D models, allowing for a wide range of expression that captures subtle nuances of emotion.
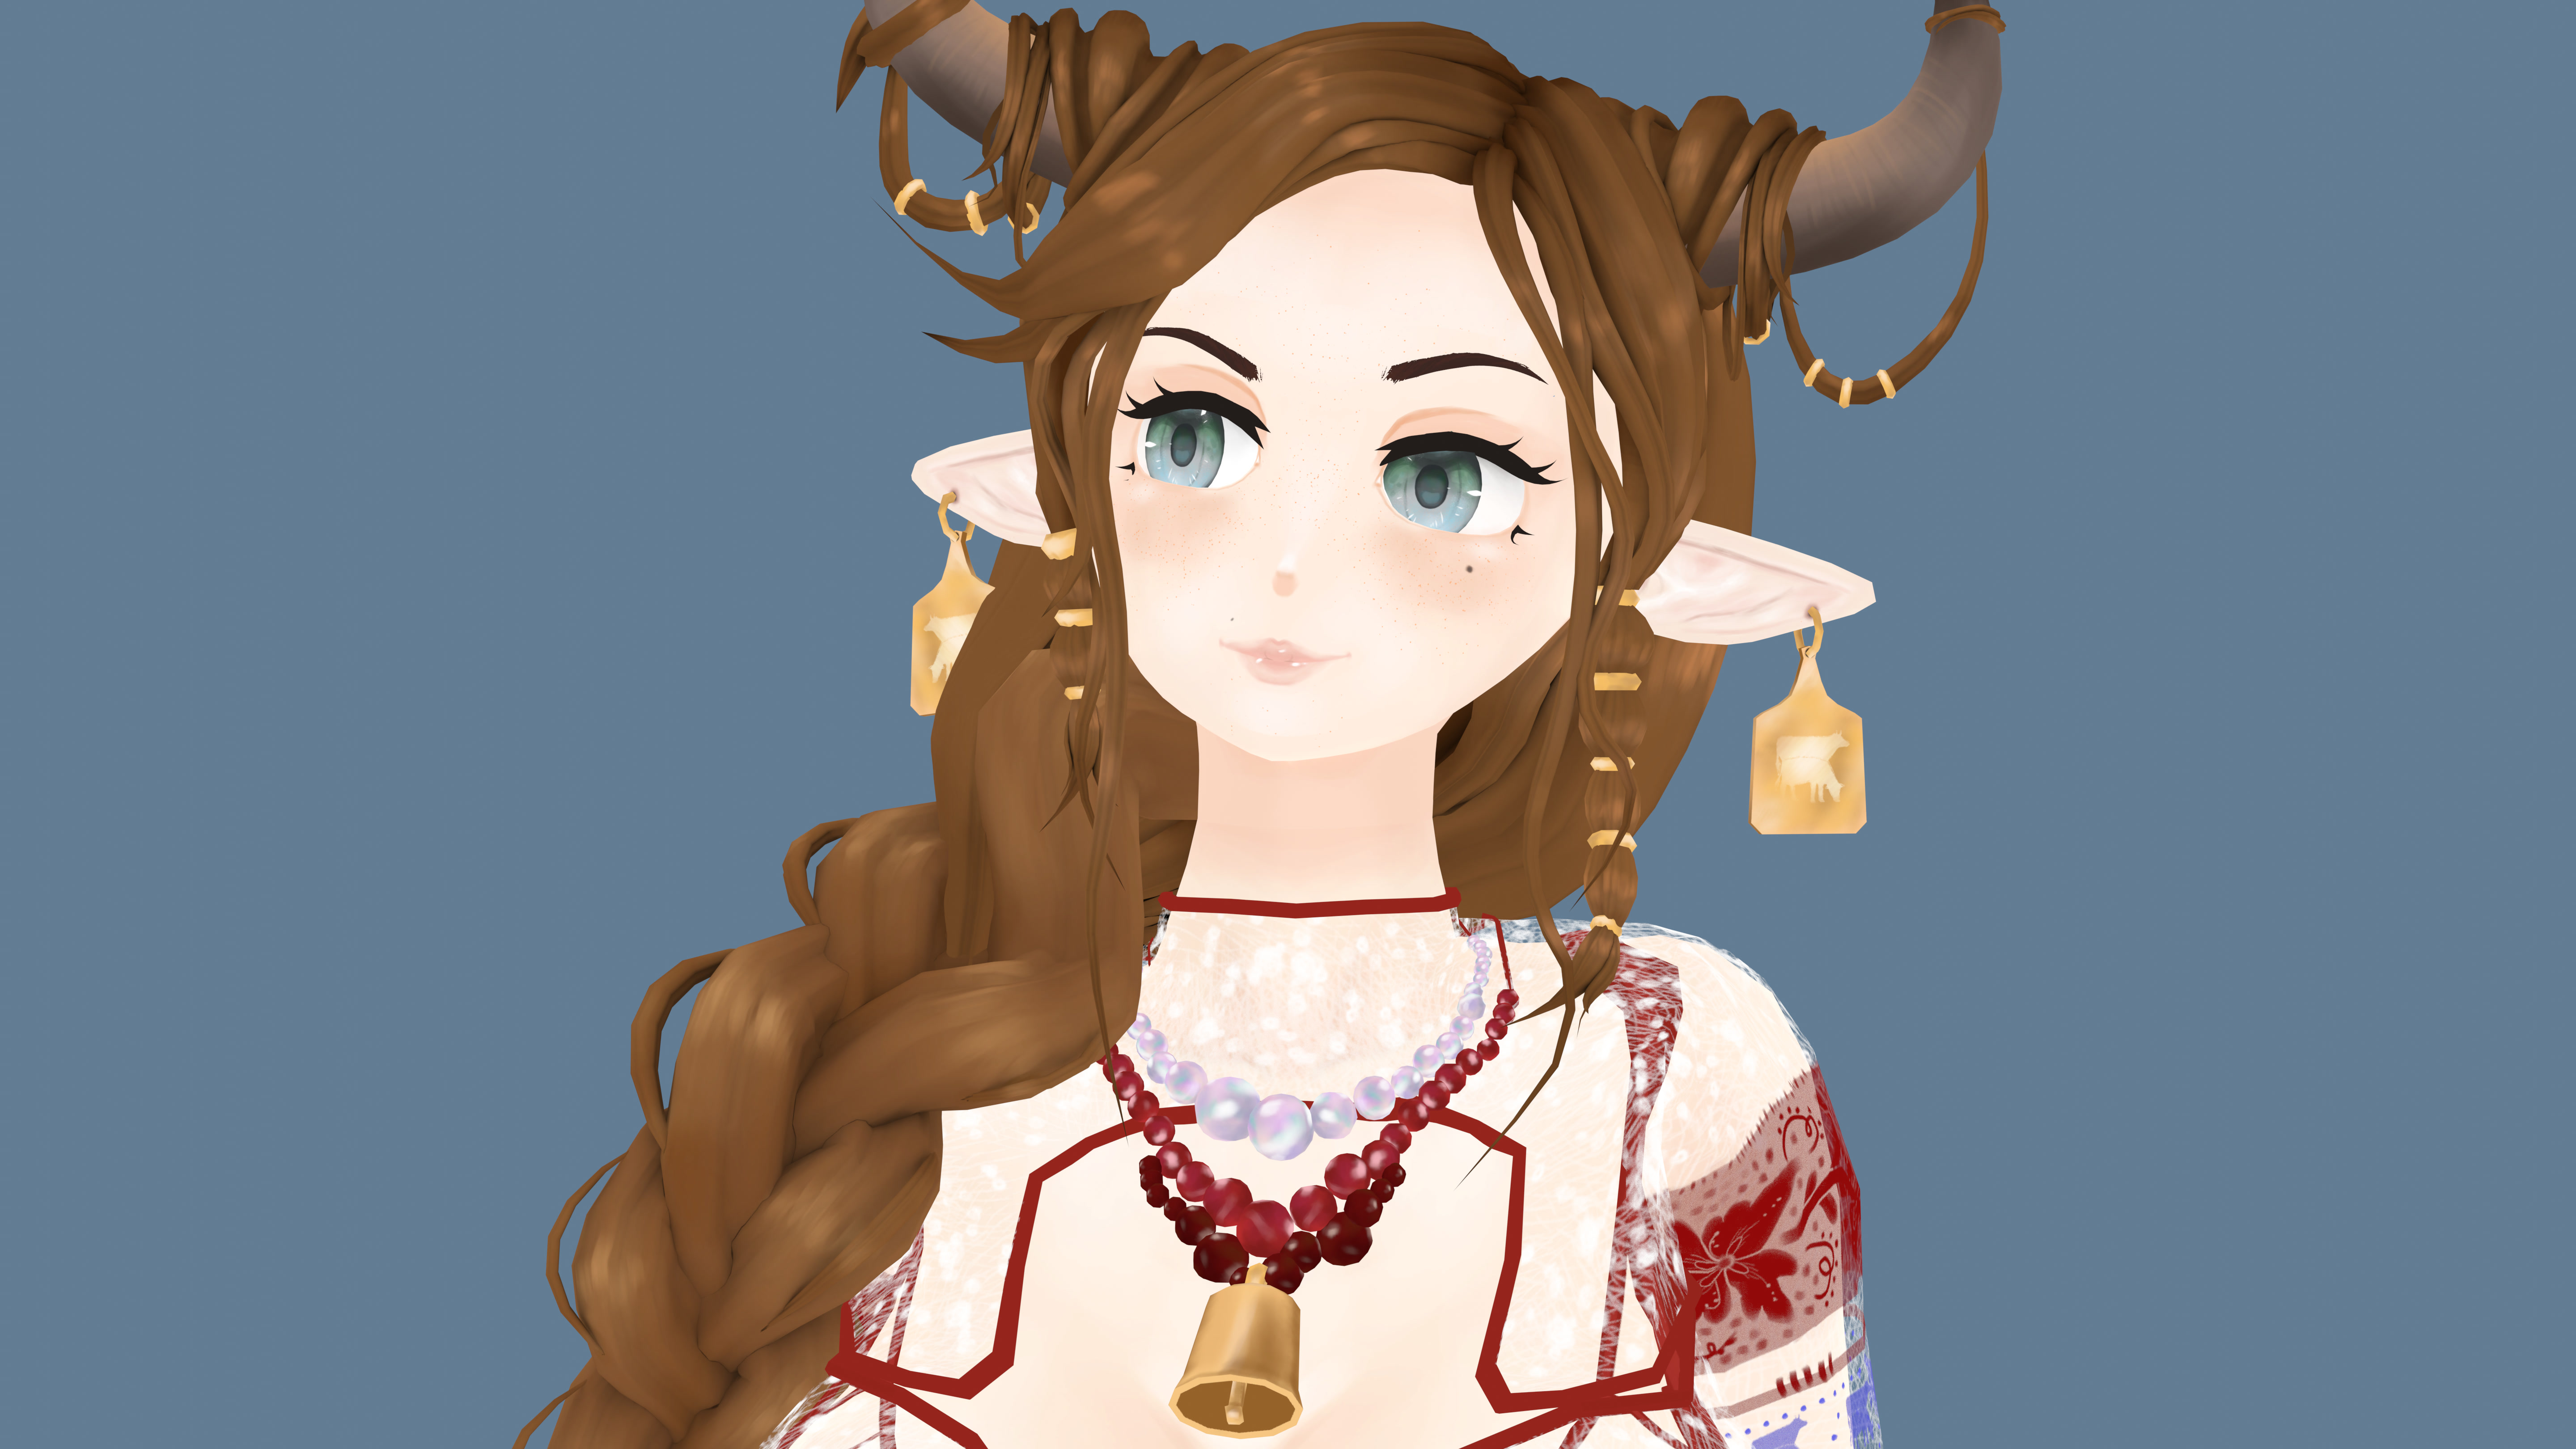
- Custom Props and Accessories: Adding custom props and accessories, like magical staffs, unique hairstyles, or themed attire, introduces an additional layer of personality to your VTuber avatar. These elements can be modeled and rigged to interact dynamically with your character.
- Dynamic Hair and Cloth Simulation: Implementing dynamic simulations for hair and clothing can significantly enhance realism. These simulations react to movements and environmental factors, providing a more immersive experience.
- Environmental Interactions: Advanced customization also extends to the interaction with virtual environments. Techniques such as collision detection and physics simulations make the character\"s interactions with the surroundings more believable.
Each of these advanced techniques requires a deeper understanding of the software tools and a creative approach to problem-solving. Resources such as detailed tutorials, community forums, and experimentation play a crucial role in mastering these skills. The journey to mastering VTuber model customization is ongoing, with new techniques and tools constantly emerging to push the boundaries of what\"s possible.

Rigging Your VTuber Model for Animation
Rigging is a critical step in bringing your VTuber model to life, allowing it to move and express emotions. Whether you\"re working with 2D or 3D models, understanding the basics of rigging can dramatically enhance your VTuber\"s presence and interactivity.
- Choosing Between 2D and 3D: Your choice between 2D and 3D models will affect the rigging process. 2D models, often created with Live2D, offer simpler rigging focused on facial expressions and limited body movements. 3D models, on the other hand, allow for full-body rigging, including complex movements and expressions.
- Essential Rigging Tools: For 2D models, Live2D Cubism is the go-to software, enabling the rigging of layered illustrations for animation. For 3D models, Blender offers extensive rigging tools to create a skeletal structure that supports detailed animations and expressions.
- Breaking Down the Rigging Process: The rigging process involves setting up a \"skeleton\" for your model. In 2D, this might mean defining the pivot points for movements. In 3D, this involves creating bones and assigning them to different parts of the model\"s mesh.
- Advanced Techniques: Beyond basic rigging, you can explore advanced techniques such as facial rigging for nuanced expressions, physics-based simulations for dynamic hair and clothing, and even custom scripting for unique animation effects.
- Testing and Refinement: Rigging is an iterative process. Testing your rigged model in various animation scenarios is crucial to identifying and fixing issues with movement or deformation.
- Software-Specific Considerations: Depending on your chosen animation and broadcasting software, you may need to adapt your rigging approach to meet specific requirements or take advantage of software-specific features for enhanced performance.
Rigging your VTuber model is both an art and a science, requiring a blend of technical skill and creative vision. By leveraging the right tools and techniques, you can create a truly lifelike and expressive virtual persona.
Integrating Your VTuber Model with Broadcasting Software
Integrating your VTuber model with broadcasting software is a crucial step in bringing your digital persona to life. This process allows you to use your VTuber avatar during live streams, making your online presence unique and engaging. Whether you\"re using a 2D or 3D model, understanding the integration process is key to a successful VTubing experience.
- Choosing Your Broadcasting Software: Popular platforms like Animaze, VUP, VTube Studio, Wakaru, VeeSeeFace, and VMagicMirror offer varied features for VTubers. These applications can use your webcam to capture motion, making them accessible for beginners and non-3D artists.
- Preparing Your VTuber Model: Ensure your model is in the correct format for your chosen software. For most applications, a .vrm file is required for 3D models, while 2D models may need PSD files split into layers for rigging.
- Importing Your Model: Follow the specific instructions provided by your broadcasting software to import your VTuber model. This may involve navigating through the software\"s interface to locate the import or avatar selection option.
- Configuring Motion Capture Settings: Adjust the motion capture settings to suit your setup. This may include calibrating the software to accurately track your facial expressions and body movements using your webcam or additional motion capture hardware.
- Testing Your Setup: Before going live, conduct several tests to ensure your avatar moves and responds as expected. Pay attention to facial expressions, lip sync, and any accessories or props that are part of your avatar.
- Going Live: Once you\"re satisfied with the setup, you\"re ready to start streaming with your VTuber avatar. Engage with your audience, experiment with different expressions and movements, and have fun!
Remember, the VTuber community is incredibly welcoming to newcomers. Don\"t hesitate to reach out for advice or support as you explore the exciting world of VTubing.

Enhancing Your VTuber Model with Textures and Materials
Enhancing your VTuber model with textures and materials is a crucial step in creating a visually appealing and unique virtual persona. Whether you\"re working with a 2D or 3D model, the right textures and materials can bring your character to life, adding depth, realism, and personality. Here\"s a guide to help you through the process:
- Understanding Textures and Materials: Textures refer to the images applied to the surface of your model to give it color, detail, and realism. Materials define how these textures react to light, adding effects like shininess, transparency, and bumpiness.
- Choosing the Right Software: For 2D models, software like Live2D allows you to apply textures directly to your layers. For 3D models, Blender offers comprehensive tools for texturing and material creation, enabling detailed customization of your model\"s appearance.
- Creating Your Textures: You can create textures using digital art software or find royalty-free images online that fit your character\"s theme. For 3D models, UV mapping is a crucial step to ensure textures align correctly with your model\"s geometry.
- Applying Textures and Materials in Blender: Blender users can utilize the software\"s UV Editing layout to unwrap their model and apply textures. The Shader Editor allows for complex material setups, combining different nodes to create effects like metallicity, roughness, and subsurface scattering.
- Testing and Adjusting: View your model under different lighting conditions and animations to see how the textures and materials behave. Adjustments may be necessary to achieve the desired effect, whether it\"s making the skin look more natural or the clothes more dynamic.
- Exporting Your Model: Once satisfied with the texturing and material work, export your model in a format compatible with your broadcasting software, ensuring all textures are correctly linked and embedded.
Enhancing your VTuber model with the right textures and materials requires a blend of artistic vision and technical knowledge. By following these steps and utilizing powerful tools like Blender, you can create a model that stands out in the VTubing community.

Animating Your VTuber Model for Expressive Performances
Animating your VTuber model to create expressive performances involves a detailed process whether you\"re working with 2D or 3D models. Below is a comprehensive guide to help you bring your virtual persona to life.
For 2D VTuber Models:
- Importing and Creating a Mesh: Start by importing your character\"s artwork into Live2D Cubism, wrapping a mesh around each layer for movement.
- Rigging with Articulation Points: Add articulation points to determine where the image will bend or move, crucial for facial expressions and body movements.
- Parameters and Motion: Use parameters in Live2D to control movement, setting ranges for actions like blinking or mouth movements for speaking.
- Adding Physics: Apply physics to parts like hair or clothing to add realism to your model\"s movement.
- Testing and Refining: Use Live2D’s tools to preview and adjust the rigging and motion until you achieve the desired expressions and movements.
- Integration with Face Tracking Software: Combine your model with face tracking software to animate in real time during live streams or recordings.
For 3D VTuber Models:
- Starting with a Base Model: Choose a default model in VRoid or create a custom one in Blender, adjusting features to match your character.
- Customizing and Rigging: Customize features and apply textures, then move to rigging, adding a skeleton structure for movement.
- Facial Rigging for Expressions: Utilize blend shapes or morph targets for facial expressions, ensuring smooth transitions between emotions.
- Testing and Motion Capture Integration: Test the model thoroughly and integrate with motion capture technology for real-life movement replication.
- Finalizing and Streaming: After refining the rigging and expressions, your model is ready for streaming with detailed gestures and facial movements.
Whether you\"re animating a 2D or 3D VTuber model, the key to expressive performances lies in detailed rigging, realistic physics, and seamless integration with tracking software. By following these steps, you can create a virtual persona that truly comes to life, engaging your audience with a wide range of emotions and actions.
_HOOK_
Optimizing Your VTuber Model for Different Platforms
Optimizing your VTuber model for various platforms ensures a seamless integration and performance, whether you\"re streaming, creating content for social media, or engaging in virtual worlds. Each platform has its unique requirements and audience expectations, so it\"s crucial to tailor your VTuber model accordingly. Here\"s a comprehensive guide on optimizing your VTuber model for different platforms.
Stream and Record with Confidence
- For live streaming and recording, platforms like OBS (Open Broadcaster Software) are recommended. They allow you to incorporate overlays, switch scenes, and more, enhancing your VTuber presence.
- Integrate your model with face tracking software such as FaceRig, PRPR Live, or VSeeFace to animate your model in real time, capturing your facial movements and expressions for an engaging performance.
Adjusting for Social Media Platforms
Short video platforms like TikTok have become popular among VTubers for making quick, engaging content. Optimize your model by focusing on expressive facial animations and quick, eye-catching movements that resonate with the fast-paced audience.
Software-Specific Considerations
- VRoid Studio: Ideal for creating 3D avatars, VRoid Studio offers user-friendly customization options. It\"s particularly suited for beginners and can produce both basic and highly detailed models.
- VSeeFace: Offers excellent face tracking capabilities for 3D avatars. It supports VRM 3D avatar formats and is compatible with models made in VRoid Studio, Unity, or Blender.
- VTube Studio: Perfect for 2D avatars, providing robust face tracking and the ability to trigger reactions with hotkeys. It\"s highly recommended for those looking to experiment with 2D VTubing.
Platform-Specific Tips
- For VRChat, customize your avatar for interaction in virtual worlds. Ensure your model is expressive and optimized for performance in the game\"s environments.
- When engaging on Twitch or similar streaming platforms, consider the interactivity of your model. Enable features like arm and hand animations for gestures, which are essential for creating shortcut animations, enhancing viewer engagement.
Regardless of the platform, the key to a successful VTuber presence lies in a well-optimized model that aligns with the platform\"s capabilities and audience expectations. By focusing on software compatibility, expressive animations, and interactive features, you can create a memorable and engaging virtual persona.

Community and Resources for VTuber Model Creators
The VTuber community is vast and supportive, offering a wealth of resources for creators at all levels. Whether you\"re starting from scratch or looking to enhance your existing VTuber model, there\"s something for everyone. Below are key resources and communities to help you on your journey.
Starting Your VTuber Journey
Begin by deciding on your VTuber model\"s style and backstory. This foundational step helps in creating a consistent design and persona. Next, choose between PNG, 2D, or 3D models based on your preference and budget. For 2D and 3D models, familiarize yourself with rigging and animation processes to bring your avatar to life. Consider creating social media profiles for your VTuber persona to start building a community even before your debut.
Essential Tools for VTuber Model Creation
- Blender, 3DMAX, and Maya: Powerful software options for creating detailed 3D VTuber models, each with its own set of advantages.
- Live3D: Offers a platform for downloading free VTuber models, commissioning custom models, and accessing a range of VTuber-specific tools and resources.
- VRoid Hub: A 3D model sharing platform where creators can publish, share, and access a variety of VTuber models.
Community Support and Networking
Engage with the VTuber community on platforms like Twitter, where hashtags like #Live2DShowcase can connect you with artists, riggers, and fellow creators. For real-time interaction and collaboration, consider joining Discord communities focused on VTubing.
Learning and Development
For those looking to dive deeper into the technical aspects of VTubing, resources like VTResources offer guides, tools, and tips for streaming, audio setup, and more. This includes accessibility tools like closed captioning plugins, audio guides for OBS, and chat enhancements for Twitch.
Remember, the journey of a VTuber is unique to each creator. Utilize these resources, engage with the community, and most importantly, have fun bringing your virtual persona to life!
Embark on a transformative journey with \"VTuber Model Blender,\" where creativity meets community. Unleash your potential, craft your unique digital persona, and join a world brimming with supportive creators. Your adventure into the vibrant VTuber universe starts here.
