Topic blender models tutorial: Welcome to our Ultimate Guide to Blender Models Tutorial, where we dive deep into creating stunning 3D models, animations, and more with Blender. Start your journey to mastery today!
Table of Content
- Beginner Tutorials
- Intermediate Tutorials
- Advanced Techniques
- Additional Resources
- What is the process for creating stylized character models in Blender?
- YOUTUBE: 5 Blender Models in 7 Minutes Tutorial
- Intermediate Tutorials
- Advanced Techniques
- Additional Resources
- Advanced Techniques
- Additional Resources
- Additional Resources
- Introduction to Blender and Its Interface
- Starting with Blender: Basic Modeling Techniques
- Creating Your First 3D Model in Blender
- Advanced Modeling Techniques for Detailed Creations
- Texturing and Rendering: Bringing Your Models to Life
- Animation Basics with Blender
- Blender for Game Development: Creating Assets
- Utilizing Blender for Architectural Visualization
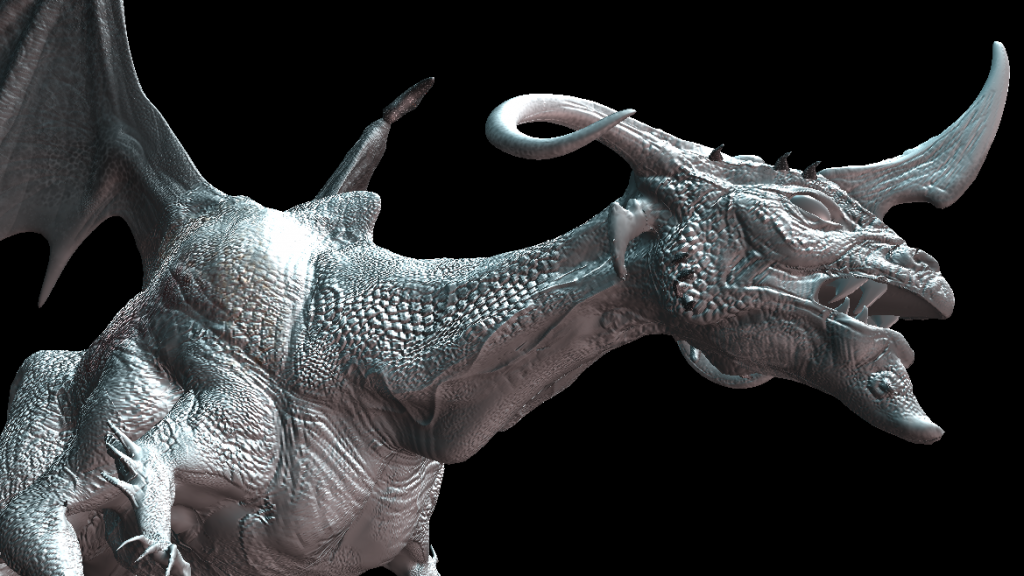
- Advanced Sculpting Techniques in Blender
- Blender Tips and Tricks for Efficiency
- Resources and Communities for Blender Learners
Beginner Tutorials
- Blender Basics: A comprehensive guide to get you started with Blender, covering the interface, navigation, and basic modeling techniques.
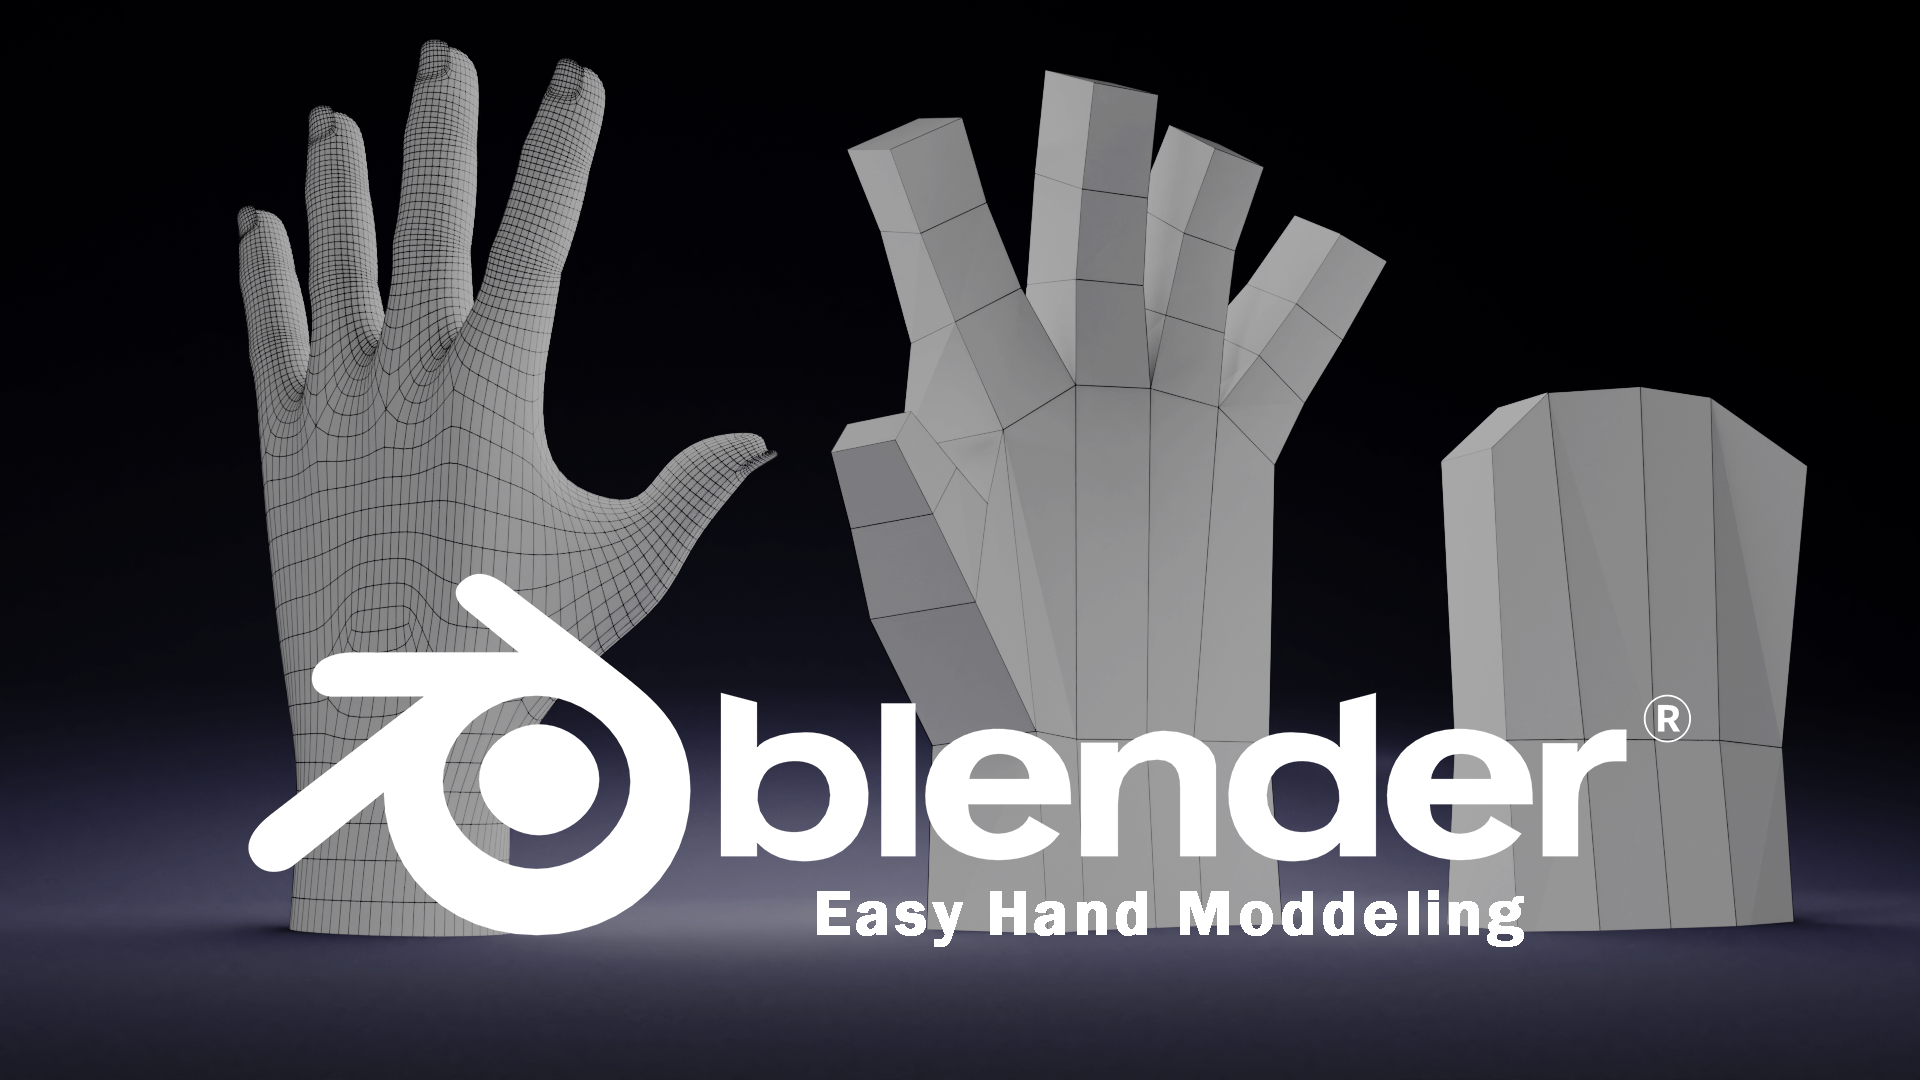
- Modeling for Absolute Beginners: Learn how to model a simple human figure, focusing on fundamental modeling skills.
- Low-Poly Trees for Game Development: A quick tutorial on creating low-poly trees, perfect for game assets and environmental design.

READ MORE:
Intermediate Tutorials
- Morphing Objects: Master the art of shape-shifting by morphing objects from one form to another using advanced techniques.
- Hard-Surface Modeling: Dive into hard-surface modeling to create detailed mechanical or man-made objects with precision.

Advanced Techniques
- Animating Characters: Step-by-step guide to animating 3D characters, including rigging and motion capture integration.
- Texturing and Materials: Learn how to add textures and materials to your models for a more realistic appearance.

Additional Resources
| Tutorial | Level | Description |
| Low-Poly Design | Beginner | Introduction to creating stylized low-poly models for games and animations. |
| Blender Sculpting | Advanced | Advanced sculpting techniques for creating detailed character models. |
| 3D Printing with Blender | Intermediate | Preparing your Blender models for 3D printing, covering export settings and material considerations. |

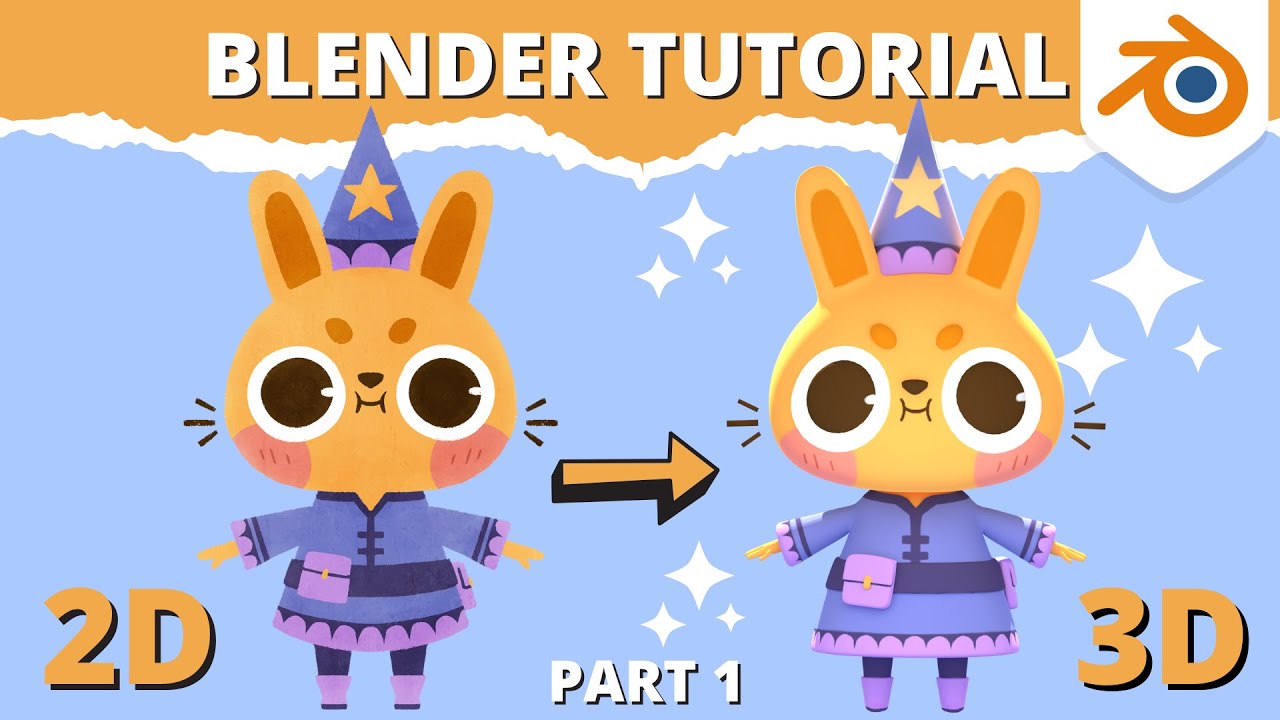
What is the process for creating stylized character models in Blender?
To create stylized character models in Blender, you can follow these general steps:
- Start by gathering visual references for the style of the character you want to create.
- Begin by sculpting the base mesh of the character using Blender\'s sculpting tools.
- Refine the sculpted mesh to achieve the desired proportions and overall shape of the character.
- Retopologize the sculpted mesh to create a clean and optimized low-poly version of the model.
- Create UV maps for the model to prepare it for texturing.
- Add materials and textures to bring the character to life in terms of color and surface detail.
- Rig the character by creating an armature and assigning weights to the mesh for animation purposes.
- Animate the character to give it movement and personality.
- Finally, render the character using Blender\'s rendering engine to create the final image or animation.
_HOOK_
5 Blender Models in 7 Minutes Tutorial
Speed: Get ready to experience the thrill of high-speed action in our latest video! With heart-pounding races and adrenaline-fueled moments, this video will leave you at the edge of your seat. Artificial Intelligence: Dive into the fascinating world of artificial intelligence in our informative and captivating video. Explore how AI is shaping the future with cutting-edge technology and innovative solutions.
Blender Tutorial - How to Use AI to Create 3D Models
Have you heard that people are using AI to create 3D models?!? In this Blender tutorial, we\'ll show you how to use ChatGPT to ...
Intermediate Tutorials
- Morphing Objects: Master the art of shape-shifting by morphing objects from one form to another using advanced techniques.
- Hard-Surface Modeling: Dive into hard-surface modeling to create detailed mechanical or man-made objects with precision.
Advanced Techniques
- Animating Characters: Step-by-step guide to animating 3D characters, including rigging and motion capture integration.
- Texturing and Materials: Learn how to add textures and materials to your models for a more realistic appearance.
Additional Resources

Advanced Techniques
- Animating Characters: Step-by-step guide to animating 3D characters, including rigging and motion capture integration.
- Texturing and Materials: Learn how to add textures and materials to your models for a more realistic appearance.

Additional Resources
| Tutorial | Level | Description |
| Low-Poly Design | Beginner | Introduction to creating stylized low-poly models for games and animations. |
| Blender Sculpting | Advanced | Advanced sculpting techniques for creating detailed character models. |
| 3D Printing with Blender | Intermediate | Preparing your Blender models for 3D printing, covering export settings and material considerations. |