Topic blender model clothes: Dive into the world of 3D fashion design with Blender, where creating model clothes becomes an art form. Unlock the secrets to crafting detailed, realistic garments and bring your fashion ideas to life with this comprehensive guide.
Table of Content
- Getting Started with 3D Clothing
- Resources for Learning
- What are the best settings for simulating cloth physics in Blender models?
- YOUTUBE: How to Create Clothing in Blender 3.4
- Resources for Learning
- Introduction to Clothing Modeling in Blender
- Basic Techniques for Creating Clothes
- Advanced Cloth Simulation in Blender
- Utilizing Blender Plugins for Clothing Design
- Exploring BlenderKit for Clothing Models
- Creating Realistic Fabrics with Cloth Weaver
- Troubleshooting Common Issues in Cloth Simulation
- Enhancing Your Clothing Designs with Textures and Materials
- Learning Resources and Tutorials for Clothing Modeling
- Community Insights: Tips and Tricks from Experienced Users
Getting Started with 3D Clothing
Blender offers various tools and plugins to design clothes for your 3D models. From basic modeling techniques to advanced cloth simulation, there\"s a method suitable for every skill level.
Basic Clothing Modeling
- Start by creating a basic mesh for your garment, such as a shirt, using plane creation and subdivision.
- Enhance the model with details like seams and buttons, and apply sculpting tools to add texture and realism.
- Texture your clothes by painting directly on the mesh or using UV maps for more complex designs.
Advanced Techniques and Tools
- Cloth Simulation: Utilize Blender\"s cloth simulation features to create realistic fabric dynamics for garments.
- Cloth Weaver Plugin: An all-in-one plugin offering a library of clothing templates and the ability to design custom garments with ease.
- BlenderKit: Access a wide range of free and paid 3D clothing models, including various accessories and footwear.

READ MORE:
Resources for Learning
Explore tutorials and guides to learn more about each step of the clothing creation process, from basic modeling to advanced cloth simulation techniques.
| Resource | Description |
| BlenderKit | A platform offering a vast selection of 3D models, including clothing, to help jumpstart your projects. |
| STYLY | Detailed guide on making clothes with cloth simulation in Blender, including troubleshooting tips. |
| Cloth Weaver | A comprehensive plugin that simplifies the clothing design process with templates and custom clothing creation tools. |
| Blender FAQs | Provides a basic tutorial on modeling a shirt in Blender, perfect for beginners. |
Whether you\"re a beginner or an experienced 3D artist, these resources and tools will help you create stunning 3D clothes in Blender.

What are the best settings for simulating cloth physics in Blender models?
To achieve the best results when simulating cloth physics in Blender models, follow these steps:
- Go to the Cloth tab in the Physics Properties panel.
- Set the Quality Steps to a higher value for smoother, more accurate simulations.
- Increase the Cloth Collision Quality to avoid cloth intersecting with other objects.
- Adjust the Structural, Shear, and Bend settings under Cloth Stiffness to control the behavior of the cloth.
- Experiment with the Cloth Friction and Cloth Damping values to fine-tune how the cloth interacts with other objects.
- Consider enabling Self-Collision to prevent the cloth from intersecting with itself during the simulation.
- Utilize Wind and Force Fields to add external forces to the cloth simulation for more realistic movement.
How to Create Clothing in Blender 3.4
Tutorial: Discover a step-by-step tutorial that will guide you through mastering a new skill. Learn valuable tips, tricks, and techniques in this engaging video that will leave you feeling inspired and empowered to succeed. Workflow: Enhance your productivity and efficiency by watching this insightful video on optimizing your workflow. Streamline your processes, improve collaboration, and achieve better results with the innovative strategies shared in this video.
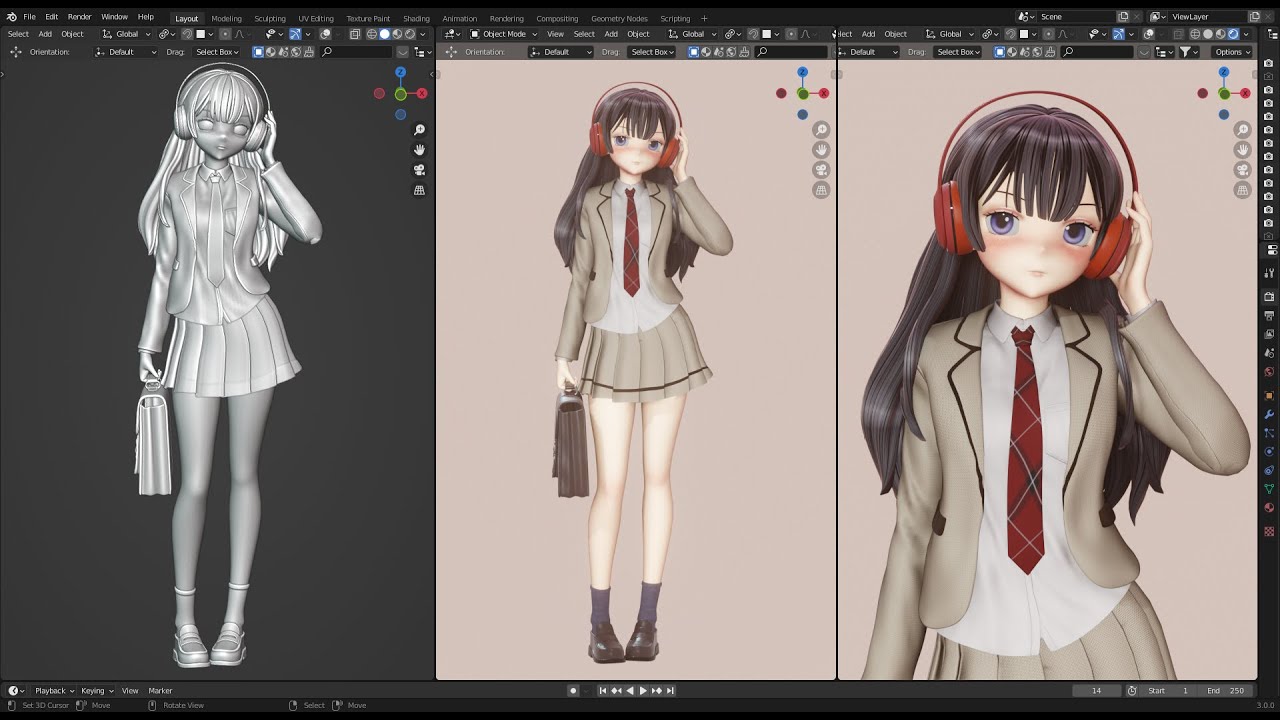
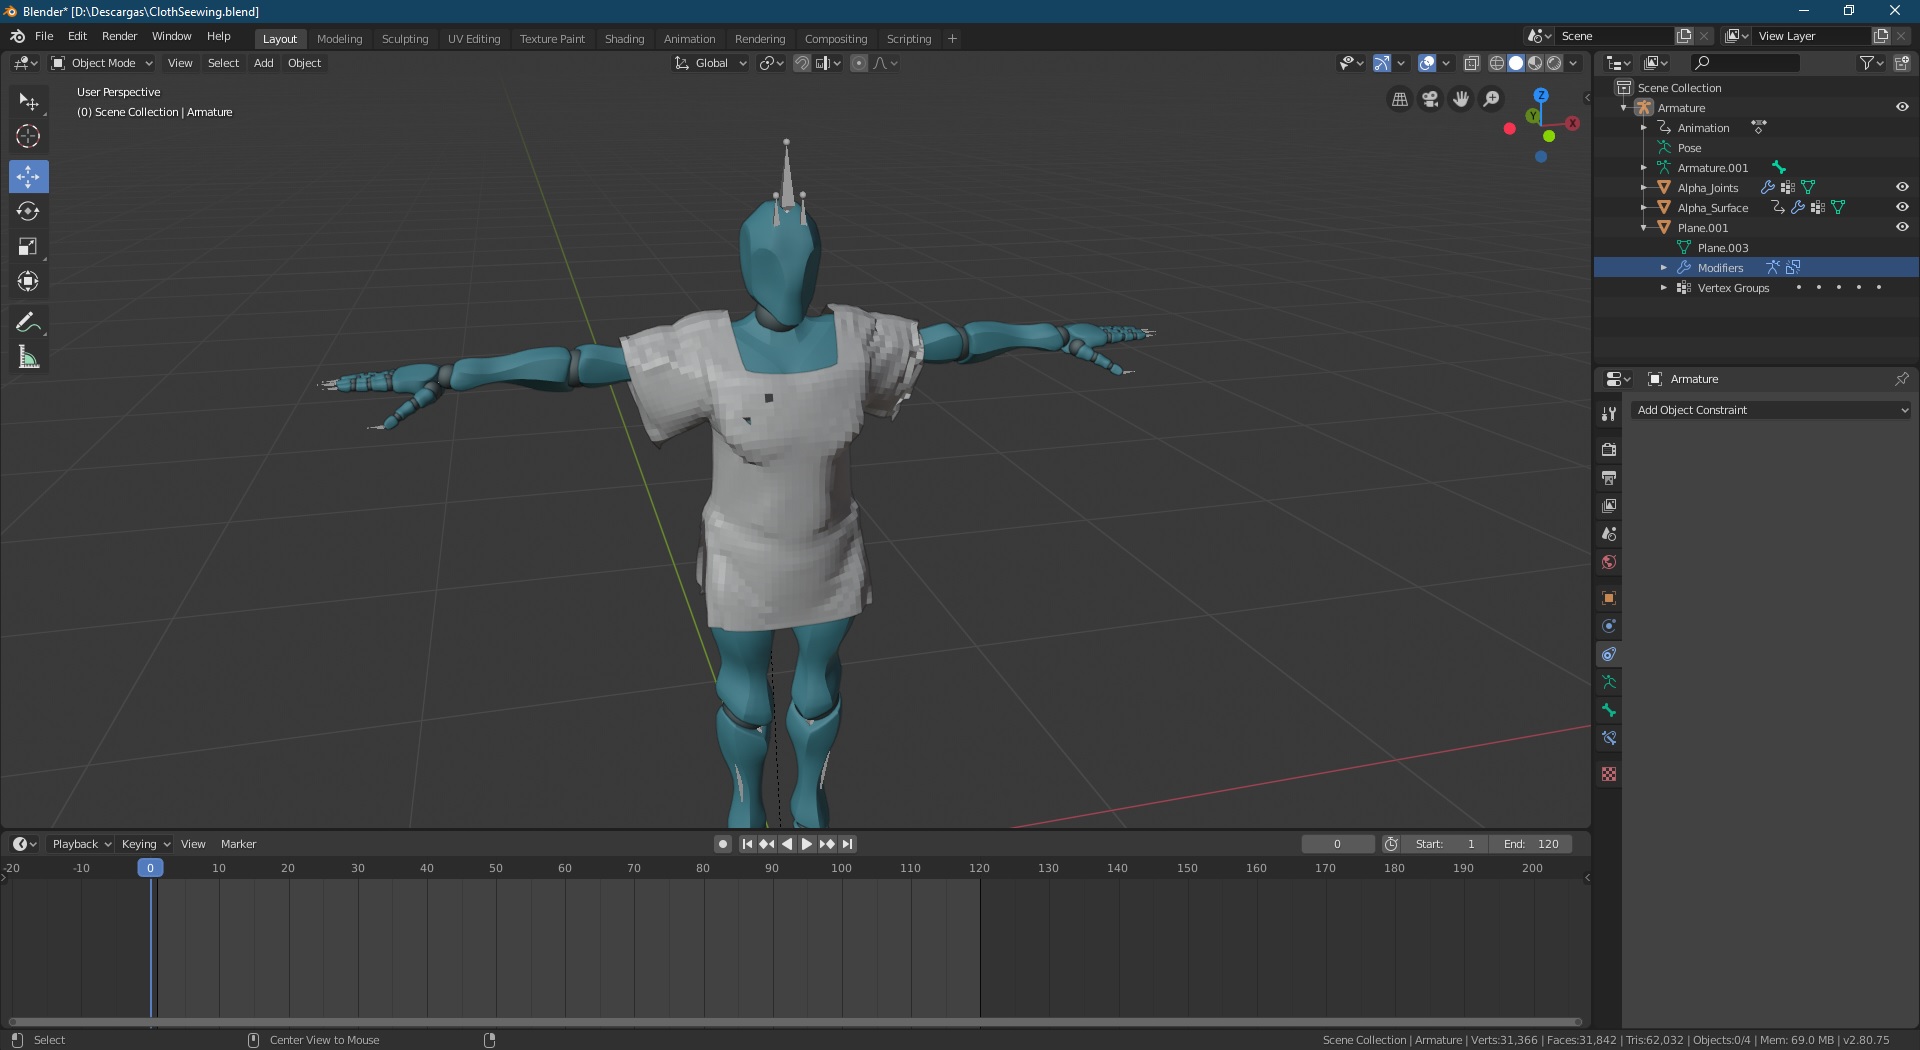
Modeling Clothes in Blender
Here I\'ve got this nice cartoon bear model created by Sketchfab user Jose Díaz. However I\'d like to put some clothes on him to ...
Resources for Learning
Explore tutorials and guides to learn more about each step of the clothing creation process, from basic modeling to advanced cloth simulation techniques.
Whether you\"re a beginner or an experienced 3D artist, these resources and tools will help you create stunning 3D clothes in Blender.
Introduction to Clothing Modeling in Blender
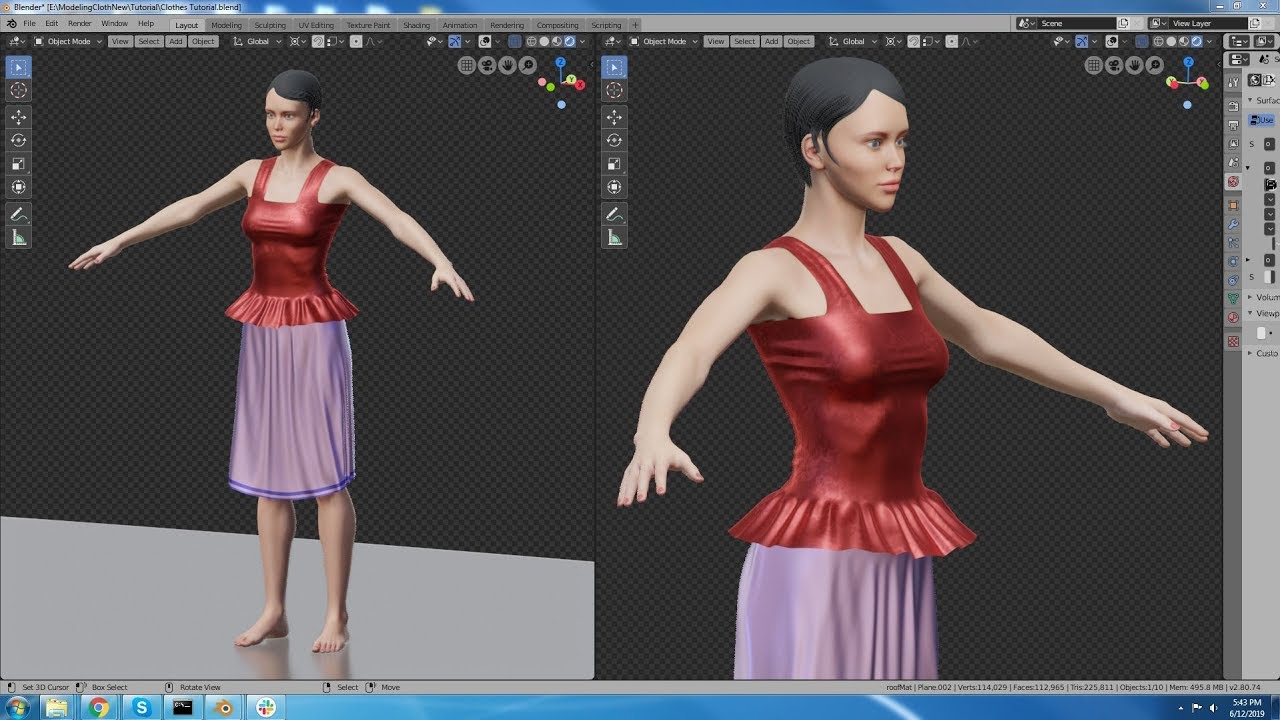
Blender offers a comprehensive suite for modeling clothing through its advanced cloth simulation features, enabling the creation of realistic garments for 3D characters. This section guides you through the basics of clothing modeling in Blender, from setting up your project to applying cloth simulations for dynamic and realistic fabric behavior.
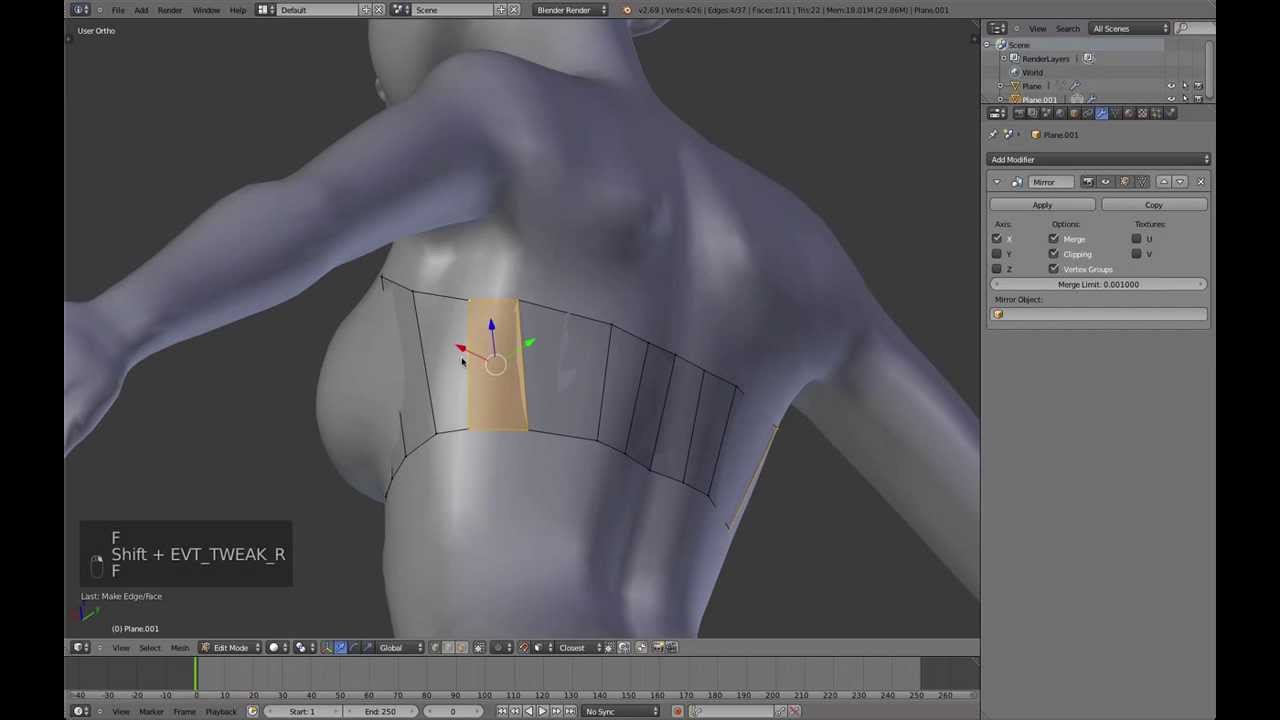
- Start by modeling simple clothing items around your character\"s body, using a low poly proxy model to speed up simulation times. Create proper UVs for the cloth mesh when it\"s still flat, which is crucial for texturing and simulation accuracy.
- Incorporate cloth simulation by treating isolated edges in the mesh as sewing springs. This approach is vital for setting up the cloth\"s physical properties and ensuring realistic movement and draping.
- Apply collision and cloth modifiers to your clothing mesh. First, select your humanoid model and enable Collision from the physics properties. Then, select your clothing mesh and enable Cloth simulation, also from the physics properties. Fine-tune settings like Sewing in the Shape section for garments that require parts to be stitched together.
- Run simulations to observe the cloth\"s behavior. If issues arise, such as the cloth not sewing together properly, use the Merge by Distance function to remove duplicate vertices, which can often resolve simulation problems.
- For more detailed and structured garments, consider the use of sewing patterns and animated collision objects, like belts, to shape the cloth around the character\"s waist or other body parts.
- Finalize your clothing model by adjusting the simulation settings to achieve the desired look, such as setting the cloth\"s pressure and self-collision properties for filled or layered garments.
Remember, the finer the mesh subdivision, the more realistic the simulation but at the cost of processing time. Start with simple shapes and simulations, gradually increasing complexity as you become more familiar with Blender\"s cloth simulation toolkit.

_HOOK_
Basic Techniques for Creating Clothes
Creating clothes in Blender involves several fundamental steps that can be adapted for various types of garments. Here\"s a guide to start modeling basic clothes, focusing on a shirt as an example, but the principles can be applied to other clothing types as well.
- Starting with a Basic Mesh: Begin by creating a plane, subdividing it a few times to increase its complexity. Then, use sculpting tools to mold the basic shape of the garment, such as a shirt.
- Adding Details: Introduce details to your garment by adding seams, buttons, or other decorations. Utilize the sculpt mode to add wrinkles and folds, enhancing the fabric\"s realism.
- Using Modifiers: Apply the Mirror modifier to work symmetrically on the garment and the Shrinkwrap modifier to conform the clothing to the character\"s body shape. These steps help in refining the clothing\"s fit and appearance.
- Simulation for Realism: Employ cloth simulation to give the fabric a natural drape and movement. Adjust physical properties and constraints as needed to achieve the desired effect.
- Texturing: Finalize your clothing with textures to add color and material details. This can be done through UV mapping and texture painting, giving life to your garment.
Remember, these steps form a foundation from which to build more complex and detailed garments. Experiment with different tools and modifiers in Blender to refine your technique and create unique clothing for your 3D models.

Advanced Cloth Simulation in Blender
Advanced cloth simulation in Blender enhances the realism and dynamic behavior of fabric in 3D models. This guide delves into sophisticated techniques and add-ons to elevate your cloth simulation projects.
- Utilizing Collision Objects: To achieve a realistic cloth interaction with other objects, such as belts or buttons, create low-poly collision objects. These objects mimic interactions like a shirt tucking into pants or a belt tightening around a waist.
- Cloth Simulation Settings: Fine-tune your cloth simulation by adjusting settings for materials like undershirts and pants. Key parameters include mass, stiffness, and damping to simulate various fabric types accurately.
- Add-on Integration: Enhance your workflow with Blender cloth modeling and simulation add-ons. Cloth Weaver, for instance, offers a comprehensive library of clothing templates and allows for intricate cloth designs with high control. Molecular Script is notable for its particle collision capabilities, ideal for simulating cloth movement and tearing effects. ClothFX simplifies cloth tearing simulations, enabling real-time interaction and visualization.
- Experimentation and Refinement: Employ different simulation techniques, such as particle systems for tearing effects or addons like CubeSurfer for real-time remeshing, to achieve unique and complex cloth dynamics.
These advanced techniques and tools facilitate the creation of highly realistic and dynamic cloth simulations in Blender, pushing the boundaries of 3D fabric modeling.

Utilizing Blender Plugins for Clothing Design
Blender offers a range of plugins specifically designed to enhance clothing design and simulation, making the process more efficient and detailed for artists and designers. These plugins cater to various aspects of clothing design, from basic garment creation to advanced simulations and texturing.
- Cloth Weaver: An all-in-one plugin that simplifies the creation of clothing and accessories. It features a library of templates for quick starting points, allowing users to easily design garments ranging from basic wear to complex outfits. Cloth Weaver also supports custom clothing design, offering tools for outlining, sewing, and fine-tuning fabrics directly on the character models.
- Molecular Script: This addon specializes in particle collision and linking for creating dynamic cloth simulations, including effects like fabric tearing. It\"s ideal for simulating realistic cloth behavior and interactions.
- Simply Cloth Pro: Aimed at streamlining cloth-related tasks, this tool simplifies the setup process for cloth simulations. It includes features like pin layers, cloth sets extraction, and optimization tools for managing simulation performance. Simply Cloth Pro is user-friendly, making it accessible for both beginners and experienced users.
These plugins enhance Blender\"s native capabilities, providing users with powerful tools for creating realistic and detailed clothing simulations. Whether you\"re working on a complex costume design or a simple garment, these plugins can significantly speed up your workflow and improve the quality of your designs.

Exploring BlenderKit for Clothing Models
BlenderKit offers a vast collection of clothing models that cater to various design needs for 3D artists. From essentials to specialized wear, BlenderKit serves as an invaluable resource, providing high-quality, ready-to-use assets for Blender users.
- Variety of Clothing Categories: BlenderKit hosts a range of clothing models, including options for both male and female characters, headwear, and even fantasy costumes. This diversity ensures that users can find almost any type of garment needed for their 3D projects.
- Free and Paid Models: The platform offers both free and paid models, allowing users to choose based on their project budget and requirements. Each model is detailed and designed to enhance the realism of 3D characters.
- Direct Integration with Blender: BlenderKit integrates directly into Blender, enabling users to browse, download, and use clothing models without leaving the software. This seamless integration significantly streamlines the workflow for 3D artists.
- Commercial and Non-commercial Use: Models downloaded from BlenderKit are licensed for both commercial and non-commercial use, offering flexibility for various project types. There are no download limitations, making it an ideal resource for extensive 3D projects.
- Community Support: BlenderKit not only serves as a platform for downloading assets but also supports the Blender community. A portion of the proceeds from paid plans is donated to the Blender Development Fund, contributing to the software\"s ongoing development.
Whether you\"re working on a fashion show animation, character design for a video game, or any project requiring detailed clothing, BlenderKit provides an extensive library of models to fulfill your creative needs. With continuous updates and new models being added, BlenderKit remains a dynamic and growing resource for Blender users worldwide.
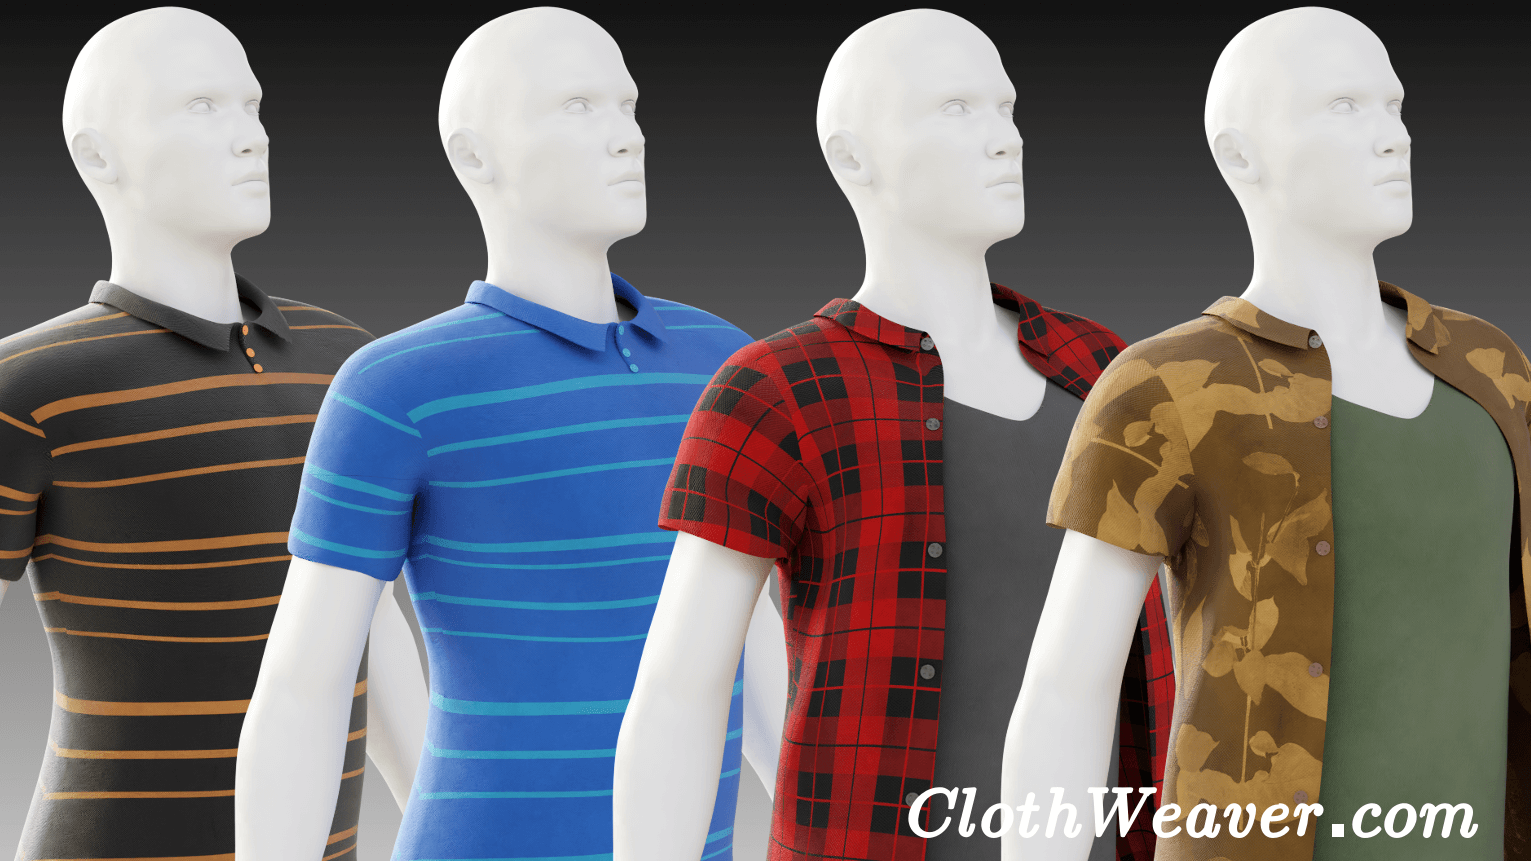
Creating Realistic Fabrics with Cloth Weaver
Cloth Weaver is an exceptional Blender addon designed to streamline the process of creating detailed and realistic fabric simulations and clothing models. It provides a comprehensive suite of tools that allow for the creation of custom clothing and accessories directly within Blender. From essential garments like pants and dresses to swimwear and accessories, Cloth Weaver offers a growing library of templates to jumpstart your projects.
To create realistic fabrics, Cloth Weaver offers built-in Blender Cycles materials, enabling the creation of photo-realistic textiles. Users can leverage a variety of patterns and textures, including bump maps for cotton fibers and various patterns such as leaves, plaid, pineapples, and stripes. The addon also provides specific values for creating materials like polyester, wool, cotton, and leather, considering factors like bump strength, translucency, and glossiness.
Starting with templates or designing from scratch, Cloth Weaver simplifies the 3D modeling process by allowing you to easily outline your clothing, define sewing sections, and let the software handle the rest. This process is enhanced by the capability to manually adjust and fine-tune your fabric to fit your character perfectly. Furthermore, Cloth Weaver encourages saving and loading your designs for efficient workflow management and sharing within the community.
Compatibility is broad, with support for various character models that can be imported into Blender. This flexibility ensures that regardless of the polygon count or the complexity of the mesh, Cloth Weaver can enhance your cloth simulation workflows. It is noted for its efficiency in managing dense mesh characters and ensuring smooth operation during the simulation process.
For those looking to explore beyond clothing, Cloth Weaver extends its functionality to fabric-based objects like bags, purses, tents, and towels, encouraging users to experiment with their creative ideas. The addon is constantly updated, offering in-app alerts for new versions to streamline the update process directly within the Cloth Weaver panel.
In summary, Cloth Weaver transforms the Blender experience for clothing and fabric design, making it an indispensable tool for artists seeking to create realistic textiles and garments with ease and precision.
_HOOK_
Troubleshooting Common Issues in Cloth Simulation
When working with cloth simulations in Blender, various issues can arise that may hinder the realism and effectiveness of your simulations. Troubleshooting these issues effectively can greatly enhance the quality of your simulations and the efficiency of your workflow.
- Creating Proper UVs: Before starting the simulation, ensure that the cloth mesh has proper UVs while it\"s still flat. This step is crucial for the simulation to behave realistically.
- Isolated Edges in Mesh: In Blender\"s cloth simulation, isolated edges (edges without polygons) are treated as sewing springs. They are an important part of the setup for cloth simulation, allowing for more realistic movement and interaction of the fabric.
- Using a Low Poly Proxy Model: For character clothing, using a low poly proxy model for the body mesh can significantly speed up the simulation process. This allows for quicker iterations and adjustments.
Here are some specific steps you can take to troubleshoot common issues:
- Collision Problems: Ensure that the collision objects are properly set up and that there\"s enough space between the cloth and the collider to prevent clipping.
- Adjusting Quality and Substeps: Increase the quality and substeps in the cloth simulation settings to achieve more accurate and stable simulations, especially for complex movements.
- Experimenting with Cloth Settings: Adjust cloth settings such as stiffness, damping, and friction to get the desired behavior of the fabric. Each setting can significantly impact how the cloth behaves, so experimentation is key.
- Updating Blender: Ensure you\"re using the latest version of Blender, as updates often include fixes and improvements to the cloth simulation engine.
For more detailed instructions and examples, consider exploring dedicated tutorials and courses on cloth simulation in Blender. These resources can provide in-depth insights and step-by-step guides on achieving realistic and high-quality cloth simulations.
Enhancing Your Clothing Designs with Textures and Materials
Textures and materials are pivotal in bringing realism and depth to your clothing designs in Blender. The right texture can transform a flat, lifeless model into a vibrant, tactile garment. Here are steps and tips for enhancing your clothing designs with textures and materials.
- Choose the Right Texture: Begin by selecting textures that closely resemble the fabric you\"re trying to mimic. For diverse options, consider visiting libraries like Poly Haven, which offers a range of fabric textures, or the Blender Open Material Repository, known for its wide variety of materials including blue velvet, canvas, carbon fibre, and more.
- Apply and Adjust Textures: After choosing a texture, apply it to your clothing model in Blender. Use the UV mapping tools to correctly map the texture onto your model, ensuring it wraps around the geometry naturally without stretching or distortion.
- Refine with Material Settings: Utilize Blender\"s material settings to adjust the reflectivity, roughness, and bump mapping of the texture. This step is crucial for achieving the desired feel of the fabric, whether it be the glossiness of silk or the roughness of denim.
- Enhance with Advanced Techniques: For added realism, explore advanced techniques such as displacement mapping for textured fabrics like knits or sequins. Also, consider using shader nodes in Blender to create complex material effects like iridescence on silken fabrics.
- Experiment with Lighting: Lighting plays a significant role in how materials are perceived. Experiment with different lighting setups in Blender to highlight the unique qualities of your fabric textures, enhancing their realism.
In addition to the aforementioned resources, websites such as CGBookcase and Sharetextures offer high-quality textures with permissive licenses, providing unique options like road textures and foliage, which can be beneficial for accessories and detailed garment designs.
Remember, the key to effectively enhancing your clothing designs with textures and materials lies in experimentation and attention to detail. By carefully selecting textures, adjusting material properties, and considering the impact of lighting, you can significantly elevate the realism and appeal of your clothing models in Blender.
Learning Resources and Tutorials for Clothing Modeling
Embarking on clothing modeling in Blender offers a wealth of creative possibilities. From the basics of cloth simulation to creating intricate designs, a variety of resources are available to guide you through this journey. Below, you will find an overview of tutorials and learning resources that cater to both beginners and advanced users looking to enhance their skills in clothing modeling.
- Introduction to Cloth Simulation: Learn how to make clothes with cloth simulation, covering everything from modeling basics to simulation techniques. This includes troubleshooting tips for common issues like unsewn clothes in simulations, ensuring that your simulations run smoothly.
- Blender 3D Modeling Tutorials for Beginners: If you\"re just starting out, this collection of tutorials will introduce you to the fundamentals of 3D modeling, including how to create nature scenes, simple trees, and even a WWII rocket plane. The tutorials emphasize practical skills for game development and offer insights into Blender\"s powerful rendering features.
- Official Blender Tutorials: The Blender website itself offers a wealth of tutorials for all levels, including beginners. Their official series, Blender Fundamentals 2.8x, is an essential starting point to get up to speed with Blender\"s interface and core concepts.
- Blender Tutorials for Beginners: This resource provides a variety of tutorials focused on different aspects of using Blender, from sculpting and lighting to animation and rigging. Whether you\"re interested in creating realistic models or learning the basics of animation, there\"s something here for everyone.
- Advanced Sculpting Techniques: For those looking to delve deeper into the art of sculpting in Blender, tutorials on advanced techniques offer a detailed look at creating complex models and textures. This includes working with Blender\"s particle system and hair settings to achieve high-resolution characters and effects.
These resources collectively offer a comprehensive guide to mastering clothing modeling in Blender. Whether you\"re a beginner looking to learn the basics or an experienced user seeking to refine your skills, the variety and depth of tutorials available ensure that there\"s always something new to discover and learn.
READ MORE:
Community Insights: Tips and Tricks from Experienced Users
Gathering insights from experienced Blender users can dramatically improve your clothing modeling projects. Here\"s a compilation of practical tips and tricks to enhance your workflow and output quality:
- Optimize Cloth Simulation: Utilize a low poly collision object for the character and detailed mesh for clothing items like undershirts and pants. An animated belt collision can help simulate the tightening effect on clothing, adding realism to your models.
- Check for Errors Regularly: Regularly inspect your model for flipped normals, overlapping vertices, or non-manifold geometry. Early detection and correction of these issues can prevent future headaches during modeling.
- UV Mapping and Texturing: Master the art of UV unwrapping and texturing to bring your models to life. Experiment with Blender’s unwrapping methods to achieve an efficient layout, minimizing texture stretching and distortion.
- Understanding Edge Flow: Control the topology flow by managing poles and edge loops effectively. This is crucial for adding specific details to your models and achieving a clean, efficient mesh.
- Use MatCaps for Better Topology Visualization: MatCaps provide a quick way to identify distortions in your mesh, helping you maintain a smooth surface for your clothing models.
- Creases vs. Holding Edges: Learn when to use creases and when to implement holding edges to maintain crispness in your models without compromising the smoothness provided by subdivision modifiers.
- Keep It Simple: Adopt the KISS (Keep It Simple, Stupid) principle to avoid overcomplicating your mesh. This helps in maintaining a manageable geometry count while focusing on the details that matter.
- Beware of Duplicates: Be cautious of inadvertently creating duplicate vertices with tools like Inset and Extrude. These can lead to unnecessary complications in your mesh topology.
By incorporating these insights from the Blender community into your workflow, you can enhance the quality and efficiency of your clothing models. Remember, practice and experimentation are key to mastering these tips and tricks.
Embark on the transformative journey of clothing modeling in Blender, where creativity meets precision. This guide illuminates every step, empowering both novices and seasoned artists to weave their digital fashion dreams into reality. Let\"s fabricate the future, one thread at a time.