Topic blender install: Discover the seamless way to install Blender and unlock the world of 3D creativity. This guide simplifies the process, ensuring you"re ready to dive into Blender"s comprehensive suite of tools without delay.
Table of Content
- How do I install Blender on Windows, macOS, or Linux?
- Installation Steps for Blender
- Additional Installation Notes
- Updating Blender
- Learning Resources
- Additional Installation Notes
- Updating Blender
- Learning Resources
- Updating Blender
- YOUTUBE: How to Download Blender for Windows 10 and Mac - Install Blender
- Learning Resources
- Learning Resources
- Introduction to Blender Installation
- System Requirements for Blender
- Downloading Blender from the Official Website
- Step-by-Step Installation Guide for Windows
- Installing Blender on macOS
- Blender Installation for Linux Users
- How to Update Blender to the Latest Version
- Installing Blender via Microsoft Store
- Using Blender on Ubuntu with Flatpak
- Managing Multiple Versions of Blender
- Common Installation Issues and Troubleshooting
- Additional Resources and Support for Blender Users
How do I install Blender on Windows, macOS, or Linux?
To install Blender on Windows, macOS, or Linux, follow these steps:
- Visit the official Blender website.
- Click on the \"Download\" section.
- Choose the version of Blender that is compatible with your operating system (Windows, macOS, or Linux).
- Once the download is complete, locate the installer file in your downloads folder.
- Double click on the installer file to begin the installation process.
- Follow the on-screen instructions to install Blender on your system.
- After the installation is complete, you can launch Blender from your desktop or applications folder.
READ MORE:
Installation Steps for Blender
- Visit the official Blender website to download the latest version suitable for your operating system (Windows, macOS, Linux).
- For Windows users, after downloading, run the installer and follow the on-screen instructions to complete the installation.
- Mac users should mount the downloaded .dmg file and drag Blender into the Applications folder.
- Linux users can install Blender via their package manager or download it directly from the Blender website and follow the instructions specific to their distribution.
Additional Installation Notes
- Blender is also available in the Microsoft Store for easier installation and updates.
- Ubuntu users have the option to install Blender using the Flatpak command for easy management of versions and dependencies.
- To work with multiple versions of Blender, it\"s recommended to use the portable .zip version, allowing for parallel installs without interference.
Updating Blender
It\"s important to regularly update Blender to access new features, improvements, and bug fixes. Check the Blender website for the latest versions and update instructions.
Support and Development
Supporting Blender\"s development through donations or by joining the Development Fund helps ensure the software\"s future and the addition of new features.

Learning Resources
For new users, Blender offers extensive documentation and tutorials to get started with 3D modeling and animation, making it accessible for beginners and professionals alike.
_HOOK_
Additional Installation Notes
- Blender is also available in the Microsoft Store for easier installation and updates.
- Ubuntu users have the option to install Blender using the Flatpak command for easy management of versions and dependencies.
- To work with multiple versions of Blender, it\"s recommended to use the portable .zip version, allowing for parallel installs without interference.

Updating Blender
It\"s important to regularly update Blender to access new features, improvements, and bug fixes. Check the Blender website for the latest versions and update instructions.
Support and Development
Supporting Blender\"s development through donations or by joining the Development Fund helps ensure the software\"s future and the addition of new features.

Learning Resources
For new users, Blender offers extensive documentation and tutorials to get started with 3D modeling and animation, making it accessible for beginners and professionals alike.
Updating Blender
It\"s important to regularly update Blender to access new features, improvements, and bug fixes. Check the Blender website for the latest versions and update instructions.
Support and Development
Supporting Blender\"s development through donations or by joining the Development Fund helps ensure the software\"s future and the addition of new features.
How to Download Blender for Windows 10 and Mac - Install Blender
Download: Discover the easiest way to download your favorite music, movies, and apps with just a few clicks! Watch our step-by-step guide to learn how to quickly and safely download content to enjoy anytime, anywhere.
How to Install Blender on Windows 11 - Complete Installation
Windows: Explore the world of endless possibilities with Windows operating system! Tune in to our video to uncover all the amazing features and tools that Windows has to offer, and take your digital experience to the next level.
Learning Resources
For new users, Blender offers extensive documentation and tutorials to get started with 3D modeling and animation, making it accessible for beginners and professionals alike.

_HOOK_
Learning Resources
For new users, Blender offers extensive documentation and tutorials to get started with 3D modeling and animation, making it accessible for beginners and professionals alike.
Introduction to Blender Installation
Blender is a powerful, free, and open-source 3D creation suite that supports the entirety of the 3D pipeline. Whether you\"re into modeling, rigging, animation, simulation, or rendering, Blender has something to offer. This section aims to simplify the Blender installation process across various operating systems, ensuring you get started with Blender without any hitches.
- First, visit the official Blender website to download the version compatible with your operating system (Windows, macOS, or Linux).
- Windows users can run the installer and follow the on-screen instructions to complete the installation.
- Mac users should open the downloaded .dmg file and drag Blender into the Applications folder to install.
- Linux users have the option to install Blender using their distribution\"s package manager or by downloading it directly from the Blender website and following the provided installation instructions.
Blender\"s versatility extends to its installation process, offering various methods to suit your preferences, including direct downloads, package managers, and even the Microsoft Store for Windows users. This flexibility ensures that regardless of your platform, setting up Blender is a straightforward process that allows you to dive into 3D creation swiftly.
- Check Blender\"s system requirements before installation to ensure your hardware is compatible.
- Consider using the portable version if you wish to run multiple versions of Blender on the same machine.
- Stay updated with the latest versions for new features and bug fixes.
Following these steps will ensure a smooth installation process, setting you up for a successful journey into 3D modeling, animation, and beyond with Blender.
System Requirements for Blender
Ensuring your computer meets Blender\"s system requirements is crucial for a smooth 3D modeling and animation experience. Blender is compatible across various platforms, including Windows, macOS, and Linux, each with specific needs for optimal performance.
- Operating System: Windows 8.1, 10, and 11; macOS 10.15 and newer (Intel and Apple Silicon); Linux distributions using glibc 2.28 or newer.
- CPU: 64-bit quad-core CPU with SSE4.2 support.
- Memory: Minimum of 8 GB RAM; however, 16 GB or more is recommended for complex projects.
- Graphics Card: OpenGL 3.3 compatible with at least 2 GB RAM. For GPU rendering, NVIDIA or AMD graphics cards with CUDA or OpenCL support are preferred.
- Display: 1280×768 display minimum; 1920×1080 or higher recommended.
- Storage: At least 2 GB of free space for installation; SSD with 20 GB or more is recommended for ongoing projects.
- Input Devices: Three-button mouse or pen+tablet for navigation and interaction.
Meeting these requirements ensures that Blender runs efficiently, allowing you to fully leverage its 3D creation capabilities. For advanced rendering features and working with highly complex scenes, investing in higher-spec hardware will enhance performance and productivity.
Downloading Blender from the Official Website
Downloading Blender directly from the official website ensures you get the latest, stable version of this powerful 3D creation suite. Follow these steps to download Blender safely and correctly:
- Go to the official Blender website at www.blender.org.
- Navigate to the \"Download\" section accessible from the main menu.
- Select the Blender version that is compatible with your operating system. Blender provides versions for Windows, macOS, and Linux.
- Click on the \"Download\" button. The website automatically suggests the version that matches your OS. However, you can manually select a different version if needed.
- Once the download is complete, locate the installer file in your download folder.
- Proceed with the installation process as detailed in the installation guide for your specific operating system.
Blender\"s website also offers additional download options, including previous versions and experimental builds for users who want to test the latest features or need compatibility with older hardware.
- For advanced users, Blender\"s source code is also available for download, allowing customization and personalization of the software.
- Ensure you download Blender only from its official website to avoid the risks associated with third-party downloads, such as malware or outdated versions.
By following these steps, you can easily download the latest version of Blender and start creating stunning 3D content.
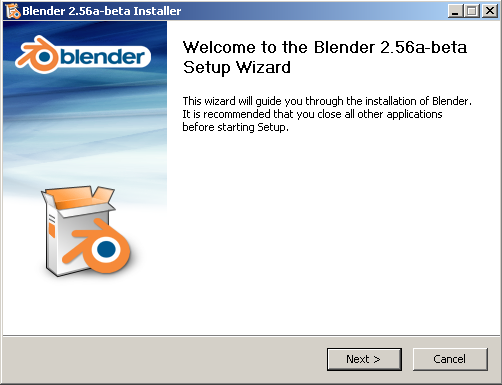
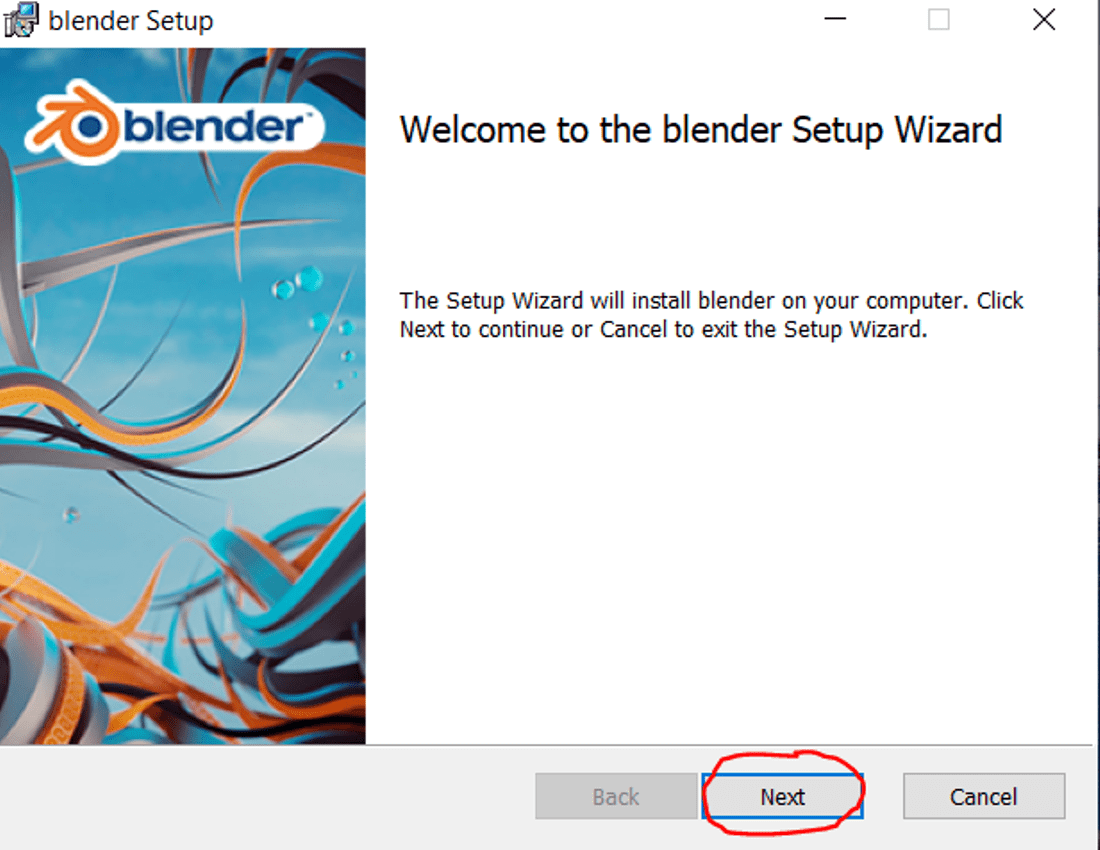
Step-by-Step Installation Guide for Windows
Installing Blender on a Windows system is straightforward. This guide will walk you through the process to ensure a successful installation.
- After downloading Blender from the official website, locate the downloaded installer file in your Downloads folder.
- Double-click the installer file to start the installation process. You might see a security prompt asking for permission to run the installer; click \"Yes\" to continue.
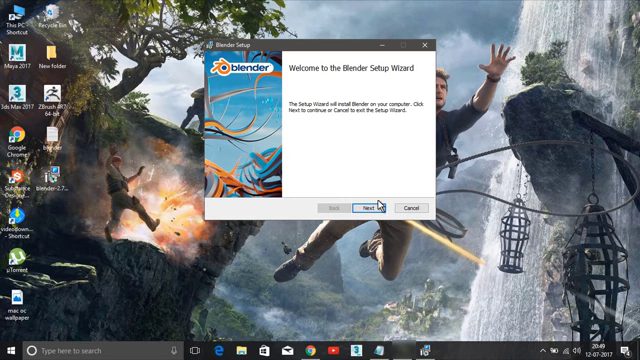
- The Blender Setup wizard will open. Click \"Next\" to proceed with the installation.
- Read the License Agreement, select \"I accept the agreement\", and then click \"Next\" to proceed.
- Choose the installation folder where you want Blender to be installed. The default location is usually fine for most users. Click \"Next\" to continue.
- Select the components you wish to install. For most users, the default selection is appropriate. Click \"Next\" to proceed.
- Choose whether to create a desktop icon for Blender, and then click \"Next\".
- Review your installation settings. Click \"Install\" to begin the installation process.
- The installer will now install Blender on your computer. This process may take a few minutes.
- Once the installation is complete, click \"Finish\" to close the setup wizard. You may choose to launch Blender immediately if the option is provided.
Blender is now installed on your Windows system, and you\"re ready to start creating 3D projects. Remember to check for updates regularly to ensure you have the latest features and improvements.
_HOOK_
Installing Blender on macOS
Installing Blender on macOS is a straightforward process that allows Mac users to enjoy the full range of Blender\"s 3D modeling, animation, and rendering capabilities. Follow these detailed steps to ensure a smooth installation:
- Visit the official Blender website (www.blender.org) and navigate to the \"Download\" section.
- Select the version of Blender that suits your macOS. The website will automatically recommend the best version for your system, whether it\"s for Intel or Apple Silicon processors.
- Click on the \"Download Blender\" button to start the download process. The file will be a .dmg (disk image) file, which is standard for macOS applications.
- Once the download is complete, open the .dmg file. This will mount a virtual disk on your desktop.
- Inside the mounted disk, you\"ll find Blender.app. Drag this application to your Applications folder to install Blender on your macOS device.
- After copying Blender to the Applications folder, you can eject the virtual disk and delete the .dmg file to save space.
- To launch Blender, simply go to your Applications folder and double-click on Blender.app.
By following these steps, you\"ll have Blender installed on your macOS device, ready for all your 3D creation projects. Remember, Blender updates frequently, so check the official website periodically for the latest version to ensure you have access to new features and improvements.
Blender Installation for Linux Users
Linux users can enjoy Blender\"s comprehensive suite for 3D creation by following these installation guidelines. Whether you prefer a graphical package manager or the command line, installing Blender on Linux is straightforward.
- Update your system to ensure all existing packages are up to date. This can typically be done with a command like sudo apt-get update && sudo apt-get upgrade for Debian-based systems, or the equivalent for your Linux distribution.
- Install Blender directly from your distribution\"s package manager. For Ubuntu and other Debian-based distributions, you can use sudo apt-get install blender. This command installs Blender from the official repositories.
- Alternatively, for the latest version, download Blender from the official website. Navigate to www.blender.org/download/, select the Linux version, and download the tarball.
- Extract the tarball using a command like tar -xvf blender-x.x.x-linux-x64.tar.xz in the terminal, replacing \"x.x.x\" with the version number you downloaded.
- Navigate to the extracted Blender directory and run Blender directly by executing the blender executable from the terminal.
For those who prefer using Snap or Flatpak, Blender can also be installed using these methods:
- Snap: Use sudo snap install blender --classic to install Blender via Snap.
- Flatpak: First, ensure Flatpak is installed and then add the Flathub repository with flatpak remote-add --if-not-exists flathub https://flathub.org/repo/flathub.flatpakrepo. Install Blender with flatpak install flathub org.blender.Blender.
These methods provide Linux users with multiple ways to install Blender, ensuring compatibility with various distributions and preferences for package management.
How to Update Blender to the Latest Version
Keeping Blender up-to-date ensures you have access to the latest features, improvements, and bug fixes. Follow these steps to update Blender on your system:
- Visit the official Blender website at www.blender.org to access the latest version. The \"Download\" section prominently displays the most current release.
- Select the version compatible with your operating system (Windows, macOS, Linux) and click the \"Download\" button. The website may automatically suggest the appropriate version for your OS.
- Once the download is complete, locate the installer file in your download folder. The file will be a .msi for Windows, .dmg for macOS, or a .tar.xz for Linux.
- Before proceeding with the installation of the new version, it\"s recommended to uninstall the previous version of Blender to avoid conflicts. This step is optional but advised for a clean update.
- Run the installer for the new version of Blender and follow the on-screen instructions to complete the installation process.
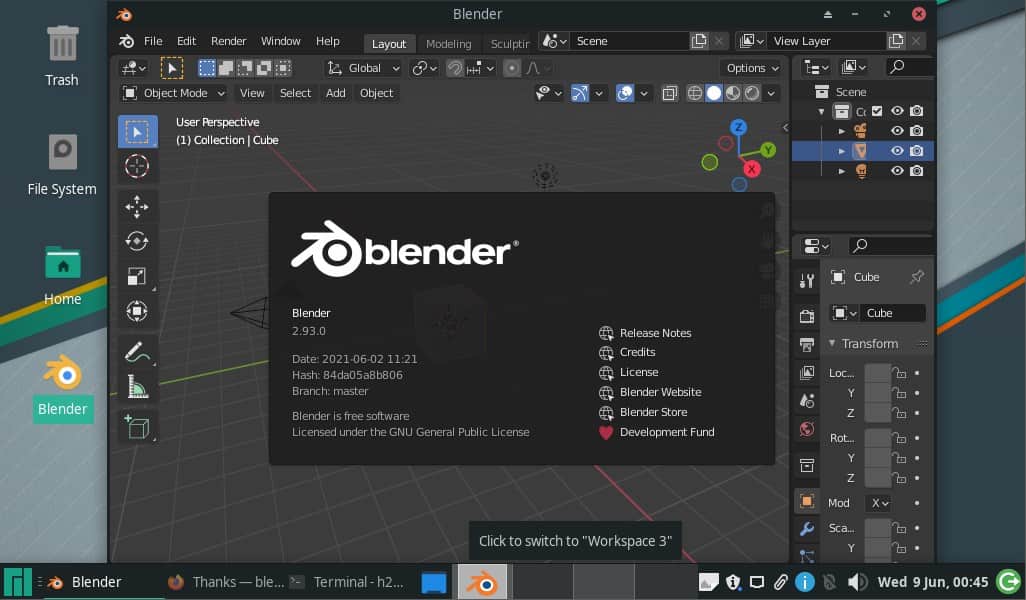
- After installation, launch Blender to verify that the update was successful. You can check the version number on the splash screen or under \"Help\" > \"About Blender\" within the application.
For users who prefer automatic updates, consider installing Blender through platforms that support this feature, such as Steam or the Microsoft Store for Windows. These platforms will automatically update Blender to the latest version when available.
- Steam: If you\"ve installed Blender via Steam, updates will be handled automatically by the Steam client. Ensure Steam is configured to keep your games and software up to date.
- Microsoft Store: For Windows users who installed Blender from the Microsoft Store, updates are also managed automatically. Check your Microsoft Store settings to ensure automatic updates are enabled.
Regularly updating Blender ensures you have the latest tools and security features, enhancing your 3D creation experience.
Installing Blender via Microsoft Store
Windows users have the convenient option of installing Blender directly from the Microsoft Store, which simplifies the installation process and ensures automatic updates. Follow these steps to install Blender using the Microsoft Store:
- Open the Microsoft Store app on your Windows device. You can find it by searching for \"Microsoft Store\" in the start menu.
- Use the search function within the Microsoft Store to find Blender. Simply type \"Blender\" into the search bar and press Enter.
- From the search results, select the official Blender app. Ensure it\"s published by the Blender Foundation to avoid downloading unofficial versions.
- Click on the \"Get\" button to begin the installation process. If you\"re not signed in with a Microsoft account, you may be prompted to sign in or create one.
- Once the installation is complete, Blender will be available in your Start menu and can be launched directly from there.
Installing Blender through the Microsoft Store offers several benefits, including:
- Automatic updates to ensure you always have the latest version of Blender without having to manually download and install updates.
- Easy installation and uninstallation process managed directly through the Microsoft Store interface.
- Integration with your Microsoft account, allowing for easy reinstallation on different devices or after a system reset.
This method provides a streamlined, user-friendly way to install and maintain Blender on Windows devices, making it an ideal choice for users looking for convenience and reliability.
Using Blender on Ubuntu with Flatpak
For Ubuntu users, installing Blender via Flatpak offers a sandboxed environment, ensuring a stable experience across different Linux distributions. This method also simplifies updates. Here\"s how to use Blender on Ubuntu with Flatpak:
- First, ensure Flatpak is installed on your system. If not, you can install it by opening a terminal and typing sudo apt install flatpak.
- Next, add the Flathub repository, which hosts the Blender Flatpak. In the terminal, enter flatpak remote-add --if-not-exists flathub https://flathub.org/repo/flathub.flatpakrepo.
- Now, you can install Blender by running flatpak install flathub org.blender.Blender in the terminal. Confirm the installation when prompted.
- Once installed, you can run Blender through the terminal with flatpak run org.blender.Blender, or find it in your applications menu, depending on your desktop environment.
This installation method ensures that you are using an isolated version of Blender, reducing conflicts with other system libraries and making the software easier to update or remove. Flatpak automatically manages updates, ensuring you always have the latest version of Blender available.
- Benefits include easy updates and a consistent experience across different Linux distributions.
- Flatpak installations are sandboxed, increasing security and stability.
Using Blender on Ubuntu with Flatpak is a robust and user-friendly option for those seeking an alternative to traditional package management systems.
_HOOK_
Managing Multiple Versions of Blender
For enthusiasts and professionals who need to run multiple versions of Blender, there are efficient ways to manage and switch between them without cluttering your system. Utilizing portable versions and specialized tools like Blender Launcher simplifies this process.
- Begin by downloading the portable (.zip) versions of Blender from the official website. These versions do not require installation and can be run directly from their folders.
- Create a dedicated folder for Blender on your system. Inside this, organize each version in its own subfolder. This keeps your multiple versions well-organized and easily accessible.
- For Windows users, enhancing the setup with tools like 7zip for extraction and Link Shell Extension for creating symbolic links can significantly streamline managing these versions. Symbolic links can help maintain common configurations and scripts across all versions.
- Blender Launcher, an open-source project available for Windows and Linux, offers a centralized interface for managing stable, daily, and experimental builds of Blender. It automatically catalogs downloaded builds and provides quick access to them, making it easier to test new features or switch between versions without manual setup.
With these methods, users can enjoy the flexibility of accessing various Blender features from different versions, ensuring compatibility with specific plugins or projects, and experimenting with the latest developments in Blender technology. Always consider the compatibility of add-ons and configurations when switching between major versions to avoid conflicts.
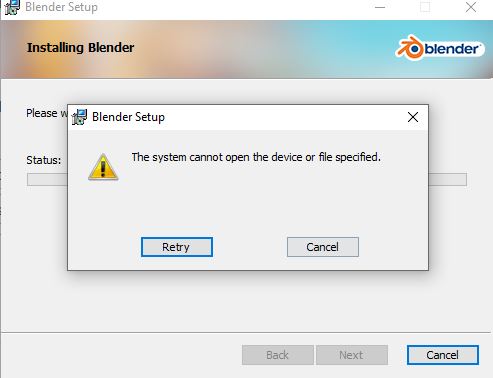
Common Installation Issues and Troubleshooting
Even the most seasoned Blender users can encounter installation issues. Here are some common problems and their solutions to help ensure a smooth Blender installation and operation:
- Interface and Viewport Issues: Problems like limited zoom in Perspective view, disappearing reference images, and glitchy interfaces can often be resolved by adjusting viewport settings, switching views, or disabling hardware acceleration and on-screen effects applied by your OS.
- Hardware Bottlenecks: If Blender is running slow or crashing, it might be pushing your computer\"s hardware to its limits. Optimizing your Blender file by simplifying geometry, reducing particle count, and using fewer textures can help. Ensure your graphics drivers are up to date and optimized for Blender use.
- Blender Stops Running: This could be due to issues with the motor, brushes, transmission gears, thermal relay, or power cord fuse. Technical knowledge might be required to diagnose and fix these issues.
- Blade Isn’t Rotating: Check the transmission gear and the drive stud for issues. Blades should be clean and well lubricated.
- Blender Jar Leaks: Often caused by issues with the seal or gasket. Check these components for damage and ensure the base of the jar is secure.
- Electrical Issues: A burning smell or excessive sparks could indicate problems with the gasket, sealing rings, o-rings, blades, couplers, or motor base. These parts may need to be repaired or replaced.
For any persistent or complicated issues, consulting the Blender manual or seeking professional technical help is recommended. Proper maintenance and regular updates can help mitigate many common problems.
READ MORE:
Additional Resources and Support for Blender Users
Blender users have access to a wide range of resources and support to enhance their 3D creation experience:
- Comprehensive documentation, including a user manual, Python API reference, and developer guides, constantly updated by volunteers worldwide.
- A large collection of free tutorials for both beginners and advanced users on Blender Studio and the official Blender YouTube channel.
- Extensive community support through forums like Stack Exchange and Blender Artists, chat rooms for development and community support, and social networks using #b3d.
- Professional enterprise-grade support services for Blender LTS releases offered by Canonical.
- A straightforward process to report bugs to help make Blender more stable for everyone.
These resources provide valuable information and support, fostering a rich learning environment and a strong sense of community among Blender users.
Embark on your 3D creation journey with Blender, the ultimate open-source software. This guide ensures a seamless installation process, empowering you to unleash your creativity and explore the boundless possibilities of 3D modeling, animation, and more.