Topic blender add bone to existing armature: Discover the art of enhancing your 3D animations in Blender by adding bones to existing armatures. This guide will empower you with the techniques to bring your characters to life with dynamic, realistic movements.
Table of Content
- How do you add a bone to an existing armature in Blender?
- Understanding Armatures and Bones
- Creating and Adding Bones
- Naming Bones
- Linking Armatures to Meshes
- Conclusion
- Creating and Adding Bones
- Naming Bones
- Linking Armatures to Meshes
- YOUTUBE: Rigify Bone Hierarchy: How to Add Extra Bones Easily
- Conclusion
- Naming Bones
- Linking Armatures to Meshes
- Conclusion
- Linking Armatures to Meshes
- Conclusion
- Conclusion
- Introduction to Armatures in Blender
- Why Add Bones to an Existing Armature?
- Step-by-Step Guide to Adding New Bones
- Connecting New Bones to Existing Ones
- Extruding Bones from Existing Ones
- Naming and Organizing Bones in Armatures
- Linking Armatures to Meshes for Animation
- Adjusting Bone Influence through Weight Painting
- Tips for Efficient Bone Addition and Rigging
- Common Pitfalls and How to Avoid Them
- Advanced Techniques and Best Practices
- Resources for Further Learning
- Conclusion: Enhancing Your Blender Projects
How do you add a bone to an existing armature in Blender?
To add a bone to an existing armature in Blender, you can follow these steps:
- Open your Blender project and go to the 3D Viewport.
- Select the armature to which you want to add a bone.
- Switch to Edit Mode by pressing Tab or selecting it from the mode dropdown menu at the bottom of the 3D Viewport.
- Place the 3D cursor where you want to add the new bone by left-clicking in the 3D Viewport.
- Press Shift + A to bring up the \"Add\" menu and select \"Single Bone\" to add a single bone to the armature.
- You can also extrude from an existing bone by selecting a bone in Edit Mode and pressing E to extrude.
- Position and adjust the newly added bone by moving, rotating, and scaling it using the transform tools.
- To connect the new bone to the existing armature, make sure the new bone is still selected, then select the parent bone in the armature.
- Press Ctrl + P to bring up the Parent menu and choose the desired parenting option (e.g., \"Connected\" or \"Keep Offset\").
- Exit Edit Mode by pressing Tab and go back to Object Mode to see the added bone in relation to the armature.
READ MORE:
Understanding Armatures and Bones
An armature in Blender is a structure of interconnected bones that simulates a skeleton, allowing for the realistic movement and deformation of character meshes. Each bone within an armature has a specific location and rotation, enabling intricate animations and poses.
Advantages of Using Armatures
- Efficient animation by controlling entire characters with a bone system
- Non-destructive animation allows for flexible posing without altering the original mesh shape
Creating and Adding Bones
To add a bone to an existing armature, you need to be in edit mode. Bones can be added directly within the armature by pressing Shift+A. For connected bones, select the initial bone, press E to extrude, and adjust its position. This process ensures bones are interconnected, facilitating smoother animations.
Extruding Bones
Extruding is a key technique for adding bones to an armature, allowing you to create a new bone that remains connected to the existing structure. This is essential for maintaining the integrity and functionality of the armature during animation.
Naming Bones
Naming each bone in your armature is crucial for organization, especially in complex rigs. Names can be assigned immediately after creation or later in the Bone Properties tab. Displaying names in the 3D viewport helps with identification and selection during the rigging process.

Linking Armatures to Meshes
Linking your armature to the mesh is a vital step for animating your character. Use the \"With Automatic Weights\" option to automatically bind the mesh to the bones, ensuring movements of the armature influence the mesh. Adjustments through weight painting may be necessary for precise control over mesh deformation.

_HOOK_
Conclusion
Adding bones to an existing armature in Blender allows for more dynamic and complex animations. By following these guidelines, you can enhance your 3D models with detailed movements and poses, bringing your animations to life with realism and fluidity.

Creating and Adding Bones
To add a bone to an existing armature, you need to be in edit mode. Bones can be added directly within the armature by pressing Shift+A. For connected bones, select the initial bone, press E to extrude, and adjust its position. This process ensures bones are interconnected, facilitating smoother animations.
Extruding Bones
Extruding is a key technique for adding bones to an armature, allowing you to create a new bone that remains connected to the existing structure. This is essential for maintaining the integrity and functionality of the armature during animation.

Naming Bones
Naming each bone in your armature is crucial for organization, especially in complex rigs. Names can be assigned immediately after creation or later in the Bone Properties tab. Displaying names in the 3D viewport helps with identification and selection during the rigging process.
Linking Armatures to Meshes
Linking your armature to the mesh is a vital step for animating your character. Use the \"With Automatic Weights\" option to automatically bind the mesh to the bones, ensuring movements of the armature influence the mesh. Adjustments through weight painting may be necessary for precise control over mesh deformation.

Rigify Bone Hierarchy: How to Add Extra Bones Easily
Explore the importance of hierarchy in 3D animation and how it can streamline your workflow. Learn how to organize your objects, layers, and animations effectively in Blender for a smooth production process. Watch the video to elevate your skills!
Rigify Bone Hierarchy: How to Add Extra Bones Easily
Explore the importance of hierarchy in 3D animation and how it can streamline your workflow. Learn how to organize your objects, layers, and animations effectively in Blender for a smooth production process. Watch the video to elevate your skills!
Conclusion
Adding bones to an existing armature in Blender allows for more dynamic and complex animations. By following these guidelines, you can enhance your 3D models with detailed movements and poses, bringing your animations to life with realism and fluidity.
_HOOK_
Naming Bones
Naming each bone in your armature is crucial for organization, especially in complex rigs. Names can be assigned immediately after creation or later in the Bone Properties tab. Displaying names in the 3D viewport helps with identification and selection during the rigging process.

Linking Armatures to Meshes
Linking your armature to the mesh is a vital step for animating your character. Use the \"With Automatic Weights\" option to automatically bind the mesh to the bones, ensuring movements of the armature influence the mesh. Adjustments through weight painting may be necessary for precise control over mesh deformation.
Conclusion
Adding bones to an existing armature in Blender allows for more dynamic and complex animations. By following these guidelines, you can enhance your 3D models with detailed movements and poses, bringing your animations to life with realism and fluidity.
_HOOK_
Conclusion
Adding bones to an existing armature in Blender allows for more dynamic and complex animations. By following these guidelines, you can enhance your 3D models with detailed movements and poses, bringing your animations to life with realism and fluidity.
Introduction to Armatures in Blender
Armatures in Blender are essential for character rigging, enabling intricate animations by simulating a skeleton\"s structure. Each bone within an armature controls a part of the mesh, allowing for complex movements such as walking or running. Armatures save significant time by simplifying the animation process, focusing on bone manipulation rather than vertex adjustments. This non-destructive method preserves the mesh\"s original shape, offering flexibility in animation.
Creating an armature involves adding bones in Object mode, with each bone consisting of a root, body, and tip. Blender supports three main modes for armature interaction: Object, Edit, and Pose mode, each offering different functionalities for rigging and animation.
To add bones, switch to Edit mode and use the Shift+A command. Bones can be connected for joint movement or extruded for extending the armature. Naming bones is crucial for organization, especially in complex rigs. Blender also facilitates linking armatures to meshes, enabling bones to control mesh deformation for animation. Initial binding with Automatic Weights often requires fine-tuning through weight painting for precise control over mesh deformation.
Engaging with armatures and practicing rigging is a great way to understand their functionality and enhance your Blender projects.
Why Add Bones to an Existing Armature?
Adding bones to an existing armature in Blender is crucial for several reasons. It allows animators to refine and enhance character animations by introducing new movements or correcting existing ones. This flexibility is essential when creating more complex or nuanced animations, where additional control over the mesh deformation is needed. Additionally, adding bones can help in segmenting the character for detailed animations, such as facial expressions or finger movements, enabling a higher level of realism and expressiveness.
From a technical perspective, adding bones to an existing armature can improve the rig\"s functionality, making it more intuitive for animators to work with. It allows for the adjustment of the armature\"s structure to better match the character\"s design or to introduce new features into the animation, such as props or additional body parts. This process is also part of optimizing the animation workflow, ensuring that the rig can accommodate any changes in the animation requirements without the need to start from scratch.
Furthermore, the process of adding bones and refining the armature contributes to the animator\"s toolkit by offering more granular control over the weight distribution and influence of the rig on the mesh. This is particularly important for achieving smooth, natural-looking movements and avoiding common pitfalls in character animation, such as unnatural deformations or rigidity in movements.
In summary, the addition of bones to an existing armature is a fundamental step in the evolution of a Blender project, enabling animators to push the boundaries of creativity and technical excellence in their work.
Step-by-Step Guide to Adding New Bones
To add new bones to an existing armature in Blender, follow these steps:
- Ensure you are in Object Mode, then select your armature and switch to Edit Mode.
- To add an unconnected bone, press Shift+A and choose Bone. This places a new bone at the 3D cursor\"s location.
- To connect a new bone to an existing one, select the new bone, then Shift+Select the bone you want to connect it to, press Ctrl+P, and choose \"Connected\".
- For extruding new bones from existing ones, select a bone, press E to extrude, then move your mouse to position the new bone, and click to confirm.
- Name your bones immediately after creation to stay organized. Access the operator panel at the bottom-left of the 3D viewport to name a new bone, or use the Bone Properties tab for renaming later.
- Enable \"Show Names\" in the Armature Data Properties panel to display bone names directly in the viewport, aiding in identification.
Linking armatures and bones to meshes is crucial for animation. Select both the mesh and armature in Object Mode, ensure the armature is active, then press Ctrl+P and choose \"With Automatic Weights\" for initial binding. Adjust weights as needed for precise control over mesh deformation.
Connecting New Bones to Existing Ones
To integrate new bones with existing armatures in Blender, there are primarily two methods. The first method involves adding a bone independently and then connecting it to an existing bone. After adding the new bone in edit mode using Shift+A, you can connect it to an existing bone by selecting the new bone, then Shift+selecting the existing bone, and using Ctrl+P to choose \"Connected\". This process parents the new bone to the existing bone, linking their movements.
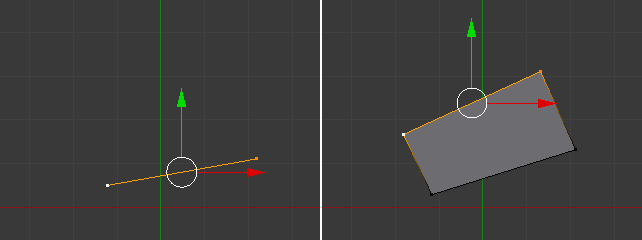
The second method is by extruding from an existing bone, which inherently creates a connected bone. Select the tip or body of an existing bone and press E to extrude a new bone. This new bone will be automatically connected to the existing structure, allowing for seamless movement and manipulation. Extruding can be constrained to specific axes by pressing E followed by X, Y, or Z, ensuring precise alignment and positioning of the new bone in relation to the existing armature.
These techniques ensure a coherent and efficient workflow when expanding armatures for complex animations, offering both flexibility and control in the rigging process.
_HOOK_
Extruding Bones from Existing Ones
Adding new bones to an existing armature in Blender is essential for detailed rigging and animation. Extruding bones from existing ones allows for the creation of complex skeletal structures. Here\"s how to do it:
- Enter Edit Mode and select the armature.
- Select the end of the bone from which you want to extrude a new bone.
- Press E to extrude and move your mouse to position the new bone.
- Click to set the position of the new bone. You can scale it as needed.
- Continue adding bones by repeating the extrusion process.
It\"s important to name and organize the new bones for easier animation and rigging processes. Extruding bones is similar to manipulating vertices; you can move, scale, rotate, and subdivide them to fit the model\"s needs.
Naming and Organizing Bones in Armatures
Naming and organizing bones within an armature in Blender is a crucial step for maintaining a well-structured and manageable rig, especially as complexity increases. Proper naming conventions and organization can significantly enhance the rigging and animation process by making it easier to identify, select, and manipulate bones.
- Naming Bones: Immediately after adding a bone, a panel appears in the bottom-left corner of the 3D viewport, allowing you to assign a name. It\"s essential to use descriptive names that reflect the bone\"s function or its position within the body (e.g., \"Arm_L\" for the left arm). If you miss the initial naming opportunity, you can always rename a bone by selecting it in edit mode and then entering a new name in the Bone Properties tab, identified by a small green bone icon.
- Displaying Names: To facilitate the selection and identification of bones, Blender allows the display of bone names directly in the 3D viewport. This is particularly helpful in complex armatures. Enable this feature by selecting the armature, going to the Armature Data Properties panel (represented by a small green stickman icon), and checking the \"Show Names\" option under Viewport Display.
- Organizing with Bone Layers: Blender\"s armature system supports organizing bones into layers, which can be toggled to display or hide groups of bones, aiding in managing complex rigs. This feature is accessible within the Armature Data Properties panel, where you can assign bones to different layers and switch between them to focus on specific parts of the rig.
- Using Collections for Organization: For additional organizational control, you can group bones and related objects into Collections. This is especially useful for large projects where you might want to separate different characters or rig components logically. Collections can be managed through the Outliner, where bones and objects can be dragged into new or existing collections.
Adhering to these naming and organizing practices not only streamlines the workflow but also makes collaboration with other artists more efficient, as it ensures that everyone can easily understand and navigate the rig.
Linking Armatures to Meshes for Animation
Linking armatures to meshes is a fundamental step in character animation within Blender. This process allows the armature to control the mesh, enabling realistic movements and poses. Follow these detailed steps to successfully link your armature to a mesh for animation purposes.
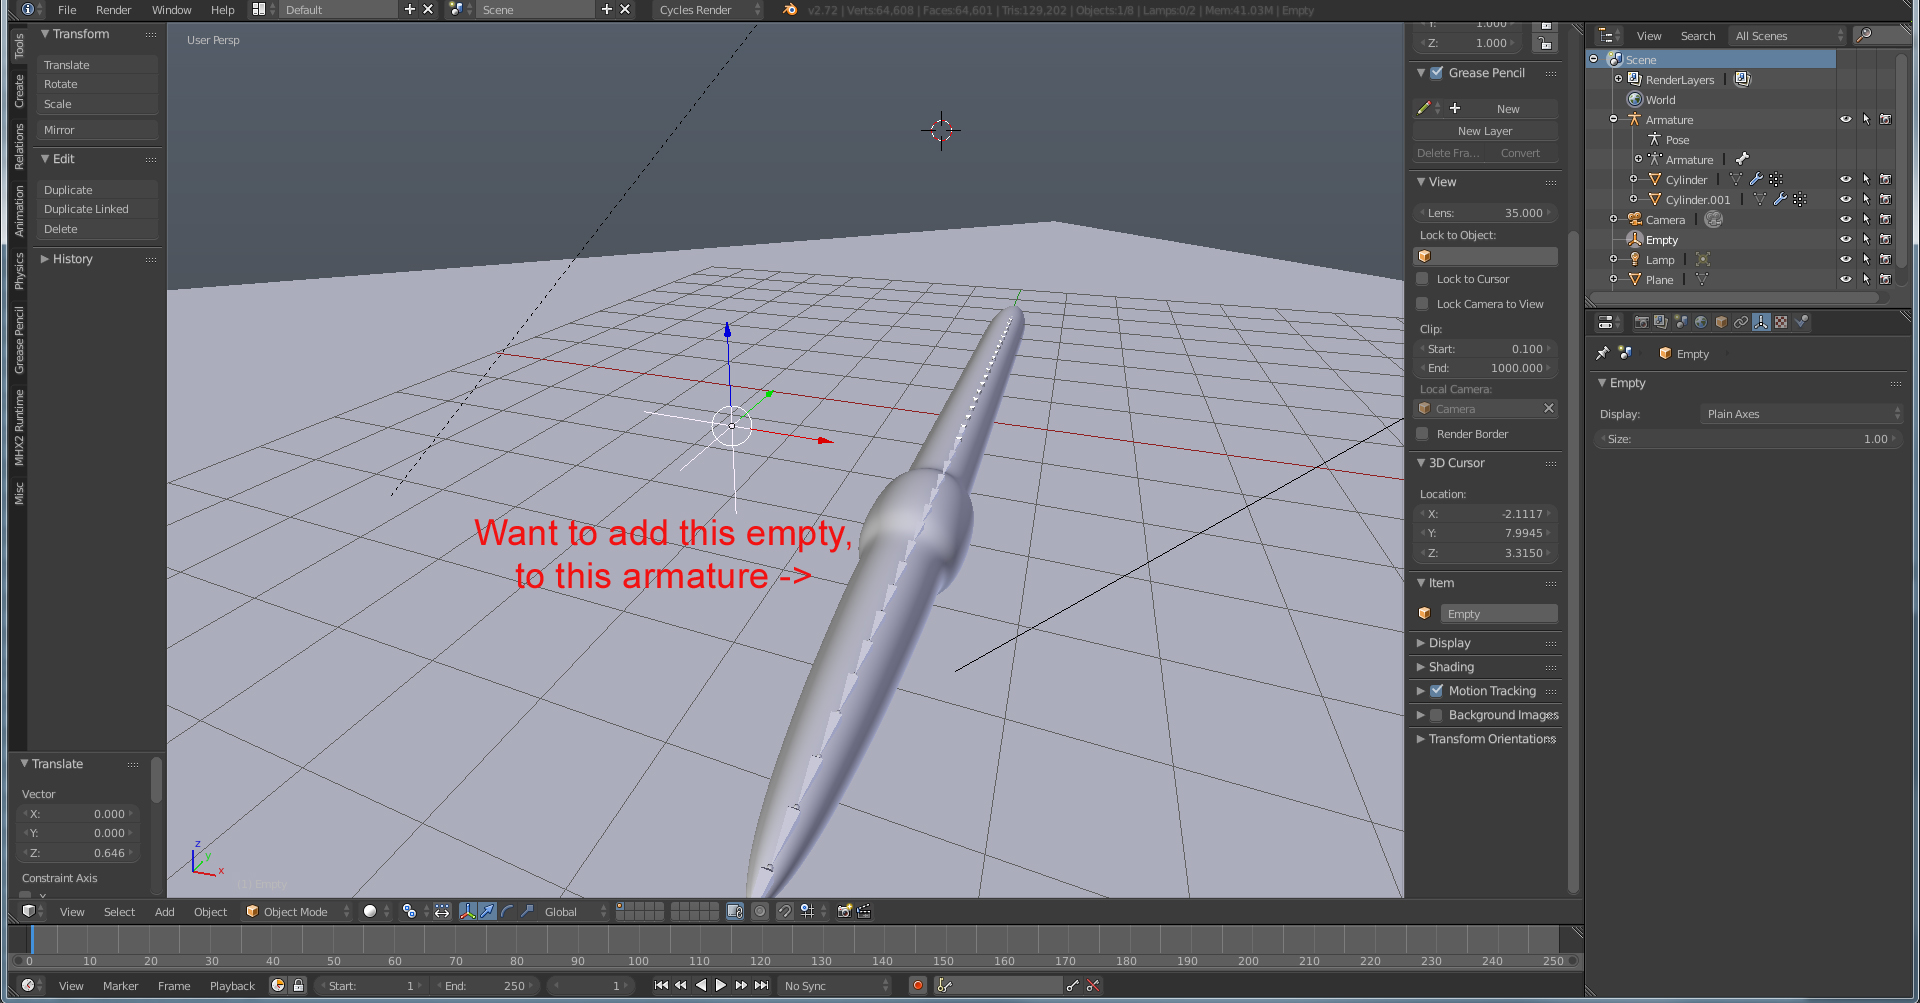
- Selecting the Mesh and Armature: Begin by selecting both the mesh object and the armature in Object Mode. This can be done by holding down the Shift key and clicking on both objects.
- Setting the Armature as the Active Object: Make sure the armature object is the active selection (usually indicated by a brighter outline) by selecting it last.
- Parenting the Mesh to the Armature: With both the mesh and the armature selected, press Ctrl + P to open the parenting menu. Choose \"With Automatic Weights\" from the options. This tells Blender to automatically generate weights based on the proximity of the mesh vertices to the bones, assigning influence accordingly.
- Testing the Link: After parenting, switch to Pose Mode by selecting the armature and changing the mode from the mode dropdown menu. Move, rotate, or scale the bones to see the mesh respond to these transformations. This is a good way to check that the mesh is correctly linked to the armature.
Adjusting Weights for Accurate Deformation:
- If you find that the deformation is not behaving as expected, you may need to adjust the weights manually. This can be done in Weight Paint mode, where you can paint on the mesh to increase or decrease the influence of specific bones.
- For precise control, you can also edit the weights directly in the Vertex Groups section of the mesh properties. Here, vertices can be assigned specific weights relative to different bones.
By carefully linking armatures to meshes and adjusting weights as necessary, you can achieve realistic and expressive animations in Blender. This process is essential for bringing your characters to life and creating dynamic animations for your projects.
Adjusting Bone Influence through Weight Painting
Adjusting bone influence in Blender through weight painting is a pivotal step in rigging, allowing you to define how much influence individual bones have on various parts of your mesh. Here\"s how you can fine-tune this process to achieve more realistic animations and deformations.
- Setting Up Vertex Groups: Ensure your mesh has vertex groups. In the Properties panel under Mesh Data > Vertex Groups, add a new group if none exists.
- Entering Weight Paint Mode: Select your object and switch to Weight Paint mode. This visualizes the mesh\"s weight distribution, where blue indicates no influence (weight of 0) and red indicates full influence (weight of 1).
- Painting Weights: Use the brush to paint weights onto the mesh. Adjust brush settings such as Weight, Radius, and Strength to control the influence.
- Assigning Weights to Bones: For armatures, each bone is associated with a vertex group. Parent your object to the armature and choose automatic weights, or manually paint weights for each bone.
- Selecting Bones in Weight Paint Mode: Enable selection of bones directly in Weight Paint mode to quickly switch between different vertex groups associated with each bone.
- Manual Weight Adjustments: For precise control, switch to Edit mode, select vertices, and manually adjust their weights in the Vertex Groups panel.
- Clearing and Normalizing Weights: To remove unwanted weights, select vertices in Edit mode and use the Remove From All Groups option. Normalize weights to ensure no vertex exceeds a total weight of 1, maintaining a balanced influence across groups.
- Using Automatic Weight Assignment: Blender can automatically assign weights based on bone proximity. For fine-tuning, you may adjust envelope distances and weights in the bone properties.
- Tips for Efficient Weight Painting: Utilize tools like mirroring weights across the X axis for symmetrical models, using gradient tools for smooth transitions, and employing vertex selection to isolate weight painting to specific areas.
Remember, weight painting is both an art and a science. It requires patience and practice to master, but understanding these fundamentals will greatly improve your rigging workflow and animation results.
Tips for Efficient Bone Addition and Rigging
Efficient bone addition and rigging in Blender are crucial for creating realistic animations and models. Here are some tips and techniques to streamline the process:
- Understanding Armatures and Bones: Armatures are the skeletons used for rigging, and bones are the elements that make up these armatures. In Object mode, you can add an armature by going to Add > Armature. Bones have a root, tip, and body, and can be added or extruded within an armature in Edit mode.
- Utilizing Edit and Pose Modes: Use Edit mode to add and adjust bones within an armature. Pose Mode is then used for animating these bones. Switching between these modes is done via the mode dropdown menu or the Tab key.
- Connecting and Extruding Bones: To add more bones to an armature, you can extrude from an existing bone by selecting it and pressing E, or add a new, unconnected bone with Shift+A. To connect bones, use Ctrl+P in Edit mode.
- Naming Bones: Keep your project organized by naming bones upon creation or later in the Bone Properties tab. Displaying bone names in the viewport can also help with identification and selection.
- Linking Armatures to Meshes: For a functional character rig, link your armature and mesh by selecting both in Object mode and pressing Ctrl+P to bind them with Automatic Weights, allowing the bones to influence the mesh during animation.
- Preparing Your Model: Ensure model normals face outward and position your mesh correctly in the scene. This preparation is key for successful rigging and deformation.
- Creating a Rigging Hierarchy: Start with a central root bone and extrude outward to create a hierarchical structure of bones for the body. Utilize X-ray mode to see bones through the mesh for easier placement and connection.
- Mirroring for Symmetry: For symmetrical models, create one side of the rig and then mirror it to the other side using Shift+D, S, X, and -1 to flip it. Ensure all bones are correctly connected and related in the Bone menu.
These steps and tips provide a foundation for effective rigging in Blender, enhancing both the rigging process and the final animation quality. Practice and experimentation are key to mastering these techniques.
_HOOK_
Common Pitfalls and How to Avoid Them
Adding bones to an existing armature in Blender is a crucial step in character rigging and animation, but it comes with its set of challenges. Being aware of common pitfalls and how to avoid them can streamline your workflow and enhance your projects.
- Ignoring Bone Orientation: When adding new bones, it\"s vital to pay attention to their orientation. Incorrect orientation can lead to animation problems. Ensure the root and tip are correctly positioned for seamless movement.
- Forgetting to Rename Bones: As armatures become complex, keeping track of each bone becomes essential. Always rename your bones after creation to maintain clarity and avoid confusion during animation.
- Improper Parenting: Not correctly parenting new bones to existing ones can lead to unexpected behavior during animation. Use the correct parenting options to ensure that bones move as intended.
- Overlooking Weight Painting: After linking armatures to meshes, the initial automatic weight assignment might not be perfect. Use weight painting to fine-tune the influence of bones on the mesh for more natural deformations.
- Neglecting Armature Layers: Utilize armature layers to organize and manage complex rigs. This helps in simplifying the animation process and makes it easier to work with multiple bones.
- Avoiding Non-Destructive Techniques: Remember that armatures allow for non-destructive animation, enabling you to go back to the original mesh shape at any point. Use this to your advantage for flexible rigging and animation workflows.
By avoiding these common pitfalls, you can enhance your Blender projects and create more effective and efficient animations.
Advanced Techniques and Best Practices
When adding bones to an existing armature in Blender, it\"s important to leverage advanced techniques and follow best practices to ensure efficient rigging and animation. These strategies can help optimize your workflow and enhance the overall quality of your projects.
- Use of Armature Layers: Organize your bones into different layers within the armature to manage complexity, especially in detailed rigs. This allows for easier selection and manipulation of bones related to specific parts of your model.
- Custom Bone Shapes: For better control and visualization, replace the default bone shapes with custom ones. This can be done by creating a mesh in the shape you desire, then setting it as the custom shape for the bone in the bone properties panel. This technique improves the rig\"s user interface and makes it more intuitive to manipulate.
- IK (Inverse Kinematics) Constraints: Implement IK constraints for limbs to simplify animation. IK allows for more natural movements with fewer keyframes by controlling a chain of bones with a target bone or empty object.
- Driver Automation: Use drivers to automate movements and transformations based on other properties. This can be particularly useful for facial rigging, where you want a control to influence multiple bones or properties.
- Corrective Shape Keys: For meshes that deform poorly at certain angles or positions, use corrective shape keys driven by bone positions. This ensures the mesh deforms correctly no matter how the bones are positioned.
- Layered Weight Painting: Start with automatic weights for a rough skinning pass, then refine the influence of bones on the mesh through weight painting. Use a combination of subtractive and additive painting to fine-tune how bones affect the mesh deformation.
- Non-Destructive Editing: Utilize non-destructive techniques, such as modifiers and constraints, to maintain flexibility in your rigging process. This approach allows for easy adjustments and iterations without permanently altering the base geometry or rig structure.
- Continuous Learning: Blender and its features are constantly evolving. Stay updated with the latest tools and techniques by engaging with the Blender community, tutorials, and documentation.
Remember, the key to successful rigging and animation in Blender lies in understanding the tools at your disposal and creatively applying them to solve unique challenges. Experimenting with different techniques and regularly practicing will greatly enhance your rigging skills and the quality of your animations.
Resources for Further Learning
Expanding your skills in adding bones to existing armatures in Blender can be greatly facilitated by accessing a variety of learning resources. Below are some curated resources that cater to both beginners and advanced users looking to deepen their understanding and proficiency in rigging and animation within Blender.
- Artisticrender Tutorials: Artisticrender offers in-depth guides on working with armatures, from creating and manipulating bones to linking armatures with meshes for animation. Their tutorials are perfect for understanding the fundamentals and advanced techniques in armature manipulation.
- Blender Studio\"s Blender 2.8 Fundamentals: The official Blender Studio provides a comprehensive video series on Blender 2.8 fundamentals, including rigging with armatures. These videos are ideal for visual learners who appreciate step-by-step guidance through video tutorials.
- YouTube Tutorials: YouTube hosts a vast array of tutorials for Blender users. Specific tutorials on adding bones to armatures can be found, offering visual aids and practical demonstrations to enhance learning. These resources cater to all skill levels, providing insights into both basic and complex rigging techniques.
- Blender Community Forums: Engaging with the Blender community through forums and discussion boards can be invaluable. Here, users can find answers to specific questions, share experiences, and learn from the challenges and solutions discovered by others in the community.
- Blender Official Documentation: For the most accurate and comprehensive information, the Blender Manual is an essential resource. It covers all aspects of Blender\"s functionality, including detailed sections on rigging and animation with armatures.
By leveraging these resources, you can significantly enhance your rigging and animation skills in Blender, moving from basic techniques to more complex and refined methods. Continuous learning and practice are key to mastering the art of adding bones to existing armatures and achieving professional-quality animation results.
READ MORE:
Conclusion: Enhancing Your Blender Projects
Adding bones to an existing armature in Blender is a crucial skill for anyone involved in 3D modeling, animation, or game development. Through the steps and best practices outlined in this guide, you\"re now equipped with the knowledge to effectively rig your characters and objects, making them ready for animation. Mastering these techniques opens up endless possibilities for bringing your digital creations to life.
Remember, the key to successful rigging and animation lies in understanding the relationship between your armature and mesh, practicing the art of weight painting for precise control over mesh deformation, and continuously exploring new and advanced techniques to refine your workflow.
- Start simple, focusing on the fundamentals of bone creation and manipulation, then gradually explore more complex rigging challenges.
- Engage with the Blender community through forums, tutorials, and resources to stay updated with the latest tips and tricks.
- Experiment with different rigging setups and constraints to discover what works best for your specific project needs.
- Practice regularly to develop intuition and efficiency in using Blender\"s powerful rigging and animation toolset.
In conclusion, the journey of learning to add and manipulate bones in Blender is ongoing and evolving. With dedication, practice, and the use of valuable resources, you can significantly enhance the quality and realism of your Blender projects. Embrace the learning process, and let your creative visions come to life through the art of rigging and animation.
Mastering the art of adding bones to existing armatures in Blender can significantly elevate your 3D modeling and animation projects, offering endless possibilities for creativity and precision. Embrace these techniques to bring your imaginative visions to life with ease and professionalism.