Topic blender unjoin: Discover the art of efficiently separating objects in Blender with our comprehensive guide on the unjoin feature, tailored for both beginners and seasoned artists.
Table of Content
- How do I unjoin vertices in Blender?
- Understanding Blender\"s Unjoin Function
- Step-by-Step Tutorial on Unjoining Objects
- Unjoining Objects by Selection
- Separating Objects by Material
- Separating Objects by Loose Parts
- Keyboard Shortcuts for Efficient Workflow
- YOUTUBE: How to Unjoin Objects in Blender Shorts
- Organizing Collections After Unjoining
- Common Issues and Solutions When Unjoining Objects
- Advanced Techniques: Boolean Operations and Modifiers
- Best Practices for Managing Complex Scenes
How do I unjoin vertices in Blender?
To unjoin vertices in Blender, you can follow these steps:
- Select the object containing the vertices you want to unjoin.
- Enter Edit Mode by pressing the Tab key or selecting Edit Mode from the Mode dropdown menu at the top of the Blender interface.
- Select the vertices you want to unjoin. You can use the A key to select all vertices, or individually select specific vertices by clicking on them while holding the Shift key.
- Once the vertices are selected, press the P key to access the Separate menu.
- From the Separate menu, choose \"By Selection\" to unjoin the selected vertices from the object. Alternatively, you can also choose other options like \"By Loose Parts\" if you have disconnected parts you want to separate into individual objects.
After following these steps, the selected vertices will be unjoined from the object and appear as a separate object in your Blender scene.
READ MORE:
Understanding Blender\"s Unjoin Function
Blender\"s unjoin function is a crucial tool for 3D artists, enabling the separation of previously combined objects or mesh parts. This function is essential for editing complex models, allowing artists to modify individual components without affecting the entire model. Understanding how to effectively unjoin objects can streamline your workflow and enhance your project\"s overall quality.
- Selecting Objects for Unjoining: Before unjoining, ensure you have correctly selected the object or mesh parts you wish to separate. This selection process is foundational for an accurate unjoin operation.
- Using the Separate Command: Blender provides a \"Separate\" command, accessible via the mesh menu in Edit Mode or by using the shortcut \"P\". This command offers multiple options for unjoining objects, including by selection, by material, or by loose parts.
- Separate by Selection: If you have specific vertices, edges, or faces selected, using \"Separate by Selection\" will create a new object from the selected elements.
- Separate by Material: This option separates the mesh into different objects based on the assigned materials, which is especially useful for models with multiple materials applied to a single mesh.
- Separate by Loose Parts: For objects composed of unconnected parts, \"Separate by Loose Parts\" divides these into individual objects, simplifying the manipulation of distinct elements.
Mastering the unjoin function in Blender not only aids in detailed model editing but also empowers you to manage your scenes more efficiently. Whether adjusting a single component or reorganizing a complex assembly, the unjoin feature is an indispensable part of the Blender toolkit.
Step-by-Step Tutorial on Unjoining Objects
Unjoining objects in Blender allows you to separate a single object into multiple parts. This tutorial will guide you through the process, ensuring you can efficiently work with complex models by simplifying them into manageable pieces.
- Preparation: Open your Blender project and select the object you wish to unjoin. Ensure you\"re in \"Object Mode\" for object-level operations or \"Edit Mode\" for mesh-level separations.
- Entering Edit Mode: Press \"Tab\" to switch to Edit Mode if you\"re working on separating parts of a single mesh. This mode allows you to select specific vertices, edges, or faces you want to separate.
- Selecting Mesh Parts: Use the mouse or keyboard shortcuts to select the part of the mesh you wish to separate. For multiple selections, hold \"Shift\" and right-click on additional elements.
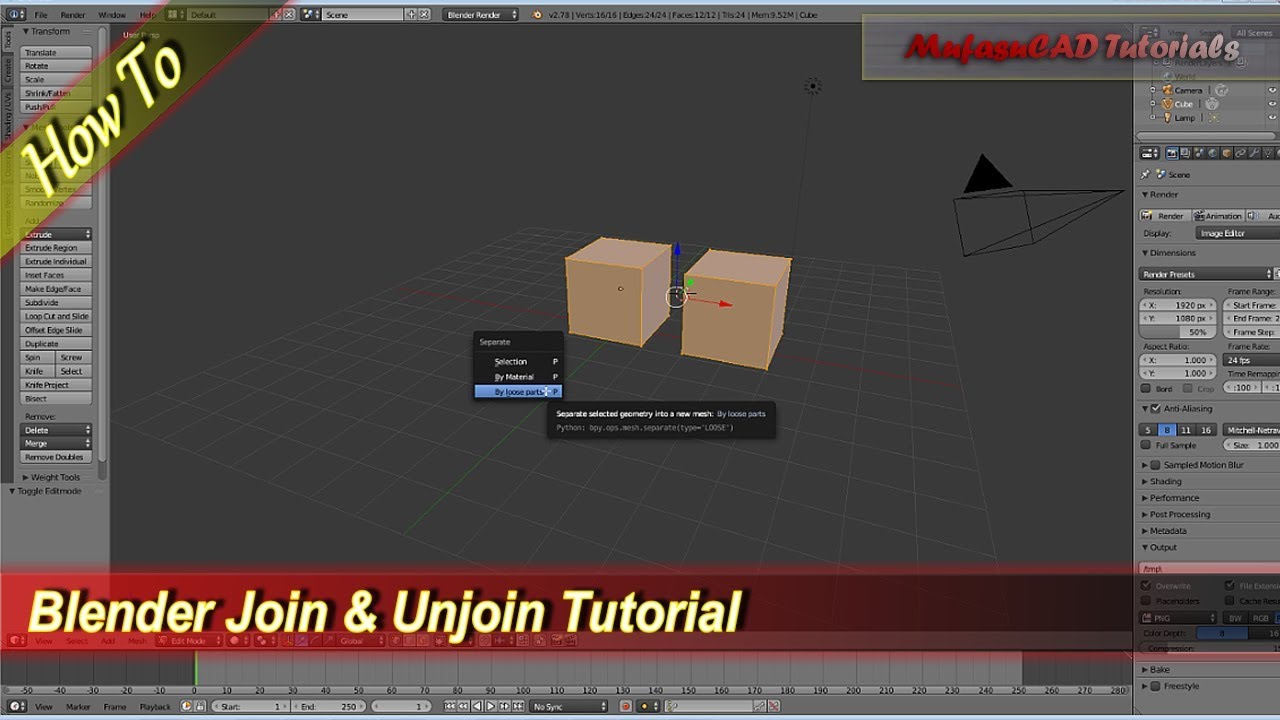
- Separating the Selection: Once your selection is made, press \"P\" to open the separate menu. You\"ll have options to separate by selection, by material, or by loose parts. Choose the one that suits your needs.
- Finalizing Separation: After choosing how to separate, Blender will create a new object from the selected parts. You can find and select this new object in \"Object Mode\". Rename and modify it as needed for your project.
- Repeating the Process: If you have more objects or mesh parts to separate, repeat the steps above for each. This systematic approach helps keep your project organized and manageable.
This step-by-step guide is designed to help you confidently navigate Blender\"s unjoin feature, making it easier to edit and refine your 3D models. With practice, these techniques will become second nature, enhancing your workflow and productivity.

Unjoining Objects by Selection
Unjoining objects by selection in Blender allows you to separate a specific part of your mesh from the rest, giving you flexibility and precision in your 3D modeling process. Follow these detailed steps to effectively unjoin objects by selection.
- Enter Edit Mode: Select the object you want to unjoin and press \"Tab\" to switch to Edit Mode. This mode enables you to select individual vertices, edges, or faces of your object.
- Select Mesh Parts: Use \"Vertex Select\", \"Edge Select\", or \"Face Select\" mode to highlight the parts of the mesh you wish to separate. You can make your selection using \"Shift\" + right-click for multiple selections or use box select (\"B\") for a broader selection area.
- Separate the Selection: Once you have made your selection, press \"P\" to open the separation menu. Choose \"Selection\" from the options. This action will separate the selected vertices, edges, or faces into a new, distinct object.
- Exit Edit Mode: After separating the selected parts, press \"Tab\" again to return to Object Mode. You will now see that the parts you separated have become an independent object that can be selected and edited on its own.
- Adjust and Rename: In Object Mode, select your new object. You can now adjust its position, rotation, and scale independently of the original mesh. Remember to rename your new object in the \"Object Properties\" panel for better organization and clarity in your project.
This method of unjoining objects by selection is particularly useful for creating detailed and complex models where precision is key. By mastering this technique, you can enhance your Blender workflow and bring your creative visions to life with greater control.

Separating Objects by Material
Separating objects by material in Blender is a useful technique for managing models with multiple materials. This method allows for efficient organization and editing of materials within a project. Follow these steps to separate objects based on their material assignments.
- Ensure Proper Material Assignments: Before separating, make sure your object has multiple materials assigned to the different parts you wish to separate.
- Enter Edit Mode: Select the object and press \"Tab\" to switch to Edit Mode. This mode lets you access the material assignments of your mesh.
- Select by Material: In Edit Mode, go to the \"Select\" menu and choose \"Select Linked\" > \"By Material\" to select all geometry assigned to a specific material. Repeat this for each material if needed.
- Separate the Selection: With the geometry of one material selected, press \"P\" and choose \"By Material\" from the separation options. Blender will create new objects for each material, separating them based on the material assignment.
- Review and Organize: Exit Edit Mode by pressing \"Tab\" again. You will now find each material-based selection as a separate object in the Outliner. Rename and organize these new objects to keep your project tidy and manageable.
This method is particularly useful for complex models with distinct parts that require different material properties. By separating objects by material, you can work more efficiently, applying unique textures, shaders, and edits to each part without affecting the others.

_HOOK_
Separating Objects by Loose Parts
Separating objects by loose parts in Blender is a powerful feature that allows you to divide a mesh into individual objects based on disconnected geometry. This is particularly useful for models imported from other sources or created through complex modeling processes that result in multiple unconnected parts within a single object.
- Ensure You\"re in Object Mode: Start by selecting the object you wish to separate. Make sure you are in Object Mode to apply operations on the object level.
- Switch to Edit Mode: Press \"Tab\" to switch to Edit Mode. This mode will enable you to select and manipulate the geometry of your object.
- Select All Geometry: Press \"A\" to select all vertices, edges, and faces of the object. Ensuring that all geometry is selected is crucial for separating by loose parts effectively.
- Separate by Loose Parts: With all geometry selected, press \"P\" to open the separation menu, then choose \"By Loose Parts\". Blender will automatically detect and separate all disconnected parts into their own objects.
- Return to Object Mode: Press \"Tab\" again to go back to Object Mode. You will now see each previously unconnected part as a separate object in the 3D viewport.
- Organize Your Scene: In the Outliner, you can rename and organize the newly created objects for better scene management. This step is especially important in complex projects to maintain workflow efficiency.
This method is invaluable for deconstructing complex models into manageable pieces, making it easier to edit, texture, and animate individual parts without affecting the whole. By understanding and utilizing the separate by loose parts feature, you can significantly enhance your Blender projects.

Keyboard Shortcuts for Efficient Workflow
Utilizing keyboard shortcuts in Blender can significantly speed up your workflow, especially when unjoining objects. Here’s a list of essential shortcuts to enhance your efficiency.
- Tab: Toggle between Object Mode and Edit Mode. Essential for selecting the right mode to unjoin objects.
- P: Open the separate menu in Edit Mode. This is your go-to shortcut for unjoining objects by selection, by material, or by loose parts.
- A: Select all or deselect all in Edit Mode. Useful for quickly selecting all geometry before unjoining by loose parts.
- B: Box select. Allows for selecting multiple vertices, edges, or faces by drawing a selection box around them.
- Shift + Right Click: Add to selection. This shortcut enables you to select multiple parts of a mesh individually.
- Ctrl + J: Join selected objects into one. While this is the opposite of unjoining, knowing how to reverse the process is equally important.
By mastering these shortcuts, you can streamline the process of unjoining objects in Blender, making it quicker and more intuitive to work on your projects.

How to Unjoin Objects in Blender Shorts
Looking for ways to unjoin from the chaos of everyday life? Watch this insightful video that shares practical tips on finding inner peace and creating balance in your life. Take a break and indulge in some valuable self-care!
How to Unjoin or Separate Objects in Blender 2.9 | Blender Tutorial | Beginner Tutorial | VFX Blend
Discover the power of separation and its impact on personal growth and relationships. Dive into this engaging video that explores the benefits of setting healthy boundaries and creating space for self-discovery. Learn how separation can ultimately lead to stronger connections and a happier, more fulfilling life.
Organizing Collections After Unjoining
After separating objects in Blender, organizing them into collections can significantly enhance your project\"s manageability. This section outlines how to effectively organize your unjoined objects into collections for a tidy and efficient workspace.
- Create New Collections: In the Outliner, right-click and select \"New Collection\" to create a collection for your separated objects. Name the collection appropriately to reflect the content or purpose of the objects it will contain.
- Assign Objects to Collections: Select the unjoined objects in the 3D viewport or Outliner. Then, drag and drop them into your new collection. Alternatively, you can press \"M\" while the objects are selected and choose the collection you want to move them to.
- Utilize Subcollections: For complex projects, consider creating subcollections within your main collections. This hierarchical organization allows for even finer control over your scene\"s structure, making it easier to manage large numbers of objects.
- Organize by Function or Material: Group objects by their function in your project or by the materials they share. This method simplifies the process of selecting and editing objects with similar attributes.
- Review and Adjust: Periodically review your collections and their contents. As your project evolves, you may need to reorganize or refine your collections to better suit your workflow.
By following these steps, you can maintain a well-organized Blender project, making it easier to navigate and work within your scene. Effective organization is key to a smooth and efficient 3D modeling process.

Common Issues and Solutions When Unjoining Objects
When working with Blender\"s unjoin features, users may encounter a variety of issues. Here are some common problems and their solutions to ensure a smooth workflow.
- Problem: Unjoin Operation Not Working: Ensure you are in Edit Mode and have correctly selected the parts you wish to unjoin. Remember, the \"P\" key is used to separate objects only in Edit Mode.
- Problem: Separated Objects Share the Same Origin Point: After unjoining, each new object may share the same origin point as the original. Use the \"Set Origin\" option in the object menu to adjust each new object\"s origin point individually.
- Problem: Difficulty Selecting Loose Parts: For complex models, selecting loose parts for separation can be challenging. Use \"L\" with your mouse cursor over a part to select linked vertices automatically, making it easier to separate specific parts.
- Problem: Unintended Parts Get Separated: This usually happens due to incorrect selection. Carefully review your selection before applying the separate command. Using selection modes like \"Vertex Select\", \"Edge Select\", or \"Face Select\" can help make precise selections.
- Problem: Losing Track of Separated Objects: After unjoining, it\"s easy to lose track of all the newly created objects. Use Blender\"s Outliner to organize and rename objects, helping you maintain a clear overview of your scene.
By understanding these common issues and their solutions, you can navigate the unjoining process in Blender with greater ease and efficiency, ensuring your 3D modeling projects progress smoothly.

Advanced Techniques: Boolean Operations and Modifiers
Boolean operations and modifiers in Blender offer advanced techniques for creating complex shapes and structures by unjoining or combining objects in sophisticated ways. These methods can significantly enhance your modeling workflow and allow for the creation of intricate designs with precision.
- Understanding Boolean Operations: Boolean operations use principles of set theory to combine or subtract mesh geometries. The primary Boolean operations are Union, Difference, and Intersection, each serving a distinct purpose in modeling.
- Applying Boolean Modifiers: To use a Boolean modifier, select your target object, then go to the Modifiers tab and add a Boolean modifier. Choose the operation type (Union, Difference, Intersection) and select the object to combine or subtract from the target object.
- Configuring the Modifier for Desired Results: Adjusting the Boolean modifier\"s settings can help resolve common issues such as non-manifold edges or unwanted artifacts. Experimenting with the solver (Exact or Fast) may improve the outcome.
- Combining Boolean with Other Modifiers: For more complex results, Boolean operations can be combined with other modifiers like Mirror, Bevel, or Subdivision Surface. This combination allows for the creation of detailed and complex models with less effort.
- Cleaning Up Geometry Post-Boolean: After applying Boolean operations, it\"s essential to clean up the geometry. This may involve merging vertices, removing doubles, or manually adjusting the mesh to ensure it\"s clean and efficient for further editing or animation.
Boolean operations and modifiers are powerful tools in Blender that can greatly expand your creative possibilities. By mastering these advanced techniques, you can achieve precise control over your models, allowing for the creation of complex and detailed designs that were previously difficult or time-consuming to make.

_HOOK_
READ MORE:
Best Practices for Managing Complex Scenes
Managing complex scenes in Blender can be challenging without a structured approach. Here are best practices to ensure your scenes remain organized and efficient, even as they grow in complexity.
- Use Layers and Collections: Organize your scene using layers and collections. This allows you to separate elements logically, such as environment, characters, and props, making it easier to manage visibility and selectivity during the editing process.
- Efficiently Use Modifiers: Apply modifiers judiciously to manage scene complexity. Non-destructive modifiers can be stacked to adjust effects without permanently altering the base geometry, offering flexibility in editing.
- Optimize Geometry: Keep your geometry as simple as possible. Use more complex geometry only where necessary to maintain performance and make the scene more manageable.
- Implement Proxies for High-Detail Models: For very high-detail models, consider using proxy models during the editing process. This can drastically reduce viewport lag and improve performance.
- Organize with Naming Conventions: Establish a consistent naming convention for objects, materials, and textures. This helps in quickly locating and identifying scene elements, especially in complex scenes.
- Utilize Blender\"s Outliner: Make extensive use of Blender\"s Outliner for scene organization. The Outliner lets you easily navigate complex scenes, enabling you to hide, lock, or select multiple objects at once.
- Save Incremental Versions: Regularly save different versions of your project. This practice not only secures your progress but also allows you to return to earlier stages of your work if needed.
By following these best practices, you can enhance your efficiency and reduce the complexity of managing detailed scenes in Blender. These strategies enable a smoother workflow and help maintain the clarity of your creative vision throughout the development process.
Mastering the art of unjoining objects in Blender opens up a world of creative possibilities. Whether you\"re refining models or organizing complex scenes, these techniques will elevate your 3D projects to new heights of professionalism and detail.