Topic blender knife project: Discover the power of Blender"s Knife Project tool, a game-changer for 3D artists seeking precision and efficiency in modeling. Learn to master cutting techniques with our comprehensive guide.
Table of Content
- How to use Knife Project in Blender for cutting objects?
- Understanding Blender Knife Project
- How to Access and Use Knife Project
- Knife Project Use Cases and Applications
- Step-by-Step Guide for Cutting Shapes
- YOUTUBE: Blender Secrets: Knife Project - New Method
- Advanced Tips for Knife Project
- Troubleshooting Common Knife Project Issues
- Knife Project Updates and Version Changes
- Comparing Knife Project with Other Cutting Tools
- Community Tips and Tricks for Knife Project
- Resources for Further Learning
How to use Knife Project in Blender for cutting objects?
Here is a step-by-step guide on how to use the Knife Project tool in Blender to cut objects:
- In Object Mode, select the objects that you want to cut.
- Switch to Edit Mode by pressing the Tab key.
- Select the cutting objects by either right-clicking on them individually or using a selection method, such as box selection (B key) or circle selection (C key).
- Go to the Tools panel on the left side of the 3D Viewport (press T if it\'s not visible).
- Under the \"Mesh Tools\" section, click on the \"Knife Project\" button.
- The selected cutting objects will be used to create a cut on the other selected objects.
- Press A to deselect everything and see the results.
This process allows you to easily create cuts or shapes on objects using other objects as the cutting tool. It is a useful feature in Blender for various modeling and sculpting tasks.
READ MORE:
Understanding Blender Knife Project
The Blender Knife Project tool is a powerful feature designed for precision cutting and shaping within the 3D modeling software, Blender. It allows users to cut through mesh objects with another object, acting like a knife, to create intricate designs and patterns effortlessly.
- How It Works: Knife Project uses a selected object to cut through another, based on the current view in the 3D viewport.
- Applications: Ideal for creating complex cutouts, engraving effects, or subtractive modeling techniques in your 3D projects.
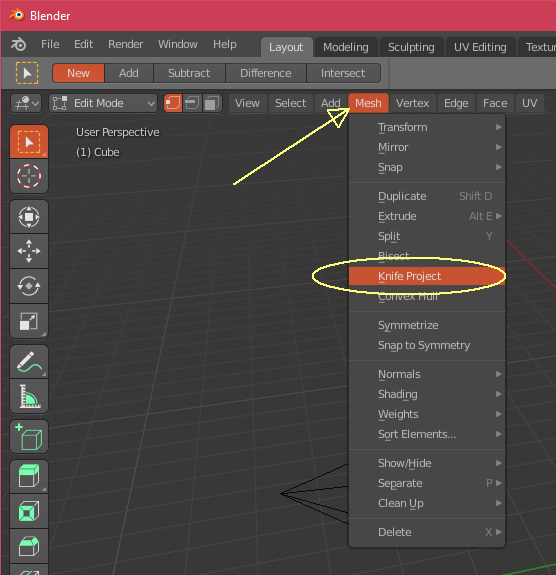
- Accessibility: Found within the Edit Mode, Knife Project is easily accessible from the tool shelf or by searching in the spacebar menu.
Using Knife Project effectively requires understanding its two main components: the \"cutter\" object and the \"target\" mesh. The process involves positioning the cutter object in front of the target, selecting both objects, and then executing the Knife Project command. This results in the cutter object\"s silhouette being projected onto and cutting through the target mesh, allowing for precise and creative modeling possibilities.
- Select your cutter object and target mesh.
- Position the cutter object to define the desired cut.
- Switch to Edit Mode on the target mesh and select Knife Project from the tools panel.
- Adjust parameters as needed to refine the cut.
Understanding these steps and the tool\"s versatility opens up a new realm of design possibilities in Blender, enhancing your modeling workflow with precision and efficiency.

How to Access and Use Knife Project
Accessing and using the Knife Project tool in Blender allows for precise cutting and modeling techniques. This step-by-step guide will help you master this powerful feature.
- Open Blender and select your target mesh by going to Object Mode.
- Switch to Edit Mode (Tab key) where you want to apply the Knife Project.
- Import or create the object you wish to use as a cutting tool.
- Position the cutter object above or in front of the target mesh to align with the desired cutting direction.
- Select the cutter object first, then hold Shift and select the target mesh to ensure both are selected.
- With both objects selected, go to the Tool Shelf on the left side of the 3D viewport, find the Knife Project button under the Mesh Tools tab. If the Tool Shelf is hidden, press T to reveal it.
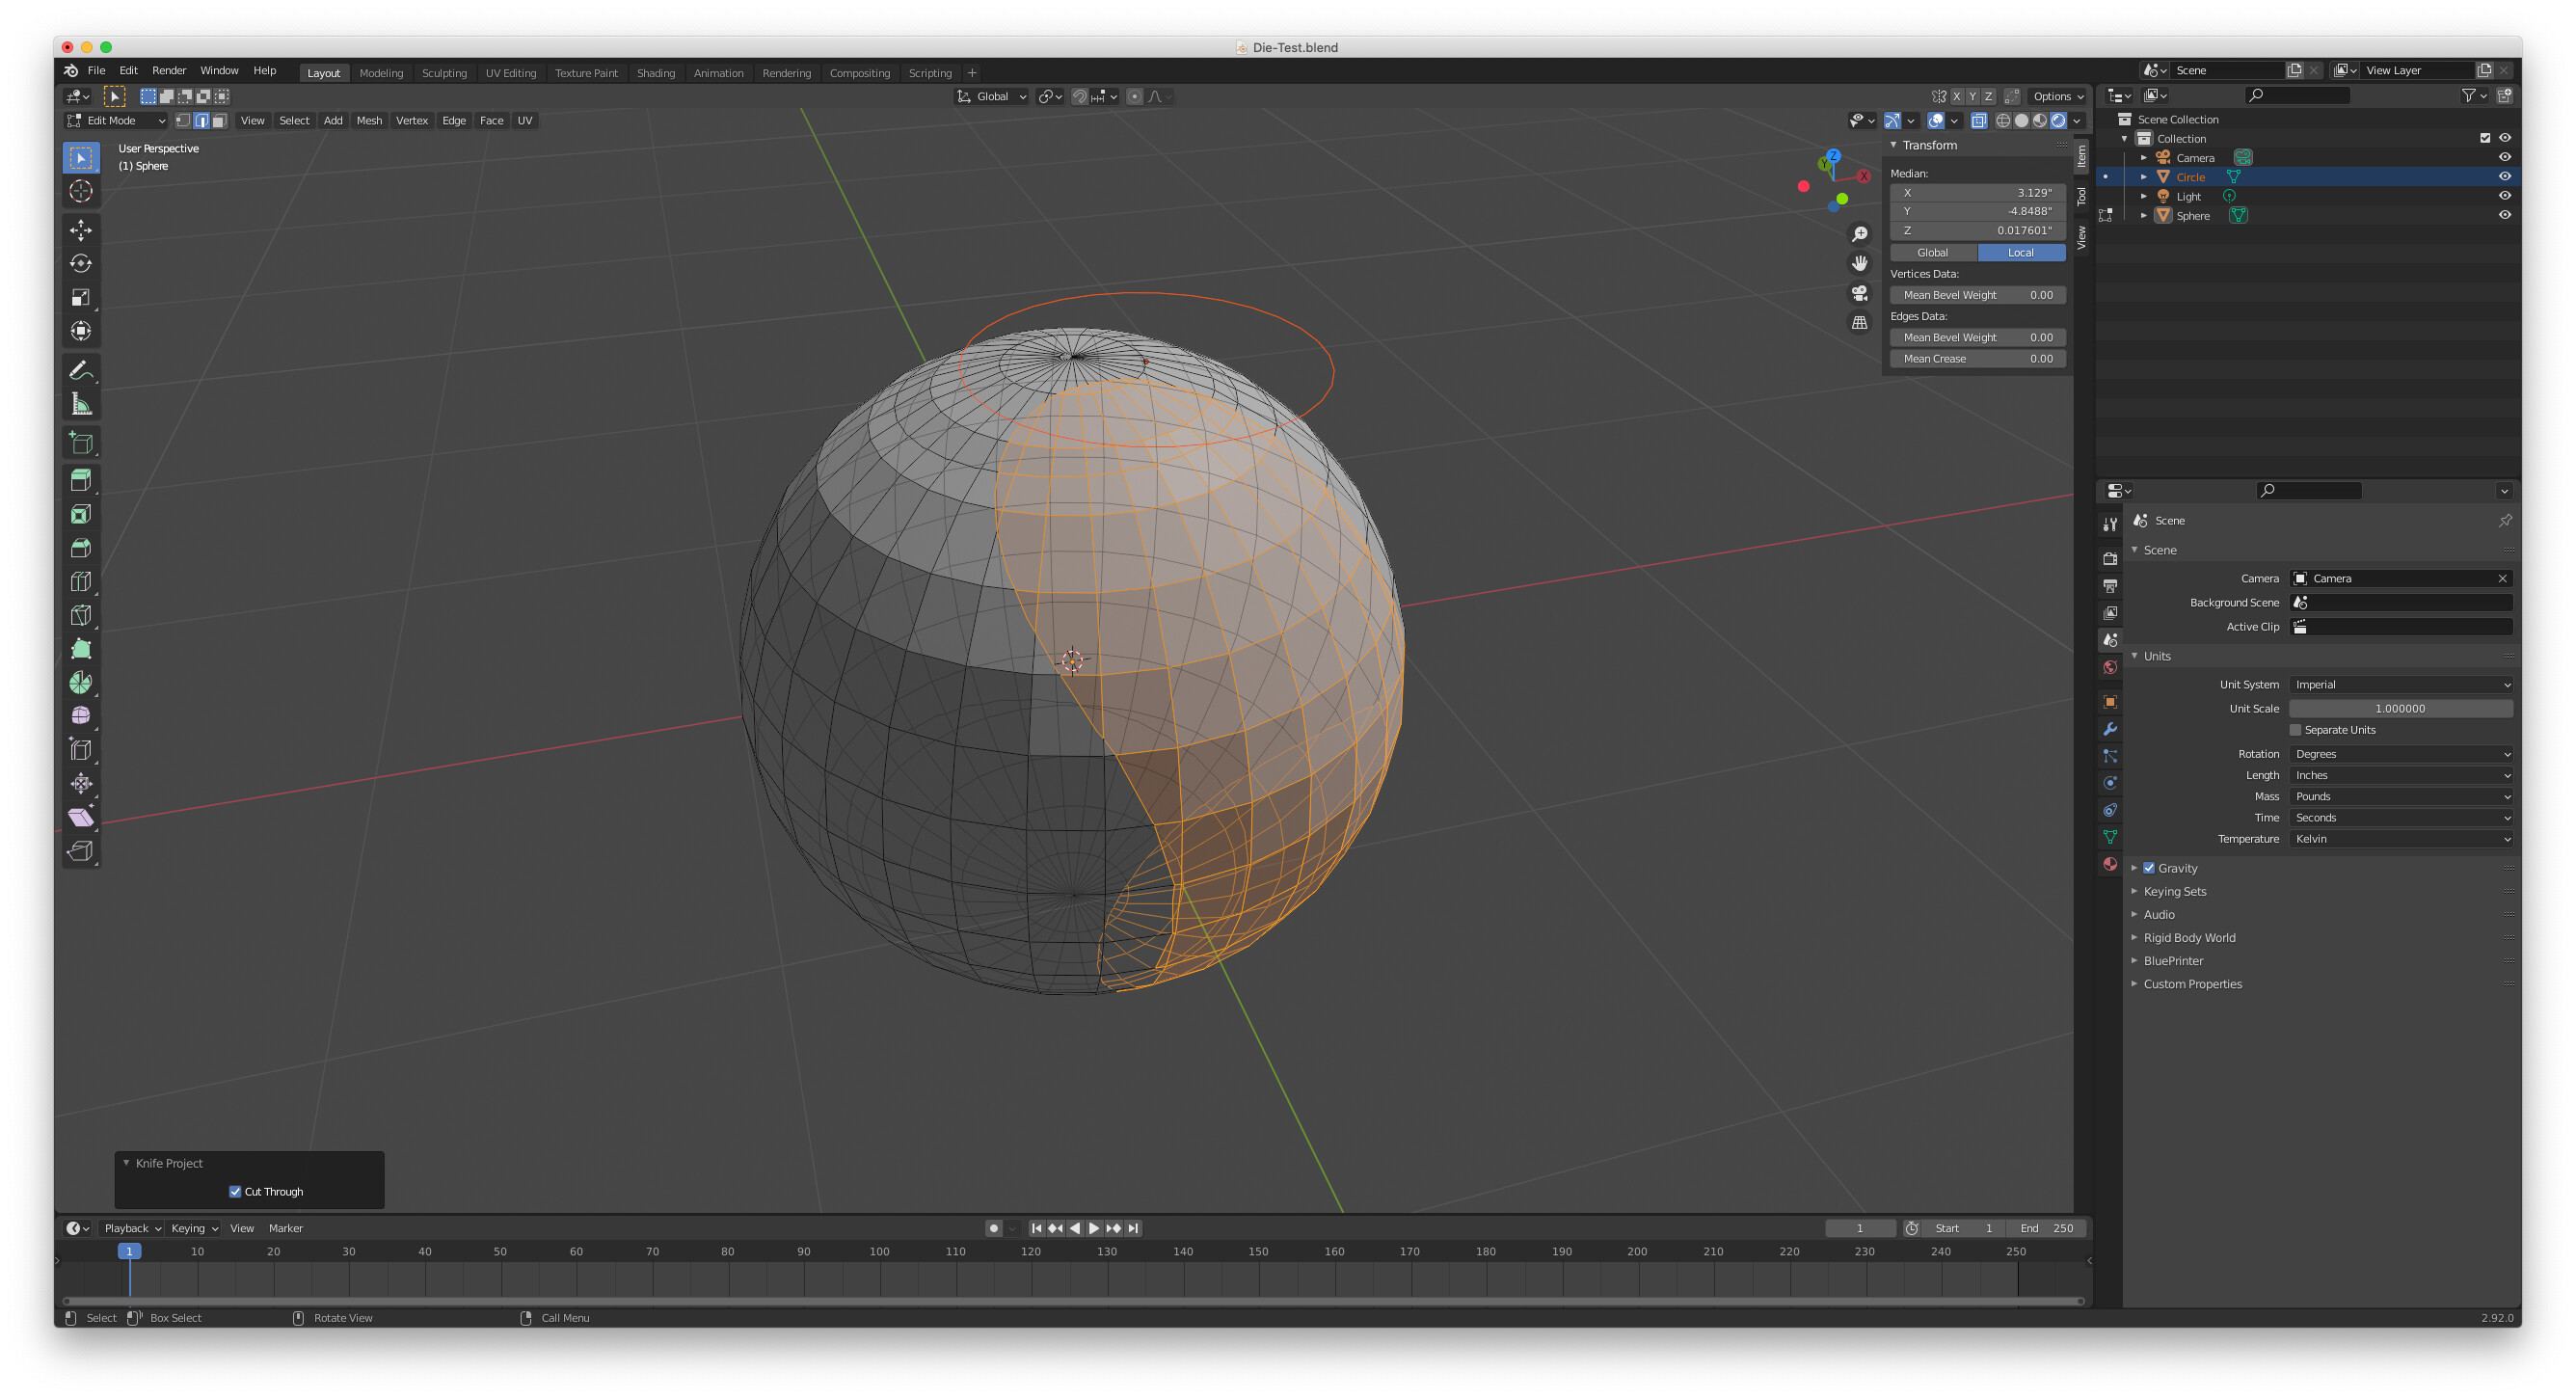
- Click on \"Knife Project\". For more options, look in the Operator panel at the bottom of the Tool Shelf, where you can choose to cut through and other settings.
Using Knife Project, you can create detailed cutouts, patterns, or modify shapes within your 3D models with precision. This tool is particularly useful for intricate designs or when needing to subtract specific areas from your mesh accurately. Remember to adjust the view angle before applying Knife Project, as the tool cuts based on the current viewport perspective, allowing for creative control over the cut direction and depth.
- Tip: For complex shapes, ensure your cutter object is well-defined and properly aligned with the target mesh.
- Note: Knife Project works best with clean geometry and may require cleanup of vertices or edges post-operation.
Knife Project Use Cases and Applications
Blender\"s Knife Project tool is versatile, serving various applications across 3D modeling, animation, and design. Its precision cutting capabilities enable users to explore creative avenues and achieve detailed outcomes.
- Creating Holes and Windows: Perfect for architectural modeling, such as cutting windows and doors in buildings.
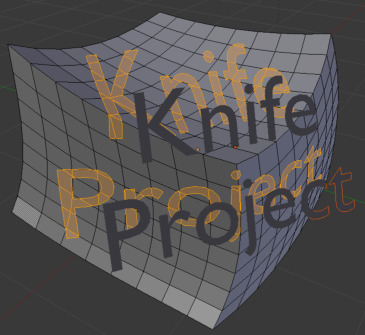
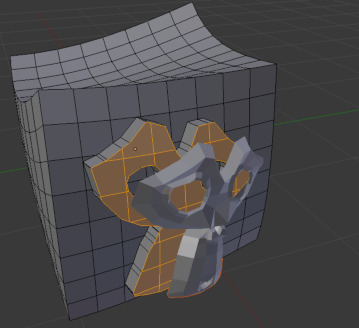
- Engraving Details: Engrave text or patterns on surfaces, ideal for logos, designs, or decorative elements on 3D models.
- Subtractive Modeling: Easily subtract one shape from another to create complex geometries or interlocking parts.
- Character Modeling: Cut out shapes for eyes, mouths, or other detailed features in characters or creatures.
- Technical Parts: Create notches, holes, and cutouts in mechanical parts for engineering or product design.
These applications highlight the Knife Project\"s utility in enhancing the precision and creativity of 3D projects. Whether for professional use or hobbyist projects, understanding how to leverage this tool can significantly impact the quality and detail of your work.
- Begin by conceptualizing the design or feature you wish to create using the Knife Project tool.
- Prepare your cutter object accordingly, keeping in mind its orientation and shape will directly influence the cut.
- Apply the Knife Project technique following the steps for access and usage to achieve your desired outcome.
Embracing Knife Project\"s capabilities can transform your approach to 3D modeling, opening up new possibilities for innovation and design complexity.

Step-by-Step Guide for Cutting Shapes
Blender\"s Knife Project tool is versatile, serving various applications across 3D modeling, animation, and design. Its precision cutting capabilities enable users to explore creative avenues and achieve detailed outcomes.
- Creating Holes and Windows: Perfect for architectural modeling, such as cutting windows and doors in buildings.
- Engraving Details: Engrave text or patterns on surfaces, ideal for logos, designs, or decorative elements on 3D models.
- Subtractive Modeling: Easily subtract one shape from another to create complex geometries or interlocking parts.
- Character Modeling: Cut out shapes for eyes, mouths, or other detailed features in characters or creatures.
- Technical Parts: Create notches, holes, and cutouts in mechanical parts for engineering or product design.
These applications highlight the Knife Project\"s utility in enhancing the precision and creativity of 3D projects. Whether for professional use or hobbyist projects, understanding how to leverage this tool can significantly impact the quality and detail of your work.
- Begin by conceptualizing the design or feature you wish to create using the Knife Project tool.
- Prepare your cutter object accordingly, keeping in mind its orientation and shape will directly influence the cut.
- Apply the Knife Project technique following the steps for access and usage to achieve your desired outcome.
Embracing Knife Project\"s capabilities can transform your approach to 3D modeling, opening up new possibilities for innovation and design complexity.
_HOOK_
Blender Secrets: Knife Project - New Method
Discover the captivating world of secrets as you dive into this intriguing video. Unveil hidden truths, untold stories, and surprising revelations that will keep you mesmerized till the very end. Don\'t miss out on this captivating journey of unraveling secrets!
Blender Knife Project Updated Since 2.93.4
Get ready to be blown away by the updated version of this incredibly informative video! Packed with fresh and valuable insights, this updated release promises to provide you with the latest knowledge, tips, and strategies that you won\'t find anywhere else. Don\'t miss out on this opportunity to level up your knowledge!
Advanced Tips for Knife Project
The Blender Knife Project tool is a powerful feature for cutting shapes into your models. Here are some advanced tips to help you make the most of it:
- Use Orthographic Views: For more precise cuts, switch to an orthographic view (front, side, or top) before using the Knife Project. This ensures that the projection is perfectly flat and reduces distortion.
- Custom Cutter Shapes: Don’t limit yourself to basic shapes. Create custom cutter objects with intricate designs to project complex patterns onto your models.
- Multiple Cutters: You can use multiple cutter objects at once by selecting them all with your target object last. This allows for complex cutting operations in a single operation.
- Snapping: Enable snapping to vertices, edges, or faces on your target object to align your cutter precisely before projecting. This is especially useful for architectural modeling and mechanical parts.
- Cutting Through: If you want to ensure the cutter goes through the entire model, extend the cutter geometry beyond the target object. This guarantees a complete cut regardless of the target object’s thickness.
- Project from View: Use the “Project from View” option to cut shapes based on your current camera angle. This method offers unique perspectives for creating cuts, especially for artistic and abstract designs.
- Clipping and Cleaning: After projecting, you may have unwanted vertices or edges. Use Blender’s cleanup tools, like \"Limited Dissolve\" and \"Delete Loose\", to remove unnecessary geometry and keep your model tidy.
- Non-Destructive Workflow: Consider using the Boolean modifier with your cutter objects for a non-destructive workflow. This allows you to adjust or animate the cutter object without permanently affecting the target model.
- Layer Management: Organize your cutter objects on separate layers or collections. This keeps your scene organized and simplifies selecting and hiding cutters when not in use.
- Experiment with Materials: Apply different materials to your cutter objects for visualization purposes. This doesn’t affect the cutting process but can help in organizing and differentiating multiple cutters in complex scenes.
By incorporating these advanced tips, you can enhance your modeling projects, increase efficiency, and unlock new creative possibilities with the Knife Project tool in Blender.
Troubleshooting Common Knife Project Issues
Working with Blender\"s Knife Project tool can sometimes lead to unexpected results or challenges. This section aims to address some of the most common issues users encounter and provide solutions to overcome them, ensuring a smooth modeling process.
- Knife Project Not Cutting: Ensure both the cutter object and the target mesh are in the same layer and visible. Also, check if the cutter object is properly aligned in front of the target mesh in the view you are projecting from.
- Incomplete Cuts: This often happens if the cutter object doesn\"t fully intersect with the target mesh. Make sure the cutter extends beyond the target mesh on all sides in the view you\"re using for the projection.
- Unexpected Results: If the operation doesn\"t produce the expected cut, double-check the orientation of your view. Knife Project uses the current view for projection, so adjusting your viewpoint to orthographic (by pressing Numpad 5) might help achieve more precise cuts.
- Difficulty with Complex Shapes: For complex or detailed cuts, break down the cutter object into simpler parts and perform multiple Knife Projects. This approach can provide more control over the cutting process.
- Objects Not Selected Correctly: Remember, the object you want to cut must be active (slightly brighter outline in the viewport), and the cutter object must be selected as well. If multiple objects are involved, ensure the correct objects are selected before executing the Knife Project.
Advanced Tips:
- For precision cutting, use the snapping feature to align your cutter object accurately.
- Utilize layers to separate complex scenes and focus on the Knife Project without distractions.
- Experiment with different cutter shapes for creative effects, such as text or custom designs.
By understanding these common issues and applying the suggested solutions, you can master the Knife Project tool in Blender, enabling you to create intricate designs and enhance your 3D modeling projects.
Knife Project Updates and Version Changes
Blender\"s development team is constantly working to improve and enhance its features, including the Knife Project tool. With each new version, users can expect updates that refine usability, increase performance, and introduce new functionalities. Here’s a look at some notable updates and changes to the Knife Project tool across different Blender versions.
- Improved Precision: Recent updates have focused on enhancing the precision of cuts, especially when dealing with complex models and intricate designs. This allows for cleaner, more accurate project results.
- User Interface Enhancements: The Knife Project tool has seen interface improvements, making it more intuitive and easier to access within Blender\"s modeling workflow. These changes aim to streamline the cutting process, reducing the learning curve for new users.
- Performance Optimizations: Optimizations in the latest versions have significantly reduced the computational load, resulting in faster processing times for Knife Project operations, even with highly detailed models.
- Increased Compatibility: Updates have also focused on ensuring the Knife Project tool works seamlessly with other Blender features and tools, enhancing its versatility in various modeling tasks.
Future Updates:
- Continuous refinement of the algorithm to handle more complex shapes and materials, improving the overall efficiency and effectiveness of the tool.
- Further integration with Blender\"s simulation and animation tools, opening up new possibilities for dynamic cuts and real-time modeling feedback.
- Enhanced customization options, allowing users to save presets for frequently used settings, streamlining their workflow.
Blender\"s community-driven development approach ensures that the Knife Project tool will continue to evolve, reflecting the needs and feedback of its user base. Stay tuned to the official Blender release notes for the most up-to-date information on Knife Project updates and version changes.
Comparing Knife Project with Other Cutting Tools
The Knife Project tool in Blender is a powerful feature for making precise cuts or holes in a model based on the projection of another object. However, it\"s just one of several cutting tools available in Blender, each with its own strengths and ideal use cases. Understanding how Knife Project compares with other cutting tools can help users choose the most effective tool for their specific needs.
- Knife Tool: The Knife tool allows for freehand cuts on a mesh by drawing a line across it. Unlike Knife Project, which uses an object to define the cut, the Knife tool is manually controlled, offering more freeform cuts but requiring a steadier hand and more time to achieve precise results.
- Boolean Modifier: The Boolean modifier uses another object to add, subtract, or intersect with the target mesh, creating complex shapes and cuts. While Knife Project is excellent for flat projections, the Boolean modifier excels at creating volumetric cuts and joins, offering more dimensional control over the cutting process.
- Bisect Tool: The Bisect tool slices a mesh along a plane defined by the user, dividing it into two parts. This tool is simpler and more straightforward than Knife Project but lacks the ability to use complex cutter shapes for detailed projection cutting.
Comparison Table:
| Tool | Use Case | Precision | Complexity |
| Knife Project | Projection cutting, intricate designs | High | Medium-High |
| Knife Tool | Freeform cuts, quick edits | Medium | Low |
| Boolean Modifier | Volumetric cutting, complex shapes | High | High |
| Bisect Tool | Straight cuts, dividing meshes | Medium | Low |
Each tool has its niche, and the choice between them depends on the specific requirements of the project, such as the complexity of the cut, the desired level of precision, and the time available for the task. By leveraging the strengths of each tool, Blender users can achieve precise and efficient modeling results.
Community Tips and Tricks for Knife Project
The Blender community is a treasure trove of insights and ingenious methods for leveraging the Knife Project tool to its fullest potential. Here are some tips and tricks shared by experienced users that can help you navigate common challenges and enhance your workflow.
- Use Orthographic View: Switching to orthographic view (Numpad 5) before using Knife Project can help ensure your cuts are precisely where you intend them to be, as this view eliminates perspective distortion.
- Clear Cutter Geometry: After using an object as a cutter, remember to remove any unnecessary geometry or vertices that may interfere with future projects. This keeps your scene clean and your file sizes manageable.
- Multiple Cutter Objects: For complex cutting operations, consider using multiple simpler objects as cutters instead of one complex object. This can provide more control and reduce the chance of errors.
- Custom Cutter Shapes: Create custom cutter shapes tailored to your specific needs. This can include text for logos or unique patterns for architectural details, giving you personalized cutting options beyond basic shapes.
- Use Layers: Organizing your cutter objects and target meshes on separate layers can streamline the selection process, especially in complex scenes, allowing for more efficient use of the Knife Project tool.
Advanced Techniques:
- Experiment with combining Knife Project cuts with modifiers like Solidify or Subdivision Surface to add depth and complexity to cuts without additional modeling effort.
- For intricate designs, consider using Knife Project in conjunction with the Shrinkwrap modifier to project cuts onto curved or irregular surfaces accurately.
- Utilize Blender\"s scripting capabilities to automate repetitive Knife Project tasks, saving time on large projects or when producing multiple variations of a design.
By incorporating these community-backed tips and tricks into your use of Blender\"s Knife Project tool, you can elevate your modeling projects, streamline your workflow, and unlock creative possibilities that go beyond the basics.
_HOOK_
READ MORE:
Resources for Further Learning
Expanding your knowledge and skills in Blender, particularly with tools like the Knife Project, is a journey that benefits greatly from a variety of learning resources. Below are some types of resources that can help deepen your understanding and proficiency in 3D modeling with Blender:
- Official Blender Tutorials: Blender.org provides a comprehensive collection of tutorials and documentation that cover everything from the basics to more advanced techniques, including the use of the Knife Project tool.
- Online Courses: Platforms like Udemy, Coursera, and LinkedIn Learning offer structured courses on Blender for all skill levels. These courses often include sections on specific tools and techniques, including modeling and cutting tools.
- YouTube Channels: Many experienced Blender artists and educators share their knowledge through YouTube tutorials. Channels such as Blender Guru, CG Geek, and Ducky 3D offer tutorials that range from beginner to advanced projects, including tips on using the Knife Project effectively.
- Blender Community Forums: Participating in forums like Blender Artists or the Blender subreddit can provide access to a community of users who share insights, answer questions, and offer feedback on projects.
- Books: There are several comprehensive guides and reference books available that cover Blender in depth. These resources often provide step-by-step instructions for tools like the Knife Project, along with project-based learning to apply your skills.
Combining these resources with practice and experimentation in Blender will help you master the Knife Project tool and enhance your overall 3D modeling skills. Remember, the key to learning Blender is persistence and the willingness to explore and try new techniques.
Mastering Blender\"s Knife Project tool unlocks a world of creative possibilities in 3D modeling. Dive into our comprehensive guide to enhance your skills, streamline your workflow, and bring your most intricate designs to life with precision and ease.