Topic blender character sculpting: Embark on a journey through the world of Blender character sculpting, where creativity meets technology. This guide illuminates the path for artists and designers eager to master 3D modeling, offering insights into tools, techniques, and transformative storytelling through digital sculpture.
Table of Content
- Essentials of Sculpting in Blender
- Character Modeling Tips
- Advanced Sculpting Techniques
- Character Modeling Tips
- Advanced Sculpting Techniques
- What tools are commonly used for blender character sculpting?
- YOUTUBE: Blender Sculpting Tutorial for Beginners - Stylized Head Sculpt Tutorial
- Advanced Sculpting Techniques
- Introduction to Blender Character Sculpting
- Understanding the Blender Sculpting Workspace and Tools
- Mastering Dynamic Topology for Detailed Sculpting
- Utilizing Masking and Brush Techniques
- Step-by-Step Guide to Character Modeling in Blender
- Advanced Techniques: Topology, Retopology, and Texturing
- Creating Realistic Characters: From Base Mesh to Final Sculpt
- Animating Your Sculpted Characters
- Tips for Efficient Workflow and Common Pitfalls to Avoid
- Community and Resources for Further Learning
Essentials of Sculpting in Blender
Dedicated Workspace and Tools
Blender\"s sculpting environment is tailored for organic modeling, featuring over 20 brush types, multi-res support, dynamic topology, and mirrored sculpting for efficient and creative sculpting processes.
Dynamic Topology
Dynamic topology, or dyntopo, allows for real-time tessellation, adding or removing details on the fly, offering artists the flexibility to refine their sculptures without constraints.
Masking Techniques
Masking is invaluable for isolating parts of your mesh, enabling detailed sculpting on complex models by hiding or protecting areas from unwanted modifications.

READ MORE:
Character Modeling Tips
- Regularly check your model for flipped normals, overlapping vertices, or non-manifold geometry to ensure a clean, efficient mesh.
- Experiment with UV mapping and texturing to bring your character to life, optimizing UV layout to minimize stretching and distortion.
- Focus on rigging and weight painting to create a functional skeleton for your character, enhancing realism through refined skinning and bone influence.
- Understand keyframes and use the timeline for animation, applying the principles of animation to create natural, engaging character movements.

Advanced Sculpting Techniques
Topology and Retopology
- Strategic use of topology guides, including edge flow and landmarks, ensures optimal deformations and articulations.
- Retopology is critical for converting high-detail sculpts into animation-ready models, emphasizing joint loops and finishing touches for realism.
Realistic Character Workflow
Starting with a base mesh facilitates the sculpting of realistic characters, focusing on proportions, shapes, and topology. The inclusion of Face Sets and UV maps early on aids in the sculpting process, allowing for detailed texturing and shading.
Clothing Sculpting
Sculpting clothes directly on characters, rather than simulating them, can offer practical solutions for small teams, enabling detailed, realistic apparel for characters.
Blender character sculpting is a multifaceted process that blends artistic creativity with technical proficiency. By mastering these tools and techniques, artists can unlock the full potential of Blender for creating stunning, lifelike characters.

Character Modeling Tips
- Regularly check your model for flipped normals, overlapping vertices, or non-manifold geometry to ensure a clean, efficient mesh.
- Experiment with UV mapping and texturing to bring your character to life, optimizing UV layout to minimize stretching and distortion.
- Focus on rigging and weight painting to create a functional skeleton for your character, enhancing realism through refined skinning and bone influence.
- Understand keyframes and use the timeline for animation, applying the principles of animation to create natural, engaging character movements.
Advanced Sculpting Techniques
Topology and Retopology
- Strategic use of topology guides, including edge flow and landmarks, ensures optimal deformations and articulations.
- Retopology is critical for converting high-detail sculpts into animation-ready models, emphasizing joint loops and finishing touches for realism.
Realistic Character Workflow
Starting with a base mesh facilitates the sculpting of realistic characters, focusing on proportions, shapes, and topology. The inclusion of Face Sets and UV maps early on aids in the sculpting process, allowing for detailed texturing and shading.
Clothing Sculpting
Sculpting clothes directly on characters, rather than simulating them, can offer practical solutions for small teams, enabling detailed, realistic apparel for characters.
Blender character sculpting is a multifaceted process that blends artistic creativity with technical proficiency. By mastering these tools and techniques, artists can unlock the full potential of Blender for creating stunning, lifelike characters.

_HOOK_
What tools are commonly used for blender character sculpting?
When it comes to Blender character sculpting, there are several tools that are commonly used to help artists bring their creations to life. Some of the key tools include:
- Sculpt Mode: This mode allows artists to sculpt and manipulate the geometry of their character using brushes and tools similar to traditional sculpting techniques.
- Dyntopo: Dynamic Topology is a feature in Blender that dynamically adjusts the topology of the mesh as you sculpt, allowing for more detailed and intricate designs.
- Clay Strips and Crease Brush: These brushes are commonly used for adding volume and defining edges on the character model.
- Grab and Inflate Brushes: These brushes are essential for adjusting the overall shape and form of the character model.
- Masking Tools: Masking allows artists to isolate specific areas of the mesh for targeted sculpting without affecting the rest of the model.
- Multi-Resolution Modifier: This modifier is useful for refining the sculpted details of the character model at different levels of resolution.
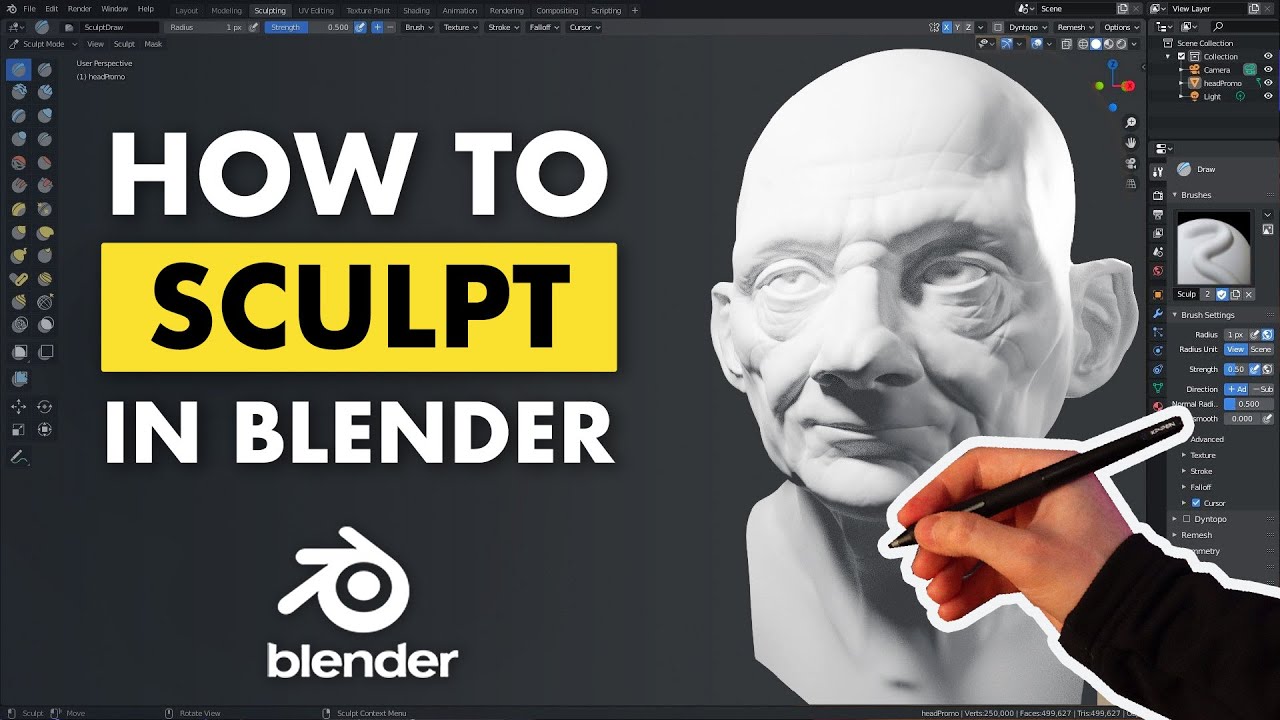
Blender Sculpting Tutorial for Beginners - Stylized Head Sculpt Tutorial
Tutorial: \"Discover step-by-step instructions and expert tips in this engaging tutorial video. Unlock new skills and knowledge easily as you follow along with clear demonstrations and explanations. Watch now!\" Guide: \"Let this insightful guide lead you through the complexities of the topic, offering valuable advice and recommendations that will elevate your understanding and experience. Navigate with confidence by watching this comprehensive video guide.\"
Sculpting in Blender: A Complete Beginner\'s Guide
blender3d #blender #sculpting If you are new to sculpting or Blender, this video is a great place to start. It will teach you everything ...
Advanced Sculpting Techniques
Topology and Retopology
- Strategic use of topology guides, including edge flow and landmarks, ensures optimal deformations and articulations.
- Retopology is critical for converting high-detail sculpts into animation-ready models, emphasizing joint loops and finishing touches for realism.
Realistic Character Workflow
Starting with a base mesh facilitates the sculpting of realistic characters, focusing on proportions, shapes, and topology. The inclusion of Face Sets and UV maps early on aids in the sculpting process, allowing for detailed texturing and shading.
Clothing Sculpting
Sculpting clothes directly on characters, rather than simulating them, can offer practical solutions for small teams, enabling detailed, realistic apparel for characters.
Blender character sculpting is a multifaceted process that blends artistic creativity with technical proficiency. By mastering these tools and techniques, artists can unlock the full potential of Blender for creating stunning, lifelike characters.
Introduction to Blender Character Sculpting
Blender character sculpting is a captivating and creative process that allows artists and designers to bring their imagination to life in 3D form. Utilizing Blender, an open-source 3D modeling software, sculpting characters involves shaping, texturing, and detailing virtual clay into dynamic and intricate models. This section aims to guide beginners through the basics of character sculpting in Blender, showcasing the tools and techniques essential for crafting detailed and lifelike characters.
- Understanding the Blender Interface: Familiarize yourself with Blender\"s interface, focusing on the sculpting tools and workspace.
- Dedicated Sculpting Workspace: Learn about Blender\"s dedicated sculpting mode, which provides a plethora of brushes and tools designed for intricate sculpting tasks.
- Dynamic Topology: Discover how dynamic topology, or \"Dyntopo\", allows for flexible sculpting by dynamically adjusting the mesh\"s detail level as you sculpt.
- Brushes and Tools: Get to know the various brushes and their uses, from carving and adding volume to smoothing and texturing your character\"s surface.
- Masking and Posing: Explore techniques for isolating areas of your model for detailed work and how to pose your character using Blender\"s rigging tools.
Character sculpting in Blender is not just about modeling; it\"s an art form that combines technical skill with creative vision. Whether you\"re sculpting fantasy figures, realistic characters, or stylized creatures, Blender offers a comprehensive set of tools to bring your visions to life. As you progress, remember that practice and experimentation are key to mastering the art of character sculpting.

Understanding the Blender Sculpting Workspace and Tools
Blender\"s sculpting environment is a robust platform designed for both beginners and professionals to sculpt detailed 3D characters and objects. It offers a dedicated workspace that is specifically tailored for sculpting tasks, providing an intuitive and efficient workflow for artists. This section will guide you through the foundational aspects of Blender\"s sculpting workspace and tools, ensuring you have the knowledge to start creating your own detailed sculptures.
Dedicated Workspace
Blender features a dedicated sculpting workspace that simplifies the transition between conceptual design and final model production. This workspace is optimized for sculpting, offering an array of tools and features at your fingertips. It supports a variety of sculpting techniques, from dynamic topology to multi-resolution sculpting, facilitating the creation of complex and detailed models.
Brushes and Sculpting Tools
The core of Blender\"s sculpting toolset is its diverse range of brushes and tools. Each brush has a specific purpose, allowing for precise control over the sculpting process. Among the essential brushes are:
- Crease: For creating sharp creases and folds.
- Clay Strips: Perfect for adding volume and shaping your model.
- Pinch: Useful for tightening surfaces and bringing details together.
- Grab: Allows you to move large sections of your model to adjust shapes and forms.
- Smooth: Essential for smoothing out rough areas and blending strokes.
- Mask: Enables isolating parts of your model to focus sculpting on specific areas.
Additionally, Blender allows for custom brush creation, giving you the ability to tailor tools to your specific needs.
Dynamic Topology
Dynamic topology, or Dyntopo, is a transformative feature in Blender that dynamically adjusts the mesh topology as you sculpt. This means that the level of detail can be increased locally, allowing for intricate details without affecting the overall mesh structure unnecessarily. It\"s particularly useful for adding fine details like wrinkles or scales.
Masking
Masking is another powerful feature within Blender\"s sculpting toolkit. It allows you to protect certain areas of your model from being affected by sculpting actions. This is particularly useful when working on complex models where precision is key. You can isolate specific parts of your mesh to sculpt on, ensuring unaffected areas remain pristine.
With these tools and features, Blender\"s sculpting workspace provides a comprehensive environment for creating detailed and realistic characters. The seamless integration of sculpting and polygonal modeling toolsets within Blender facilitates a smooth workflow from initial design to final production, empowering artists to bring their visions to life with precision and creativity.

Mastering Dynamic Topology for Detailed Sculpting
Dynamic Topology (Dyntopo) in Blender is a revolutionary tool that transforms the way artists sculpt by automating mesh subdivision. This feature allows for intricate detail without the need to manually adjust the mesh\"s topology. With Dyntopo, the focus shifts from topology management to the artistic shaping of the model, relegating the former to a subsequent retopology phase. This separation is crucial for a workflow that prioritizes creative freedom over technical constraints.
Activating Dynamic Topology
To activate Dyntopo, enter Sculpt mode and locate the Dyntopo option in the 3D viewport\"s header on the right side or within the Active Tool tab of the Properties editor. A simple checkbox enables this feature, allowing your sculpting brush to add or remove geometry on-the-fly, precisely where needed without globally increasing the vertex count.
Understanding Dyntopo Settings
The efficacy of Dyntopo hinges on its settings, which dictate how Blender modifies the mesh during sculpting. These settings include:
- Detail Size: This setting controls the edge length and consequently, the level of detail. The detail can be adjusted dynamically with shortcuts, allowing for seamless transitions between different levels of detail.
- Refine Method: Options here determine whether edges within the brush\"s radius are subdivided for added detail, collapsed to simplify the mesh, or both. This flexibility supports both the addition of intricate details and the simplification of the mesh where necessary.
- Detailing Method: This influences how detail size is perceived relative to the model\"s scale and the viewport\"s zoom level, with options for maintaining consistent detail or allowing for dynamic adjustment based on screen pixels or predefined percentages.
Practical Applications and Limitations
While Dyntopo is indispensable for adding localized detail, it\"s important to be mindful of its limitations. Not all brushes will introduce new geometry, and certain actions might necessitate switching brushes or employing the \"Detail Flood Fill\" option for uniform mesh density. Moreover, enabling Dyntopo alters the mesh topology permanently, affecting vertex colors, UVs, and vertex groups.
Alternatives and Complements
The Multiresolution modifier presents an alternative to Dyntopo, allowing for the subdivision and sculpting of mesh at various levels of detail. This modifier is particularly useful for evenly detailed models and offers a non-destructive workflow advantageous for different stages of the sculpting process.
In conclusion, mastering Dyntopo involves understanding its settings and knowing when and how to apply them for detailed sculpting. Its integration into Blender represents a significant advancement in digital sculpting, providing artists with unprecedented control over their creative process.

_HOOK_
Utilizing Masking and Brush Techniques
Mastering masking and brush techniques in Blender is essential for creating detailed and lifelike character sculptures. Blender provides a comprehensive set of tools that allow artists to precisely control where and how they sculpt, enhancing the overall sculpting process. This guide will explore effective strategies for leveraging these powerful features.
Brush Types and Uses
Blender offers an array of brushes designed for various sculpting needs. Each brush serves a unique purpose, enabling artists to add intricate details or shape their sculptures with high precision. Key brushes include:
- Crease: Ideal for creating sharp lines and wrinkles.
- Clay Strips: Adds volume and builds up the form of your sculpture.
- Pinch: Tightens the surface and enhances details.
- Grab: Moves large portions of the mesh for significant adjustments.
- Smooth: Softens the surface and blends details.
- Mask: Protects specific areas from being altered by sculpting actions.
Understanding the specific application of each brush will significantly improve the sculpting workflow and outcome.
Mastering Masking Techniques
Masking is a crucial technique for isolating parts of your model, allowing you to sculpt with precision without affecting the surrounding areas. This technique is particularly useful for working on complex models where detailed work is necessary. There are several approaches to masking in Blender:
- Isolating parts of the mesh to focus on specific areas.
- Using the mask brush to define protected areas.
- Applying masks to hide parts of the model, making intricate areas more accessible.
Effectively using masks can enhance your ability to add fine details and achieve a more polished final sculpture.
Combining Brush and Masking Techniques
The combination of various brushes and masking techniques allows for the creation of highly detailed and expressive characters. By strategically applying masks and selecting the appropriate brush for each task, artists can:
- Add subtle textures and details that bring the character to life.
- Refine shapes and features with precision.
- Create dynamic expressions and features that convey emotion and personality.
Through practice and experimentation with these tools, sculptors can push the boundaries of digital art and create stunning, lifelike characters in Blender.
Step-by-Step Guide to Character Modeling in Blender
Creating a character in Blender is a thrilling journey that blends creativity with technical skill. This step-by-step guide is designed to take beginners through the process of character modeling, from the initial concept to the final rendering. By following these steps, you will be able to bring your own unique characters to life.
Step 1: Planning and Sketching
Begin by sketching your character from various angles. These sketches will serve as a valuable reference, helping you capture the character\"s essential features and personality.
Step 2: Modeling the Character
Start a new project in Blender, removing the default cube. Use basic shapes, like cubes or spheres, as a starting point. Gradually refine these shapes by extruding and scaling, always referring back to your sketches for guidance.
Step 3: Refining the Model
Once you have a basic outline, it\"s time to add details. Utilize Blender\"s sculpting tools to model the character\"s finer features, such as facial expressions and clothing textures.
Step 4: UV Unwrapping
UV unwrapping transforms your 3D model into a 2D template for texturing. Mark seams on your model to indicate where the UV map will be cut, then unwrap the model to create a UV map.
Step 5: Texturing the Model
Add color and texture to your character by creating materials and applying image or procedural textures. Experiment with various textures to enhance the character\"s appearance.
Step 6: Rigging the Character
Rigging involves adding a skeleton to your character for animation. Assign vertices to specific bones and use weight painting to ensure natural movement.
Step 7: Animating the Character
With the character rigged, animate it using Blender\"s animation tools. Focus on creating fluid movements and expressions that bring your character to life.
Step 8: Rendering and Final Touches
Configure Blender\"s render settings to produce the final output. Incorporate lighting and post-processing effects to enhance the final image.
Following these steps, you\"ll be able to model, texture, and animate your own characters in Blender, turning your creative visions into 3D reality.
Advanced Techniques: Topology, Retopology, and Texturing
Mastering advanced techniques in Blender such as topology, retopology, and texturing is crucial for creating high-quality, realistic characters. These processes are interconnected and serve as the foundation for bringing your digital creations to life with depth, realism, and animation readiness.
Topology and Retopology
Topology refers to how vertices, edges, and faces are arranged in your 3D model, affecting its quality, deformations, and animation capabilities. Good topology is essential for maintaining a clean and efficient workflow, especially for characters intended for animation. Retopology is the process of redesigning the model\"s topology to optimize it for these purposes, often after an initial sculpting phase.
- Start with a Clean Base: Begin retopology with a generic topology that can be applied broadly, especially for human characters which have predictable forms. This can streamline the process for background characters or when detailed textures will be applied later.
- Symmetry in Retopology: Utilize symmetrical retopology to ease the process and support rigging and later detailing. Keeping a symmetrical copy even after applying asymmetrical sculpt details can be beneficial.
- Attention to Loops and Seams: Proper placement of loops around landmarks and seams, such as where clothing pieces meet, is vital for realistic deformation and movement.
Texturing and Detail Projection
After retopology, projecting detailed sculpt information back onto the new topology and texturing becomes the next step. This involves using multi-resolution and shrinkwrap modifiers in Blender to capture the high-resolution details from the original sculpt onto the new, cleaner topology.
- UV Unwrapping: Carefully unwrap the retopologized model to prepare it for texturing.
- Texture Painting: Apply colors, materials, and textures to bring your character to life. Utilize Blender\"s painting tools to add complex textures and details.
- Normal and Displacement Maps: Bake detailed information onto texture maps to maintain the high level of detail without the computational cost of a high-poly model.
Sculpting for Realism
With the base model properly retopologized and textured, additional sculpting layers can be added to enhance realism. Focus on tertiary details such as skin pores, wrinkles, and cloth folds, applying them on separate sculpt layers for non-destructive editing and variation.
By following these advanced techniques in Blender, artists can achieve professional-quality characters suitable for animation and high-resolution renderings. The key to success lies in meticulous attention to detail during the retopology process, thoughtful texturing, and the strategic use of sculpt layers for final detailing.
Creating Realistic Characters: From Base Mesh to Final Sculpt
Creating realistic characters in Blender encompasses a detailed process that begins with a base mesh and ends with a finely sculpted figure. This transformative journey involves several key steps, ensuring that every aspect of the character is meticulously crafted.
Step 1: Blockout
Start by creating the character\"s blockout using simple geometries. This initial stage focuses on understanding the shapes and proportions of your character. Spheres and other primitive shapes are often used to map out the basic structure.
Step 2: Sculpting
Combine the blockout geometries and proceed to sculpt mode to merge them into one cohesive mesh. This step allows for the refinement of the character\"s form, adding details and further defining the proportions.
Step 3: Clothing and Accessories
Using the sculpted body as a base, create clothing by making masks and face sets, then extracting these into new geometries without thickness. Clean the geometry with tools like Quad Remesher and then apply modifiers such as extrude or solidify for realism.
Step 4: Retopology
After sculpting, retopology is crucial for optimizing the character\"s mesh for animation and further detailing. This involves creating a clean topology that matches the sculpted form. Tools and add-ons like RetopoFlow or Blender\"s PolyBuild tool can aid in this process.
Step 5: Texturing
Texturing brings color and surface details to your character. Depending on your workflow, this could involve UV unwrapping and painting directly in Blender or using external applications like Substance Painter for complex textures.
Step 6: Hair and Final Details
Create realistic hair using Blender\"s particle system, adding individual strands or clumps as needed. Adjust other accessories and finalize the character\"s look by refining materials and textures.
Step 7: Rigging and Posing
Rigging prepares your character for animation, adding a skeleton that can be posed and animated. Use Blender\"s rigging tools to create bones and assign vertex groups for movement.
Step 8: Rendering
Finalize your character by setting up lighting and camera angles for rendering. Utilize Blender\"s powerful rendering engines to produce high-quality images or animations that showcase your character in the best light.
Throughout this process, the integration of Blender\"s diverse toolset—from sculpting and retopology to texturing and rendering—enables the creation of complex, realistic characters suitable for a variety of projects.
Animating Your Sculpted Characters
Animating sculpted characters in Blender involves a comprehensive workflow that transitions from sculpting and retopology to rigging, posing, and finally, animation. This multi-step process ensures that your characters not only look realistic but also move in a believable and expressive manner.
Retopology and UV Mapping
Before animating, it\"s crucial to refine your character\"s topology. This ensures that the mesh deforms properly during animation. Techniques such as facial and body retopology are employed to optimize edge flow and articulation. Following retopology, UV mapping prepares your model for texturing, allowing for detailed and realistic surface appearances.
Texturing and Material Setup
With a clean topology and UV map, the next step is texturing. Applying base colors, procedural details, and textures like skin, hair, and clothing materials bring your character to life. This stage is pivotal for adding visual depth and realism to your model.
Rigging and Posing
Rigging is the process of adding a skeleton structure to your model. Bones and joints are created and positioned within the mesh, defining how your character will move. Weight painting is applied to ensure mesh parts deform correctly in relation to the rig. Once rigged, posing your character is the preliminary step to animation, allowing you to test the rig and prepare your character for specific scenes or actions.
Animation
With the character rigged and posed, animation brings your creation to dynamic life. Keyframe animation, where poses are defined at specific points in time, is the primary method. This can involve everything from simple movements to complex sequences that convey emotion and tell a story.
Throughout this process, Blender\"s integrated toolset—from sculpting to animation—provides a seamless workflow for bringing your sculpted characters into motion. The transition from static sculpture to animated figure is a detailed journey that, with practice and patience, results in characters that truly embody your artistic vision.
_HOOK_
Tips for Efficient Workflow and Common Pitfalls to Avoid
Creating characters in Blender can be a complex process that requires a nuanced understanding of both the software\"s capabilities and the fundamentals of character design. To ensure a smooth workflow and to avoid common pitfalls, here are some curated tips drawn from experts in the field.
Key Tips for Efficient Workflow:
- Use Reference Images: Continually refer back to your reference images during the sculpting phase to maintain accuracy and realism in your character\"s details.
- Detailing: Pay attention to small details like pores, skin textures, and fabric patterns to enhance realism. However, avoid over-detailing to prevent distractions in the final render.
- Retopology: Focus on creating a clean, quad-based topology, especially around areas of movement like joints. Utilize Blender\"s retopology tools for efficiency.
- UV Mapping and Texturing: Efficiently unwrap your model and use high-quality textures. Blender\"s unwrapping methods and Shader Editor can be pivotal in achieving realistic textures.
- Rigging and Weight Painting: Create a logical bone hierarchy and refine skinning with weight painting to ensure smooth deformations. Add constraints and controllers for easier animation.
Common Pitfalls to Avoid:
- Inconsistent Polygon Density: Ensure uniform polygon density across your model to avoid rendering issues and to facilitate easier mesh management.
- Ignoring Rigging Hierarchy: A well-organized bone hierarchy is crucial for realistic animation. Neglecting this can lead to unnatural movements.
- Overcomplicating Textures: While textures add depth to your character, overly complex or high-resolution textures can lead to unnecessary rendering burdens.
- Underestimating Project Time: Blender character modeling can take anywhere from 32 to 160 hours. Planning and time management are key to avoiding burnout and meeting deadlines.
Blender\"s all-encompassing suite for character creation, from modeling and texturing to rigging and animation, requires patience and practice to master. By adhering to these tips and being mindful of common pitfalls, you can streamline your workflow and elevate the quality of your character designs.
READ MORE:
Community and Resources for Further Learning
The journey of mastering Blender for character sculpting is both exciting and continuous. To further enhance your skills and connect with the community, we recommend exploring a variety of resources and platforms dedicated to Blender enthusiasts and professionals alike.
- ArtStation: A leading platform for artists to showcase their work, ArtStation also offers tutorials and courses for Blender character sculpting. It\"s a great place to find inspiration, learn new techniques, and connect with other artists.
- Blender.org: The official Blender website is a treasure trove of information, featuring tutorials, a user forum, and detailed documentation on all aspects of Blender. It\"s an essential resource for both beginners and advanced users seeking to understand the full capabilities of Blender.
- Blender Artists Community: This online forum is a vibrant community where Blender users share their work, ask for feedback, and exchange tips and tricks. Participating in community discussions can accelerate your learning and help solve specific challenges.
- BlenderNation: For daily news, articles, tutorials, and interviews with Blender artists, BlenderNation is a go-to resource. It covers a wide range of topics, including character sculpting, and keeps you updated on the latest trends and techniques.
- YouTube: YouTube hosts countless Blender tutorial channels, such as Blender Guru, CG Geek, and FlippedNormals, offering step-by-step guides on character sculpting and more. These channels are suitable for learners at all levels and cover a wide range of subjects from basics to advanced sculpting techniques.
- Udemy: Udemy offers comprehensive courses on Blender character sculpting, catering to both beginners and advanced users. These courses often include hours of video tutorials, downloadable resources, and community support.
Engaging with these resources and communities will not only help you improve your Blender skills but also keep you inspired and connected with like-minded individuals across the globe. Remember, the key to mastering Blender sculpting lies in practice, patience, and continuous learning.
Embark on your Blender character sculpting journey with confidence. This comprehensive guide offers the tools, techniques, and community insights to transform your creativity into stunning 3D characters. Let\"s sculpt your imagination into reality together!