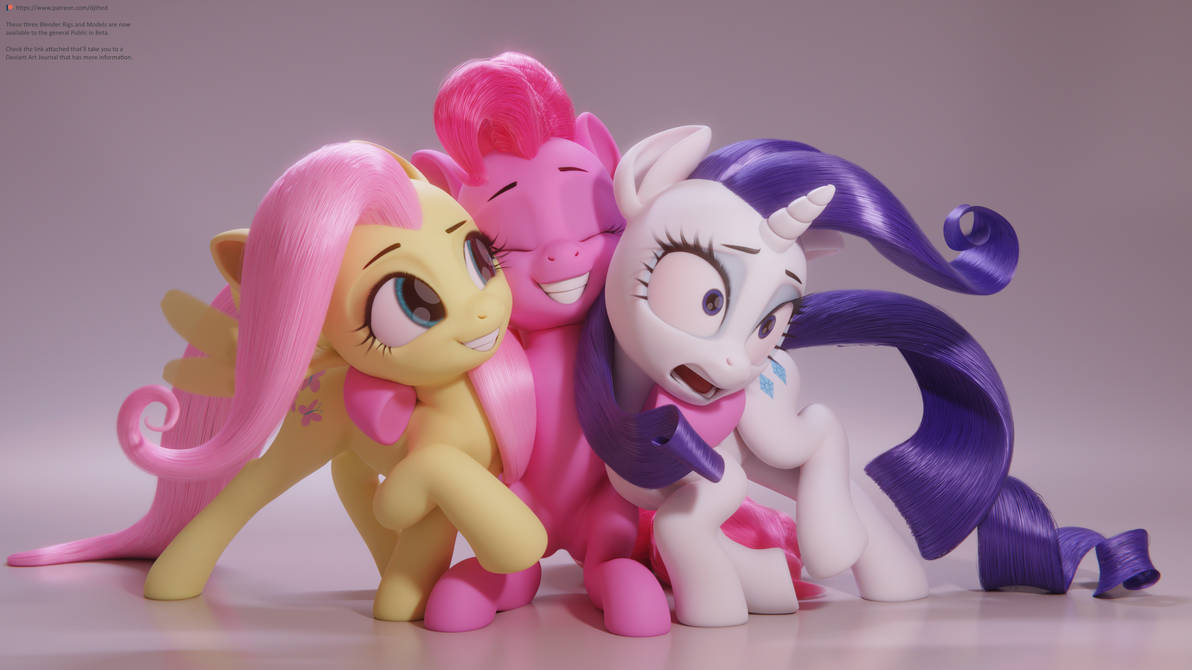
Topic basic sculpting in blender: Discover the art of basic sculpting in Blender and unleash your creativity. This guide will walk you through the essentials, empowering you to bring your imaginative concepts to life with this powerful 3D modeling tool.
Table of Content
- Understanding Blender\"s Sculpt Mode
- Step-by-Step Guide to Sculpting in Blender
- Practical Tips for Beginners
- Conclusion
- Step-by-Step Guide to Sculpting in Blender
- Practical Tips for Beginners
- Conclusion
- What are the essential tools and techniques for basic sculpting in Blender?
- Practical Tips for Beginners
- YOUTUBE: Blender Sculpting Tutorial for Beginners - Stylized Head Sculpt Tutorial
- Conclusion
- Conclusion
- Introduction to Blender and Sculpting Basics
- Setting Up Your Workspace for Sculpting
- Understanding Blender\"s Sculpt Mode and Tools
- Exploring Key Sculpting Brushes and Their Uses
- Step-by-Step Sculpting Process for Beginners
- Techniques for Adding Detail and Texture to Your Sculpt
- Utilizing Dynamic Topology for Complex Shapes
- Practical Tips and Best Practices for Sculpting
- Common Challenges and Solutions in Sculpting
- Advanced Techniques and Resources for Further Learning
- Conclusion and Encouragement for Continuous Practice
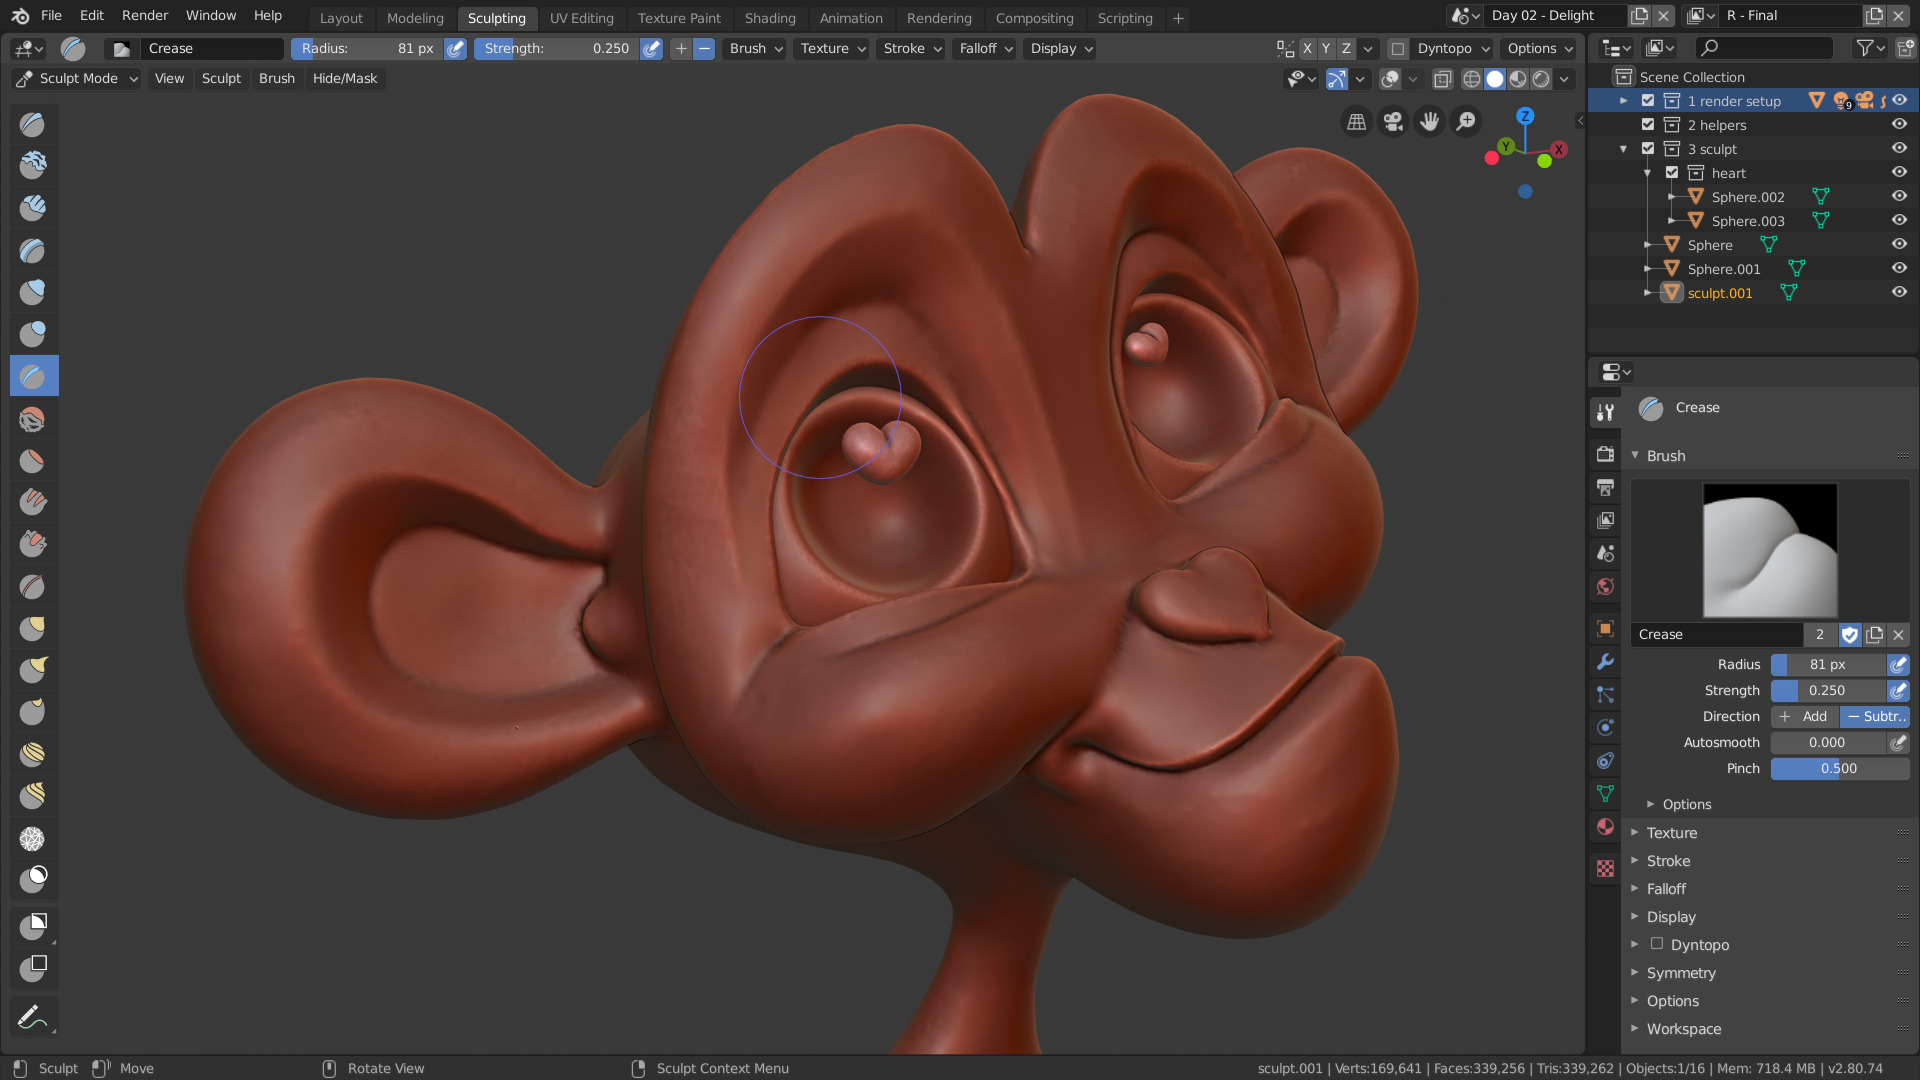
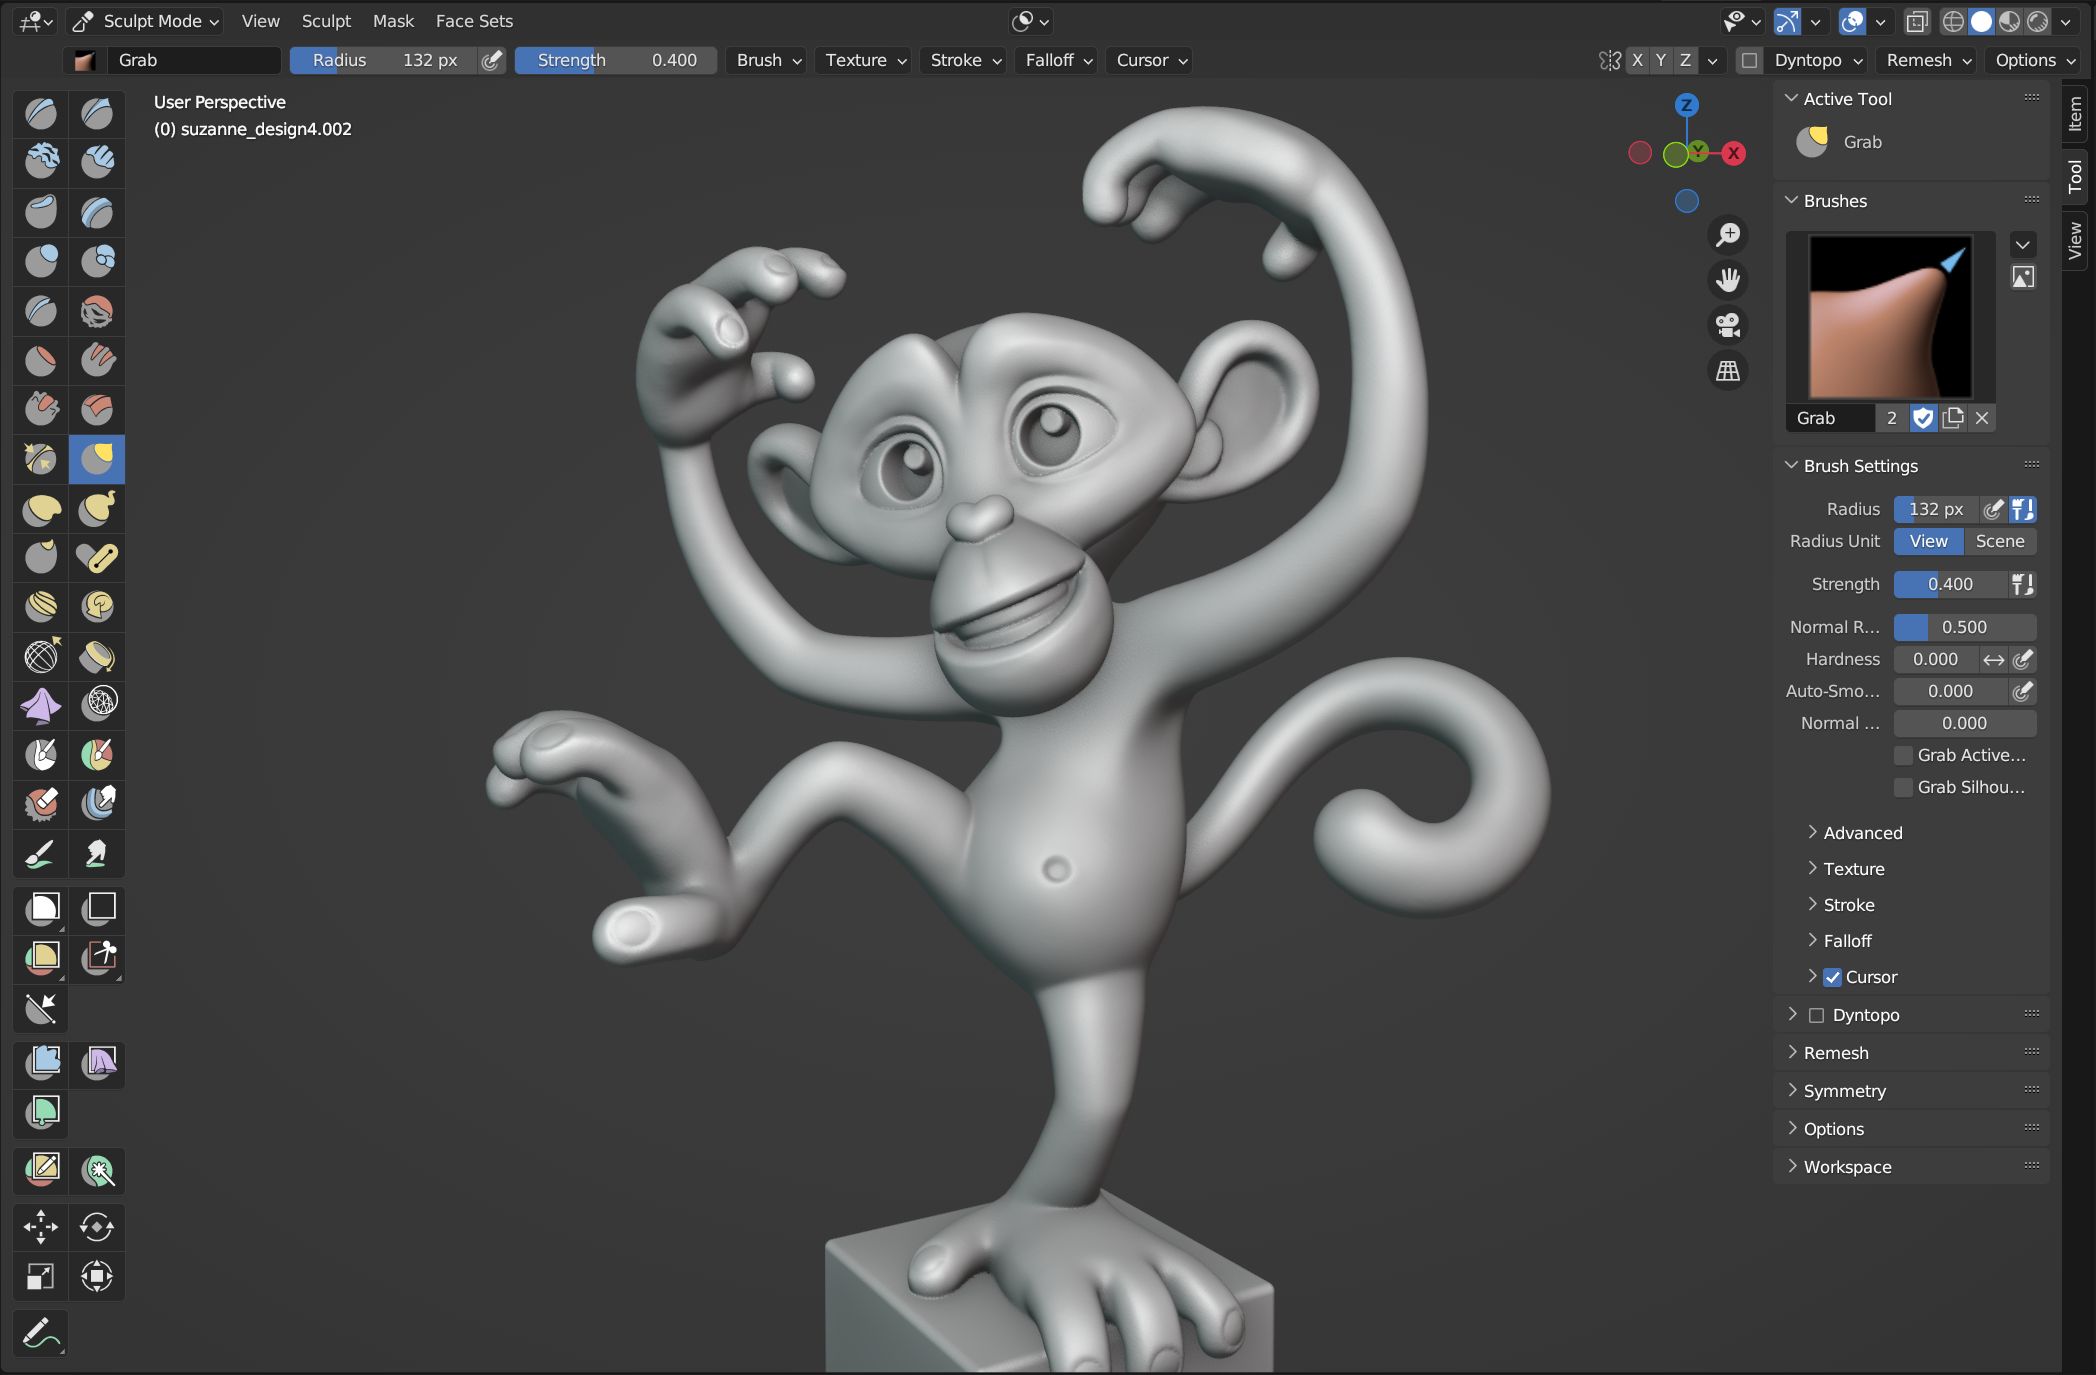
Understanding Blender\"s Sculpt Mode
Blender\"s Sculpt Mode offers an intuitive platform for creating detailed 3D models. It simulates traditional clay sculpting, allowing for dynamic shaping and texturing of digital objects. Learn about the basic brushes and how to effectively use them to add depth and detail to your creations.
Key Brushes and Their Uses
- Crease: Ideal for creating sharp creases and folds.
- Clay Strips: Perfect for adding volume and building up surfaces.
- Pinch: Used to tighten details and sharpen edges.
- Grab: Allows for the manipulation of the mesh, similar to working with clay.
- Smooth: Softens and blends surfaces for a more natural look.
READ MORE:
Step-by-Step Guide to Sculpting in Blender
- Setting Up Your Workspace: Familiarize yourself with Blender\"s interface and prepare your workspace for sculpting.
- Choosing the Right Brush: Select the appropriate brush based on the detail or effect you wish to achieve.
- Mastering Brush Properties: Adjust brush size, strength, and other properties to suit your sculpting needs.
- Sculpting Techniques: Learn basic sculpting techniques such as adding, subtracting volume, and smoothing surfaces.
- Detailing Your Sculpt: Refine your sculpt with finer details to bring your creation to life.
Practical Tips for Beginners
- Start with simple projects to familiarize yourself with sculpting tools and techniques.
- Use reference images to guide your sculpting process and achieve more realistic results.
- Experiment with different brushes and settings to discover unique textures and effects.
- Practice regularly to improve your skills and develop your own sculpting style.
Dynamic Topology
Dynamic topology, or dyntopo, is a powerful feature in Blender that allows for flexible editing of the mesh. It adds or removes details on the fly, making it easier to create complex shapes and textures without worrying about the underlying geometry.
Conclusion
Sculpting in Blender opens up a world of creative possibilities. With practice and patience, you can master the art of digital sculpting and bring your imaginative concepts to life. Remember, the key to success is experimentation and continuous learning.
Step-by-Step Guide to Sculpting in Blender
- Setting Up Your Workspace: Familiarize yourself with Blender\"s interface and prepare your workspace for sculpting.
- Choosing the Right Brush: Select the appropriate brush based on the detail or effect you wish to achieve.
- Mastering Brush Properties: Adjust brush size, strength, and other properties to suit your sculpting needs.
- Sculpting Techniques: Learn basic sculpting techniques such as adding, subtracting volume, and smoothing surfaces.
- Detailing Your Sculpt: Refine your sculpt with finer details to bring your creation to life.
_HOOK_
Practical Tips for Beginners
- Start with simple projects to familiarize yourself with sculpting tools and techniques.
- Use reference images to guide your sculpting process and achieve more realistic results.
- Experiment with different brushes and settings to discover unique textures and effects.
- Practice regularly to improve your skills and develop your own sculpting style.
Dynamic Topology
Dynamic topology, or dyntopo, is a powerful feature in Blender that allows for flexible editing of the mesh. It adds or removes details on the fly, making it easier to create complex shapes and textures without worrying about the underlying geometry.
Conclusion
Sculpting in Blender opens up a world of creative possibilities. With practice and patience, you can master the art of digital sculpting and bring your imaginative concepts to life. Remember, the key to success is experimentation and continuous learning.
What are the essential tools and techniques for basic sculpting in Blender?
When it comes to basic sculpting in Blender, there are several essential tools and techniques that you need to be familiar with:
- Brushes: Blender offers a variety of sculpting brushes such as Draw, Clay, Crease, Smooth, and Inflate. Each brush has a specific function and can be used to shape and manipulate your object.
- Dynamic Topology: This feature allows you to add more geometry to your mesh as you sculpt, which helps in adding details and refining the shape of your model.
- Texture Painting: Blender also allows you to paint directly onto your sculpted model using textures, which can add more realism and detail to your sculpt.
- Masking: Masking allows you to protect certain areas of your model while sculpting, making it easier to focus on specific details without affecting the rest of the model.
- Multi-Resolution Sculpting: This feature allows you to work on different levels of detail within the same model, giving you more control over the level of detail in various parts of your sculpt.
By mastering these essential tools and techniques, you\'ll be well on your way to creating impressive sculpts in Blender.
Practical Tips for Beginners
- Start with simple projects to familiarize yourself with sculpting tools and techniques.
- Use reference images to guide your sculpting process and achieve more realistic results.
- Experiment with different brushes and settings to discover unique textures and effects.
- Practice regularly to improve your skills and develop your own sculpting style.
Dynamic Topology
Dynamic topology, or dyntopo, is a powerful feature in Blender that allows for flexible editing of the mesh. It adds or removes details on the fly, making it easier to create complex shapes and textures without worrying about the underlying geometry.
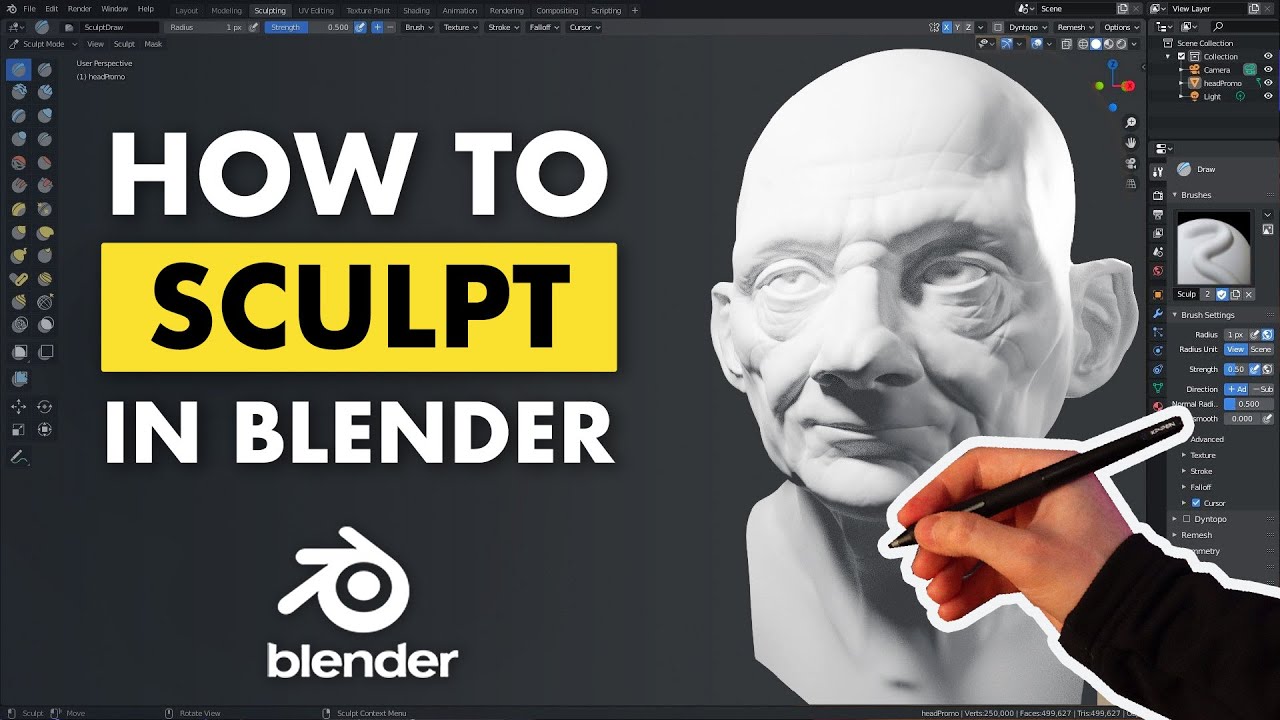
Blender Sculpting Tutorial for Beginners - Stylized Head Sculpt Tutorial
Stylized: Step into a world where vibrant colors, bold shapes, and unique designs come together to create a visually stunning and stylized experience. Watch our video to immerse yourself in this captivating aesthetic journey! Complete: Dive into our comprehensive video guide that covers all aspects of the topic, leaving no stone unturned. From beginner to expert level, this complete resource is sure to provide you with valuable insights and knowledge.
Sculpting in Blender: A Complete Beginner\'s Guide
blender3d #blender #sculpting If you are new to sculpting or Blender, this video is a great place to start. It will teach you everything ...
Conclusion
Sculpting in Blender opens up a world of creative possibilities. With practice and patience, you can master the art of digital sculpting and bring your imaginative concepts to life. Remember, the key to success is experimentation and continuous learning.

_HOOK_
Conclusion
Sculpting in Blender opens up a world of creative possibilities. With practice and patience, you can master the art of digital sculpting and bring your imaginative concepts to life. Remember, the key to success is experimentation and continuous learning.
Introduction to Blender and Sculpting Basics
Blender is a versatile and powerful tool for 3D modeling, animation, and, notably, sculpting. Sculpting in Blender allows artists to create detailed models with an approach similar to traditional clay sculpting. This section introduces the fundamental concepts and tools essential for beginners to start their sculpting journey in Blender.
- Understanding the Blender Interface: Before diving into sculpting, it\"s crucial to familiarize yourself with Blender\"s interface. This includes navigating the 3D viewport, accessing tools, and customizing your workspace for efficiency.
- Entering Sculpt Mode: Sculpt Mode is Blender\"s dedicated environment for sculpting. Learn how to switch to Sculpt Mode and prepare your canvas for sculpting.
- Basic Sculpting Tools and Brushes: Blender offers a variety of brushes for sculpting, each designed for specific tasks. Get to know the most commonly used brushes like the Draw, Crease, Clay Strips, Grab, and Smooth brushes, and understand their applications.
- Dynamic Topology (Dyntopo): Discover how Dynamic Topology, or Dyntopo, allows for flexible mesh editing by adding or removing vertices as needed. This feature is invaluable for sculpting complex shapes without worrying about the mesh structure.
- Practical Sculpting Tips: Start with simple projects to practice using different brushes and techniques. Experimenting with brush settings and Dynamic Topology can help you understand the sculpting process better.
Whether you\"re aiming to create intricate characters, realistic animals, or abstract art, mastering the basics of sculpting in Blender is the first step toward bringing your creative visions to life.
Setting Up Your Workspace for Sculpting
Creating an efficient workspace in Blender is crucial for sculpting success. A well-organized environment allows for smoother workflow and better focus on your creative process. Here\"s how to set up your workspace for sculpting in Blender:
- Optimize Your Interface: Start by customizing Blender\"s interface to suit sculpting tasks. This involves arranging your 3D viewport for maximum visibility and accessibility to sculpting tools.
- Choose the Right Layout: Blender offers various layouts tailored for different tasks. Select a layout that prioritizes the 3D viewport and tool settings for sculpting.
- Configure Tool Settings: Ensure easy access to essential sculpting tools and brushes by customizing the tool shelf and properties panel. This step helps in quickly switching between tools and adjusting settings on the fly.
- Set Up Material and Texture Panels: For sculpting projects that involve texturing, arrange your workspace to include panels for material and texture settings. This allows for real-time previews of texture applications on your sculpt.
- Adjust Lighting and Camera Views: Proper lighting and strategic camera placements can greatly enhance your sculpting accuracy. Set up lighting within your workspace that mimics a studio environment for the best visibility of details.
Remember, there\"s no one-size-fits-all approach to setting up a workspace; it\"s about finding what best supports your sculpting workflow. Experiment with different configurations to discover what setup helps you sculpt most efficiently and comfortably.
Understanding Blender\"s Sculpt Mode and Tools
Blender\"s Sculpt Mode transforms the software into a powerful digital sculpting tool, allowing artists to model complex shapes and details as if working with clay. This mode provides an array of brushes and tools, each designed for specific sculpting tasks. Key features include dynamic topology for adaptive mesh refinement, multiresolution sculpting for managing different levels of detail, and symmetry options to ensure uniformity where needed. Learning to navigate and utilize these tools effectively opens up vast creative possibilities, from character modeling to intricate designs.
- Dynamic Topology: Enables real-time mesh tessellation during sculpting, allowing for detailed sculpting without prior mesh subdivision.
- Multiresolution Sculpting: Allows working on different detail levels without altering the base mesh structure.
- Symmetry Options: Facilitates uniform edits across a model, enhancing efficiency in creating symmetrical designs.
Mastering these functionalities provides a solid foundation for exploring the full potential of sculpting in Blender, catering to both beginners and experienced artists alike.
Exploring Key Sculpting Brushes and Their Uses
Blender\"s sculpting feature includes a variety of brushes designed for different aspects of the sculpting process. Understanding how to use these brushes effectively is key to creating detailed and expressive 3D models.
- Crease: Ideal for creating tight creases and folds, simulating skin or cloth effects.
- Clay Strips: Mimics the effect of adding clay to a sculpture, great for building up shapes and forms.
- Pinch: Pulls vertices towards the cursor, sharpening edges and refining details.
- Grab: Allows for the large-scale manipulation of the mesh, useful for shaping and positioning.
- Smooth: Softens the surface of the model, blending and refining surfaces and transitions.
- Mask: Enables selective sculpting by protecting certain areas from being modified.
Each brush has its unique application, and mastering their use can greatly enhance your sculpting workflow in Blender.
_HOOK_
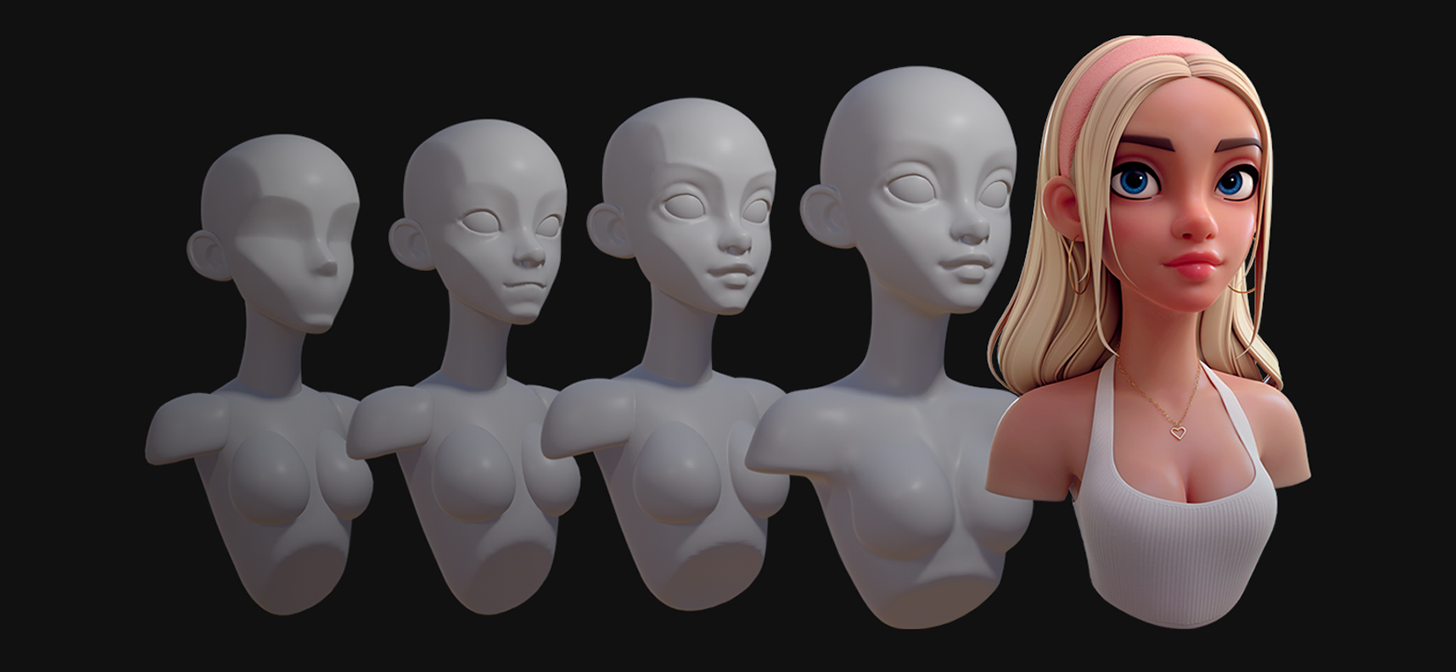
Step-by-Step Sculpting Process for Beginners
- Conceptualize Your Character: Start by brainstorming ideas about the character\"s appearance, personality, and backstory. Sketch multiple variations to explore different designs.
- Collect References: Gather images that align with your character\"s features, clothing, and accessories. Organize them for easy access during modeling and texturing.
- Set Up Blender: Download the latest version of Blender and familiarize yourself with the interface. Customize your workspace layout to suit your workflow.
- Build the Base Mesh: Begin with a basic cube and shape it into a rough character form using the Grab, Scale, and Rotate tools. Enable \"Proportional Editing\" for large-scale edits.
- Enter Sculpt Mode: Switch to Sculpt Mode to add finer details. Experiment with various brushes and use shortcuts to enhance the sculpting process.
- Add Facial Features: Refine facial features in Edit Mode using extrude, scale, and move operations. Use \"Proportional Editing\" for smooth transitions.
- Clothing and Accessories: Create clothing and accessories as separate objects. Ensure they closely follow the character\"s form.
- UV Mapping and Texturing: Unwrap the character\"s mesh into a UV map and switch to Texture Paint mode to apply textures.
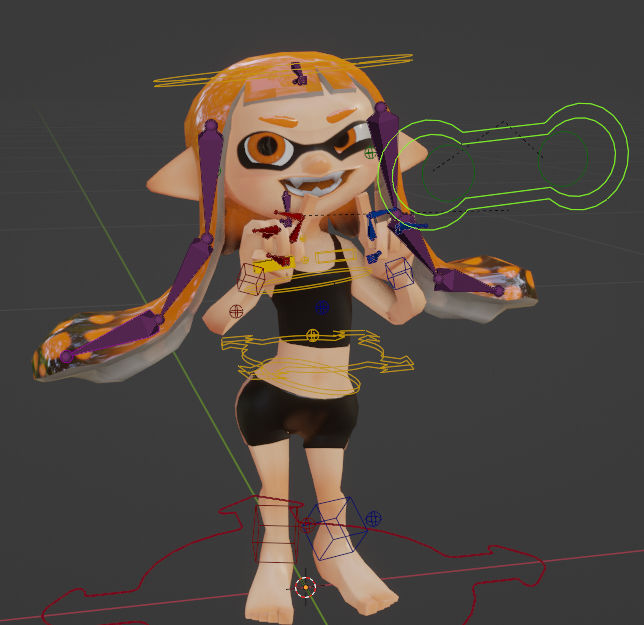
- Rigging and Bones: Create an armature for your character and use weight painting to control mesh movement.
- Animation (Optional): Set keyframes for movements and use the Dope Sheet for animation. Consider creating basic animations like a walk cycle.
- Rendering and Output: Set up the camera, adjust lighting, and apply materials and shaders. Use three-point lighting for a visually appealing render.
- Post-Processing (Optional): Apply post-processing effects in Blender\"s compositing workspace for enhanced visuals.
- Exporting Your Character: Export your character in your preferred file format, ensuring the 3D cursor is at the center of the scene for correct positioning.
Congratulations! You\"ve completed the journey of creating a 3D character in Blender. This process blends artistic creativity with technical know-how, allowing for endless creative possibilities.
Techniques for Adding Detail and Texture to Your Sculpt
Adding detail and texture to your sculpt in Blender can significantly enhance the visual appeal and realism of your creations. Here are some techniques to help you achieve more intricate and detailed sculptures:
- Dynamic Topology: Utilize Blender\"s dynamic topology (dyntopo) feature to add details on the fly. This method allows for adaptive mesh refinement, adding or removing details as you sculpt without affecting the overall mesh structure.
- Custom Brushes: Blender offers a wide range of brushes like Crease, Clay Strips, Pinch, Grab, and Smooth. Experiment with these brushes to add various textures and details. You can also create or customize your own brushes to suit specific needs.
- Impressing Objects: For physical sculpting, pressing objects into clay creates interesting textures. Similarly, in Blender, you can use textured brushes or alphas to press patterns and designs into your digital sculptures.
- Carving Techniques: Carving tools or brushes can be used to create intricate designs and patterns on your sculpt\"s surface, perfect for adding fine details that make your sculptures stand out.
- Incorporating Materials: Adding materials like sand, sawdust, or even simulated glass beads in Blender can create unique textured surfaces. This technique enhances the visual appeal and adds depth to your piece.
Experimenting with textures and details is crucial for evolving your sculpting skills. The more you explore these techniques, the more you\"ll discover new ways to bring your 3D artworks to life. Remember, keeping your workspace organized and attending sculpting workshops, either physically or online, can further enhance your ability to create striking 3D artworks.
Utilizing Dynamic Topology for Complex Shapes
Dynamic topology, or Dyntopo, revolutionizes sculpting in Blender by allowing artists to add intricate details to their models without pre-planning the mesh topology. This tool dynamically subdivides the mesh during sculpting, enabling the creation of complex shapes with high levels of detail effortlessly.
- Enabling Dyntopo: In Sculpt mode, locate the Dyntopo option in the header of the 3D viewport and activate it. This allows for automatic mesh subdivision as you sculpt, providing more detail where needed.
- Understanding Dyntopo Settings: Dyntopo comes with several settings that dictate how the mesh is subdivided or reduced. These include Resolution, which affects the level of detail; Refine Method, which controls how edges are subdivided or collapsed; and Detailing, which sets the detail level based on screen pixels or a percentage.
- Applying Detail Where Needed: With Dyntopo, there\"s no need to increase the overall mesh density for adding details to specific areas. Instead, detail can be added precisely where required, making the sculpting process more efficient and focused.
- Refine Method Options: Choose between Subdivide Edges, Collapse Edges, or Subdivide Collapse to control how Dyntopo modifies the mesh during sculpting. Each option serves a specific purpose, from adding fine details to smoothing and refining the overall topology.
- Adjusting Detail Size: The Detail Size setting in Dyntopo determines the precision of the sculpting details. This can be adjusted on the fly with hotkeys, allowing for seamless transitions between different levels of detail as you sculpt.
By leveraging Dynamic Topology in Blender, artists can sculpt freely, focusing on creativity and form without the constraints of traditional modeling workflows. Dyntopo\"s flexibility makes it an indispensable tool for sculpting organic shapes, characters, and other complex models.
Practical Tips and Best Practices for Sculpting
Mastering the art of sculpting in Blender is a journey that combines creativity with technical skill. To aid beginners and enhance the sculpting experience, here are some practical tips and best practices gathered from various experts in the field.
- Understand Sculpt Mode and Tools: Familiarize yourself with Blender\"s Sculpt Mode, exploring the variety of brushes and their functions. Use brushes like Grab, Crease, and Smooth to manipulate your model effectively. Each brush offers unique capabilities for adding detail or modifying the shape of your sculpt.
- Start with Basic Shapes: Begin your sculpting project with simple shapes. Block out the basic form of your model before moving on to finer details. This approach helps in establishing the overall proportions and structure of your sculpt.
- Utilize Reference Images: Keeping reference images handy is crucial for achieving accurate and realistic results. They guide your sculpting process, ensuring your model adheres to the desired appearance and proportions.
- Focus on Subtle Details: Paying attention to small details like textures, pores, and fabric patterns can significantly enhance the realism of your sculpt. However, avoid over-detailing as it might not be visible in the final render and could distract from the overall composition.
- Employ Dynamic Topology: Dynamic topology (dyntopo) allows for flexible sculpting by adding geometry where needed. It\"s particularly useful for creating complex shapes without worrying about the underlying mesh structure.
- Maintain Mesh Quality: Regularly use the Remesh function to keep your mesh clean and manageable. A well-structured mesh is easier to sculpt and reduces the chances of artifacts in the final model.
- Experiment with Symmetry: The symmetry function can speed up your workflow by mirroring actions across an axis. This is especially helpful for characters and objects that require uniform features on both sides.
- Adjust Brush Strength and Size: Tailoring the brush size and strength according to the detail level you\"re working on can make a big difference. Use a larger brush for broad modifications and a smaller one for fine details.
- Practice Regularly: Like any skill, regular practice is key to improvement. Experiment with different techniques, tools, and projects to expand your sculpting abilities.
- Stay Inspired and Experiment: Finally, let your creativity flow by trying out new ideas and approaches. Sculpting is not just about technical skills but also about expressing your artistic vision.
Adhering to these tips and practices will not only improve your sculpting technique but also enhance your overall experience with Blender. Happy sculpting!
Common Challenges and Solutions in Sculpting
Sculpting in Blender, like any artistic endeavor, comes with its set of challenges. Understanding these common hurdles and knowing how to overcome them can significantly improve your sculpting workflow and final results. Here are some of the most frequent issues sculptors face, along with practical solutions to address them.
- Overcoming Mesh Complexity: Beginners often struggle with managing complex meshes, especially when adding intricate details. Using dynamic topology (dyntopo) allows for adding detail only where necessary, making the mesh easier to manage. Remember, dynamic topology adds geometry dynamically as you sculpt, which can help maintain a manageable level of detail.
- Difficulty in Achieving Symmetry: Achieving perfect symmetry, especially in character modeling, can be challenging. Utilize Blender\"s mirror functionality early in your sculpting process to ensure symmetrical results without having to manually replicate details on both sides of your model.
- Preventing Sculpting Artifacts: Sculpting artifacts such as unwanted creases or bumps can often occur. Regular use of the Smooth brush can mitigate these issues. Additionally, customizing your brushes to suit the specific task at hand can help in achieving smoother results.
- Masking for Detailed Work: Working on intricate parts close to other mesh areas can result in accidental modifications. Using the masking feature to isolate and protect areas of your mesh can provide more control and precision in your sculpting.
- Choosing the Right Brush: Blender offers a wide array of brushes for different sculpting needs. Familiarize yourself with each brush\"s purpose and effect. Experimentation is key to understanding how each brush behaves and when to use it for best results.
- Handling Performance Issues: High-detail sculpting can sometimes lead to performance lags. To counter this, consider simplifying your mesh with the Remesh modifier or working in parts to keep the viewport responsive.
- Staying Motivated and Inspired: Sculpting can be a time-consuming process that requires patience. Set realistic goals, take regular breaks, and seek inspiration from the Blender community to stay motivated.
Remember, mastering Blender\"s sculpting tools takes time and practice. Don\"t hesitate to experiment with different techniques and approaches. Each challenge is an opportunity to learn and grow as a digital artist.
_HOOK_
Advanced Techniques and Resources for Further Learning
As you progress in your Blender sculpting journey, mastering advanced techniques and exploring additional resources can significantly enhance your skills and creativity. Here\"s a compilation of advanced sculpting techniques and valuable resources for further learning.
- Mastering Blender\"s Sculpting Tools: Gain proficiency in tools like Sculpt Draw, Clay Strips, Inflate/Deflate, and more. Each tool has unique properties that can help achieve detailed textures and forms in your sculpting projects.
- Efficient Sculpting Workflows: Learn strategies to sculpt more efficiently. This includes using reference photos for human and animal anatomy, creating both hard surface objects and organic shapes from imagination, and refining details with Subdivision Surface modeling.
- Dynamic Topology for High-Resolution Sculpting: Discover the benefits of dynamic topology, which allows for detailed sculpting without performance drawbacks, enabling you to add complexity to your models as needed.
- Texturing and Material Application: Understand how to bring your sculptures to life by applying textures and materials, adding realism and depth to your creations.
- Preparation for 3D Printing, Animation, and Games: Acquire the necessary skills to prepare your sculpts for various end uses, ensuring they meet the requirements for 3D printing, animation, or game development.
- Hard Surface Sculpting Workflow: Explore the complete workflow for hard surface sculpting, starting from thumbnail sketches to a finished 3D sculpt. This includes creating alpha textures, tiling displacement maps, and using hard surface VDM brushes.
- Alpha Textures and Tiling Displacement Maps: Learn to use alpha textures for adding details and tiling displacement maps for creating interesting shapes and concepts quickly and efficiently.
For those looking to delve deeper into Blender sculpting, FrameFocusSchool offers comprehensive modules covering everything from the fundamentals of sculpting to polishing and finalizing sculpts. Additionally, Blender Secrets provides an in-depth course on hard surface sculpting, including assets like alpha textures and procedural cables. These resources offer structured learning paths and practical exercises to help you master Blender sculpting and unlock your creative potential.
READ MORE:
Conclusion and Encouragement for Continuous Practice
The journey through learning sculpting in Blender is both challenging and rewarding. As you have seen, starting from the basics and moving through to advanced techniques, there\"s always something new to learn and a way to improve your skills. The beauty of digital sculpting is that it allows for endless creativity and exploration.
Remember, every artist was once a beginner. The key to mastering sculpting in Blender lies in continuous practice and dedication. Here are a few parting words of encouragement and tips to keep you motivated on your sculpting journey:
- Patience is Your Best Friend: Sculpting is a skill that takes time to develop. Be patient with yourself and enjoy the learning process.
- Practice Regularly: Even if it\"s just for a short period each day, regular practice will improve your skills more than sporadic, long sessions.
- Challenge Yourself: Step out of your comfort zone and try sculpting subjects you\"re not familiar with. This will accelerate your learning and improve your adaptability.
- Use Resources Wisely: Make the most of the countless tutorials, courses, and forums available. Learning from a variety of sources can provide new perspectives and techniques.
- Share Your Work: Don\"t be afraid to share your sculptures with the Blender community. Feedback is invaluable for growth, and the community is a great source of support and inspiration.
- Reflect on Your Progress: Take time to look back at your earlier works to see how far you\"ve come. This can be a huge motivational boost.
As you continue to sculpt and bring your visions to life, remember that every masterpiece starts with a single brush stroke. Keep pushing your limits, and let your creativity flow freely. The world of Blender sculpting is vast and waiting for you to make your mark. Happy sculpting!
The journey through learning sculpting in Blender is both challenging and rewarding. As you have seen, starting from the basics and moving through to advanced techniques, there\"s always something new to learn and a way to improve your skills. The beauty of digital sculpting is that it allows for endless creativity and exploration.
Remember, every artist was once a beginner. The key to mastering sculpting in Blender lies in continuous practice and dedication. Here are a few parting words of encouragement and tips to keep you motivated on your sculpting journey:
As you continue to sculpt and bring your visions to life, remember that every masterpiece starts with a single brush stroke. Keep pushing your limits, and let your creativity flow freely. The world of Blender sculpting is vast and waiting for you to make your mark. Happy sculpting!