Topic blender sculpting tutorial beginner: Embark on a creative journey with our Blender Sculpting Tutorial for Beginners, designed to guide you through the basics of 3D art and unlock your potential as a digital sculptor.
Table of Content
- Getting Started with Blender Sculpting
- Improving Your Sculpting Skills
- Resources and Community Support
- Improving Your Sculpting Skills
- Resources and Community Support
- Resources and Community Support
- What are some beginner-friendly Blender sculpting tutorials available online?
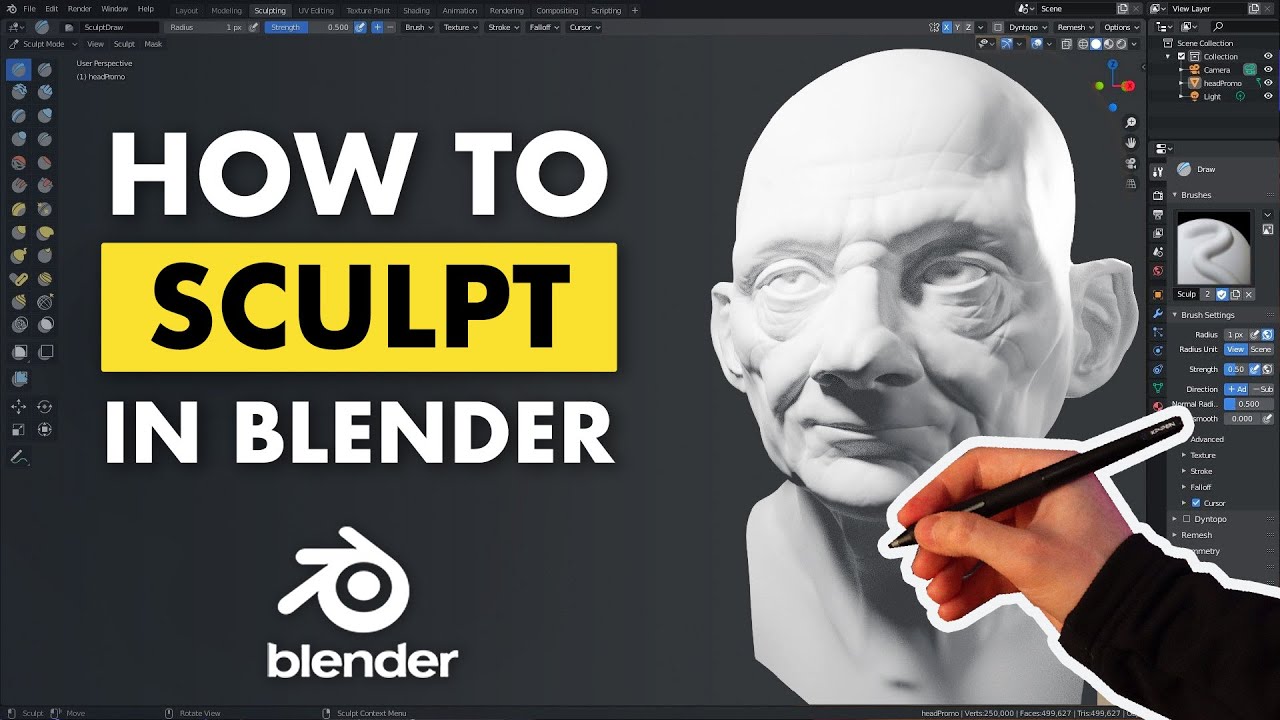
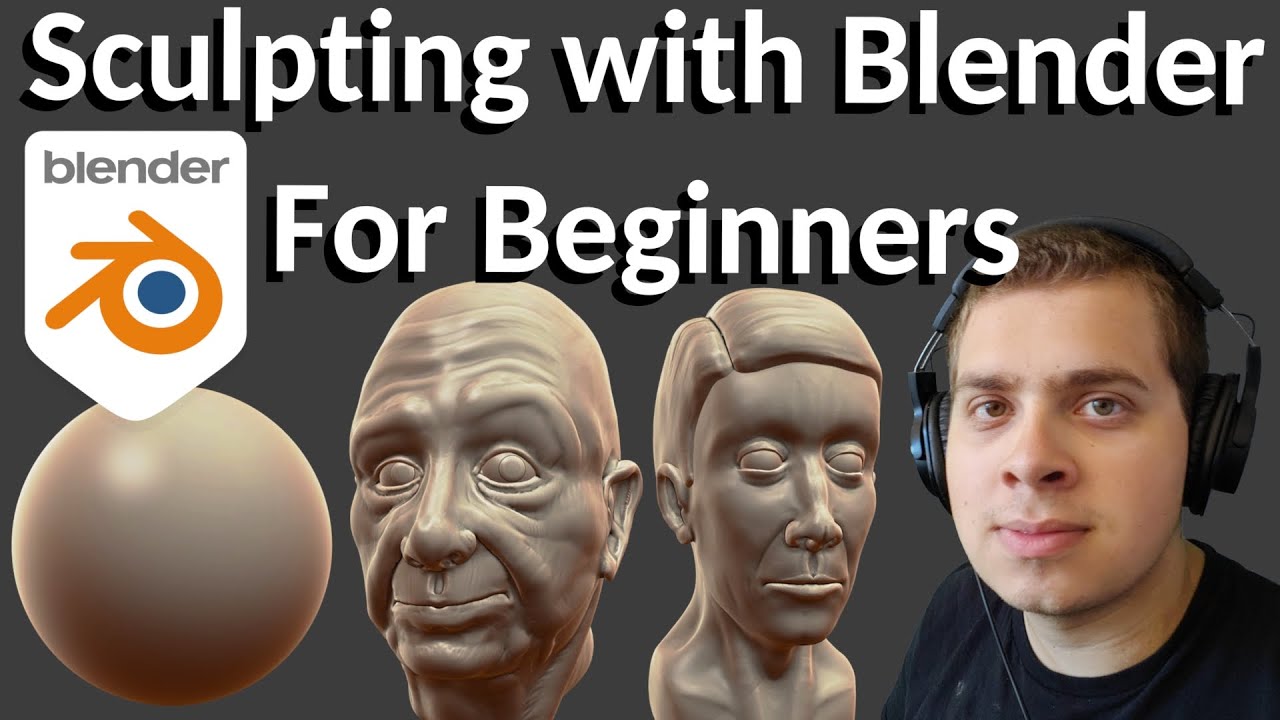
- Introduction to Blender Sculpting for Beginners
- YOUTUBE: Blender Sculpting Tutorial for Beginners - Stylized Head Sculpt Tutorial
- Essential Blender Tools and Interface Overview
- Basic Sculpting Techniques and Tips
- Understanding and Using Dynamic Topology
- Mastering Sculpting Brushes and Their Uses
- Step-by-Step Beginner Sculpting Projects
- Advanced Sculpting Techniques for Detailing
- Texturing and Material Application in Sculpting
- Common Sculpting Challenges and How to Overcome Them
- Resources for Continuous Learning and Community Engagement
Getting Started with Blender Sculpting
Begin your sculpting journey by familiarizing yourself with Blender\"s interface and basic sculpting tools. Learn how to manipulate digital clay, utilize dynamic topology, and apply various brushes to achieve desired shapes and textures.
Essential Tools and Techniques
- Understanding Blender\"s sculpting environment
- Mastering the use of sculpting brushes
- Exploring dynamic topology for flexible modeling
- Techniques for creating realistic textures and details
Step-by-Step Sculpting Projects
- Creating a simple sculpted object to grasp basic techniques
- Sculpting a human face to understand anatomy and proportions
- Advanced projects: Sculpting detailed characters and creatures
READ MORE:
Improving Your Sculpting Skills
As you become more comfortable with the basics, challenge yourself with advanced sculpting techniques. Learn about sculpting symmetry, refining details, and using Blender\"s modifiers for enhancing your sculptures.
Advanced Techniques and Tips
- Working with asymmetrical sculpting for dynamic poses
- Detailing with alphas and custom brushes
- Retopology and mesh optimization for high-quality renders
- Texturing and material creation for lifelike results
Resources and Community Support
Join the Blender community to share your progress, get feedback, and learn from fellow artists. Explore forums, online courses, and tutorials to continue advancing your sculpting skills. Embrace the challenges and enjoy the creative process of sculpting in Blender.
Improving Your Sculpting Skills
As you become more comfortable with the basics, challenge yourself with advanced sculpting techniques. Learn about sculpting symmetry, refining details, and using Blender\"s modifiers for enhancing your sculptures.
Advanced Techniques and Tips
- Working with asymmetrical sculpting for dynamic poses
- Detailing with alphas and custom brushes
- Retopology and mesh optimization for high-quality renders
- Texturing and material creation for lifelike results

Resources and Community Support
Join the Blender community to share your progress, get feedback, and learn from fellow artists. Explore forums, online courses, and tutorials to continue advancing your sculpting skills. Embrace the challenges and enjoy the creative process of sculpting in Blender.

_HOOK_
Resources and Community Support
Join the Blender community to share your progress, get feedback, and learn from fellow artists. Explore forums, online courses, and tutorials to continue advancing your sculpting skills. Embrace the challenges and enjoy the creative process of sculpting in Blender.
What are some beginner-friendly Blender sculpting tutorials available online?
Here are some beginner-friendly Blender sculpting tutorials available online:
- Blender Beginner Sculpting Tutorial - Stylized Head Sculpt: This tutorial covers basic sculpting techniques using Blender to create a stylized head sculpt. Suitable for beginners.
- Blender Sculpting Tutorial for Absolute Beginners: This tutorial is designed for absolute beginners and covers the fundamental tools and workflow of sculpting in Blender.
- Blender 2.8 Tutorial - Beginners Guide to Sculpting Characters: This tutorial provides a comprehensive guide to sculpting characters in Blender 2.8, ideal for beginners looking to improve their skills.
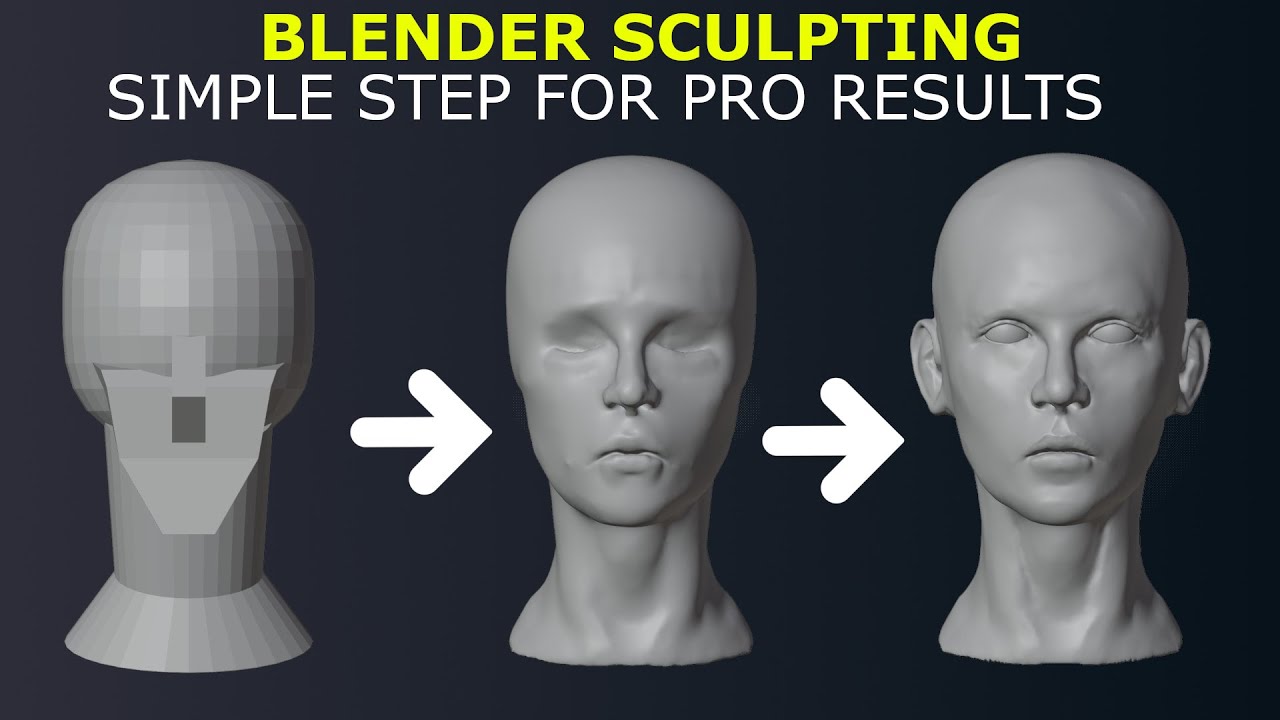
Introduction to Blender Sculpting for Beginners
Blender sculpting offers a dynamic platform for creating detailed 3D models and artworks from scratch. As a beginner, stepping into the world of 3D sculpting can seem daunting, yet with the right guidance, you can unleash your creative potential. This section is designed to provide you with a solid foundation in Blender sculpting, covering everything from navigating the interface to mastering your first sculpting project.
- Understanding the Blender Interface: Familiarize yourself with the Blender workspace and learn how to access essential sculpting tools.
- Basic Sculpting Tools: Discover the core tools available in Blender for sculpting, including brushes, smoothing techniques, and dynamic topology.
- Creating Your First Sculpt: Follow step-by-step instructions to create your first simple sculpt, learning fundamental techniques and shortcuts along the way.
- Exploring Advanced Techniques: As your skills progress, delve into more advanced sculpting methods to add intricate details and realism to your creations.
- Resources for Continuous Learning: Utilize online tutorials, community forums, and project-based learning to continuously improve your sculpting skills.
By the end of this guide, you will have a comprehensive understanding of how to navigate Blender\"s sculpting environment, use its tools to create basic and complex models, and where to find resources to continue your learning journey. Embrace the process of learning and experimenting, and you will find that Blender sculpting opens up a world of creative possibilities.

Blender Sculpting Tutorial for Beginners - Stylized Head Sculpt Tutorial
Immerse yourself in a world of vibrant colors and bold designs with this stylized video that will captivate your senses and transport you to a visually stunning realm of artistry and creativity.
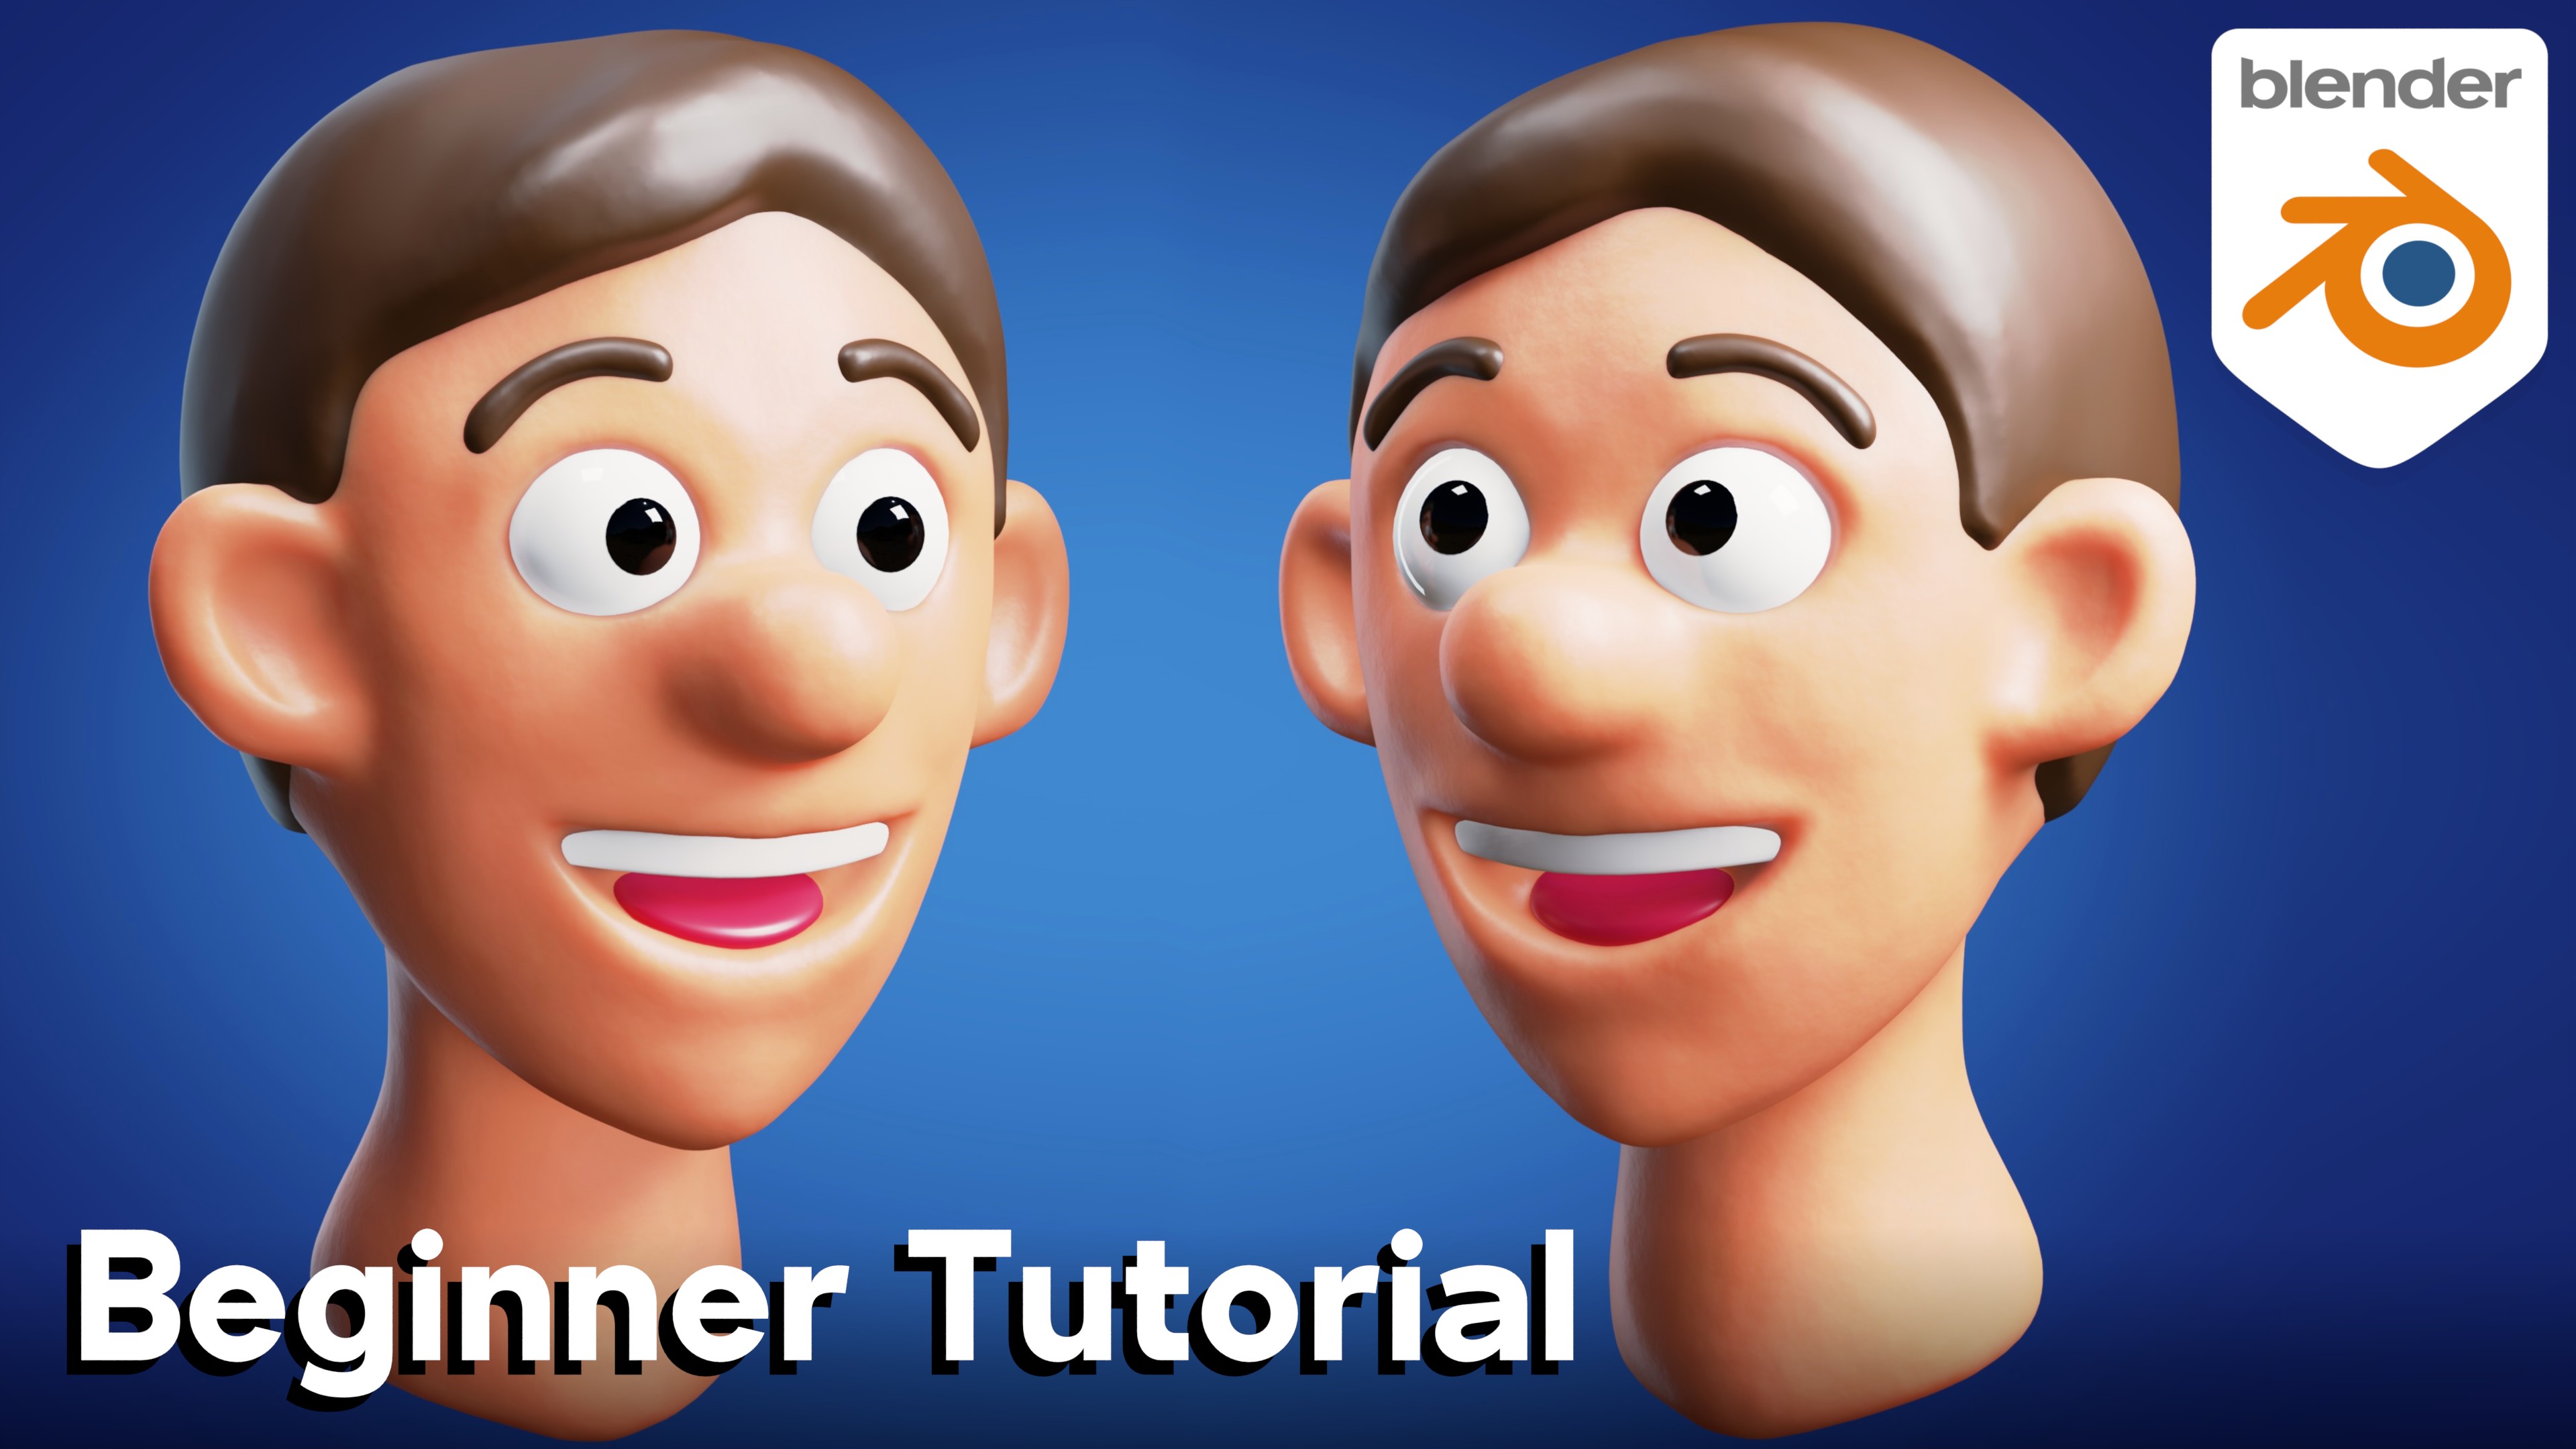
Sculpting in Blender: A Complete Beginner\'s Guide
Experience the satisfaction of watching a complete video that leaves no question unanswered, covering every aspect of the topic in an engaging and informative way. Let this video be your ultimate guide to full understanding and knowledge.
Essential Blender Tools and Interface Overview
Blender\"s sculpting mode provides a versatile set of tools designed for creating detailed 3D models. This section introduces the essential tools and features of the Blender interface, guiding beginners through the functionalities critical for sculpting.
- Navigation Tools: Learn how to efficiently navigate the 3D viewport, including zooming, panning, and rotating your view around the model.
- Sculpting Brushes: Get to know the variety of brushes available for sculpting, such as the Grab, Clay, Crease, Smooth, and Inflate brushes, and understand their specific uses.
- Dyntopo (Dynamic Topology): Discover the dynamic topology feature, which automatically subdivides the mesh as you sculpt, allowing for detailed creation without the need for manual topology adjustments.
- Symmetry: Learn how to use the symmetry tool to mirror your sculpting actions across the model, saving time and ensuring consistency.
- Masking: Understand the importance of masking areas of your model to protect them from being affected by sculpting actions.
These tools form the backbone of Blender\"s sculpting module, each playing a crucial role in the creation process. Familiarizing yourself with these tools and their functions will significantly enhance your sculpting workflow and open up new possibilities for your 3D art.
- Begin with basic navigation to feel comfortable moving around your model.
- Experiment with different brushes to understand their effects on the model.
- Utilize dynamic topology for detailed sculpting without worrying about mesh structure.
- Apply symmetry to make your sculpting process more efficient and consistent.
- Practice masking to safeguard specific areas of your model during intensive sculpting sessions.
Mastering these essential tools and features will provide a solid foundation for your sculpting projects, making the creative process more intuitive and enjoyable.

Basic Sculpting Techniques and Tips
Starting your sculpting journey in Blender can be exciting and a bit overwhelming. However, with a few basic techniques and tips, you can quickly begin to bring your visions to life. This section breaks down fundamental sculpting practices to help you create with confidence.
- Stylus vs. Mouse: While you can sculpt with a mouse, using a stylus and tablet provides greater precision and a more natural feel.
- Brush Familiarity: Spend time getting to know each sculpting brush and its purpose. Experiment with the Strength, Size, and Falloff settings to see their effects.
- Start with Simple Shapes: Begin your sculpting projects with basic shapes to understand volume and proportion before moving on to more complex forms.
- Use Reference Images: Having reference images can greatly improve your accuracy and detail in sculpting, especially for organic subjects like humans or animals.
- Layer Your Details: Start with large, broad strokes to define the basic form, then gradually move to finer details. This helps in managing the sculpting process without getting lost in details too early.
Additionally, mastering the art of sculpting in Blender involves understanding the technical aspects:
- Dynamic Topology: Learn how to use dynamic topology to add detail to your sculpt without worrying about the mesh structure initially.
- Remeshing: Utilize the remesh feature to create a uniform topology, which is especially helpful before adding fine details.
- Masking: Practice using masks to isolate areas of your sculpt, allowing for focused adjustments without affecting the rest of the model.
- Sculpt Layers: Use sculpt layers to experiment with different details or adjustments without permanently altering the base model.
Remember, sculpting is as much about the creative process as it is about the final result. Don\"t be afraid to experiment and make mistakes, as each project brings valuable learning opportunities. Happy sculpting!

_HOOK_
Understanding and Using Dynamic Topology
Dynamic Topology, or Dyntopo, is a revolutionary feature in Blender that allows for a more intuitive sculpting experience. This powerful tool dynamically subdivides the mesh as you sculpt, enabling you to add intricate details without predefining the mesh\"s resolution. This section explores how to effectively utilize Dynamic Topology in your sculpting workflow.
- Activating Dyntopo: Learn how to activate Dynamic Topology in the sculpting mode and understand the settings that control its behavior.
- Detail Size: Discover how to adjust the level of detail Dyntopo creates based on the brush size or a fixed detail size, allowing for precise control over the mesh\"s complexity.
- Subdivision Types: Explore the different methods of subdivision Dyntopo offers, such as Relative Detail, Constant Detail, and Brush Detail, and when to use each type.
- Managing Performance: Gain insights on how to manage Blender\"s performance while using Dyntopo, ensuring a smooth sculpting experience even with highly detailed models.
- Combining with Other Tools: Understand how Dyntopo interacts with other sculpting tools and features, such as masking and smoothing, to enhance your sculpting process.
Dynamic Topology fundamentally changes how you approach sculpting in Blender, offering the flexibility to sculpt with freedom and creativity. By adjusting the detail level dynamically, artists can focus on the artistry of their sculpt without worrying about the technical constraints of their mesh. Mastering Dyntopo will unlock new possibilities in your 3D sculpting projects, allowing you to achieve unparalleled detail and realism.
- Begin with a simple shape to familiarize yourself with how Dyntopo affects the mesh.
- Experiment with different subdivision types to see their impact on your sculpt.
- Use Dyntopo in conjunction with sculpting brushes to add detail where needed.
- Regularly toggle Dyntopo on and off to manage performance and check the overall form.
- Practice using Dyntopo on various projects to understand its full potential.
Embracing Dynamic Topology in your sculpting workflow will enhance your ability to create detailed and complex models, making it an essential technique for any Blender sculptor.

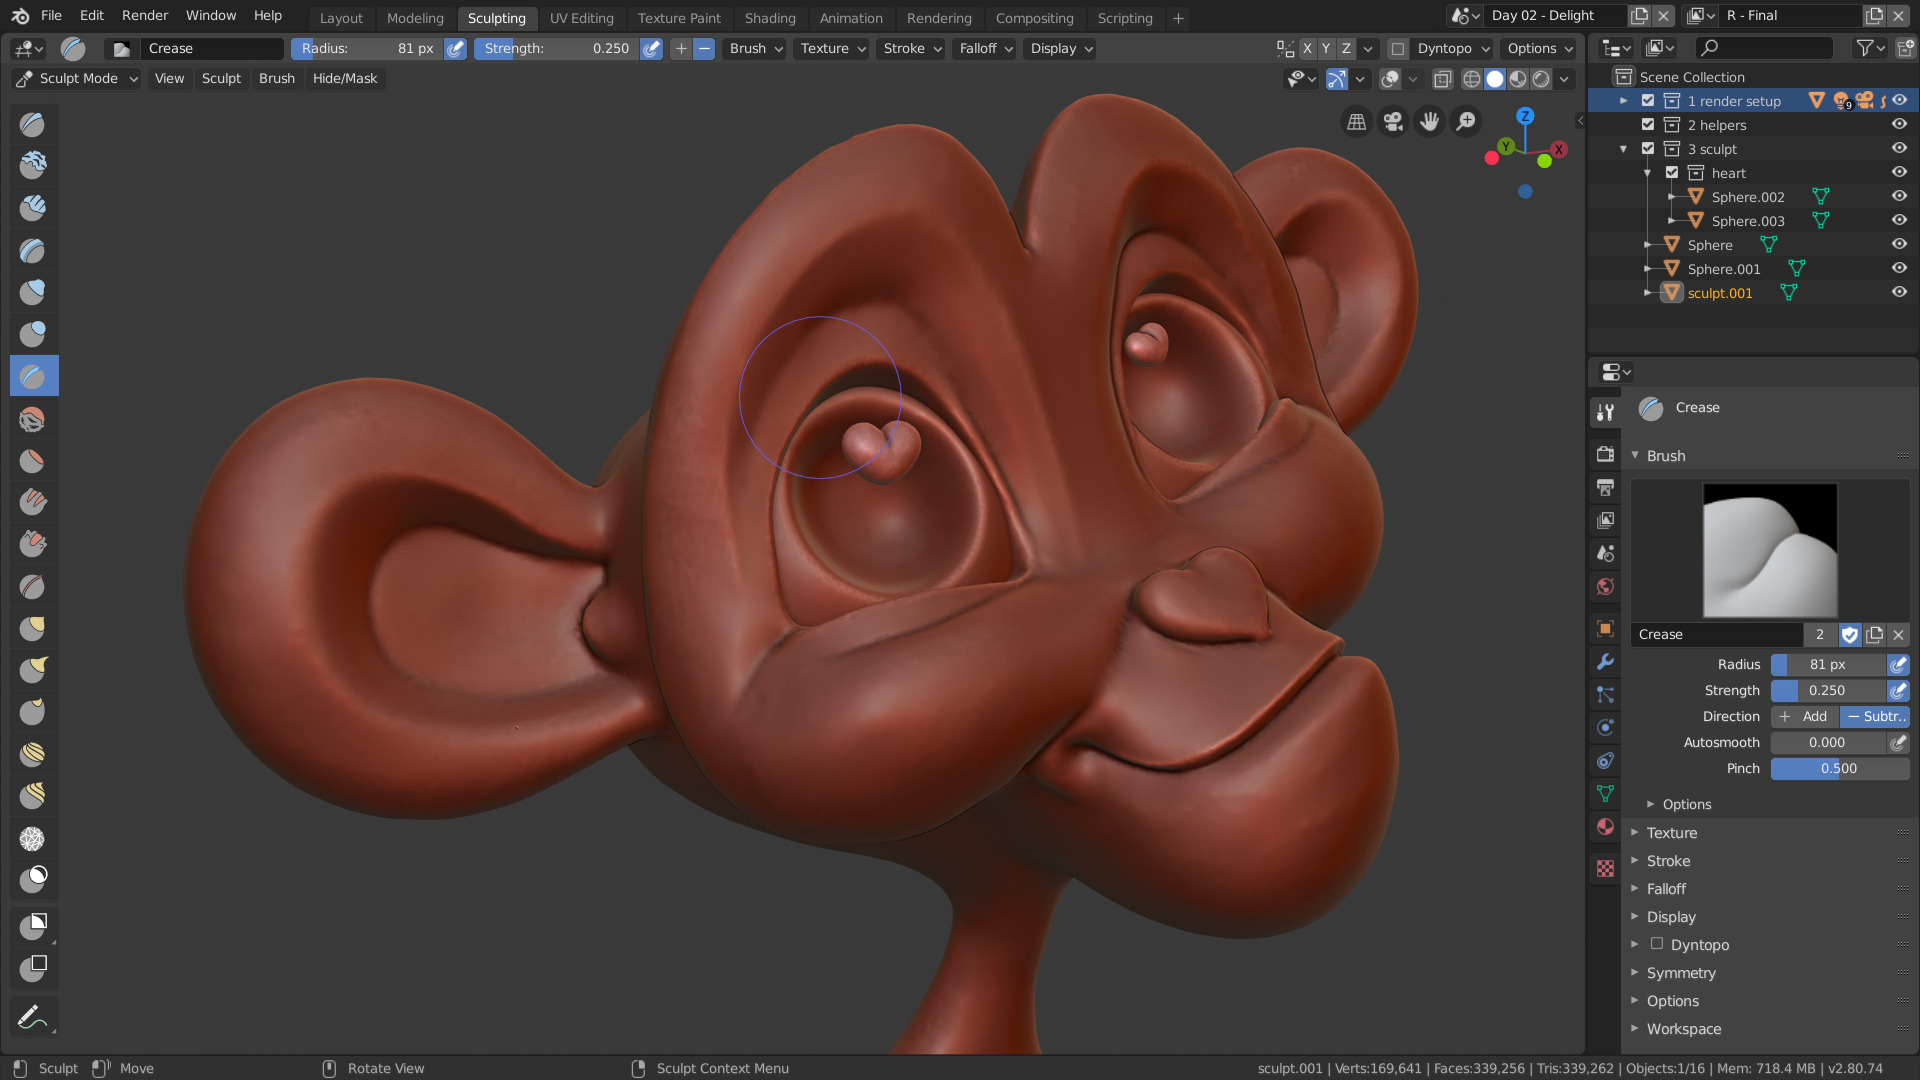
Mastering Sculpting Brushes and Their Uses
Blender\"s sculpting feature offers a rich set of brushes, each designed for specific aspects of the sculpting process. Mastering these brushes and understanding their unique properties can dramatically enhance your sculpting projects. This section delves into the most commonly used brushes and their applications in Blender sculpting.
- Draw Brush: Ideal for adding volume and building up the form of your model. It\"s the go-to brush for defining shapes and contours.
- Clay Strips Brush: Mimics the effect of adding clay strips to a sculpture, perfect for building up surfaces with a more controlled approach than the Draw brush.
- Crease Brush: Used for creating sharp indentations or ridges, such as folds or wrinkles, enhancing the model\"s detail and realism.
- Inflate Brush: Increases volume in targeted areas, useful for puffing up portions of your model to suggest muscle, fat, or other bulges.
- Smooth Brush: Softens and evens out the surface of your sculpture, essential for refining shapes and blending details.
- Grab Brush: Allows you to move large portions of your model, adjusting shapes and positions, similar to working with real clay.
- Snake Hook Brush: Extends parts of your model dramatically, enabling the creation of elongated features like horns or noses.
- Mask Brush: Enables selective sculpting by masking off areas that you don\"t want to be affected by your sculpting actions.
Each brush in Blender\"s sculpting toolkit has adjustable settings, such as strength, size, and falloff, which allow for further customization of their effects. Experimenting with these settings will help you achieve the precise look and feel you\"re aiming for in your sculptures.
- Begin by experimenting with each brush on a simple sphere to understand its basic effect.
- Practice combining different brushes to achieve complex textures and forms.
- Adjust brush settings frequently to suit the specific needs of each part of your sculpture.
- Use the Smooth brush sparingly to refine your work without losing critical details.
- Remember to frequently switch between brushes as you add details to keep your sculpture dynamic and detailed.
Mastering the use of these brushes will significantly impact your ability to sculpt detailed and expressive 3D models in Blender, enhancing both the process and the outcome of your sculpting projects.
Step-by-Step Beginner Sculpting Projects
Embarking on your first sculpting projects in Blender can be an exciting step towards mastering 3D art. These beginner-friendly projects are designed to help you apply basic techniques, familiarize yourself with Blender\"s sculpting tools, and build confidence in your sculpting abilities.
- Simple Fruit Sculpt: Start with something basic like an apple or a banana. This project will teach you how to shape objects and apply basic textures.
- Character Bust: Move on to sculpting a character bust to practice human anatomy and proportions. Focus on facial features and expressions.
- Stylized Animal: Choose a favorite animal and create a stylized version of it. This will help you understand form and volume, as well as how to simplify complex shapes.
- Fantasy Terrain: Create a piece of fantasy terrain, such as a small landscape or a magical tree. This project will introduce you to sculpting natural forms and textures.
- Basic Humanoid Character: As you gain confidence, sculpt a simple humanoid character. Start with basic shapes and gradually add details like clothing and accessories.
For each project, follow these general steps:
- Begin by blocking out the basic shapes using the Draw and Clay Strips brushes.
- Refine the shapes and add details with the Crease and Inflate brushes.
- Use the Smooth brush to soften any harsh transitions or rough areas.
- Experiment with Dynamic Topology to add finer details as your sculpture progresses.
- Finally, explore texturing and painting to bring your sculptures to life.
These projects are designed to build on each other, introducing new skills and concepts as you progress. By starting with simpler forms and gradually moving to more complex subjects, you\"ll develop a solid foundation in Blender sculpting. Remember, practice and patience are key to mastering any new skill, so take your time and enjoy the learning process.
Advanced Sculpting Techniques for Detailing
As you progress beyond the basics of Blender sculpting, mastering advanced techniques becomes crucial for adding intricate details and realism to your models. This section explores several advanced sculpting methods that can elevate your work to professional levels.
- Layering Details: Learn to build up details in layers, starting from broad forms and gradually adding finer textures and features.
- Custom Brushes and Alphas: Discover how to create and use custom brushes and alphas for unique textures and effects, enhancing the detail and complexity of your sculpts.
- Sculpting with Masks: Utilize masks to isolate and sculpt specific areas without affecting the surrounding geometry, allowing for precise control over complex shapes and details.
- Hard Surface Techniques: Apply specific strategies for hard-surface modeling within the sculpting environment, such as using the Crease brush and Pinch brush for sharp edges and clean lines.
- Topology and Retopology: Understand the importance of topology in sculpting and learn techniques for retopologizing your models, ensuring they are animation-ready and efficient for rendering.
Integrating these advanced techniques into your sculpting workflow will not only enhance the visual appeal of your models but also improve their functionality and versatility within various digital production pipelines.
- Start with a solid understanding of basic sculpting principles before attempting these advanced techniques.
- Experiment with different tools and settings to find what works best for the specific detail you\"re trying to achieve.
- Practice regularly, as proficiency in these techniques requires time and experimentation to develop fully.
- Seek out tutorials and resources on specific techniques to deepen your understanding and skill set.
- Share your work with the Blender community for feedback and tips on further refining your sculpting techniques.
By dedicating time to learn and apply these advanced sculpting methods, you\"ll be able to create highly detailed, realistic models that stand out in any portfolio or production.
Texturing and Material Application in Sculpting
Applying textures and materials to your sculptures in Blender transforms them from simple models to lifelike creations. This section covers the basics of texturing and material application, essential for adding color, depth, and realism to your sculptures.
- Understanding Materials: Learn about Blender\"s material system and how to create materials that mimic real-world surfaces.
- Applying Textures: Discover how to apply image textures to your sculptures for added detail and realism.
- UV Unwrapping: Understand the importance of UV unwrapping for accurately mapping textures onto your model.
- Using Nodes: Get to grips with Blender\"s node-based material system for complex texturing effects.
- Bump and Normal Maps: Learn to use bump and normal maps for adding surface detail without increasing mesh complexity.
By mastering these texturing and material application techniques, you can significantly enhance the appearance of your sculptures, making them more dynamic and engaging.
- Start by creating a basic material to understand the settings and how they affect the appearance of your sculpture.
- Experiment with applying different textures, adjusting their scale, rotation, and mapping to fit your model perfectly.
- Practice UV unwrapping simple objects before moving on to more complex sculptures to ensure accurate texture mapping.
- Explore the power of Blender\"s node system to create materials that react realistically to light and environment.
- Incorporate bump and normal maps into your materials for enhanced surface detail and realism.
With these skills, you\"ll be able to bring a new level of realism to your Blender sculptures, making them stand out with rich textures and intricate materials.
_HOOK_
Common Sculpting Challenges and How to Overcome Them
Every sculptor faces challenges, especially when starting out with Blender. Understanding these common issues and knowing how to tackle them can significantly improve your sculpting experience and outcomes. Here, we discuss some typical hurdles and provide practical solutions.
- Overwhelming Interface: Blender\"s comprehensive interface can be daunting. Solution: Spend time learning the basics of the interface, customize your workspace, and gradually incorporate more tools as you gain confidence.
- Difficulty with Detailing: Achieving fine details can be challenging for beginners. Solution: Practice with dynamic topology and use specialized brushes for fine details. Start with broad shapes and gradually refine.
- Managing Mesh Density: Keeping a balanced mesh density for smooth sculpting without performance lag. Solution: Use dynamic topology wisely and remesh your sculpture periodically to maintain an even mesh density.
- Asymmetrical Sculpting: Creating symmetrical models can be tricky. Solution: Use the mirror modifier or the symmetrize function in the sculpting tools to ensure symmetry.
- Texture Application: Texturing and painting can seem complex. Solution: Begin with simple texturing techniques and gradually explore UV mapping and Blender\"s node-based material system.
Here are additional tips to enhance your sculpting process:
- Regularly save different versions of your work to avoid losing progress.
- Use reference images for accuracy and inspiration.
- Join Blender forums and communities for support and feedback.
- Set realistic goals for each sculpting session to keep improving.
- Remember, patience and practice are key to overcoming these challenges.
By facing these challenges head-on with the right strategies, you\"ll not only improve your skills but also enjoy the sculpting process more thoroughly.
READ MORE:
Resources for Continuous Learning and Community Engagement
Continuously improving your sculpting skills in Blender and engaging with the community are vital steps towards mastering the software. Here, we list valuable resources and platforms where beginners can learn new techniques, share their work, and get feedback from peers.
- Online Tutorials and Courses: Platforms like YouTube, Udemy, and Skillshare offer a wide range of tutorials, from beginner to advanced levels. These resources are perfect for learning at your own pace.
- Blender Official Documentation: The Blender Manual is an excellent resource for understanding all aspects of Blender, including sculpting tools and techniques.
- Forums and Online Communities: Join forums such as Blender Artists or the Blender subreddit to connect with other Blender users, share your work, and receive constructive feedback.
- BlenderNation: Stay updated with the latest Blender news, tutorials, and art showcases to inspire your next project.
- Blender Studio: Access official training and project files to practice your skills on real-world projects.
Engaging with these resources not only aids in honing your technical skills but also helps in staying motivated through community support. Continuous learning through tutorials, coupled with regular practice and community feedback, is key to advancing your sculpting abilities in Blender.
- Begin with free tutorials to cover basic concepts and tools.
- Participate in community challenges to practice and showcase your skills.
- Use the official Blender documentation for in-depth understanding and troubleshooting.
- Seek feedback from online communities to improve your work.
- Never stop learning. Regularly check for new tutorials and resources to keep your skills sharp.
By leveraging these resources, you can continuously grow as a Blender artist, bringing more complexity and realism to your sculptures.
Embarking on your Blender sculpting journey opens up a world of creative possibilities. With patience, practice, and the right resources, you\"ll transform your digital sculptures into masterpieces that captivate and inspire.