Topic sculpt blender tutorial: Dive into the world of 3D art with our Sculpt Blender tutorial, where beginners and advanced users alike can learn to shape their imagination into stunning sculptures using Blender"s powerful sculpting tools.
Table of Content
- Getting Started with Blender Sculpting
- Advanced Techniques and Tips
- What is the best Blender tutorial for sculpting?
- YOUTUBE: Blender Sculpting Tutorial for Beginners - Stylized Head Sculpt Tutorial
- Join the Community
- Advanced Techniques and Tips
- Join the Community
- Join the Community
- Introduction to Blender Sculpting
- Choosing the Right Blender Version for Sculpting
- Understanding Blender\"s Sculpting Workspace
- Exploring Sculpting Tools and Brushes
- Mastering Dynamic Topology in Sculpting
- Techniques for Realistic Textures and Details
- Advanced Sculpting Techniques and Tips
- Creating Your First Sculpture: A Step-by-Step Tutorial
- Utilizing Add-ons and Custom Brushes for Sculpting
- Incorporating Sculpting into Your Workflow
- Community Resources and Where to Find Help
- Continuing Your Blender Education: Next Steps
Getting Started with Blender Sculpting
- Introduction to the Blender interface and sculpting tools.
- Overview of sculpting features including dynamic topology, brushes, and masking.
- Step-by-step guides on creating your first sculpt.
Key Features
- Dedicated Sculpting Workspace for intuitive sculpting experience.
- Dynamic Topology (Dyntopo) for real-time mesh tessellation.
- Advanced Brush Set including Crease, Clay Strips, Pinch, Grab, and more.
- Masking Tools for isolating and focusing on specific mesh areas.
READ MORE:
Advanced Techniques and Tips
Delve deeper into sculpting with tutorials on advanced techniques, tips for efficiency, and creative ways to use Blender\"s sculpting tools. Learn about multi-resolution sculpting, mirrored sculpting, and custom brush creation to enhance your digital sculptures.
Resources and Learning Paths
| Resource | Description | Access |
| Blender Studio | Access production assets and knowledge from open movies. | Free |
| Blender Manual | Comprehensive documentation on usage and features. | Free |
| Blender Development Updates | Stay up-to-date with the latest from Blender developers. | Free |
What is the best Blender tutorial for sculpting?
One of the best Blender tutorials for sculpting is the tutorial offered by Keelan Jon. He provides a comprehensive beginner course that covers the basics of sculpting in Blender. Here is a step-by-step guide on how to access this tutorial:
- Visit Keelan Jon\'s Gumroad page at https://keelanjon.gumroad.com/l/beginners-guide-to-blender-by-keelanjon
- Click on the option to purchase the Beginner\'s Guide to Blender course.
- Follow the instructions to complete the purchase process.
- Once you have access to the course, go through the lessons and practice sculpting in Blender following Keelan Jon\'s guidance.
Additionally, you can refer to other online resources and tutorials on sculpting in Blender to further enhance your skills and knowledge in this area.
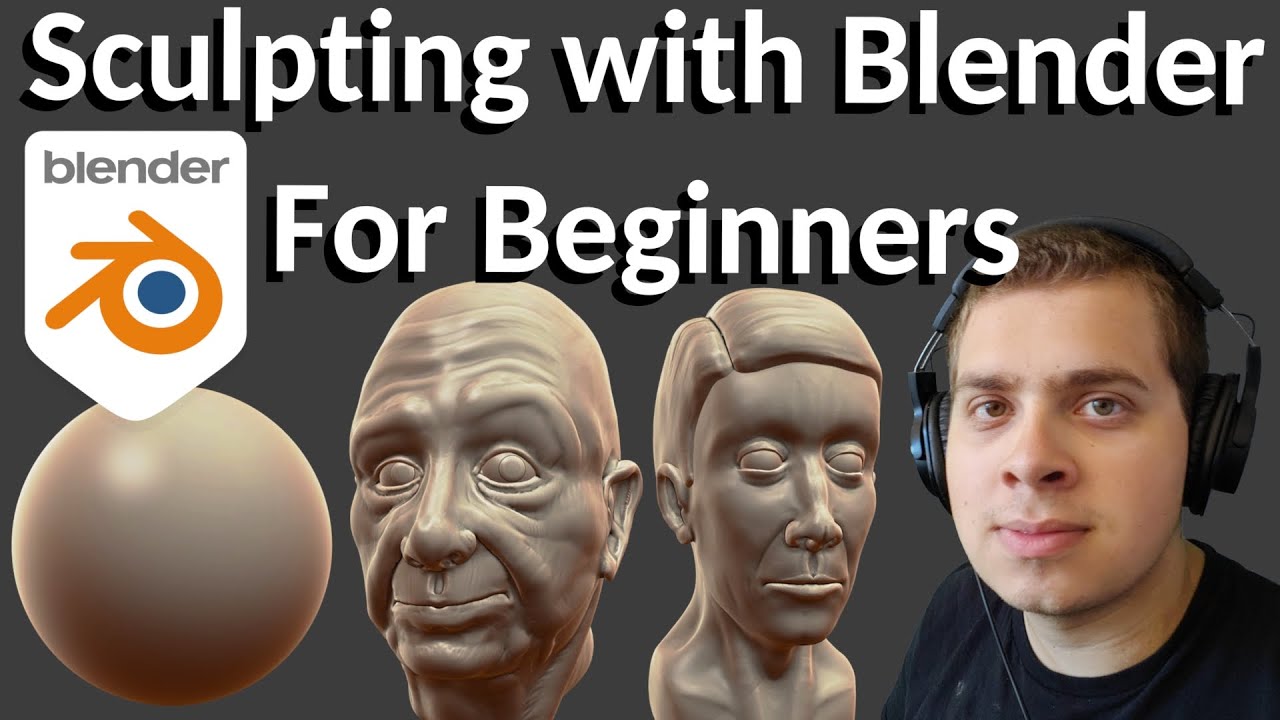
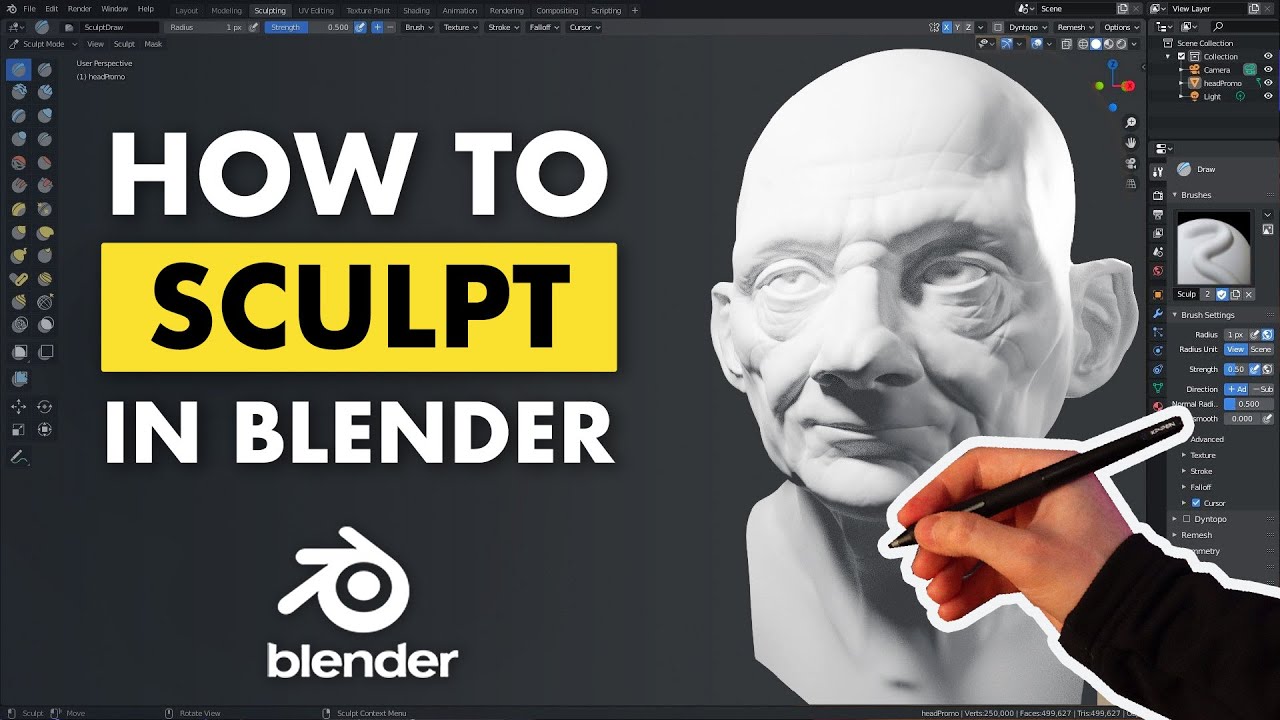
Blender Sculpting Tutorial for Beginners - Stylized Head Sculpt Tutorial
Sculpting: Discover the mesmerizing art of sculpting in this captivating video! Watch as talented artists bring life to clay, stone, and metal with their skilled hands, creating breathtaking sculptures that will leave you in awe. Blender: Dive into the world of digital creativity with Blender in this exciting video! Learn how to use this powerful software to create stunning 3D models, animations, and visual effects that will ignite your imagination.
Join the Community
Engage with a vibrant community of digital artists, access user stories, and participate in the annual Blender Conference to connect with peers and learn from industry professionals.
Artistic freedom starts with Blender - The Free and Open Source 3D Creation Suite. Dive into the world of digital sculpting with Blender and unleash your creativity.
Advanced Techniques and Tips
Delve deeper into sculpting with tutorials on advanced techniques, tips for efficiency, and creative ways to use Blender\"s sculpting tools. Learn about multi-resolution sculpting, mirrored sculpting, and custom brush creation to enhance your digital sculptures.
Resources and Learning Paths
_HOOK_
Join the Community
Engage with a vibrant community of digital artists, access user stories, and participate in the annual Blender Conference to connect with peers and learn from industry professionals.
Artistic freedom starts with Blender - The Free and Open Source 3D Creation Suite. Dive into the world of digital sculpting with Blender and unleash your creativity.
Introduction to Blender Sculpting
Blender sculpting brings the art of digital sculpting to life, allowing artists to create detailed 3D models with an intuitive set of tools. This section introduces the core aspects of Blender sculpting, from understanding the sculpting workspace to mastering dynamic topology and exploring advanced techniques.
- Understanding the Workspace: Blender\"s sculpting workspace is designed for efficiency, offering a customizable interface with tools and options tailored for sculpting tasks.
- Choosing the Right Tools: A variety of sculpting tools and brushes are available in Blender, each with its own purpose, from shaping and texturing to fine detailing.
- Dynamic Topology: Learn how dynamic topology, or Dyntopo, allows for flexible sculpting by dynamically adjusting the mesh topology as you sculpt.
- Realistic Textures and Details: Techniques for adding realistic textures and fine details to your sculptures, enhancing the overall appearance and realism.
- Advanced Techniques: Explore advanced sculpting techniques and tips to take your sculptures to the next level.
By the end of this section, you\"ll have a solid foundation in Blender sculpting, ready to start creating your own 3D sculptures with confidence and creativity.

Choosing the Right Blender Version for Sculpting
When diving into the world of sculpting with Blender, selecting the appropriate version of the software is crucial for a seamless experience. Blender\"s sculpting capabilities have evolved significantly over time, with each version bringing enhancements that cater to the needs of digital sculptors. Whether you are a beginner or an experienced artist, understanding the features and improvements of each Blender version will help you make an informed decision.
- For beginners, it\"s recommended to start with the latest stable release of Blender, which offers the most up-to-date tools and features for sculpting. This version includes a dedicated sculpting workspace, a variety of brushes for different effects, and support for dynamic topology.
- Experienced sculptors looking for specific features or improvements might prefer the Long-Term Support (LTS) version or even experimental builds. The LTS version provides a stable environment with extended support, while experimental builds offer early access to the latest features and tools.
- Regardless of your choice, Blender\"s flexibility in sculpting organic subjects, its side-by-side offering of sculpting and polygonal modeling toolsets, and the ability to customize brushes ensure a powerful and flexible sculpting experience.
Before finalizing your choice, consider your level of experience, the complexity of projects you aim to undertake, and whether you need the latest features or a more stable and supported version. Additionally, engaging with the Blender community and resources can provide insights into the best practices and version recommendations based on your sculpting needs.
Understanding Blender\"s Sculpting Workspace
The Blender sculpting workspace is designed to provide artists with a comprehensive set of tools for creating detailed sculptures digitally. This workspace is tailored to offer an intuitive and efficient sculpting experience, closely mimicking traditional clay sculpting techniques.
To begin sculpting in Blender, you\"ll navigate to the Sculpting workspace, accessible from the top of the screen. This workspace optimizes the Blender interface for sculpting, presenting you with a range of brushes and tools specifically for this purpose.
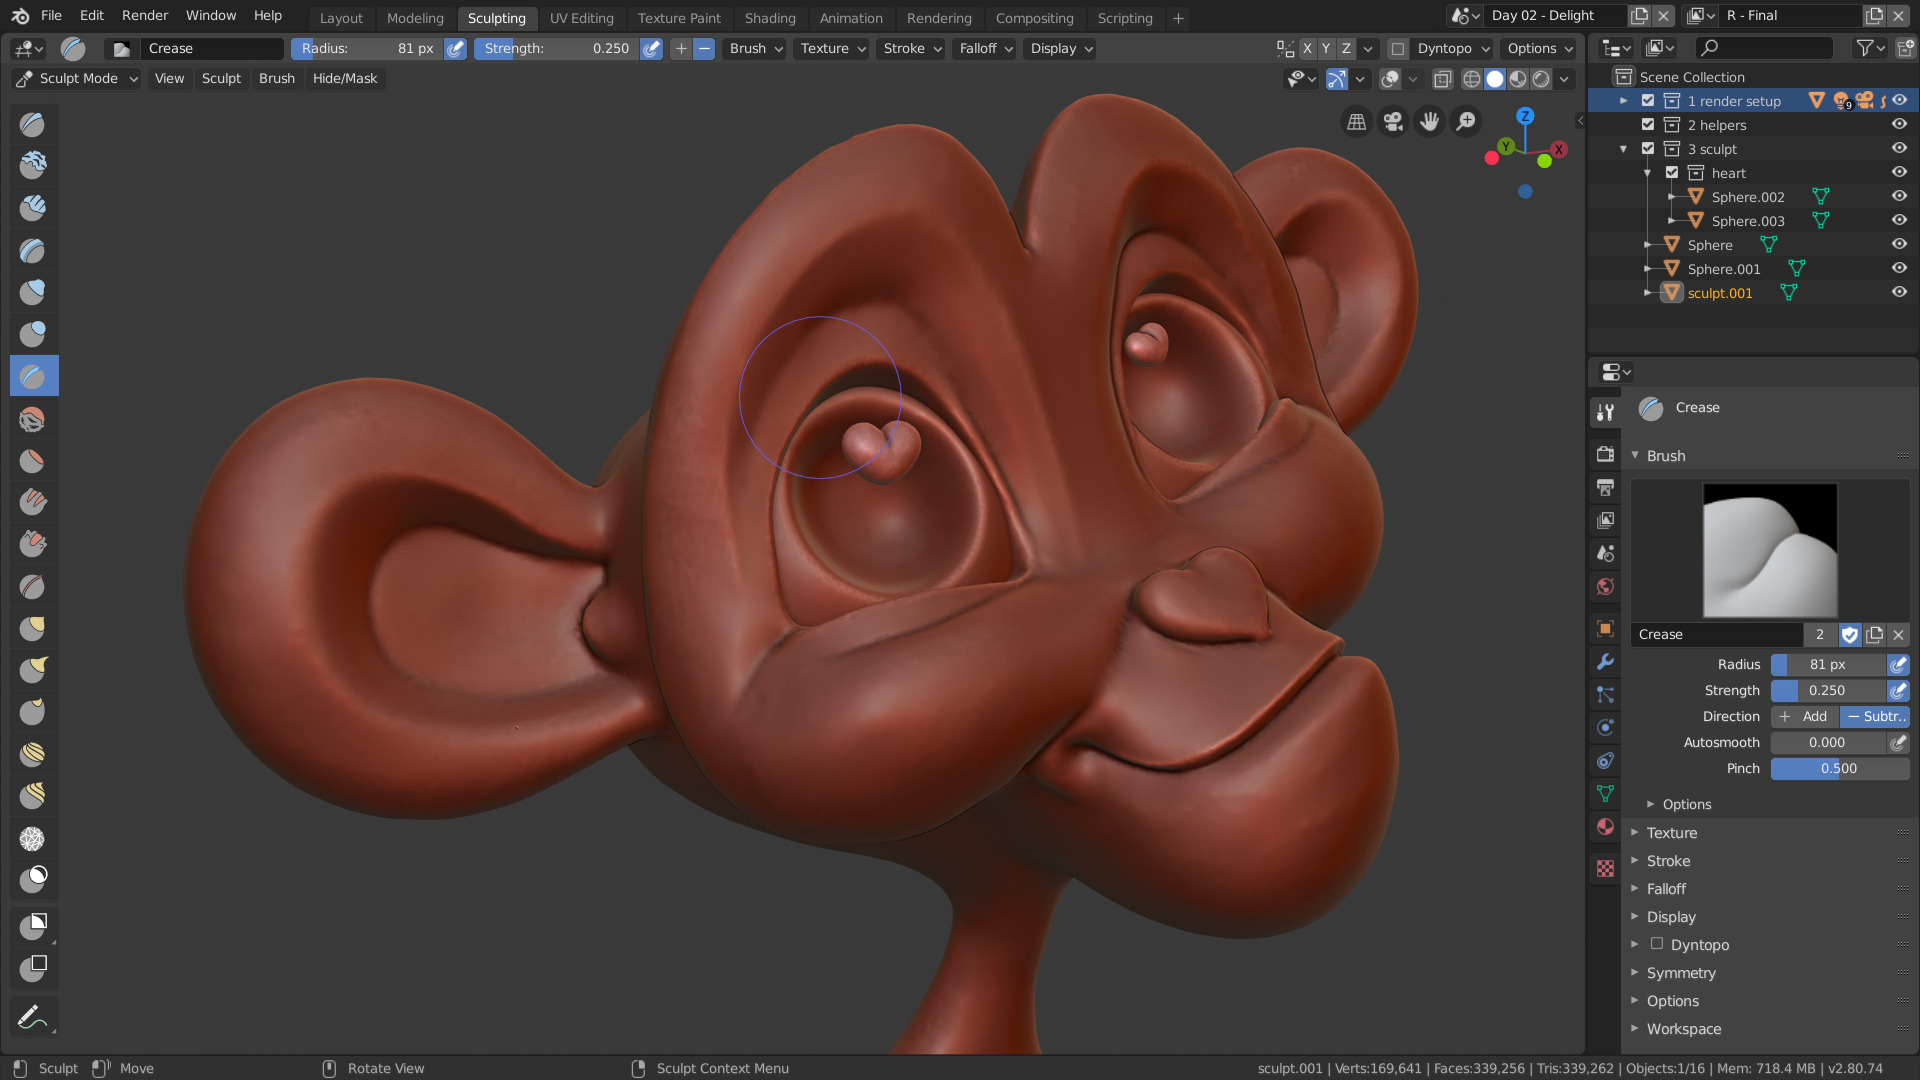
- The workspace includes various brushes, each with its unique purpose, such as the Crease, Clay Strips, Pinch, Grab, Smooth, and Mask brushes. These allow for a wide range of effects and textures in your sculpture.
- Dynamic topology, multi-res sculpting support, and mirrored sculpting are key features within this workspace, facilitating a flexible sculpting process that can accommodate a variety of artistic visions.
- The Trim Lasso brush, for instance, is particularly useful for creating and modifying shapes. It allows for precise control over the addition and subtraction of material from your digital sculpture, similar to working with clay.
- Modifiers can be used in conjunction with sculpting tools to further refine and shape your sculptures. The Smooth modifier, for example, can be applied to smooth out surfaces and create more organic shapes.
Adjusting brush settings is crucial for achieving the desired sculpting effects. The settings panel for each brush offers extensive customization options, including the ability to adjust the strength, size, and dynamics of the brush strokes.
With these tools and features at your disposal, the Blender sculpting workspace is a powerful environment for digital artists looking to explore the realm of 3D sculpting. Whether you\"re sculpting complex characters, intricate details, or vast landscapes, Blender provides a robust set of tools to bring your creative visions to life.

_HOOK_
Exploring Sculpting Tools and Brushes
Embarking on a journey through Blender\"s sculpting mode unveils a powerful suite of tools designed to mimic the intuitive feel of traditional clay sculpting. This digital sculpting environment is optimal for creating organic models, offering a more artistically fluid experience than traditional polygon modeling.
At the heart of Blender\"s sculpting arsenal are its diverse brushes, each tailored for specific sculpting tasks. These tools allow for the addition, subtraction, and refinement of your digital clay, enabling the creation of intricate details and textures on your models. Understanding how to effectively use these brushes is crucial for any aspiring digital sculptor.
- Brushes: Blender comes equipped with a variety of brushes such as the Crease, Clay Strips, Pinch, Grab, Smooth, and Mask brushes, each serving a unique purpose in the sculpting process.
- Dynamic Topology: A transformative feature that dynamically adjusts the mesh\"s topology as you sculpt, allowing for the creation of complex forms without the need for pre-defined geometry.
- Symmetry and Tiling: For efficient sculpting, tools that mirror your actions across an axis or repeat them in a tiled pattern save time and ensure consistency.
- Matcaps: Visual aids that enhance the sculpting process by providing better visual feedback on the surface details and form of your models.
- Masking Tools: Essential for isolating and protecting specific areas of your model while you work on others, enabling precise control over the sculpting process.
To harness the full potential of Blender\"s sculpting tools, practice and exploration are key. Start with simple projects to familiarize yourself with the different brushes and techniques. As you grow more comfortable, experiment with dynamic topology and other advanced features to bring your creative visions to life.
Remember, the journey of mastering Blender\"s sculpting tools is ongoing. With each project, you\"ll discover new methods and workflows that enhance your ability to sculpt detailed, lifelike models. Whether you\"re sculpting for animation, game design, or personal projects, the skills you develop in Blender will serve as a valuable asset in your digital art toolkit.
Mastering Dynamic Topology in Sculpting
Dynamic Topology, or Dyntopo, stands as a revolutionary sculpting feature within Blender that significantly alters the sculpting workflow. Unlike traditional sculpting methods that only modify a mesh\"s shape, Dynamic Topology adds or removes details on-the-fly, thereby providing unparalleled flexibility in creating intricate models without pre-defining the mesh\"s topology.
Understanding and mastering Dynamic Topology involves several key concepts and steps:
- Activation: To start with Dynamic Topology, you must first activate it within the sculpting workspace. This action prepares your mesh for dynamic changes that occur as you sculpt.
- Detail Size: Controlling the level of detail is crucial in Dyntopo. You can adjust the detail size to define how fine or coarse the changes should be. Smaller detail sizes allow for finer, more intricate details, whereas larger sizes are suitable for broader modifications.
- Brushes and Their Impact: All sculpting brushes interact uniquely with Dynamic Topology. Some brushes may add more geometry for detailing, while others might smooth or reduce the complexity of the mesh. Experimenting with different brushes gives you a feel for how each affects your model dynamically.
- Re-topology Considerations: While Dynamic Topology is powerful for creating detailed sculptures, it may lead to non-uniform mesh densities. It\"s often necessary to perform re-topology on your model for animation or game asset creation, ensuring a uniform, manageable mesh.
Practicing with Dynamic Topology enables artists to sculpt without limitations, adding complexities and details that were not possible before. It encourages a freeform approach to digital sculpting, allowing creativity to flow unimpeded by technical constraints. For newcomers and seasoned professionals alike, mastering Dynamic Topology is a journey that significantly enhances your sculpting toolkit in Blender.
For a deeper dive into Dynamic Topology and practical exercises, exploring official Blender documentation and structured courses such as those offered by CG Cookie and Blender.org can provide comprehensive learning paths from basic to advanced techniques.
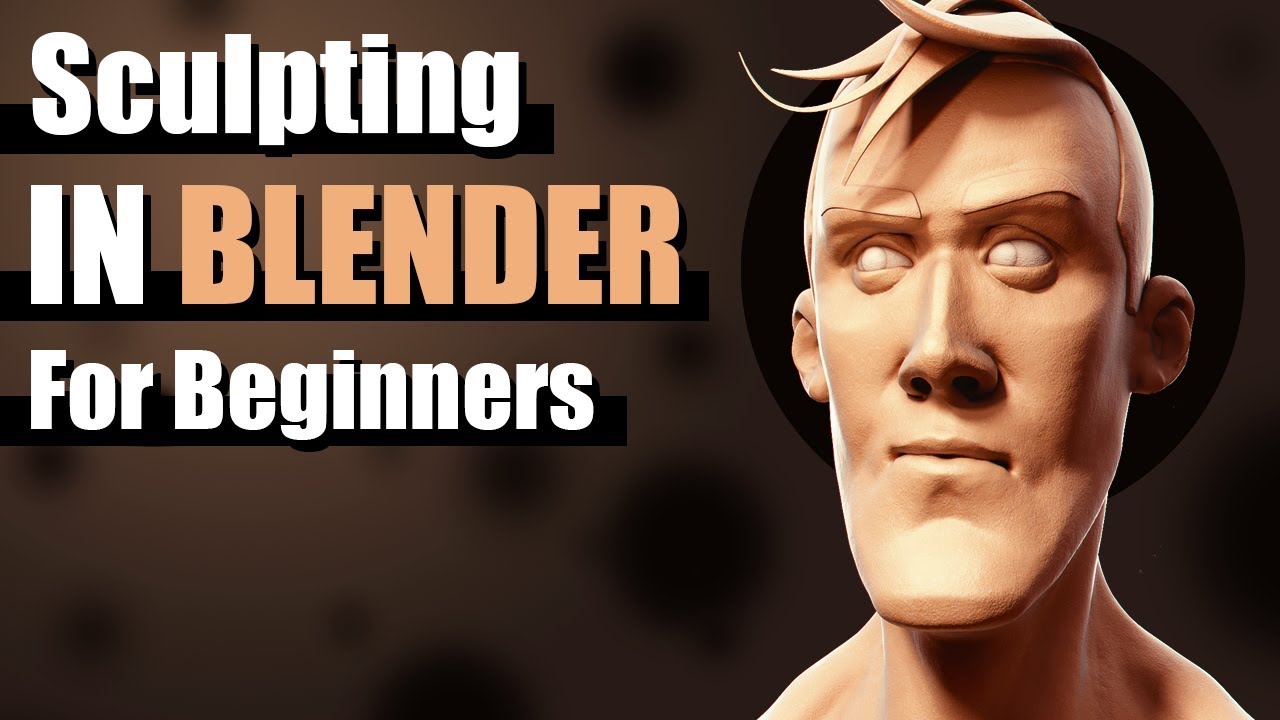
Techniques for Realistic Textures and Details
Creating realistic textures and details in Blender sculpting is an art that combines technical skill with creative vision. This process involves several techniques and tools designed to enhance the visual appeal and authenticity of your sculptures. Here’s how you can achieve realism in your sculpting projects:
- Brush Variety: Utilize Blender\"s extensive brush set for texture detailing. Brushes like Crease, Clay Strips, Pinch, Grab, and Smooth are fundamental. Each brush has a unique effect on the mesh, allowing for the creation of complex textures and fine details.
- Stylized Workflows: For characters or stylized sculptures, understanding the fundamentals of sculpt mode, the interface, and the differences between tools and brushes is crucial. This knowledge enables the artist to effectively apply textures and details that bring characters to life.
- Custom Brushes: Customize your own brushes or import them from external sources. This flexibility allows artists to create unique textures and details not possible with the default set.
- Dynamic Topology: Use dynamic topology (dyntopo) for adding intricate details without worrying about mesh structure. Dyntopo adjusts the mesh density dynamically, which is ideal for creating highly detailed textures.
- Masking: Employ masking to isolate areas for detailed work, protecting other parts of your model. This technique is especially useful for adding fine details to specific areas without affecting the entire model.
Practicing these techniques will enhance your ability to sculpt with realism in Blender. It’s essential to experiment with different brushes, settings, and methods to find what works best for the specific textures and details you aim to create. Remember, achieving realism in sculpting is a blend of observation, understanding material properties, and applying the right techniques to replicate those details digitally.
Advanced Sculpting Techniques and Tips
Mastering advanced sculpting in Blender requires a deep understanding of its powerful features and a creative approach to modeling. Here are some techniques and tips to elevate your sculpting projects:
- Understand Sculpting Fundamentals: Before diving into advanced techniques, ensure you have a solid foundation in digital sculpting basics. This includes familiarity with Blender\"s sculpt mode, essential sculpting tools, and features like dynamic topology and brush customization.
- Utilize Dynamic Topology: Dynamic topology, or Dyntopo, allows you to add complexity to your sculptures on-the-fly. This feature is indispensable for creating highly detailed models without the constraints of predefined mesh topology.
- Experiment with Brushes: Blender offers a wide range of brushes for different sculpting needs. Beyond the standard set, explore custom brushes or modify existing ones to achieve unique textures and effects.
- Master Masking Techniques: Masking is a powerful tool for isolating parts of your model for detailed work. Use it to focus on specific areas without affecting the rest of your sculpture.
- Incorporate Multi-res Sculpting: For projects requiring high levels of detail, multi-res sculpting support in Blender allows you to sculpt at various levels of resolution, providing greater control over the finesse of your work.
- Practice Mirrored Sculpting: For symmetrical models, mirrored sculpting can save time and ensure consistency across your sculpture. This technique is especially useful for character and creature modeling.
Advanced sculpting in Blender is both a technical skill and an art form. By exploring Blender’s comprehensive toolset and practicing regularly, you can push the boundaries of what\"s possible in digital sculpting. Remember, the key to mastering these advanced techniques is patience, experimentation, and continuous learning.
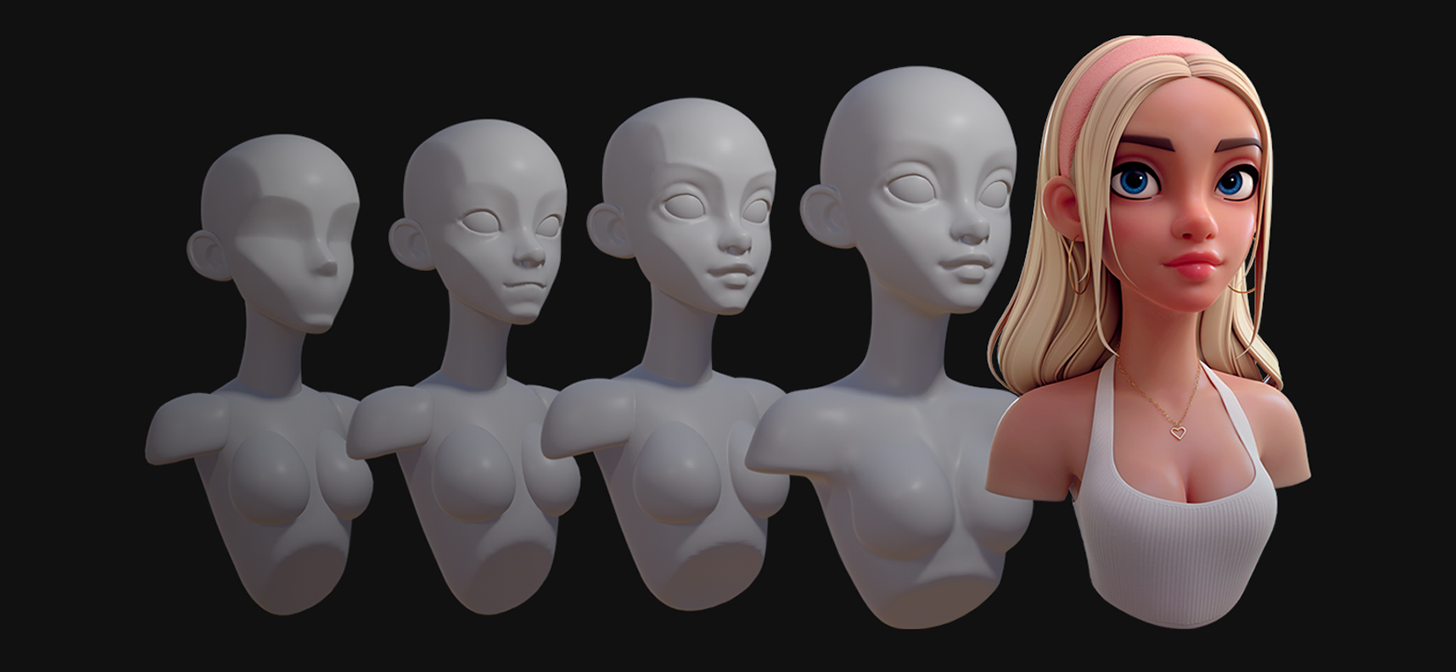
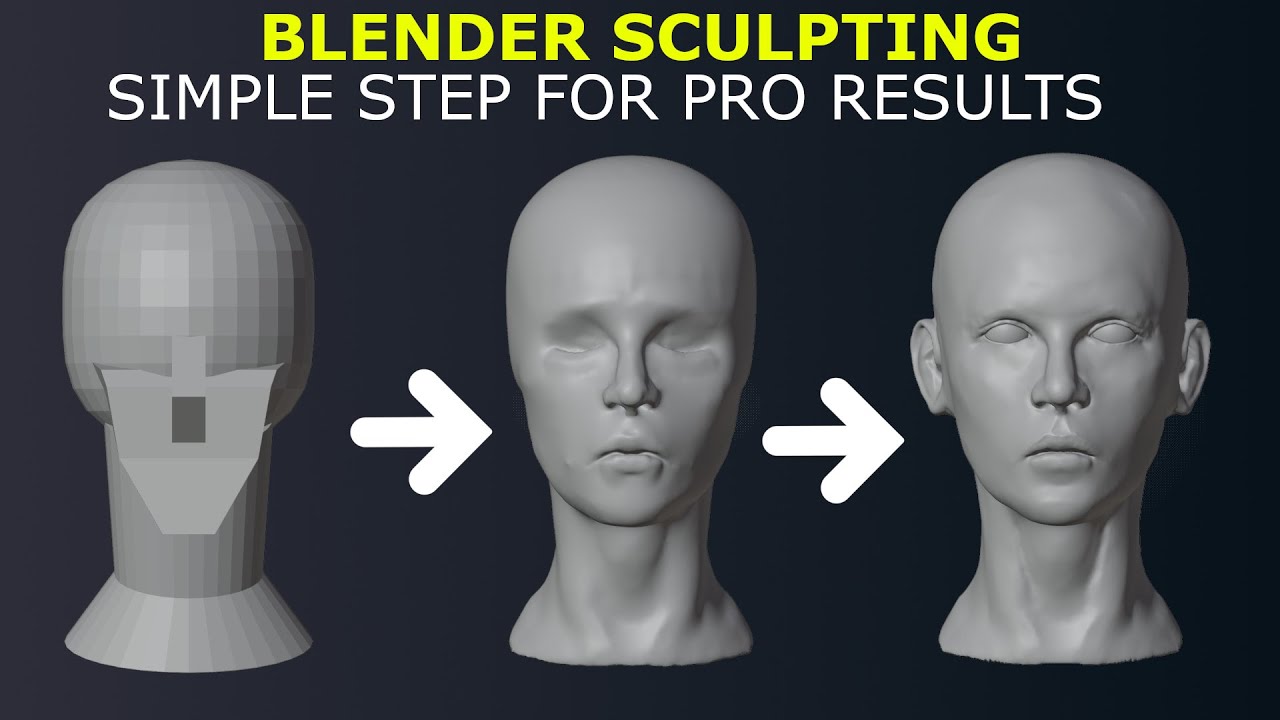
Creating Your First Sculpture: A Step-by-Step Tutorial
Embarking on your first sculpting project in Blender can be an exciting journey into the world of digital art. Here\"s a streamlined process to help you create your first sculpture, inspired by various expert sources and tutorials on digital sculpting with Blender.
- Get Familiar with Blender: Start by familiarizing yourself with Blender\"s interface and the sculpting environment. Understanding the workspace layout, navigation controls, and where to find sculpting tools is crucial.
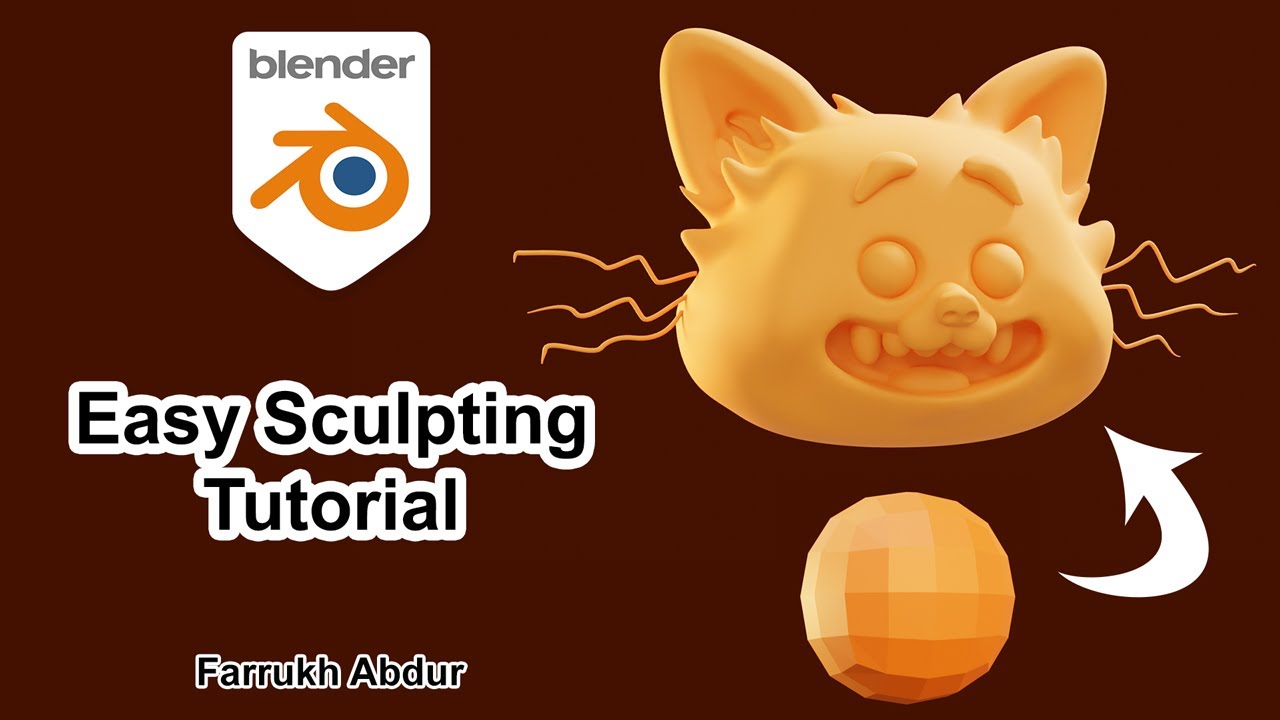
- Choose Your Subject: Decide on a simple subject for your first project. Something like a basic shape or a simple organic form like a fruit or a basic character head can be a great start.
- Setup Your Sculpt: Begin with a basic mesh (like a UV sphere or cube) that you can mold into your desired shape. Ensure you\"re in Sculpt Mode, which provides you access to all the sculpting tools you\"ll need.
- Basic Shaping: Use the Grab, Inflate, and Smooth brushes to start shaping your object. The Grab brush can pull parts of the mesh to form the basic outline, Inflate can add volume, and Smooth can soften the transitions.
- Add Details: Once you have the basic shape, you can start adding details. Use brushes like Crease for sharp lines or indentations and Clay Strips to add volume or texture to your sculpture.
- Dynamic Topology: For more complex details, consider enabling Dynamic Topology (Dyntopo) to add more geometry only where you need it. This tool allows you to sculpt without worrying about the underlying mesh density.
- Refining Your Sculpt: Continue refining your sculpture, adding finer details and textures. Experiment with different brushes and stroke methods to achieve the look you desire.
- Final Touches: Use the Smooth brush to refine the surface and soften any overly harsh details. You can also use the Masking tool to isolate areas for more focused detailing.
Remember, sculpting is an iterative process that involves a lot of back and forth between adding and subtracting volume, refining shapes, and detailing. Don\"t be afraid to experiment and use Undo (Ctrl + Z) liberally to explore different creative avenues.
For comprehensive guidance and more detailed tutorials, consider exploring resources like CG Cookie and the official Blender website. These platforms offer in-depth tutorials and courses that cover everything from the basics of digital sculpting to advanced techniques and projects.
_HOOK_
Utilizing Add-ons and Custom Brushes for Sculpting
Blender\"s sculpting capabilities can be significantly enhanced by utilizing add-ons and custom brushes. These tools can help streamline your workflow, introduce new functionalities, and allow for a higher degree of detail and realism in your sculptures. Here\"s how to make the most out of these resources:
- Exploring Blender Add-ons: Blender supports a wide array of add-ons specifically designed for sculpting. These add-ons can offer advanced sculpting features, such as improved brush sets, enhanced dynamic topology functions, and tools for more efficient sculpting workflows. To install an add-on, download it from a reputable source, then go to Blender\"s Preferences > Add-ons section, click \"Install,\" and navigate to your downloaded file.
- Custom Brushes: Blender comes equipped with a versatile set of brushes, but for more specialized tasks, you might find the need for custom brushes. These can be either created within Blender or imported from external sources. Custom brushes can mimic a wide range of materials and textures, providing a more lifelike quality to your sculptures. To create a custom brush, start with an existing brush, then tweak its settings under the Brush menu to suit your specific needs. You can also import brushes created by other artists.
- Integration with Sculpting Workflows: Integrating add-ons and custom brushes into your sculpting workflow can drastically improve your efficiency and the quality of your work. Experiment with different tools to find what best suits your style and project needs. Remember to regularly save your brush presets and add-on configurations to streamline your setup process for future projects.
For beginners and professionals alike, Blender\"s extensibility through add-ons and the ability to customize brushes are invaluable assets. By taking advantage of these features, you can push the boundaries of digital sculpting and bring your creative visions to life with greater detail and precision.
To learn more about sculpting in Blender, including using add-ons and custom brushes, consider visiting Blender\"s official sculpting page and exploring courses on CG Cookie for detailed tutorials and guidance.
Incorporating Sculpting into Your Workflow
Incorporating sculpting into your Blender workflow can significantly enhance your 3D modeling capabilities, offering a more intuitive and artistic approach to creating organic shapes and detailed models. Here\"s how you can seamlessly integrate sculpting into your projects:
- Start with a Concept: Begin your sculpting project with a clear concept or reference images. This initial step helps in visualizing the end result and planning the sculpting process.
- Choose the Right Base Mesh: Depending on the complexity of your sculpture, choose a simple base mesh like a sphere or cube that you can easily mold into your desired shape. This serves as the foundation of your sculpture.
- Master Sculpting Tools: Familiarize yourself with Blender\"s sculpting tools and brushes. Each brush has specific functions that can add, subtract, smooth, or modify the surface of your mesh, allowing you to sculpt detailed features.
- Dynamic Topology: Utilize dynamic topology (Dyntopo) for more flexibility in adding details without worrying about the mesh structure. This feature dynamically adjusts the mesh\"s topology as you sculpt, facilitating the creation of complex shapes and textures.
- Refinement and Detailing: After shaping your basic form, refine your sculpture by adding finer details. This is where custom brushes and add-ons can be particularly useful, providing you with a wider range of texturing options.
- Regularly Review Your Work: Periodically step back and review your sculpture from different angles. This practice helps in maintaining proportion, symmetry, and ensuring that the details contribute to the overall aesthetics of your model.
- Integrate with Other Workflows: Sculpting is often one part of a larger workflow. Once your sculpt is complete, you may need to retopologize your model for animation, apply materials and textures for rendering, or incorporate it into a larger scene.
Blender\"s sculpting tools, supported by its comprehensive set of features for modeling, texturing, and rendering, make it an ideal platform for artists to bring their visions to life. With practice and exploration, you can develop a workflow that leverages the strengths of sculpting to enhance your 3D creations.
For more detailed guides and tutorials on sculpting with Blender, resources like CG Cookie and the official Blender website offer extensive learning materials to help you advance your skills.
Community Resources and Where to Find Help
The Blender community offers a wealth of resources and support channels for both new and experienced users exploring sculpting in Blender. Here are some key resources to help you on your journey:
- Blender Artists Community: A vibrant forum where users share their work, ask questions, and provide feedback to one another. It\"s a great place to seek advice on sculpting techniques or solve specific challenges you\"re facing.
- Blender Network: Official Blender Foundation\"s professional network, offering connections to experienced Blender professionals and trainers. Ideal for finding mentors or professional training.
- Blender Stack Exchange: A Q&A site for Blender users where you can ask technical questions and receive answers from the community. This platform is well-organized and covers a wide range of topics, including sculpting.
- Blender Documentation: The official Blender Manual is an exhaustive resource that covers all aspects of Blender, including detailed sections on sculpting tools, features, and workflows.
- Online Courses and Tutorials: Websites like CG Cookie offer comprehensive courses on digital sculpting with Blender, covering everything from the basics to advanced techniques.
- Social Media and Video Platforms: YouTube and Instagram are filled with Blender-focused channels and artists sharing tutorials, time-lapses of sculpting projects, and insights into their workflows.
Engaging with these resources can significantly accelerate your learning process, providing you with a mix of structured learning, community support, and inspiration. Remember, the Blender community is known for its willingness to help newcomers, so don\"t hesitate to reach out and ask for help when needed.
READ MORE:
Continuing Your Blender Education: Next Steps
As you venture further into the world of Blender sculpting, your journey is just beginning. Embracing continuous learning and exploring advanced techniques will significantly enhance your skills. Here are some recommended steps to further your education in Blender:
- Explore Advanced Sculpting Techniques: Dive deeper into the functionalities of Blender\"s sculpting tools. Experiment with dynamic topology, multi-res sculpting, and custom brushes to refine your work and add intricate details to your sculptures.
- Master Texturing and Shading: Learn how to bring your sculptures to life with realistic textures and shading. Understanding material properties, UV mapping, and node-based shading will open up new possibilities for your creations.
- Integrate with Other Blender Workflows: Sculpting is just one part of the 3D creation process. Explore how to incorporate your sculptures into larger projects by learning about Blender\"s modeling, animation, and rendering capabilities.
- Participate in Community Challenges: Engage with the Blender community by participating in sculpting challenges and contests. This is a great way to get feedback, learn from others, and push your limits.
- Stay Updated with Blender Updates: Blender is continuously evolving, with new features and improvements being added regularly. Stay updated with the latest versions and explore new features to enhance your sculpting workflow.
- Utilize Online Resources: There is a wealth of knowledge available online, including tutorials, forums, and video courses. Resources like CG Cookie and the Blender Studio offer in-depth courses on sculpting and other Blender topics.
- Contribute to Open Projects: Consider contributing to open-source projects or Blender Foundation initiatives. This not only helps improve Blender but also gives you practical experience and exposure to real-world projects.
Remember, the key to mastering Blender sculpting is practice, experimentation, and staying engaged with the community. Keep exploring, learning, and sharing your work with others. Your next masterpiece is just a project away!
Embark on your Blender sculpting journey with confidence, embracing the endless possibilities that digital art offers. Whether you\"re a beginner or looking to refine your skills, our comprehensive guide provides the tools and inspiration you need to unleash your creative potential and transform your visions into reality.