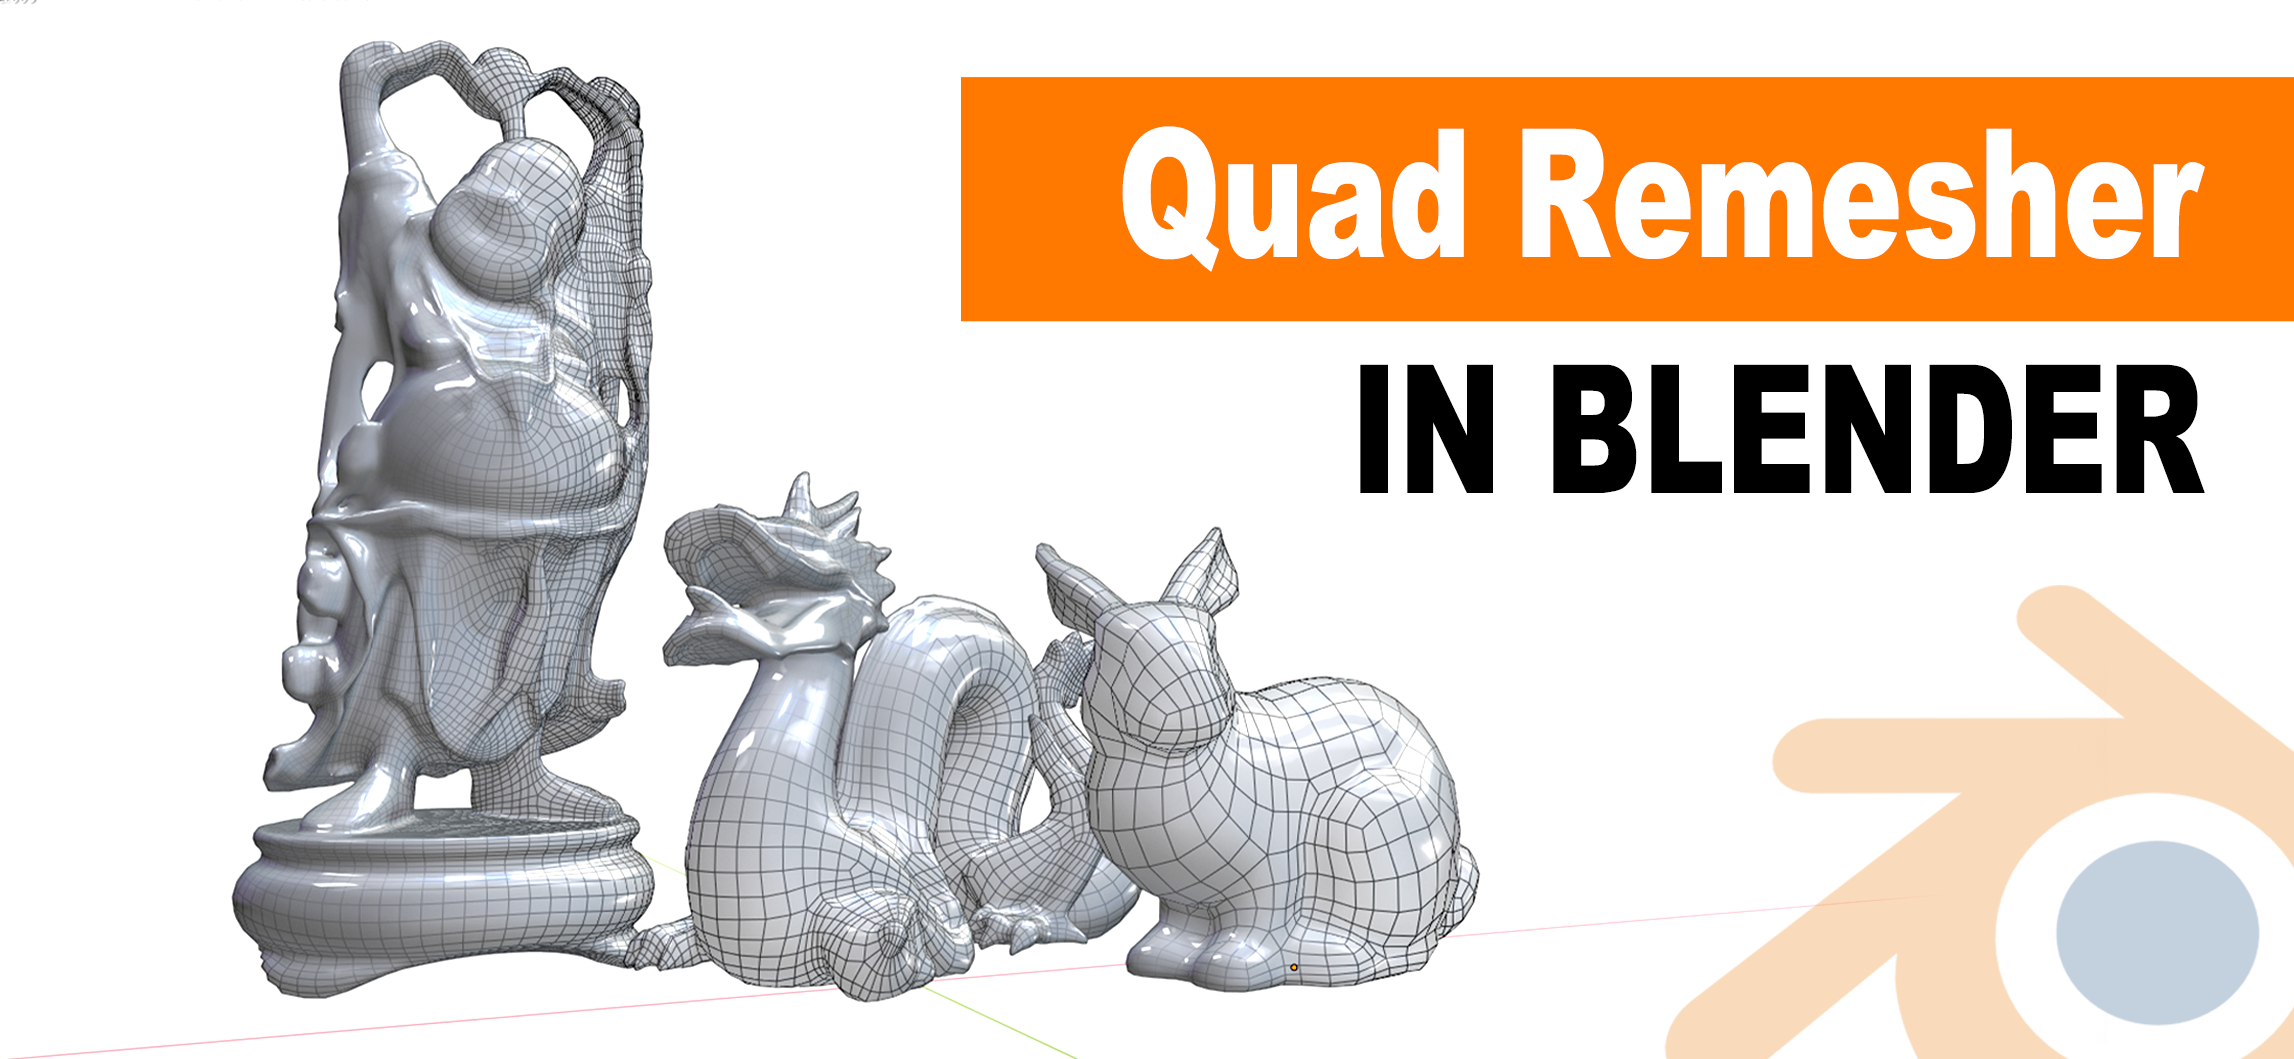
Topic blender quad remesher: Discover Blender Quad Remesher, the ultimate solution for mesh simplification, enhancing your 3D modeling workflow with efficiency and precision. Transform complex meshes effortlessly.
Table of Content
- How to use Blender Quad Remesher for auto-retopology?
- What is Blender Quad Remesher?
- Key Features and Benefits of Quad Remesher
- Installation and Setup for Quad Remesher in Blender
- How to Use Quad Remesher: A Step-by-Step Guide
- Comparing Quad Remesher with Other Remeshing Tools
- Best Practices for Achieving Optimal Results with Quad Remesher
- YOUTUBE: Quad Remesher Add-on - Blender Secrets
- Common Issues and Troubleshooting Tips for Quad Remesher
- Case Studies: Successful Uses of Quad Remesher in Projects
- Advanced Techniques and Tips for Quad Remesher
- Future Updates and Community Resources for Quad Remesher
How to use Blender Quad Remesher for auto-retopology?
To use Blender Quad Remesher for auto-retopology, you can follow these steps:
- First, make sure that you have the Quad Remesher addon installed in your Blender. If you don\'t have it, you can download it from the developer\'s website or through a trusted source.
- Once you have the addon installed, open Blender and go to the \"Preferences\" window.
- In the \"Add-ons\" tab, search for \"Quad Remesher\" and enable the addon by checking the box next to it.
- Close the \"Preferences\" window, and you should now see the Quad Remesher option in Blender\'s interface.
- Before using Quad Remesher, make sure you have a mesh that needs to be retopologized. If you don\'t have a mesh, you can create one or import an existing one into Blender.
- Select the mesh that you want to retopologize by right-clicking on it in the 3D Viewport.
- With the mesh selected, go to the \"Object\" menu and navigate to the \"Quad Remesher\" submenu.
- Click on the \"Remesh\" option, and Quad Remesher will start processing the mesh to generate a new retopologized version.
- Wait for the remeshing process to complete. The time it takes will depend on the complexity of your mesh.
- Once the remeshing is done, you can tweak the settings of Quad Remesher if needed. These settings allow you to adjust the quality, density, and other parameters of the retopology.
- After adjusting the settings (if necessary), you can preview the retopologized mesh by clicking on the \"Preview\" button in the Quad Remesher panel.
- If you are satisfied with the result, you can click on the \"Apply\" button to finalize the retopology and replace the old mesh with the new one.
- That\'s it! You have successfully used Blender Quad Remesher for auto-retopology.
READ MORE:
What is Blender Quad Remesher?
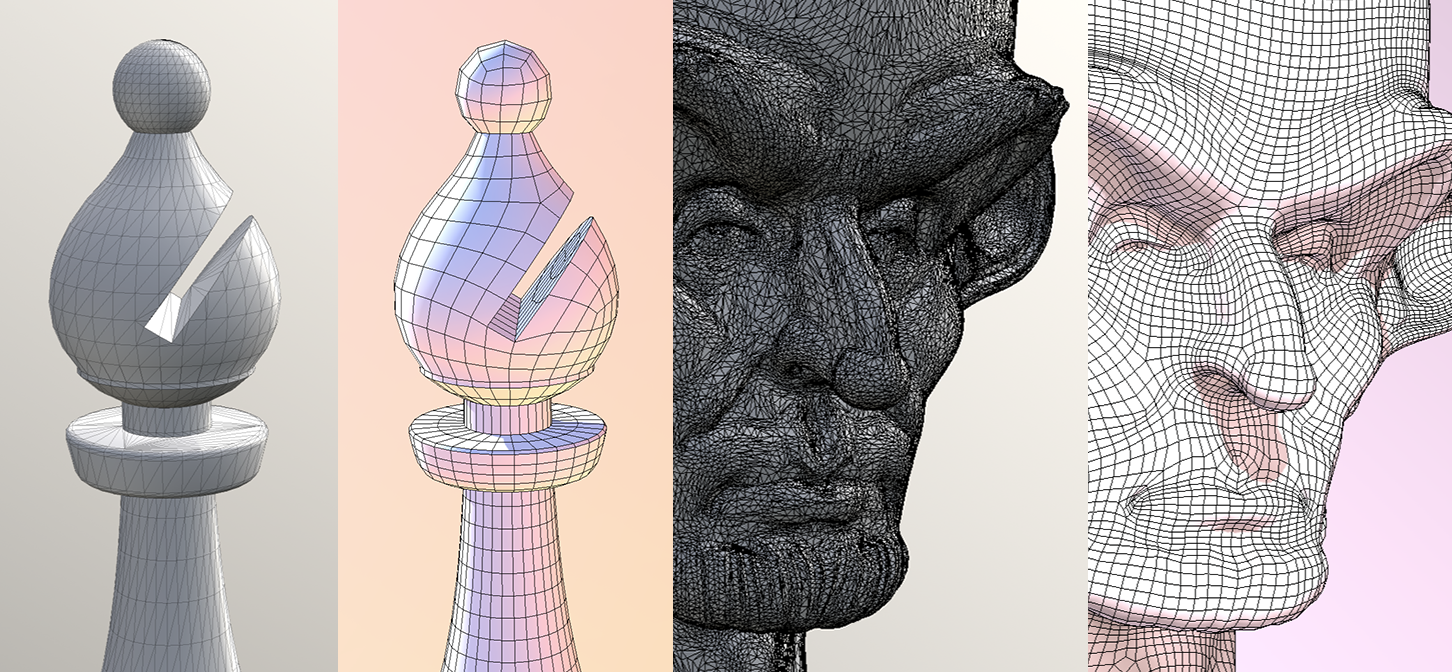
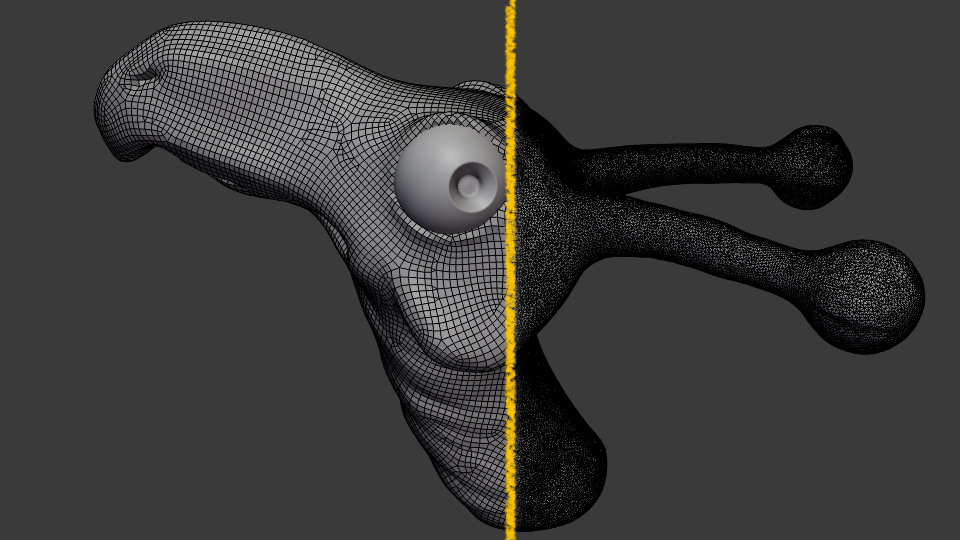
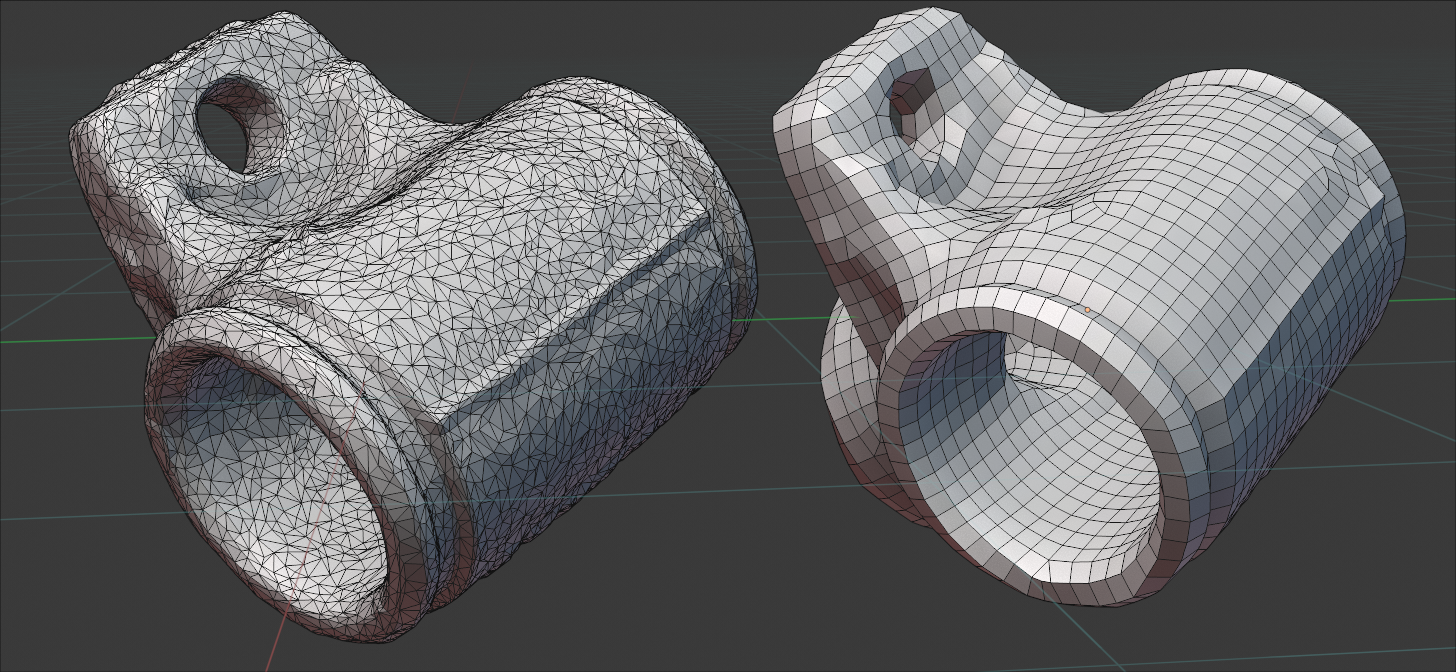
Blender Quad Remesher is an advanced auto-retopology tool that simplifies the mesh optimization process for 3D models within Blender. It converts complex meshes into quad-based meshes, facilitating smoother workflows for animators, game developers, and 3D artists. This tool is particularly valuable for creating clean, topologically sound meshes that are essential for high-quality 3D modeling and animation.
- Automatically converts dense meshes into clean quad meshes.
- Optimizes workflow for professionals in animation, game development, and 3D modeling.
- Supports a variety of customization options for mesh density, symmetry, and edge flow.
- Integrates seamlessly with Blender, offering a user-friendly interface and efficient processing.
The Quad Remesher tool is recognized for its ability to maintain the original shape and detail of the model while significantly reducing the polygon count, making it an indispensable asset for any 3D modeling project that requires high levels of detail and optimization.
Key Features and Benefits of Quad Remesher
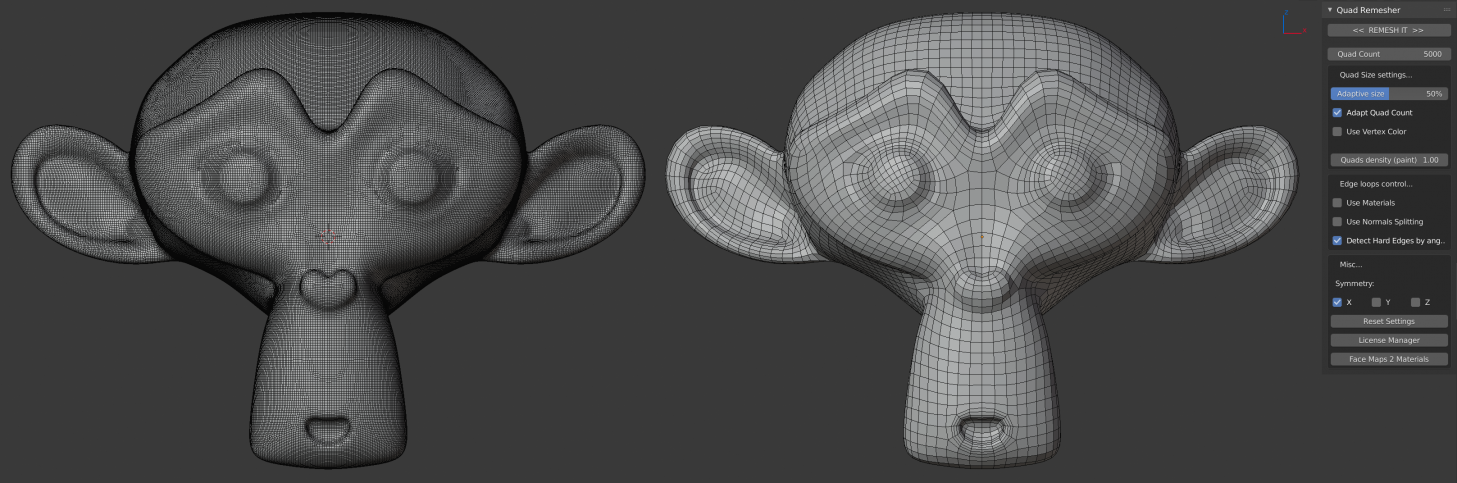
The Quad Remesher for Blender offers a suite of features designed to streamline the retopology process, enhancing both efficiency and output quality for 3D modeling projects. Below are its standout features and the benefits they bring to users:
- Auto-Retopology: Converts complex meshes into quad-based meshes automatically, saving time and effort in the modeling process.
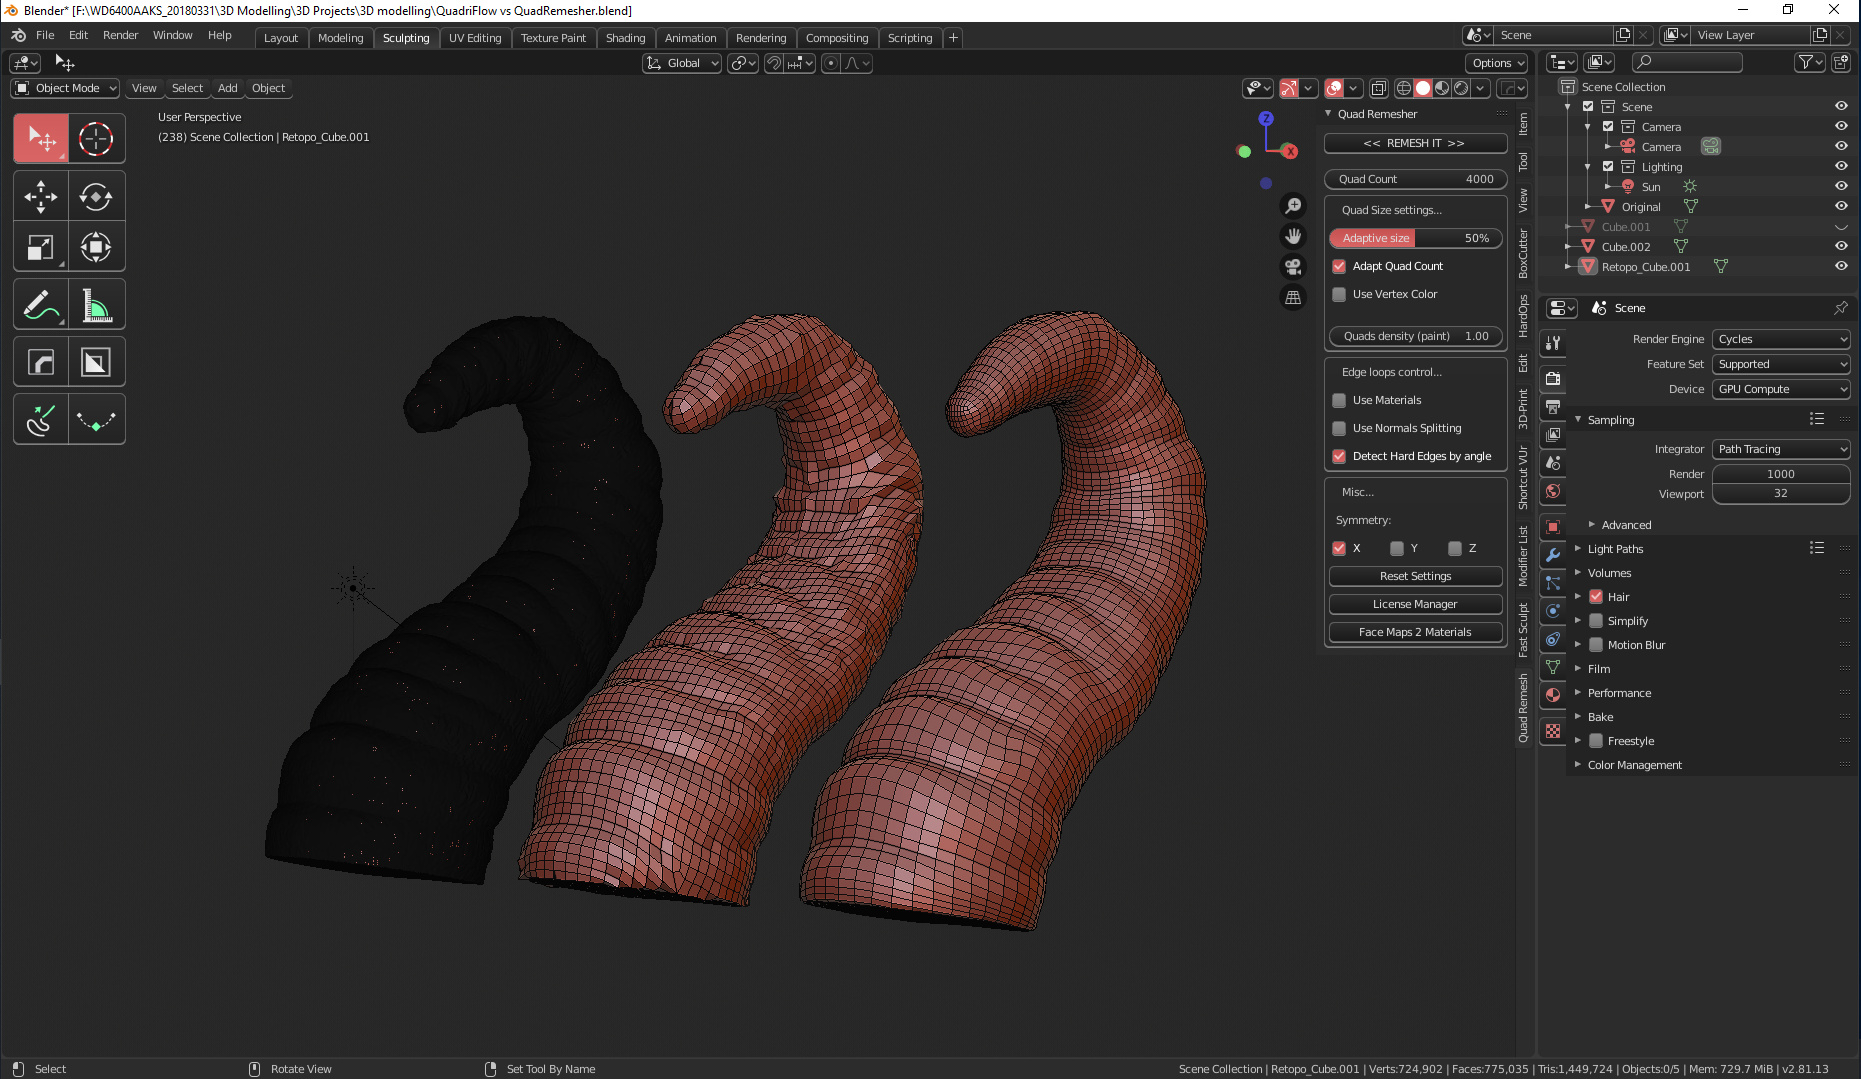
- Customizable Mesh Density: Allows users to control the density of the resulting mesh, ensuring optimal balance between detail and performance.
- Adaptive Edge Loop Detection: Identifies and preserves natural edge loops, improving the animation and deformation quality of the model.
- Symmetry Support: Supports retopologizing symmetrical models, maintaining uniformity and reducing work by half.
- Hard Surface Support: Efficiently handles hard-surfaced models, making it ideal for mechanical or architectural visualizations.
- Seamless Blender Integration: Designed to integrate smoothly with Blender, offering a user-friendly interface and workflow.
These features collectively make Quad Remesher an indispensable tool for 3D artists, animators, and game developers looking to improve their production workflow and achieve high-quality results with minimal manual intervention.

Installation and Setup for Quad Remesher in Blender
- Download the Quad Remesher Add-on: Visit the official Quad Remesher website or a trusted marketplace to purchase and download the add-on.
- Open Blender: Launch Blender and go to Edit > Preferences > Add-ons.
- Install Add-on: Click on the Install button, then navigate to the location of the downloaded file (usually a .zip file) and select it.
- Activate Quad Remesher: Search for Quad Remesher in the add-ons list, check the box next to it to activate, and then click Save Preferences.
- Access Quad Remesher: To use Quad Remesher, select the object you wish to remesh, then go to the mesh options where Quad Remesher should now be visible as an option.
- Configure Settings: Adjust the Quad Remesher settings according to your project needs, including target quad count, symmetry options, and adaptive size.
- Remesh: Click the Remesh button to start the remeshing process. The time it takes will depend on the complexity of the model and the settings chosen.
This simple process integrates Quad Remesher seamlessly into your Blender workflow, allowing you to efficiently optimize and simplify your 3D models with high-quality quad meshes.
How to Use Quad Remesher: A Step-by-Step Guide
- Select Your Model: Begin by selecting the model you wish to remesh within Blender.
- Access Quad Remesher: Find Quad Remesher in the Blender menu, usually under the mesh editing options, depending on your version of Blender.
- Adjust Remeshing Settings: In the Quad Remesher options panel, adjust the settings to fit your needs. Options include target quad count, symmetry, and edge flow preferences.
- Execute Remesh: Once satisfied with the settings, click the \"Remesh\" button. Quad Remesher will process your model, automatically converting it into a quad-dominant mesh based on your specifications.
- Review and Refine: After remeshing, review the new mesh for any areas that may require manual refinement. Adjust the settings and remesh again if necessary.
- Final Adjustments: Make any final adjustments to the remeshed model as needed, including smoothing and sculpting details.
This guide should help you effectively utilize Quad Remesher in Blender, streamlining your workflow and improving the quality of your 3D models with ease.
_HOOK_
Comparing Quad Remesher with Other Remeshing Tools
Quad Remesher stands out in the realm of remeshing tools for Blender due to its unique set of features and benefits. Let\"s explore how it compares to other popular remeshing solutions:
- Automatic Quad-Dominant Meshing: Unlike many remeshing tools that produce a mix of quads and triangles, Quad Remesher focuses on creating quad-dominant meshes, which are preferred for their ease of editing and smoother results in animations.
- Adaptive Edge Loops: It intelligently detects and preserves edge loops, which is crucial for maintaining the details and form of the original model, a feature that is not as refined in other tools.
- Advanced Algorithms: Based on the technology behind ZBrush\"s ZRemesher, Quad Remesher offers superior algorithms for mesh simplification, offering better control over the final output compared to other Blender plugins or standalone tools.
- User-Friendly Interface: Quad Remesher integrates seamlessly into Blender, providing a straightforward and intuitive interface, making it accessible even to those new to remeshing.
- Customization Options: It provides extensive control over the remeshing process, including target quad count, mesh density, and symmetry options, offering flexibility that is unmatched by most free tools.
- Efficiency and Time Saving: Designed to streamline the remeshing workflow, Quad Remesher significantly reduces the time and manual effort required for retopologizing complex models, a key advantage over manual remeshing techniques.
In comparison to other remeshing tools, Quad Remesher\"s blend of automation, control, and quality makes it a preferred choice for professionals and hobbyists looking to optimize their 3D modeling and animation workflows in Blender.

Best Practices for Achieving Optimal Results with Quad Remesher
To ensure the best possible outcomes when using Quad Remesher in Blender, follow these best practices:
- Prepare Your Model: Ensure your model is clean and free of non-manifold edges or duplicate vertices before remeshing. This preparation helps Quad Remesher accurately analyze and process the geometry.
- Optimal Quad Count: Set a realistic quad count for your model\"s complexity and intended use. Higher counts for detailed models and lower for simpler or distant objects.
- Use Symmetry When Possible: If your model is symmetrical, take advantage of the symmetry option to reduce processing time and improve mesh uniformity.
- Adjust Edge Flow: Utilize the edge flow controls to guide the remeshing process according to your model’s topology needs, especially for models requiring specific deformation behaviors.
- Experiment with Settings: Don\"t hesitate to experiment with different settings to find the optimal configuration for your specific project. The adaptive size and hardness settings can dramatically affect the final outcome.
- Post-Remeshing Clean-up: After remeshing, inspect the mesh for any irregularities or areas that may need manual refinement and use Blender\"s modeling tools to clean up if necessary.
- Save Your Settings: Once you find a settings combination that works well for your type of projects, save them as presets for future use to streamline your workflow.
By following these guidelines, you can maximize the efficiency and effectiveness of Quad Remesher in your Blender projects, achieving high-quality, optimized meshes with ease.
Quad Remesher Add-on - Blender Secrets
Add-on: Discover the ultimate productivity boost for your favorite software with our game-changing add-on! Unlock new features, streamline your workflow, and supercharge your productivity - all while making your work easier and more enjoyable. Watch our video to learn how this add-on can take your tasks to the next level!
Quad Remesher for Blender - Quick Start Tutorial
Tutorial: Ready to master a new skill or level up your knowledge? Our comprehensive tutorial video will guide you every step of the way, making learning fun and effortless. From beginner to expert, our tutorial ensures you gain the confidence and expertise you need. Join thousands of satisfied learners who have transformed their abilities by watching our tutorial video now!
Common Issues and Troubleshooting Tips for Quad Remesher
While Quad Remesher is a powerful tool for Blender users, certain common issues may arise. Here are troubleshooting tips to help you overcome these challenges:
- Installation Problems: If you encounter issues installing Quad Remesher, ensure that you have the correct version for your Blender installation. Always download the latest version from the official website.
- Mesh Not Remeshing Correctly: Ensure your original mesh is clean; remove any non-manifold edges and make sure the mesh is closed. Sometimes, applying a slight scale can help.
- Unexpected Results: For complex models, adjusting the target quad count and experimenting with the adaptive quad count feature can yield better results. Also, checking the \"Use materials\" option might help in preserving details.
- Crashes or Freezes: Large or complex models may cause Blender to freeze or crash during the remeshing process. Try simplifying the model or reducing the target quad count to alleviate this issue.
- License Activation Issues: Ensure that your license key is correctly entered and that you\"re connected to the internet for activation. If problems persist, contact support for assistance.
- Performance Optimization: For better performance, close other heavy applications while remeshing and consider upgrading your hardware specifications if consistently working on high-poly models.
These tips should help address the most common issues encountered with Quad Remesher, ensuring a smoother and more efficient workflow in Blender.
Case Studies: Successful Uses of Quad Remesher in Projects
Quad Remesher has been successfully applied in various projects across different domains, showcasing its versatility and efficiency in enhancing 3D modeling workflows. Here are some illustrative case studies:
- Character Modeling for Animation: A 3D artist transformed a complex, sculpted character model into a clean, animation-ready mesh with uniform quad distribution, significantly reducing the time required for rigging and skinning.
- Architectural Visualization: In an architectural project, Quad Remesher was used to streamline the creation of detailed 3D models of buildings from high-poly scans, enabling smoother rendering and faster project completion.
- Game Asset Creation: Game developers utilized Quad Remesher to optimize high-poly assets for real-time rendering in games, balancing detail and performance to enhance the gaming experience.
- Product Design and Prototyping: Designers employed Quad Remesher to refine complex product models into cleaner versions suitable for 3D printing and prototyping, facilitating a more efficient design iteration process.
- Visual Effects (VFX): VFX artists used Quad Remesher to quickly convert detailed creature and environment models into meshes that are easier to animate and incorporate into live-action footage, improving workflow efficiency.
These case studies demonstrate Quad Remesher\"s ability to improve productivity, enhance model quality, and support creative exploration across various fields of 3D modeling and animation.
Advanced Techniques and Tips for Quad Remesher
Maximizing the potential of Quad Remesher in Blender requires a blend of understanding its core functionalities and applying advanced techniques. Here are some expert tips to enhance your usage:
- Optimize Mesh Before Remeshing: Pre-process your mesh by removing unnecessary vertices and correcting topology errors. This step ensures that Quad Remesher has the best possible base to work from, leading to superior results.
- Use Custom Loops: For areas requiring specific edge flow, use Blender\"s tools to define custom loops before remeshing. This guides Quad Remesher on where to create loops, enhancing the final topology\"s suitability for animation or further detailing.
- Combine with Sculpting: After remeshing, use Blender’s sculpting tools to refine the model. Quad Remesher provides a clean topology that is ideal for adding detailed sculpts without the typical polygon stretching.
- Iterative Remeshing: For complex models, consider using an iterative approach. Start with a lower density mesh to get the basic forms right, then incrementally increase the density for detailing, using Quad Remesher at each stage.
- Adjust Hardness Settings: Experiment with the \"hardness\" settings to control edge sharpness in your remeshed model, especially useful for hard-surface models to preserve crisp edges.
- Experiment with Projection Settings: Use the projection feature to ensure that the remeshed model closely matches the original mesh\"s surface detail, adjusting the projection strength as needed.
Applying these advanced techniques can significantly improve the quality of your remeshed models, making Quad Remesher an even more powerful tool in your Blender toolkit.
_HOOK_
READ MORE:
Future Updates and Community Resources for Quad Remesher
Staying ahead with Quad Remesher means being aware of future updates and tapping into a wealth of community resources. Here\"s how to stay informed and engaged:
- Follow Official Announcements: Keep an eye on the official Quad Remesher website and social media channels for announcements regarding new features, updates, and enhancements.
- Participate in Forums and Communities: Join Blender forums and communities such as BlenderArtists.org or the Blender subreddit. These platforms often share tips, tutorials, and user experiences related to Quad Remesher.
- Explore Tutorials and Guides: Look for tutorials on YouTube, BlenderNation, and other educational platforms where professionals share their Quad Remesher workflows and techniques.
- Provide Feedback: Engaging with the Quad Remesher development team by providing feedback or feature requests can help shape future updates.
- Test Beta Versions: Participate in testing beta versions of Quad Remesher if available. This can offer early access to new features and the opportunity to contribute to the tool\"s development.
- Stay Updated with Blender Releases: Since Quad Remesher works within Blender, keeping your Blender software up to date ensures compatibility and access to the latest features.
By engaging with these resources and staying informed about the latest developments, users can maximize their use of Quad Remesher and contribute to a vibrant community of 3D modeling professionals.
Embrace the transformative power of Blender Quad Remesher to elevate your 3D modeling projects. Its unmatched efficiency, precision, and ease of use make it an essential tool for artists seeking to push the boundaries of creativity.