Topic blender green screen vfx: Discover the secrets of creating stunning visual effects with Blender green screen VFX. This guide offers everything you need to integrate realistic CGI with live footage, transforming your projects into cinematic masterpieces.
Table of Content
- What are the best practices for implementing green screen VFX in Blender?
- Understanding Green Screen VFX
- Getting Started with Green Screen in Blender
- Advanced Techniques and Tips
- Resources and Tutorials
- Getting Started with Green Screen in Blender
- Advanced Techniques and Tips
- YOUTUBE: Learn Green Screen VFX in Blender in UNDER 7 MINUTES New Title: Green Screen VFX Tutorial in Blender under 7 Minutes
- Resources and Tutorials
- Advanced Techniques and Tips
- Resources and Tutorials
- Resources and Tutorials
- Introduction to Blender and Green Screen VFX
- Why Use Blender for Green Screen VFX
- Getting Started with Blender for Green Screen Work
- Step-by-Step Tutorial for Green Screen in Blender
- Advanced Techniques for Realistic Compositing
- Common Pitfalls and How to Avoid Them
- Resources for Learning More About Blender VFX
- Real-World Projects Using Blender for Green Screen VFX
What are the best practices for implementing green screen VFX in Blender?
Implementing green screen VFX in Blender requires attention to detail and a structured approach. Here are some best practices to follow:
- Start by filming your subject against a green screen backdrop. Make sure the lighting is even and there are no shadows on the screen.
- Import your footage into Blender and place it on the timeline.
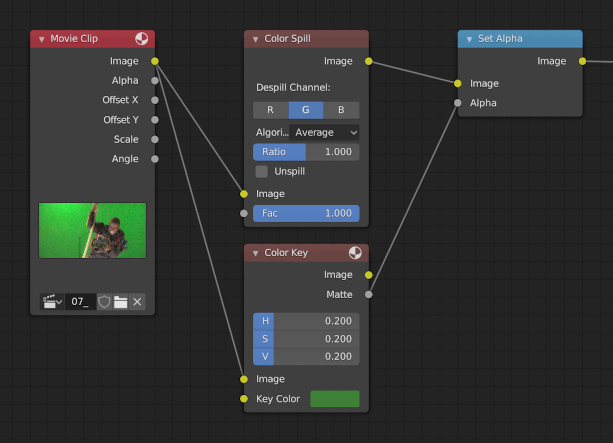
- Add a \"Keying\" node to your footage in the compositor. This node will help you remove the green screen background.
- Adjust the settings of the Keying node to fine-tune the removal of the green screen. Play around with parameters like Key Color and Despill to get the best results.
- Use additional nodes like Color Correction and Matte tools to further enhance the quality of your keying.
- Composite your keyed footage onto a background image or video to create the final VFX shot.
- Preview your composition and make any necessary adjustments to ensure a seamless integration of the subject with the background.
- Render the final VFX shot using Blender\'s rendering engine.
By following these steps and experimenting with different settings, you can achieve professional-looking green screen VFX in Blender.
READ MORE:
Understanding Green Screen VFX
Green screen VFX involves removing a green background from live-action footage and replacing it with a new background or CGI elements. This technique is crucial for creating seamless integrations between real and virtual worlds in filmmaking and video production.
Benefits of Using Blender
- Open-source and free to use
- Comprehensive toolset for modeling, animation, rendering, and VFX
- Supports a wide range of VFX techniques including chroma keying and compositing

Getting Started with Green Screen in Blender
To begin working with green screen footage in Blender, you\"ll need to familiarize yourself with its compositing and keying nodes. These tools allow you to extract clean alpha channels, remove green backgrounds, and integrate your footage with CGI elements effectively.
Key Steps for Green Screen VFX
- Import your green screen footage into Blender.
- Use the Keying node to remove the green background.
- Composite your footage with desired CGI backgrounds or elements.
- Adjust color grading to match the live footage with the CGI elements.
Advanced Techniques and Tips
Once you\"ve mastered the basics, explore advanced techniques to enhance your VFX work in Blender:
- Utilize motion tracking for dynamic scenes.
- Experiment with lighting and shadows for realism.
- Apply color correction for seamless integration.
Resources and Tutorials
There are numerous online resources, including tutorials on YouTube and courses on platforms like Udemy, to help you deepen your understanding of green screen VFX in Blender. Practice with these resources to refine your skills and bring your creative visions to life.
Conclusion
Blender\"s robust features make it an ideal choice for green screen VFX, offering both beginners and professionals the tools needed for high-quality visual effects production. By following tutorials and practicing regularly, you can achieve professional-looking results and push the boundaries of your creative projects.

_HOOK_
Getting Started with Green Screen in Blender
To begin working with green screen footage in Blender, you\"ll need to familiarize yourself with its compositing and keying nodes. These tools allow you to extract clean alpha channels, remove green backgrounds, and integrate your footage with CGI elements effectively.
Key Steps for Green Screen VFX
- Import your green screen footage into Blender.
- Use the Keying node to remove the green background.
- Composite your footage with desired CGI backgrounds or elements.
- Adjust color grading to match the live footage with the CGI elements.

Advanced Techniques and Tips
Once you\"ve mastered the basics, explore advanced techniques to enhance your VFX work in Blender:
- Utilize motion tracking for dynamic scenes.
- Experiment with lighting and shadows for realism.
- Apply color correction for seamless integration.

Learn Green Screen VFX in Blender in UNDER 7 MINUTES New Title: Green Screen VFX Tutorial in Blender under 7 Minutes
Green Screen: Step into the world of creativity with the magic of green screen technology! Unleash your imagination and transport yourself to any place or time. Let the possibilities be endless, watch the video now!
Blender Green Screen Tutorial in 1 Minute New Title: Green Screen Tutorial in Blender 1 Minute
Blender: Discover the endless possibilities of 3D animation and modeling with Blender! From creating stunning visual effects to designing intricate 3D models, this powerful software can bring your ideas to life. Dive into the world of Blender by watching the video now!
Resources and Tutorials
There are numerous online resources, including tutorials on YouTube and courses on platforms like Udemy, to help you deepen your understanding of green screen VFX in Blender. Practice with these resources to refine your skills and bring your creative visions to life.
Conclusion
Blender\"s robust features make it an ideal choice for green screen VFX, offering both beginners and professionals the tools needed for high-quality visual effects production. By following tutorials and practicing regularly, you can achieve professional-looking results and push the boundaries of your creative projects.

Advanced Techniques and Tips
Once you\"ve mastered the basics, explore advanced techniques to enhance your VFX work in Blender:
- Utilize motion tracking for dynamic scenes.
- Experiment with lighting and shadows for realism.
- Apply color correction for seamless integration.

Resources and Tutorials
There are numerous online resources, including tutorials on YouTube and courses on platforms like Udemy, to help you deepen your understanding of green screen VFX in Blender. Practice with these resources to refine your skills and bring your creative visions to life.
Conclusion
Blender\"s robust features make it an ideal choice for green screen VFX, offering both beginners and professionals the tools needed for high-quality visual effects production. By following tutorials and practicing regularly, you can achieve professional-looking results and push the boundaries of your creative projects.

_HOOK_
Resources and Tutorials
There are numerous online resources, including tutorials on YouTube and courses on platforms like Udemy, to help you deepen your understanding of green screen VFX in Blender. Practice with these resources to refine your skills and bring your creative visions to life.
Conclusion
Blender\"s robust features make it an ideal choice for green screen VFX, offering both beginners and professionals the tools needed for high-quality visual effects production. By following tutorials and practicing regularly, you can achieve professional-looking results and push the boundaries of your creative projects.
Introduction to Blender and Green Screen VFX
Blender, an open-source 3D computer graphics software, is widely used for creating stunning visual effects (VFX), particularly for green screen compositing. This technique allows filmmakers and video producers to seamlessly integrate live-action footage with computer-generated imagery (CGI). The process involves removing the green background from the live footage and replacing it with a new background or CGI elements, providing endless possibilities for creative storytelling.
- Blender\"s compositing tools are designed for VFX artists, offering features like chroma keying, masking, and node-based compositing.
- Understanding the basics of green screen VFX in Blender includes learning about lighting, camera settings, and the importance of a clean green screen setup.
- Advanced Blender features such as the Keying Node and the Compositor enable precise control over the integration of CGI and live footage.
- Practical exercises include background replacement, color grading, and adding CGI elements to live-action footage.
Mastering green screen VFX in Blender opens up a world of possibilities for creative expression, allowing artists to bring their most imaginative concepts to life. From simple background replacements to complex scenes integrating multiple elements, Blender provides all the tools necessary for high-quality VFX production.
Why Use Blender for Green Screen VFX
Blender offers a comprehensive suite of tools for green screen VFX, making it a preferred choice for professionals and hobbyists alike. Its powerful features enable creators to achieve high-quality visual effects seamlessly integrated with live-action footage.
- Cost-Effective: As an open-source platform, Blender is freely available, providing a cost-effective solution for high-quality VFX production.
- Comprehensive Toolset: Blender includes a robust set of features for compositing, including chroma keying, masking, and node-based editing, all essential for green screen work.
- Flexibility: Blender\"s flexibility allows for both simple and complex VFX projects, from basic background replacements to intricate scenes combining CGI with real-world footage.
- Community Support: A large, active community provides extensive resources, tutorials, and support, making it easier for newcomers to learn and for professionals to share advanced techniques.
- Integration with Other Tools: Blender works well with other software, supporting a wide range of formats for seamless integration into various workflows.
- Continuous Improvement: Regular updates introduce new features and improvements, ensuring Blender remains at the cutting edge of VFX technology.
Choosing Blender for green screen VFX offers a blend of professional-grade features, community support, and cost-efficiency, making it an attractive option for anyone looking to bring their creative visions to life.
Getting Started with Blender for Green Screen Work
Starting with green screen VFX in Blender is an exciting journey that opens up numerous possibilities for creative video production. Here\"s a step-by-step guide to help you begin.
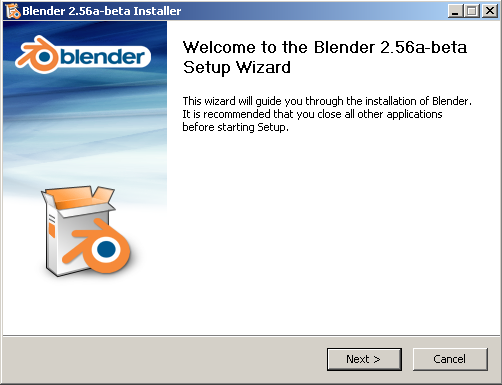
- Download and Install Blender: Ensure you have the latest version of Blender installed. It\"s available for free from the official Blender website.
- Set Up Your Green Screen: For best results, ensure your green screen is evenly lit and free of wrinkles or shadows, which can complicate the keying process.
- Record Your Footage: When filming, maintain a consistent distance between your subject and the green screen to avoid shadows and ensure a uniform color for easier keying.
- Import Your Footage into Blender: Use the Movie Clip Editor to import your green screen footage. Blender supports various video formats, making it versatile for different project needs.
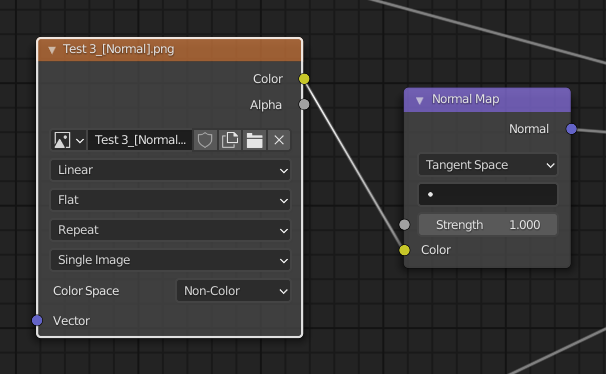
- Start Compositing: Utilize Blender\"s Node Editor for compositing. The Keying node is essential for green screen work, allowing you to separate your subject from the green background.
- Adjust the Settings: Fine-tune the Keying node settings to achieve a clean key. This may involve adjusting the Clip Black and Clip White values to remove any green spill.
- Add Your Background: Once your subject is isolated, you can add a new background. This could be another video clip, a static image, or a CGI environment created within Blender.
- Finalize Your Composition: Use additional nodes for color correction, blending, and adding effects to integrate your subject seamlessly into the new background.
- Render Your Project: With your composition complete, render your project. Blender offers powerful rendering options, including support for rendering animations.
This guide provides a foundation for starting with green screen VFX in Blender. As you become more familiar with Blender\"s tools, you\"ll discover even more ways to enhance your VFX projects.
Step-by-Step Tutorial for Green Screen in Blender
- Prepare Your Footage: Start with well-lit green screen footage to ensure easy keying. The lighting should be even with minimal shadows.
- Import Footage into Blender: Use the Movie Clip Editor to import your green screen footage into Blender.
- Setup the Scene: In the 3D Viewport, set up your scene for the background elements you plan to integrate with your green screen footage.
- Keying the Green Screen: Use the Node Editor and add a Keying node to your compositor setup to remove the green background. Adjust the settings to get a clean key, focusing on the Clip Black and Clip White values to eliminate any spill.
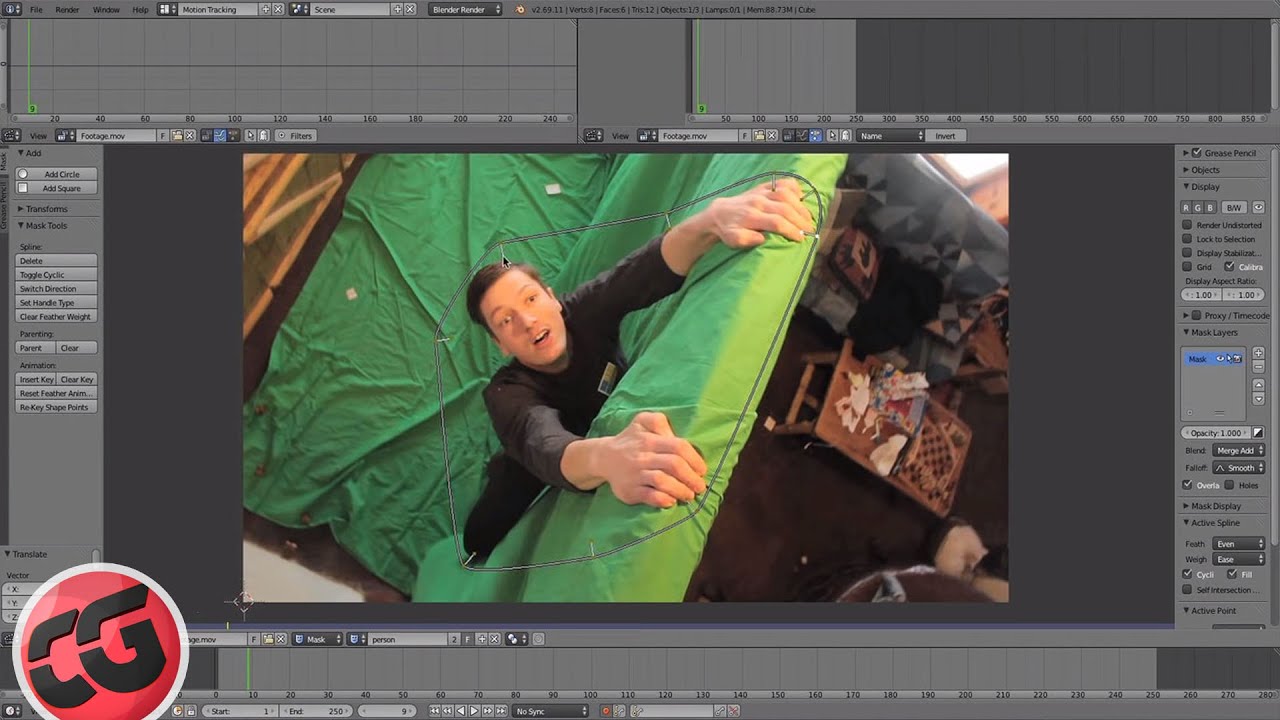
- Masking: If needed, create masks to fine-tune the areas that the Keying node cannot perfectly isolate.
- Adding Background: Once the green screen is keyed out, you can add your new background. This could be an image, video, or a 3D scene created within Blender.
- Adjust the Lighting: To make the composition believable, adjust the lighting of your foreground element to match that of your new background.
- Color Correction: Use color correction nodes to blend the foreground and the background seamlessly, ensuring the colors match for a realistic look.
- Add Shadows and Reflections: For further realism, add shadows and reflections if necessary. This can be done by rendering these elements separately and compositing them into your scene.
- Render and Export: Finally, render your composite. Blender offers various rendering options, including support for rendering animations. Export your finished project in your desired format.
This tutorial covers the basics of working with green screen footage in Blender. By following these steps, you can create stunning VFX shots that blend CGI with live-action footage seamlessly.
_HOOK_
Advanced Techniques for Realistic Compositing
To achieve professional and realistic results in green screen VFX using Blender, advanced techniques are crucial. Here are some methods to enhance your compositing skills:
- Light Matching: Ensure the lighting in your CGI matches the live footage. This includes direction, color temperature, and intensity for seamless integration.
- Color Grading: Use Blender\"s color grading tools to match the colors between the foreground and the background, ensuring they blend perfectly.
- Edge Blending: Soften the edges of your keyed subject to avoid harsh lines. This can be achieved through feathering and edge blur techniques.
- Spill Suppression: Green spill on the subject can break the illusion. Utilize spill suppression techniques to remove unwanted green reflections.
- Shadows and Reflections: Adding realistic shadows and reflections can significantly enhance the realism of your composite. This might involve rendering these elements separately in Blender and integrating them into your scene.
- Depth of Field: Mimicking the camera\"s depth of field between the foreground and background elements can add a layer of realism to your composite.
- Atmospheric Effects: Incorporate atmospheric effects like fog, smoke, or particulate matter to unify the foreground and background elements further.
- Node-Based Compositing: Master Blender\"s node-based compositing for greater control over the final image. This allows for the combination of various effects and adjustments in a non-destructive workflow.
By applying these advanced techniques, you can push the boundaries of what\"s possible with green screen VFX in Blender, achieving results that are not only believable but also visually stunning.
Common Pitfalls and How to Avoid Them
When working with green screen VFX in Blender, there are several common pitfalls that can affect the quality of your final output. Recognizing and avoiding these pitfalls is crucial for achieving professional results.
- Inconsistent Lighting: Uneven lighting on the green screen can lead to keying difficulties. Ensure your green screen is evenly lit to facilitate a cleaner key.
- Green Spill: Green reflections on your subject can be challenging to remove. Position your subject at a sufficient distance from the green screen and use spill suppression techniques in Blender to mitigate this issue.
- Poor Quality Footage: Low-resolution or noisy footage complicates the keying process. Shoot in the highest quality possible and consider using denoise filters sparingly.
- Sharp Edges: Overly sharp edges around your subject can make the composite look unrealistic. Soften the edges in the compositor to integrate your subject more naturally into the background.
- Matching Perspectives: A mismatch between the perspective of your footage and the CGI background can break the illusion. Ensure the camera angles and focal lengths match to maintain consistency.
- Ignoring Reflections and Shadows: Forgetting to add matching shadows and reflections can make your subject look like it\"s floating. Use Blender\"s tools to simulate these effects based on your new background.
- Overlooking Color Matching: The color and tone of your subject and background need to match for seamless integration. Utilize Blender\"s color correction nodes to adjust these elements until they harmonize.
By being mindful of these common pitfalls and applying the appropriate techniques to counter them, you can enhance the realism and quality of your green screen composites in Blender.
Resources for Learning More About Blender VFX
Mastering green screen VFX in Blender requires continuous learning and practice. Here are some top resources that can help you improve your skills and knowledge:
- YouTube Tutorials: Channels like CG Geek, Blender Guru, and Ian Hubert offer extensive tutorials covering everything from basic to advanced VFX techniques in Blender.
- Blender Official Documentation: The official Blender Manual is an invaluable resource for understanding all of Blender\"s features and tools.
- Online Courses: Platforms like Udemy and Coursera feature comprehensive courses on Blender, including specific classes focused on VFX and green screen techniques.
- Blender Community Forums: Participating in forums such as Blender Artists and the Blender subreddit can provide you with insights, feedback, and support from the Blender community.
- BlenderNation: For the latest news, tutorials, and art, BlenderNation offers daily updates on all things Blender, including VFX projects.
- Books and eBooks: Publications like \"Blender 3D Cookbook\" and \"The Complete Guide to Blender Graphics\" can be excellent resources for both beginners and advanced users.
- Practice Projects: Engaging in practice projects, available on sites like Gumroad and Blender Market, can provide hands-on experience with real-world VFX scenarios.
Utilizing these resources can significantly enhance your ability to create stunning VFX in Blender, helping you turn your creative visions into reality.
READ MORE:
Real-World Projects Using Blender for Green Screen VFX
Blender\"s capabilities for green screen VFX have been utilized in a variety of real-world projects, demonstrating its versatility and power in the field of visual effects. Here are examples of how Blender has been applied in practical scenarios:
- Short Films: Independent filmmakers frequently use Blender for creating visually compelling short films, where green screen techniques allow for the integration of actors into fantastical environments.
- Music Videos: Music video directors have harnessed Blender\"s green screen VFX to craft unique and engaging visuals that complement the music, blending live performances with imaginative backgrounds.
- Educational Content: Educational creators use Blender to produce engaging content for online platforms, enhancing their videos with green screen effects to explain complex subjects in a visually appealing manner.
- Video Game Cinematics: Blender is also used in the video game industry to create cinematics. Green screen work combined with Blender’s 3D capabilities brings to life dynamic scenes and characters.
- YouTube Creators: Many YouTube content creators rely on Blender for green screen effects to enhance their videos, whether for vlogs, tutorials, or special effects showcases.
- Commercial Advertisements: Advertisers utilize Blender to create striking commercials that often blend real-world footage with CGI, making products stand out through creative storytelling and visual effects.
These examples highlight the adaptability of Blender in various creative fields, offering a glimpse into the potential applications of green screen VFX in real-world projects.
Embrace the power of Blender for green screen VFX to unlock new realms of creativity. With its robust toolset and vibrant community support, Blender stands as a beacon for artists aiming to bring their visionary projects to life.