Topic blender 3d printing: Explore the endless possibilities of Blender 3D printing, where creativity meets technology. This guide unlocks the secrets to transforming your digital designs into tangible realities, empowering both beginners and experts alike.
Table of Content
- What are the best practices for preparing Blender models for 3D printing?
- Getting Started with Blender for 3D Printing
- Designing Models in Blender
- Optimizing Models for 3D Printing
- Exporting and Preparing for Print
- Designing Models in Blender
- Optimizing Models for 3D Printing
- Exporting and Preparing for Print
- Optimizing Models for 3D Printing
- YOUTUBE: Blender Model to 3D Print Quick Guide
- Exporting and Preparing for Print
- Exporting and Preparing for Print
- Introduction to Blender for 3D Printing
- Key Features of Blender for 3D Printing
- Getting Started with Blender: First Steps
- Designing Your First 3D Model in Blender
- Optimizing 3D Models for Printing
- Advanced Modeling Techniques for 3D Printing
- Exporting Models from Blender for 3D Printing
- Common 3D Printing Problems and Solutions
- Case Studies: Successful 3D Printing Projects Using Blender
- Conclusion: Maximizing Your 3D Printing Potential with Blender
What are the best practices for preparing Blender models for 3D printing?
When preparing Blender models for 3D printing, it\'s important to follow these best practices:
- Ensure Model Integrity: Check for any non-manifold geometry, holes, or intersecting faces in the model. Use Blender\'s built-in tools like the 3D Print Toolbox addon to identify and fix any issues.
- Check Scale: Make sure the model is scaled correctly for 3D printing. You can use the measurement tools in Blender to confirm the dimensions are accurate.
- Optimize Geometry: Simplify the geometry of the model to reduce file size and improve printing performance. Remove any unnecessary details that won\'t impact the final print quality.
- Set Printing Parameters: Configure the print settings such as layer height, infill density, and support structures based on the requirements of your 3D printer. Blender allows for customization of these parameters before exporting the model.
- Export in the Correct Format: Choose the appropriate file format for 3D printing, such as STL or OBJ. Ensure that the units are set correctly to avoid scaling issues when importing the model into a slicer software.
- Test Print: Before sending the model to the 3D printer, it\'s recommended to perform a test print on a smaller scale to check for any potential issues. This allows for adjustments to be made before committing to a full-size print.
READ MORE:
Getting Started with Blender for 3D Printing
Blender has supported 3D printing modeling and file formats since its early versions, becoming even more potent with the introduction of the 3D Printing Toolbox and Mesh Analysis features. This makes Blender an ideal platform for both beginners and professionals interested in 3D printing.
Key Features for 3D Printing
- 3D Printing Toolbox: Analyze your mesh to identify and fix errors that could affect printing.
- Real-time Mesh Analysis: Ensure your model is ready for printing with live feedback.
- Exporting Models: Learn how to prepare and export your models for 3D printing.

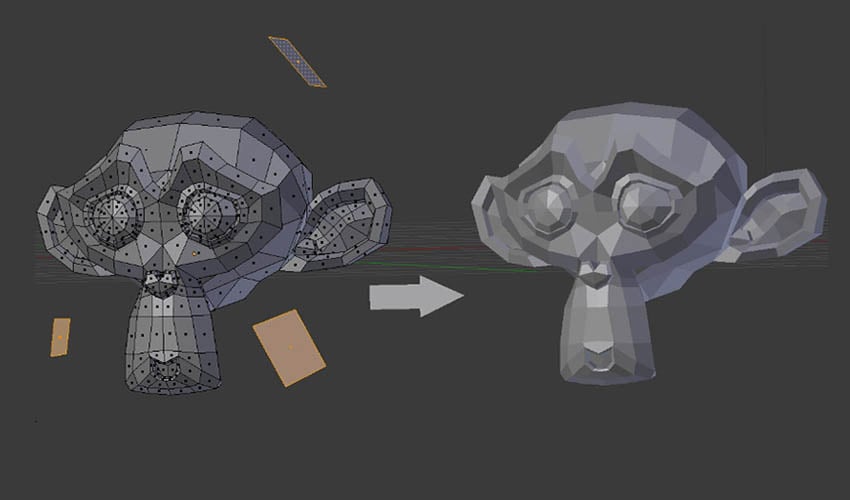
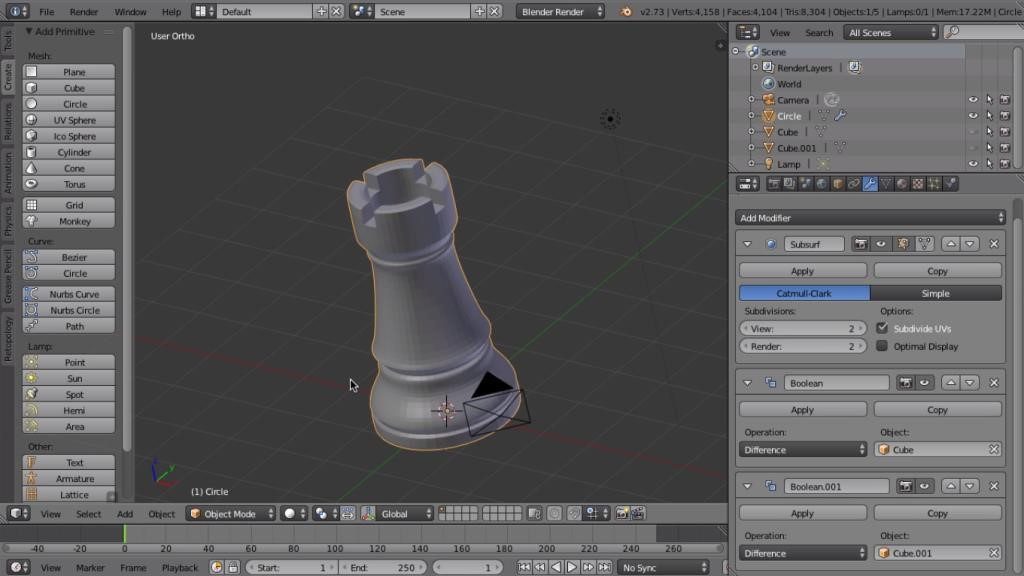
Designing Models in Blender
Blender\"s comprehensive array of modeling tools makes creating, transforming, and editing your models a breeze. Utilize full N-Gon support, edge slide, inset, grid and bridge fill, along with advanced sculpting tools and brushes, to craft your perfect 3D printable model.
Optimizing Models for 3D Printing
- Setting the correct unit system for precise measurements.
- Using the 3D Printing Toolbox to check for non-manifold edges and other common printability issues.
- Applying modifiers to improve the printability of your models.

Exporting and Preparing for Print
Once your model is designed and optimized, exporting it in a 3D printer-friendly format is crucial. Blender allows easy export of your models, ensuring they are ready to be brought to life through 3D printing.
Conclusion
Blender\"s integration with 3D printing technology opens up a world of possibilities for creators. Whether you\"re a novice looking to print your first model or a professional refining your craft, Blender provides the tools necessary for success in 3D printing.
_HOOK_
Designing Models in Blender
Blender\"s comprehensive array of modeling tools makes creating, transforming, and editing your models a breeze. Utilize full N-Gon support, edge slide, inset, grid and bridge fill, along with advanced sculpting tools and brushes, to craft your perfect 3D printable model.
Optimizing Models for 3D Printing
- Setting the correct unit system for precise measurements.
- Using the 3D Printing Toolbox to check for non-manifold edges and other common printability issues.
- Applying modifiers to improve the printability of your models.
Exporting and Preparing for Print
Once your model is designed and optimized, exporting it in a 3D printer-friendly format is crucial. Blender allows easy export of your models, ensuring they are ready to be brought to life through 3D printing.
Conclusion
Blender\"s integration with 3D printing technology opens up a world of possibilities for creators. Whether you\"re a novice looking to print your first model or a professional refining your craft, Blender provides the tools necessary for success in 3D printing.
Optimizing Models for 3D Printing
- Setting the correct unit system for precise measurements.
- Using the 3D Printing Toolbox to check for non-manifold edges and other common printability issues.
- Applying modifiers to improve the printability of your models.
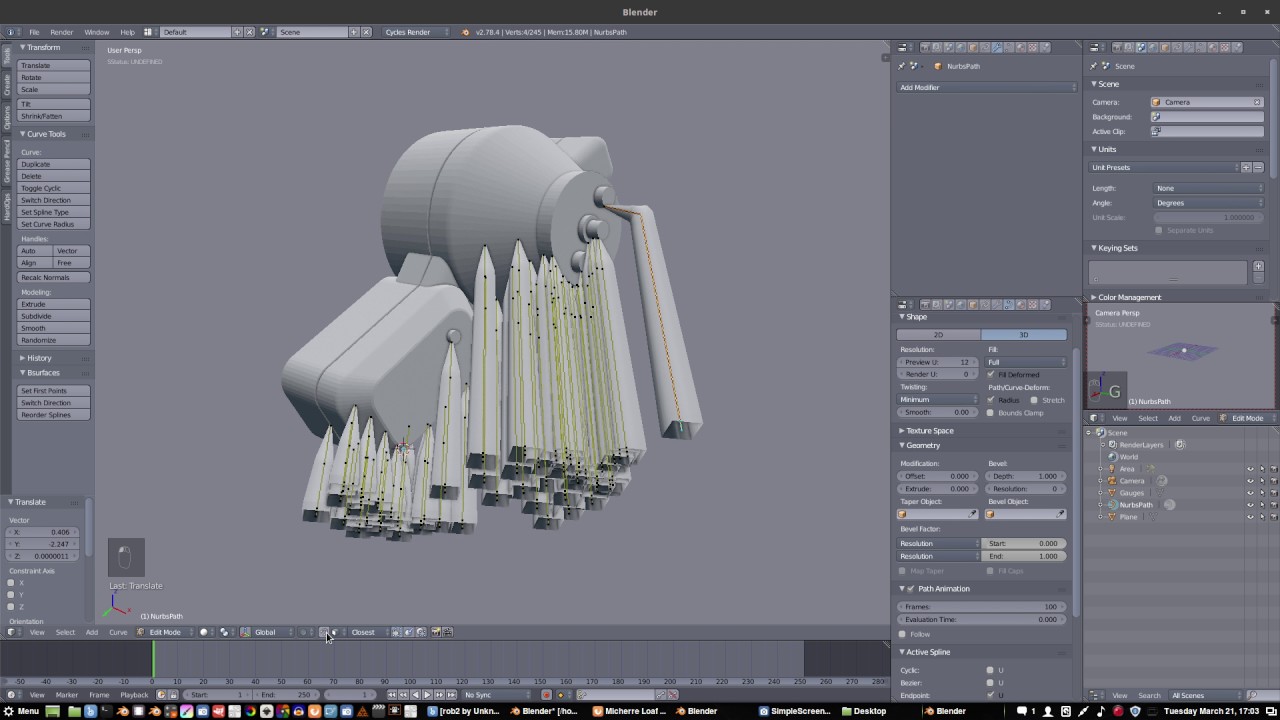
Blender Model to 3D Print Quick Guide
Modeling: Discover the captivating world of modeling in this video, where you will be enchanted by the glamour, confidence, and artistry portrayed by professional models. Witness the transformation and beauty unfold before your eyes. Basics: Dive into the essential foundations of the subject in this informative video that breaks down complex concepts into easy-to-understand basics. Build a solid understanding to propel your knowledge and skills to new heights.
How to Blender To 3D Printer The Basics Tutorial Blender for 3D Printing
UPDATED VERSION OF THIS VIDEO: https://youtu.be/9EF2VryBAq4 A detailed guide of the basics of bringing a file into and out ...
Exporting and Preparing for Print
Once your model is designed and optimized, exporting it in a 3D printer-friendly format is crucial. Blender allows easy export of your models, ensuring they are ready to be brought to life through 3D printing.
Conclusion
Blender\"s integration with 3D printing technology opens up a world of possibilities for creators. Whether you\"re a novice looking to print your first model or a professional refining your craft, Blender provides the tools necessary for success in 3D printing.

_HOOK_
Exporting and Preparing for Print
Once your model is designed and optimized, exporting it in a 3D printer-friendly format is crucial. Blender allows easy export of your models, ensuring they are ready to be brought to life through 3D printing.
Conclusion
Blender\"s integration with 3D printing technology opens up a world of possibilities for creators. Whether you\"re a novice looking to print your first model or a professional refining your craft, Blender provides the tools necessary for success in 3D printing.

Introduction to Blender for 3D Printing
Blender, a renowned and free 3D modeling software, has been facilitating 3D printing enthusiasts since its early versions. The integration of the 3D Printing Toolbox and real-time Mesh Analysis features in Blender version 2.67 has significantly enhanced its capabilities, making it an indispensable tool for both beginners and professionals in the 3D printing realm. This section explores the fundamentals of using Blender for 3D printing, guiding you through the initial steps to start your journey in creating 3D printable models.
- Understanding Blender’s Interface: Familiarize yourself with Blender’s comprehensive interface designed for 3D modeling and printing.
- 3D Printing Toolbox: A closer look at Blender’s 3D Printing Toolbox, which offers mesh analysis and error detection features crucial for preparing models for printing.
- Modeling Basics: Insights into basic modeling techniques in Blender to create your first 3D printable model.
- Mesh Analysis and Preparation: Learn how to use Blender’s mesh analysis tools to ensure your models are print-ready.
- Exporting Models for 3D Printing: A step-by-step guide on exporting your models from Blender in formats compatible with 3D printers.
Blender’s versatility in 3D modeling, coupled with its specialized tools for 3D printing, provides a robust platform for transforming imaginative designs into physical objects. By the end of this section, you’ll have a solid foundation to embark on your 3D printing projects using Blender.
Key Features of Blender for 3D Printing
Blender is equipped with a myriad of features tailored specifically for 3D printing, making it a popular choice among enthusiasts and professionals alike. These features not only facilitate the creation of complex 3D models but also ensure their printability by addressing common issues encountered during the printing process.
- 3D Printing Toolbox: This feature provides an extensive set of tools for analyzing and preparing models for 3D printing, including checks for errors and print readiness.
- Real-time Mesh Analysis: Blender offers live feedback on the mesh quality, highlighting potential issues that could affect the final print, such as non-manifold edges or intersecting faces.
- Advanced Sculpting Tools: For artists and designers, Blender’s sculpting tools allow the creation of detailed models with precision, suitable for high-quality 3D prints.
- Comprehensive Modeling Capabilities: From basic shapes to intricate designs, Blender’s modeling tools support the creation of virtually any 3D object imaginable.
- Support for Multiple File Formats: Blender supports exporting models in various formats compatible with 3D printers, including STL, OBJ, and more, ensuring seamless integration with your 3D printing workflow.
These key features of Blender for 3D printing emphasize the software’s versatility and power in turning creative visions into tangible, 3D printed objects. Whether you are a hobbyist looking to bring your ideas to life or a professional aiming to streamline your 3D printing projects, Blender offers the necessary tools to achieve your goals efficiently.
Getting Started with Blender: First Steps
Embarking on your 3D printing journey with Blender begins with understanding its interface and features. This powerful, free software is perfect for creating 3D printable models. Here\"s how to start:
- Download and Install Blender: Ensure you have the latest version of Blender installed on your computer for the most up-to-date features and tools.
- Familiarize Yourself with the Interface: Spend some time navigating Blender’s user interface. It’s customizable and packed with tools for 3D modeling, animation, and more.
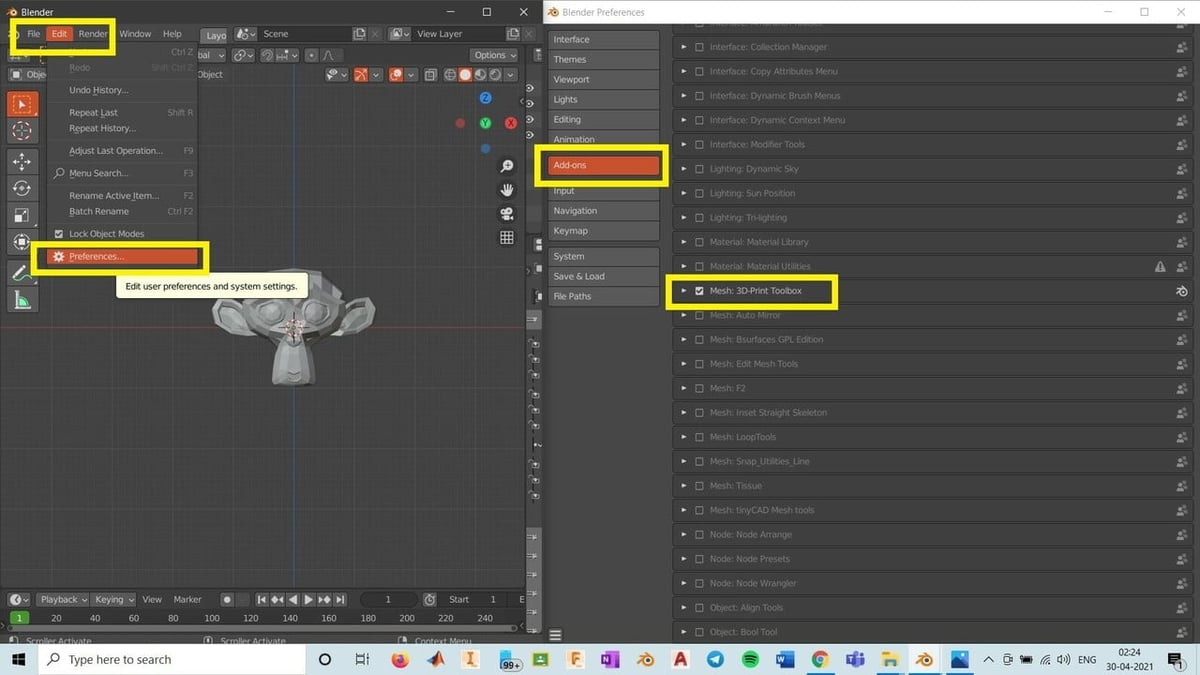
- Activate the 3D Printing Toolbox: This add-on is essential for preparing your models for 3D printing. Go to Edit > Preferences > Add-ons, and search for \"3D Print Toolbox\" to enable it.
- Start with Basic Shapes: Begin by creating simple shapes to understand the basics of modeling. Use the add mesh option to insert basic forms like cubes, spheres, and cylinders.
- Learn to Modify and Sculpt: Experiment with Blender’s modifiers and sculpting tools to modify your basic shapes into more complex models.
- Analyze Your Model: Use the 3D Printing Toolbox to check for any errors that could affect the printability of your model, such as non-manifold edges or overhangs.
- Export Your Model: Once you’re satisfied with your model, export it in a format compatible with your 3D printer, typically STL or OBJ.
These initial steps will guide you through the process of creating your first 3D model in Blender, setting the foundation for more complex projects as you become more comfortable with the software’s capabilities.
Designing Your First 3D Model in Blender
Creating your first 3D model in Blender is an exciting step towards mastering 3D printing. This section will guide you through the basic steps, from conceptualizing your design to finalizing it for printing.
- Conceptualize Your Design: Begin with a clear idea of what you want to create. Sketching your design on paper can be a helpful first step.
- Start Blender and Set Up Your Scene: Open Blender and familiarize yourself with the interface. Set your scene by selecting the correct unit of measurement under Scene Properties to ensure your model\"s dimensions match your 3D printing requirements.
- Add Your First Object: Use the Add menu to insert basic shapes (cube, sphere, cylinder) as the starting point of your model.
- Modify and Sculpt Your Model: Utilize Blender’s modeling tools to modify your object. This can include scaling, rotating, and using modifiers to add complexity to your model.
- Check for 3D Printability: Use the 3D Printing Toolbox to analyze your model for common printing issues such as non-manifold edges or thin walls.
- Refine Your Model: Based on the toolbox analysis, make necessary adjustments to your model. This might involve thickening walls, adding supports, or correcting overhangs.
- Export Your Model: Once your model is ready and free from errors, export it in a 3D printing-friendly format like STL or OBJ.
Following these steps will help you create a basic 3D model in Blender that is ready for printing. Remember, practice and experimentation are key to mastering 3D modeling in Blender.
_HOOK_
Optimizing 3D Models for Printing
Optimizing your 3D models in Blender for printing is crucial to ensure a successful print. This process involves several steps to prepare your model, reduce errors, and enhance printability. Follow these guidelines to optimize your models effectively:
- Check Model Scale: Ensure your model\"s scale matches the physical dimensions you desire. Use Blender\"s unit system to set measurements accurately.
- Use the 3D Printing Toolbox: This Blender add-on helps identify and fix common issues like non-manifold edges, intersecting faces, and thin walls.
- Reduce Mesh Complexity: Simplify your model\"s mesh to reduce printing time and material use without compromising detail. Tools like Decimate can help.
- Ensure Wall Thickness: Adjust your model to meet the minimum wall thickness required by your 3D printer to prevent collapses or printing errors.
- Add Supports and Rafts: For models with overhangs or unstable structures, add supports and rafts in Blender or your printer\"s software to ensure stability during printing.
- Optimize Orientation: Position your model to minimize supports and reduce printing time. The best orientation often balances print quality and material use.
- Test Printability: Use Blender’s mesh analysis tools to simulate how your model will print, identifying potential problems before actual printing.
- Export Correctly: Once optimized, export your model in a format compatible with your 3D printer, typically STL or OBJ, ensuring all transformations are applied.
By following these steps, you can significantly improve the quality of your 3D prints, reduce material waste, and avoid common printing problems.
Advanced Modeling Techniques for 3D Printing
For those looking to push the boundaries of 3D printing with Blender, mastering advanced modeling techniques is key. These methods allow for the creation of intricate and complex designs that stand out both in detail and functionality.
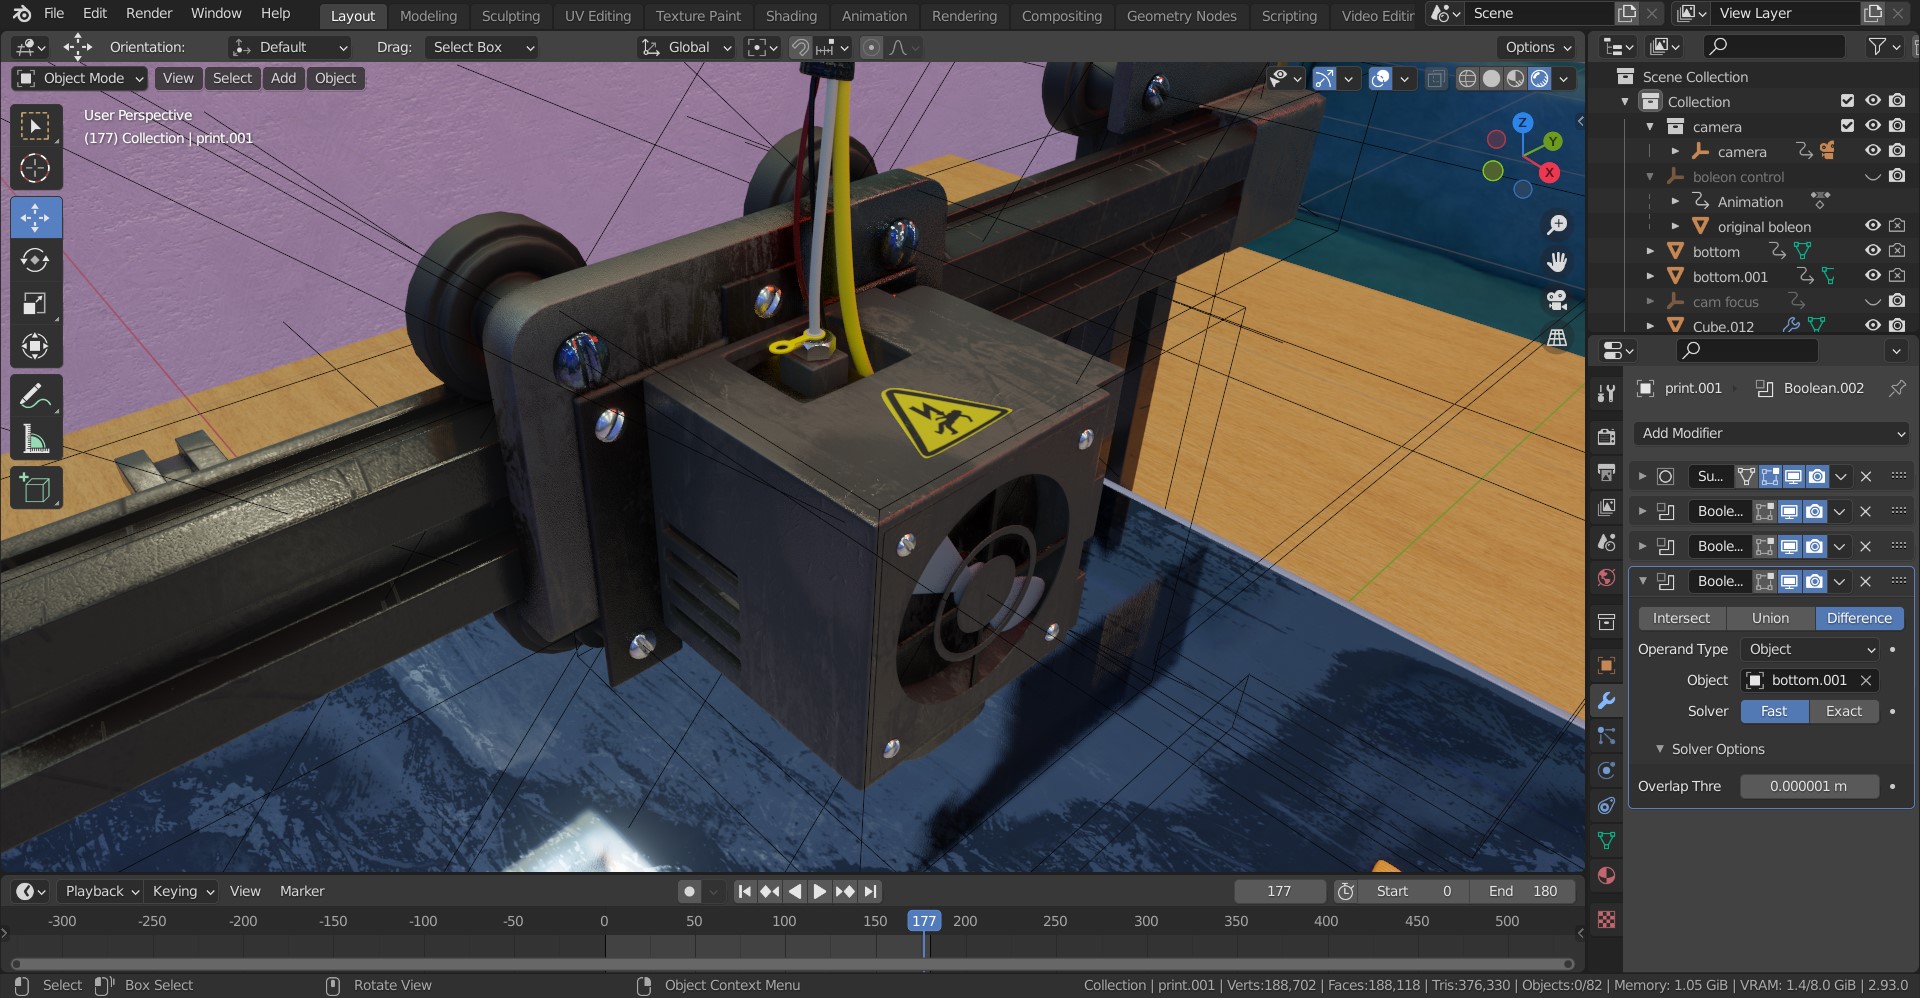
- Boolean Operations: Use Boolean modifiers to combine or subtract shapes, creating complex models with precise geometric relationships.
- Non-Destructive Modeling: Leverage modifiers like Mirror, Array, and Solidify to enhance your models without permanently altering the base mesh. This approach allows for easy adjustments and iterations.
- Sculpting for Detail: For models requiring intricate details, Blender’s sculpting tools offer the ability to add fine textures and features, ideal for high-resolution 3D prints.
- Topology Optimization: Refine your model’s topology for 3D printing by ensuring an efficient flow of edges, which helps in maintaining structural integrity and minimizing printing errors.
- Multi-Material Modeling: Prepare models for multi-material 3D printing by segmenting them into different parts, each assigned to a specific material or color, enhancing the aesthetic and functional aspects of the print.
- Retopology Tools: Use Blender’s retopology tools to convert high-poly models into more manageable, low-poly versions that retain the original detail but are more suited to 3D printing constraints.
By incorporating these advanced techniques, you can create models that not only challenge the capabilities of your 3D printer but also expand your creative horizons. These methods encourage experimentation and can lead to breakthroughs in both design and printing techniques.
Exporting Models from Blender for 3D Printing
Exporting your 3D models from Blender for 3D printing is a critical step in bringing your digital creations to life. The process involves preparing your model to ensure it is compatible with 3D printing technologies. Follow these steps to successfully export your models:
- Finalize Your Model: Make sure your model is fully designed, optimized for printing, and free from errors using Blender\"s 3D Printing Toolbox.
- Choose the Right File Format: STL and OBJ are the most commonly used file formats for 3D printing. Ensure you select the appropriate format for your printer\"s requirements.
- Set the Correct Scale: Confirm that your model\"s scale matches the real-world dimensions you intend to print. Blender allows you to set measurements in metric or imperial units for accuracy.
- Apply All Transformations: Before exporting, apply all transformations (scale, rotation, location) to ensure the model\"s geometry is correctly interpreted by the printing software.
- Export Your Model: Go to File > Export and select the desired file format. In the export options, you can adjust additional settings like the export scale and whether to include textures.
After exporting, it\"s recommended to use slicing software to check your model for any last-minute adjustments before printing. This software can also help you add supports and optimize print settings for the best results.
Common 3D Printing Problems and Solutions
3D printing, while innovative and revolutionary, can encounter a range of issues that affect the quality and success of prints. Understanding these common problems and their solutions is crucial for both beginners and experienced users. Here are some of the most frequent challenges faced during 3D printing and how to address them:
- Warping: This occurs when the print lifts off the build plate during printing. Solution: Use a heated bed, apply an adhesive to the build plate, and ensure proper bed leveling.
- Stringing: Thin strands of plastic are left between parts of the print. Solution: Adjust retraction settings in your slicing software to reduce or eliminate stringing.
- Under-Extrusion: The printer fails to supply enough filament, leading to thin layers or missing parts. Solution: Check for clogs in the nozzle, ensure the filament is feeding smoothly, and adjust the extrusion multiplier.
- Over-Extrusion: Excess filament is deposited, causing blobs and zits on the print. Solution: Calibrate your printer’s extrusion multiplier and ensure accurate filament diameter settings.
- Layer Adhesion Problems: Poor adhesion between layers can lead to weak prints. Solution: Increase the print temperature slightly to improve layer bonding.
- Printing Too Fast: Printing at high speeds can affect print quality and accuracy. Solution: Reduce the print speed, especially for detailed or complex sections of the print.
- Nozzle Clogs: Filament can sometimes clog the nozzle, preventing extrusion. Solution: Perform regular maintenance, clean the nozzle, and use the correct printing temperature for your filament type.
By addressing these common issues with the suggested solutions, you can greatly improve your 3D printing results, leading to successful and satisfying prints.
Case Studies: Successful 3D Printing Projects Using Blender
Exploring successful 3D printing projects that utilized Blender reveals the software\"s vast potential in various fields. These case studies showcase how Blender\"s capabilities have been leveraged to create innovative solutions and advance technological applications.
- Mantle\"s Metal 3D Printing Advancements: Mantle, a US-based metal 3D printer manufacturer, significantly reduced tooling lead times by 50% with its P-200 metal 3D printer, securing three new customers. This case highlights the efficiency and innovation in metal 3D printing facilitated by Blender\"s precision modeling tools.
- Upwing Energy\"s Subsurface Compressor System: Leveraging Velo3D technology, Upwing Energy successfully 3D printed its Subsurface Compressor System (SCS) compressor module. This project demonstrates Blender\"s role in optimizing components for energy solutions, showcasing the software\"s application in enhancing the functionality and efficiency of energy systems.
- Evolve Additive Solutions\" High-Volume 3D Printing: Evolve Additive Solutions launched a Production Assessment Program to scale 3D printing for high-volume manufacturing. This initiative exemplifies how Blender can be used to design products for mass production, highlighting its scalability and the potential for broad industrial application.
- HP\"s Digital Manufacturing Expansion: HP\"s series of use cases for its 3D printers in manufacturing opened new markets for 3D printing service providers. These cases illustrate Blender\"s adaptability in creating models for diverse manufacturing needs, from prototype development to finished products.
- Education and Innovation with Stratasys 3D Printers: Stratasys empowers educational institutions by integrating 3D printing into their curriculums, thereby fostering innovative learning environments. Projects like the Milwaukee School of Engineering\"s Additive Lab Consortium and NASA\"s Human-Supporting Rover with FDM parts underline Blender\"s role in education, from conceptual design to physical realization.
These case studies not only highlight Blender\"s flexibility in 3D modeling for printing across various sectors but also its contribution to advancing 3D printing technology. By facilitating complex designs, optimizing production processes, and supporting educational endeavors, Blender continues to be at the forefront of 3D printing innovation.
_HOOK_
READ MORE:
Conclusion: Maximizing Your 3D Printing Potential with Blender
Blender\"s versatility as a 3D modeling tool opens up a world of possibilities for 3D printing enthusiasts. By understanding and applying advanced techniques, such as utilizing metaballs for base shapes, leveraging the fluid simulator for unique mesh joins, and ensuring models are manifold, triangulated, and correctly sized, users can greatly enhance their 3D printing outcomes. Blender\"s built-in tools like the Ruler/Protractor and the 3D Printing Toolbox add-on are invaluable for ensuring models are print-ready. Finally, STL export functionality seamlessly transitions models from the digital realm to physical form. Embracing these strategies will not only refine your modeling process but also expand the creative boundaries of what you can achieve with 3D printing and Blender.
Discover the transformative power of Blender for 3D printing, where creativity meets technology. Mastering Blender opens up endless possibilities, enabling you to bring your most intricate designs to life with precision and ease. Join the revolution and unleash your potential today.