Topic 3d animation blender: Dive into the world of 3D animation with Blender, the ultimate free software that empowers both beginners and professionals to bring their imaginative visions to life with ease and sophistication.
Table of Content
- Key Features of Blender
- Animation & Rigging
- Getting Started with Blender Animation
- Why Choose Blender for 3D Animation
- Animation & Rigging
- Getting Started with Blender Animation
- Why Choose Blender for 3D Animation
- What are the latest developments in 3D animation using Blender?
- YOUTUBE: The ABSOLUTE BASICS of 3D Animation in BLENDER
- Getting Started with Blender Animation
- Why Choose Blender for 3D Animation
- Why Choose Blender for 3D Animation
- Introduction to Blender and Its Capabilities in 3D Animation
- Getting Started with Blender: Installation and Basic Tutorials
- Exploring Blender\"s Interface and Tools for 3D Animation
- Modeling in Blender: Techniques and Tips for Beginners
- Texturing and Materials: Bringing Realism to Your Creations
- Rigging and Weight Painting: Preparing Your Models for Animation
- Animation Basics: Keyframes, Timelines, and Motion Paths
- Advanced Animation Techniques: Simulations and Effects
- Rendering and Exporting: Finalizing Your 3D Projects
- Community and Resources: Learning More and Getting Help
Key Features of Blender
- Advanced modeling tools including full N-Gon support, edge slide, inset, grid and bridge fill.
- Dynamic sculpting tools and brushes for detailed creations.
- Multi-resolution and dynamic subdivision for high-quality rendering.
- 3D painting with textured brushes and masking capabilities.

READ MORE:
Animation & Rigging
- Comprehensive rigging tools, including envelope, skeleton, and automatic skinning.
- Easy weight painting and mirror functionality for precise animation.
- Bone layers and colored groups for efficient organization.
- B-spline interpolated bones and powerful constraints system.

Getting Started with Blender Animation
Blender is suitable for beginners and advanced users alike, offering tutorials and courses to get you started with 3D animation. From creating your first keyframe to animating complex scenes, Blender provides all the tools you need to bring your animations to life.
Beginner Tutorials and Courses
- Introduction to 3D animation in Blender, covering basic concepts and tools.
- Step-by-step guides on animating characters and objects.
- Comprehensive courses on character animation, available on platforms like Udemy.

Why Choose Blender for 3D Animation
- Free and open-source software with a large supportive community.
- Flexibility and customization options to suit your creative workflow.
- Regular updates and improvements, including support for the latest technologies.
Advanced Animation Techniques
For those looking to dive deeper, Blender offers advanced animation techniques, including fluid and smoke simulations, to create visually stunning effects. Whether you\"re a hobbyist or a professional, Blender has something to offer for everyone interested in 3D animation.

Animation & Rigging
- Comprehensive rigging tools, including envelope, skeleton, and automatic skinning.
- Easy weight painting and mirror functionality for precise animation.
- Bone layers and colored groups for efficient organization.
- B-spline interpolated bones and powerful constraints system.
_HOOK_
Getting Started with Blender Animation
Blender is suitable for beginners and advanced users alike, offering tutorials and courses to get you started with 3D animation. From creating your first keyframe to animating complex scenes, Blender provides all the tools you need to bring your animations to life.
Beginner Tutorials and Courses
- Introduction to 3D animation in Blender, covering basic concepts and tools.
- Step-by-step guides on animating characters and objects.
- Comprehensive courses on character animation, available on platforms like Udemy.
Why Choose Blender for 3D Animation
- Free and open-source software with a large supportive community.
- Flexibility and customization options to suit your creative workflow.
- Regular updates and improvements, including support for the latest technologies.
Advanced Animation Techniques
For those looking to dive deeper, Blender offers advanced animation techniques, including fluid and smoke simulations, to create visually stunning effects. Whether you\"re a hobbyist or a professional, Blender has something to offer for everyone interested in 3D animation.

What are the latest developments in 3D animation using Blender?
Here are some of the latest developments in 3D animation using Blender:
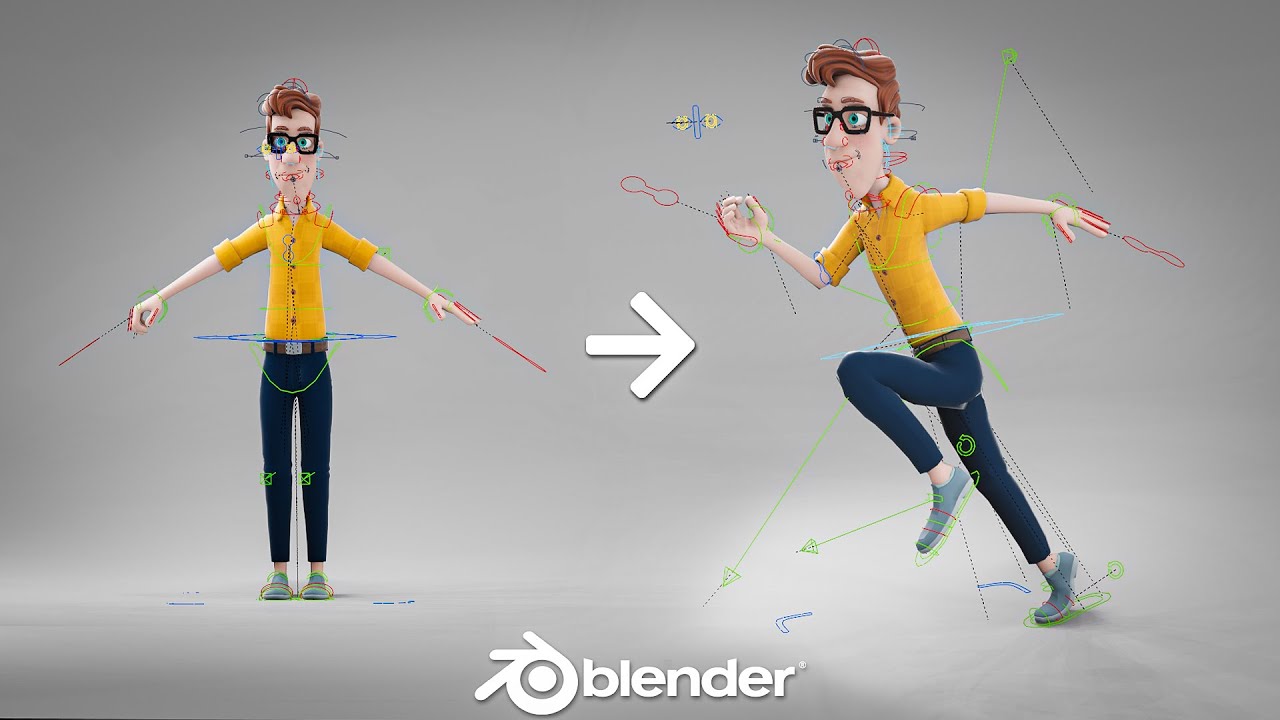
- Improved Character Animation Tools: Blender now offers a pose editor for character animation, non-linear animation (NLA) for independent movements, and forward/inverse kinematics for creating fast poses.
- Enhanced Rigging Capabilities: Blender has high-quality rigging tools that allow animators to create sophisticated and realistic character movements.
- Sound Synchronization: Blender now has features that enable sound synchronization with animations, enhancing the overall viewing experience.
- Artistic Freedom: Blender is a free and open-source 3D creation suite, providing artists with the freedom to unleash their creativity without any limitations.
These developments in Blender have made it a powerful tool for 3D animation, offering advanced features that cater to the needs of animators and artists, ultimately pushing the boundaries of what can be achieved in the world of animation.
The ABSOLUTE BASICS of 3D Animation in BLENDER
Basics: \"Discover the essential foundations of the topic in our informative video. Whether you\'re a beginner or need a refresher, this video covers all the basics in an easy-to-understand and engaging manner. Watch now!\" Pro: \"Take your expertise to the next level with our advanced techniques and strategies in this professional-level video. Learn from the pros themselves and elevate your skills to achieve outstanding results. Don\'t miss out on this opportunity to become a pro in no time!\"
Become a PRO at Animation in 25 Minutes
Learn the fundamentals of Animation in this Beginner Blender Tutorial The first 1000 people who click the link will get 2 free ...
Getting Started with Blender Animation
Blender is suitable for beginners and advanced users alike, offering tutorials and courses to get you started with 3D animation. From creating your first keyframe to animating complex scenes, Blender provides all the tools you need to bring your animations to life.
Beginner Tutorials and Courses
- Introduction to 3D animation in Blender, covering basic concepts and tools.
- Step-by-step guides on animating characters and objects.
- Comprehensive courses on character animation, available on platforms like Udemy.
Why Choose Blender for 3D Animation
- Free and open-source software with a large supportive community.
- Flexibility and customization options to suit your creative workflow.
- Regular updates and improvements, including support for the latest technologies.
Advanced Animation Techniques
For those looking to dive deeper, Blender offers advanced animation techniques, including fluid and smoke simulations, to create visually stunning effects. Whether you\"re a hobbyist or a professional, Blender has something to offer for everyone interested in 3D animation.

_HOOK_
Why Choose Blender for 3D Animation
- Free and open-source software with a large supportive community.
- Flexibility and customization options to suit your creative workflow.
- Regular updates and improvements, including support for the latest technologies.
Advanced Animation Techniques
For those looking to dive deeper, Blender offers advanced animation techniques, including fluid and smoke simulations, to create visually stunning effects. Whether you\"re a hobbyist or a professional, Blender has something to offer for everyone interested in 3D animation.
Introduction to Blender and Its Capabilities in 3D Animation
Blender is a powerful, free, and open-source 3D creation suite that supports the entire 3D pipeline. This comprehensive toolset includes modeling, rigging, animation, simulation, rendering, compositing, and motion tracking, alongside video editing capabilities. Designed for both beginners and professionals, Blender is well-suited for individual artists and large studios alike, offering a versatile solution for creating high-quality 3D animations.
- Modeling: Blender provides a wide range of modeling tools, including full N-Gon support, edge slide, inset, grid and bridge fill, making it ideal for creating complex 3D models.
- Rigging: With advanced rigging tools such as envelope, skeleton, and automatic skinning, Blender simplifies the process of preparing models for animation.
- Animation: Blender\"s animation tools allow for intricate animations, offering features like easy weight painting, mirror functionality, and a powerful constraints system.
- Simulation: Users can create realistic simulations, including fluid, smoke, hair, and cloth dynamics, to add life to their 3D scenes.
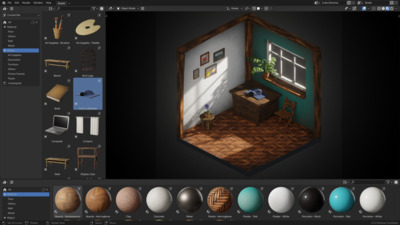
- Rendering: Blender\"s rendering capabilities, including support for real-time viewport preview and powerful rendering engines like Cycles, ensure high-quality output.
Blender\"s user-friendly interface and extensive documentation make it accessible to newcomers, while its deep feature set and customizability meet the needs of experienced users. Whether you\"re looking to create animated films, visual effects, art, 3D printed models, interactive 3D applications, or video games, Blender offers a robust, cost-effective toolset for bringing your ideas to life.
Getting Started with Blender: Installation and Basic Tutorials
Embarking on your 3D animation journey with Blender begins with downloading and installing the software from the official Blender website. This powerful, open-source platform is compatible with Windows, macOS, and Linux, ensuring accessibility for creators across different operating systems.
- Navigate to blender.org and download the version of Blender that suits your operating system.
- Follow the installation instructions to successfully install Blender on your computer.
- Open Blender and familiarize yourself with the user interface through introductory tutorials available on the Blender website or YouTube channels dedicated to Blender training.
Once installed, it\"s time to dive into the basics:
- Understanding Blender\"s Interface: Learn about the layout, key menus, and shortcuts to navigate efficiently.
- Modeling Fundamentals: Start with simple projects to grasp modeling tools and techniques.
- Basic Animation Principles: Explore keyframing and the timeline to animate your models.
- Rendering Your First Scene: Learn how to light, texture, and render your creations.
For beginners, various online platforms offer structured tutorials and courses, ranging from free to paid, catering to all skill levels. Starting with simple projects like animating a bouncing ball or creating a basic character can help solidify your understanding of Blender\"s tools and workflows. Engaging with the Blender community through forums and social media can also provide support and inspiration as you learn.
Blender\"s extensive documentation and user guides are invaluable resources, offering step-by-step instructions and insights into more complex features. Whether you\"re interested in character animation, visual effects, or 3D printing, mastering the fundamentals of Blender opens up a world of creative possibilities.
Exploring Blender\"s Interface and Tools for 3D Animation
Blender\"s interface is designed to provide an efficient workflow for 3D animators, offering a customizable layout that caters to a wide range of creative tasks. The interface is divided into several editors, with the 3D Viewport being central to 3D animation work. Here, animators can view and interact with their scene in real-time.
- 3D Viewport: The heart of Blender, where models and animations are shaped and visualized.
- Timeline: Offers control over the animation frame rate, allowing for precise animations.
- Dope Sheet: Simplifies the animation process by providing an overview of keyframes and timing.
- Graph Editor: Allows for fine-tuning animations with bezier curves for smooth motion.
- NLA Editor: Non-Linear Animation (NLA) for managing and blending multiple animation actions.
Blender\"s tools are vast and cater to every aspect of 3D creation:
- Modeling: Includes everything from simple shapes to complex sculpting tools for creating detailed models.
- Rigging: Blender\"s rigging system allows for creating flexible and intricate character movements.
- Animation: Blender provides powerful animation tools, including automatic keyframe insertion, inverse kinematics, and shape keys.
- Simulation: Features physics simulations for cloth, fluid, smoke, and soft bodies to add realism to animations.
- Rendering: With the powerful Cycles rendering engine, users can produce stunning photorealistic images.
For those new to Blender, the software offers a built-in tutorial system to help users get acquainted with the interface and tools. The flexibility of Blender\"s interface, combined with its comprehensive toolset, makes it a powerful suite for creating professional-level 3D animations. Whether you\"re working on simple projects or complex scenes, Blender equips you with the tools necessary to bring your ideas to life.
Modeling in Blender: Techniques and Tips for Beginners
Modeling is a foundational skill in 3D animation, and Blender offers a robust set of tools for creating detailed models. Whether you\"re sculpting a character, designing a landscape, or creating abstract art, these techniques and tips will help you get started on the right foot.
- Start Simple: Begin with basic shapes and practice manipulating vertices, edges, and faces. Understand how to extrude, scale, and rotate elements to shape your model.
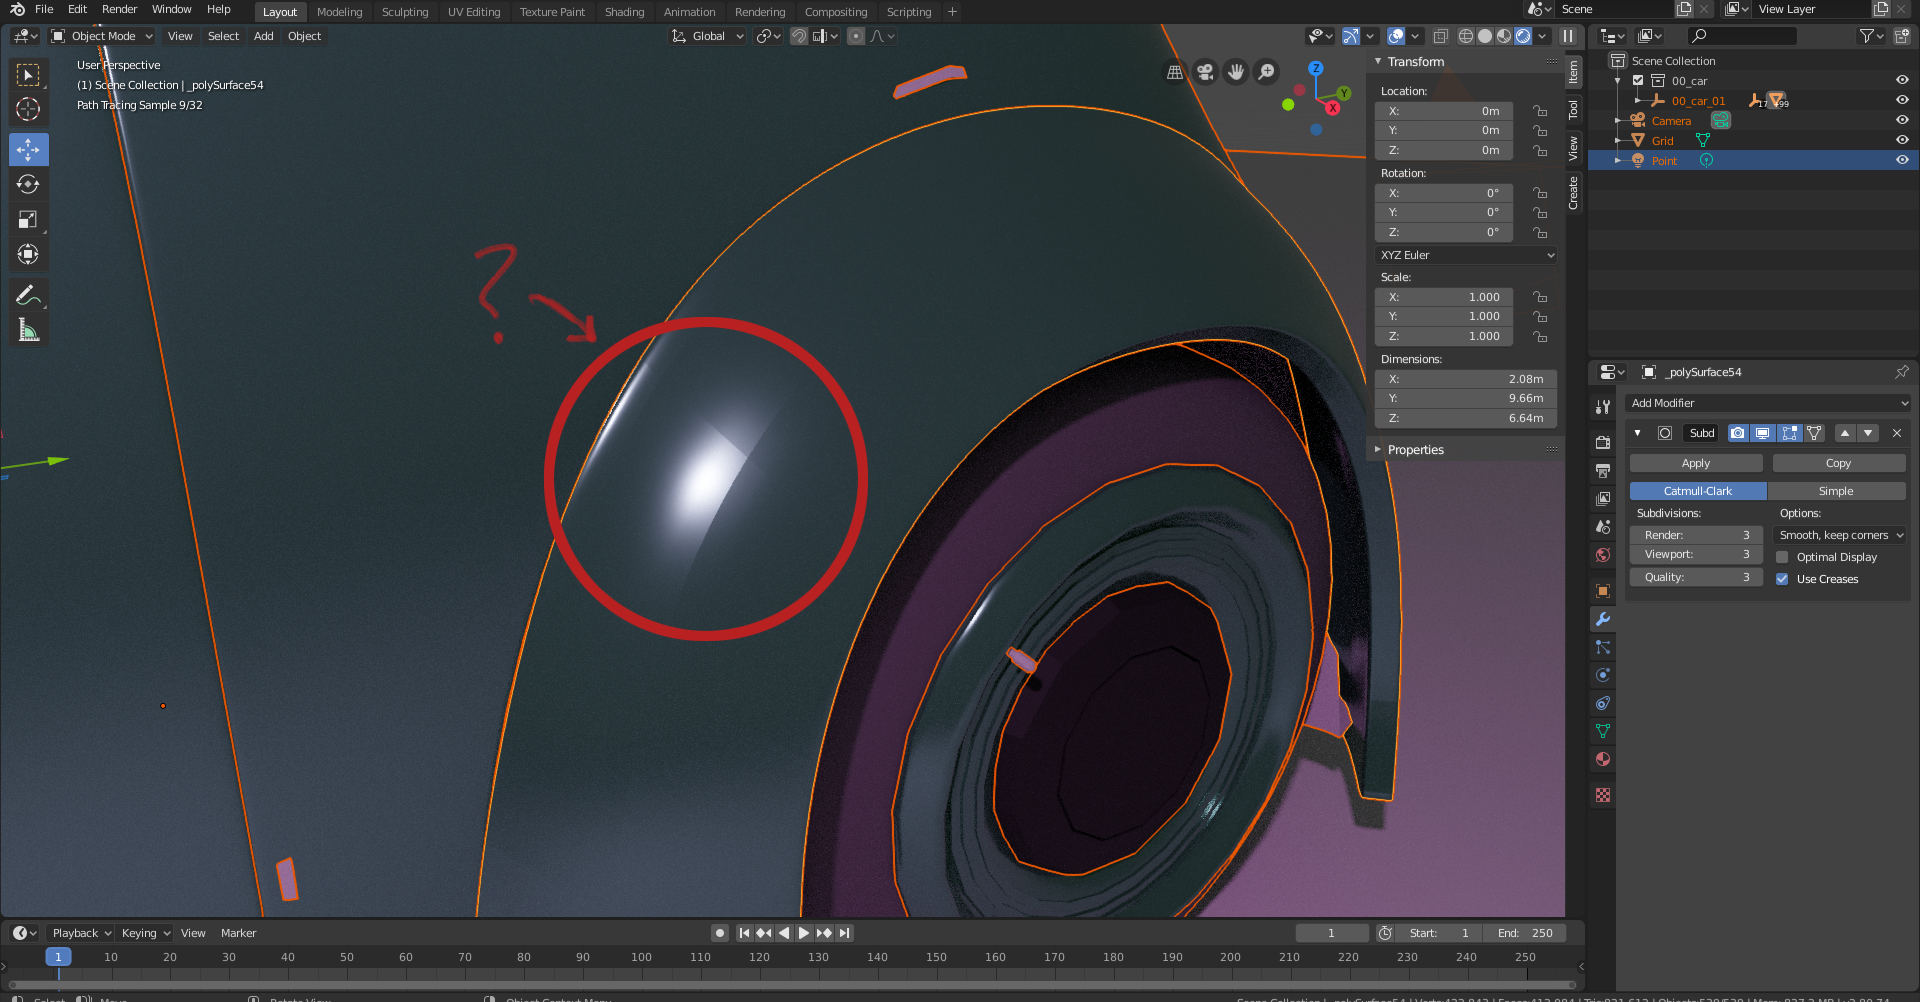
- Use Modifiers: Blender\"s modifiers can automate tasks like smoothing, subdividing, and mirroring your models. Modifiers like Subdivision Surface are essential for adding complexity to your models without manual work.
- Learn Topology: Good topology is key for models that deform well in animation. Focus on creating a mesh with clean, efficient loops and quads.
- Sculpting: For organic models, such as characters and creatures, Blender\"s sculpting tools offer a more intuitive approach. Begin with a basic form and use brushes to add detail.
- Retopology: After sculpting, you may need to create a lower-poly version of your model with better topology. Blender\"s retopology tools can help streamline this process.
Additional Tips:
- Shortcuts: Memorize Blender\"s keyboard shortcuts to speed up your workflow. Shortcuts for common actions like extruding (E) or switching between vertex, edge, and face selection (Ctrl+Tab) are particularly useful.
- Reference Images: Use reference images for accuracy when modeling real-world objects or characters. Blender allows you to import images directly into the 3D viewport for this purpose.
- Practice Projects: Apply your skills with small projects that challenge you to use different tools and techniques. Consider starting with simple objects and gradually moving to more complex scenes.
- Community and Tutorials: Engage with the Blender community and explore online tutorials for specific modeling challenges. The feedback and new techniques you learn will greatly enhance your skills.
Modeling in Blender is a skill that improves with practice and exploration. By starting with the basics, using the software\"s powerful tools, and continuously learning, you\"ll develop the ability to bring your creative visions to life in 3D.
_HOOK_
Texturing and Materials: Bringing Realism to Your Creations
Texturing and applying materials in Blender is a crucial step in the 3D animation process, transforming simple models into lifelike representations. This stage involves mapping images, patterns, and textures onto your 3D objects to simulate real-world surfaces.
- Understanding UV Mapping: Before applying textures, it\"s essential to unwrap your model into a 2D image layout, known as UV mapping. This process allows for accurate texture placement on complex 3D surfaces.
- Choosing Textures: Select textures that match the physical characteristics of your model. Blender supports a range of textures, from simple color maps to intricate bump and displacement maps for added realism.
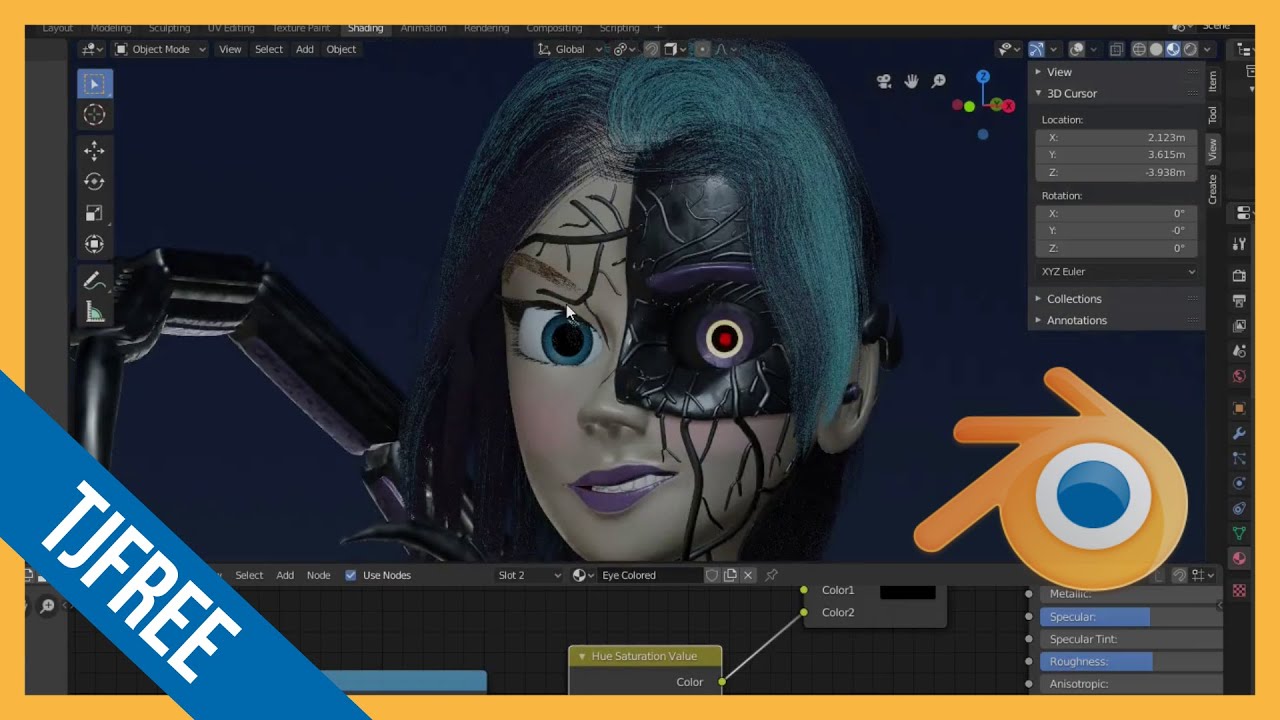
- Applying Materials: Materials define how textures react to light and shadow. Use Blender’s material properties to adjust aspects like glossiness, transparency, and reflectivity to mimic real-world materials.
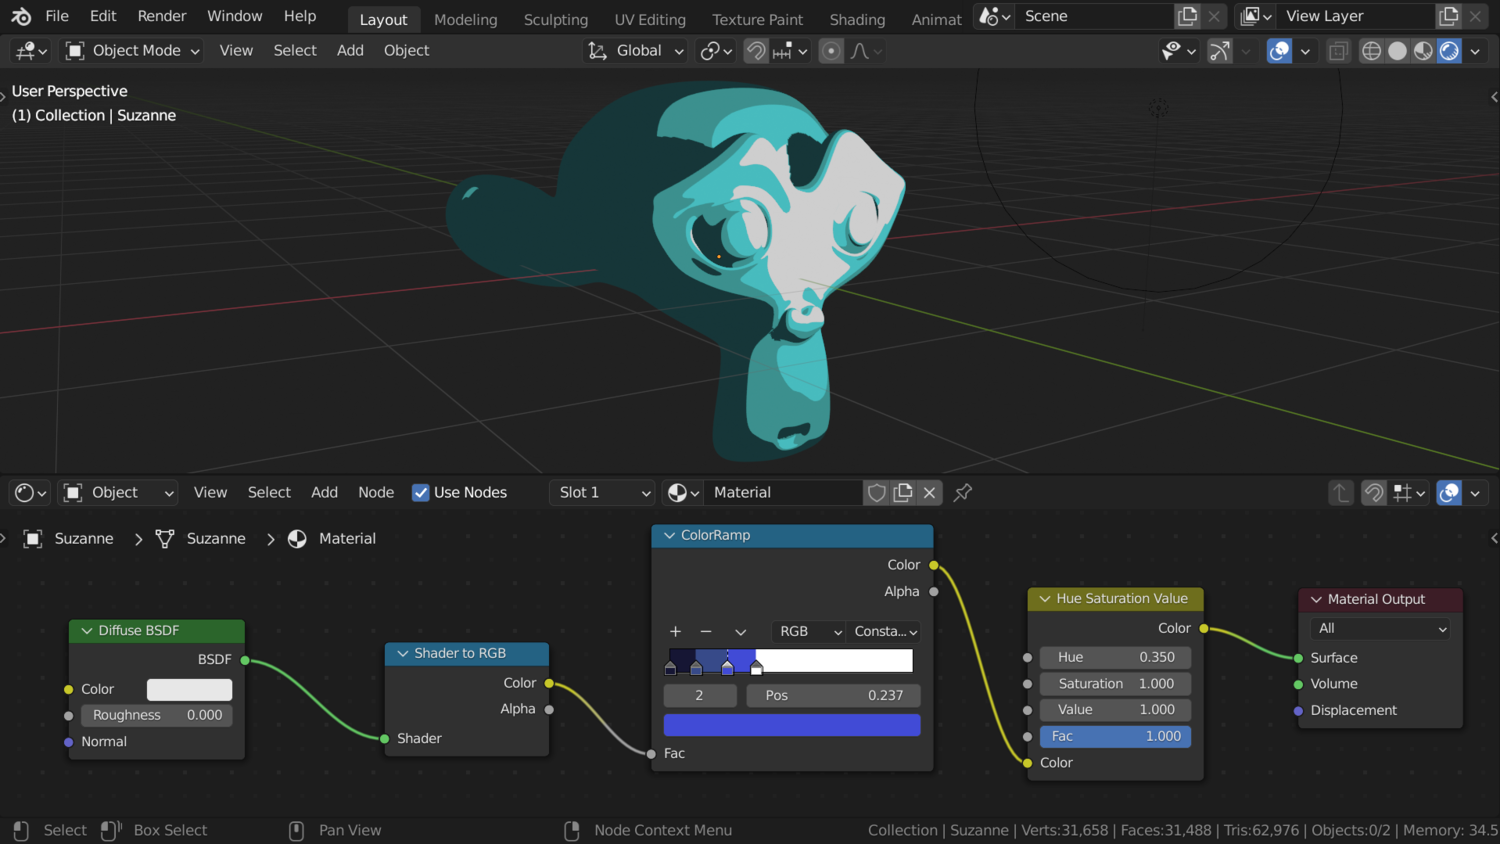
- Using PBR Workflows: Physically Based Rendering (PBR) materials offer more realistic results by simulating how light interacts with surfaces. Blender\"s node-based material system allows for complex PBR setups.
- Lighting and Shading: Proper lighting is crucial for showcasing your textures. Experiment with different light sources and settings to highlight the details and depth of your textures.
For beginners, starting with simple projects can help in understanding the basics of texturing and material application. Experimenting with different textures and materials, and observing their interaction with light, will enhance your ability to create more lifelike and engaging 3D animations.
Rigging and Weight Painting: Preparing Your Models for Animation
Rigging is the process of creating a skeleton for a 3D model so it can be animated. Weight painting is used to define how the mesh of the model moves with the rig. Together, these steps are crucial for bringing characters and objects to life in Blender.
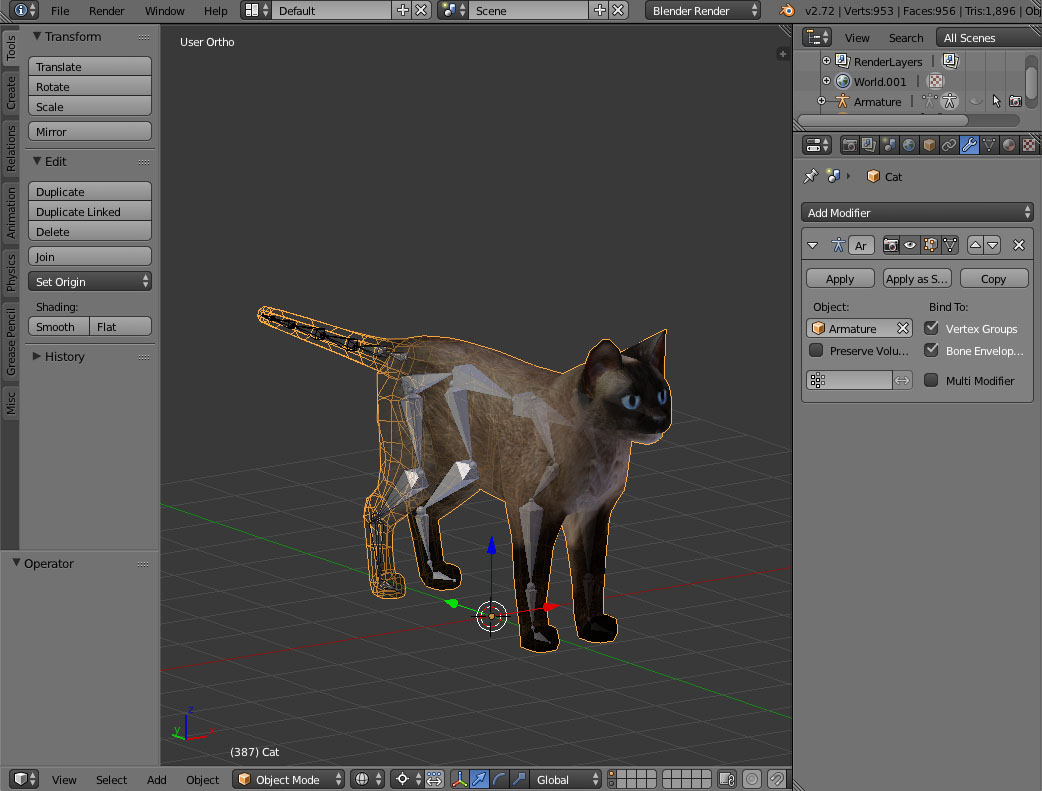
- Creating the Rig: Start by adding an armature to your model. This armature acts as the skeleton that will drive the movements of your model. Blender offers various types of bones that can be used to mimic real-world skeletal structures.
- Defining Bone Hierarchies: Organize the bones in parent-child hierarchies to ensure that movements are realistic. For example, a hand bone should be a child of the forearm bone, so moving the forearm naturally moves the hand.
- Weight Painting: This step involves painting the model to specify how much influence each bone has on different parts of the mesh. Areas painted with more weight will move more in relation to the bone’s movement. Start with automatic weight painting and then refine manually for precise control.
- Testing Movements: After rigging and weight painting, it\"s important to pose the model to test the rig. This helps identify areas that may need more weight painting adjustments for natural movement.
For beginners, focusing on simple rigs and practicing weight painting on basic models can help build a solid foundation. Utilizing Blender’s extensive tutorials and community resources can also provide additional guidance and support through the learning process.
Animation Basics: Keyframes, Timelines, and Motion Paths
Understanding the fundamentals of animation in Blender is essential for creating smooth and realistic animations. This section covers the basics of keyframes, timelines, and motion paths, which are the building blocks of animation in Blender.
- Keyframes: Keyframes are the core of animation, marking the start and end points of any motion. In Blender, you can insert a keyframe by selecting an object, moving to a specific frame on the timeline, and pressing the \"I\" key to choose the type of transformation to record (such as location, rotation, or scale).
- Timelines: The timeline in Blender allows you to scrub through your animation, set the start and end points of the animation, and manage keyframes. It provides a visual representation of your animation\"s timing and sequence.
- Motion Paths: Motion paths show the trajectory of an object\"s movement in the 3D space over time. They help visualize and fine-tune the animation\"s flow and timing. In Blender, you can display motion paths for selected objects through the Object Properties panel.
To animate an object, move it to the desired starting position, insert a keyframe, then move to another frame, change the object\"s position, rotation, or scale, and insert another keyframe. Blender will interpolate the frames between keyframes, creating smooth motion. Experimenting with different types of keyframes and adjusting them in the Graph Editor can refine your animations, making them more dynamic and lifelike.
For beginners, starting with simple animations like moving a cube across the screen or rotating a sphere can provide a solid foundation in these basic concepts. As you become more comfortable, you can explore more complex animations using Blender’s advanced tools and features.
Advanced Animation Techniques: Simulations and Effects
Blender offers advanced animation techniques that allow for the creation of complex simulations and effects, taking your 3D animations to a whole new level. From realistic fluid dynamics to intricate particle systems, these tools enable artists to add depth and realism to their projects.
- Fluid Simulation: Blender\"s fluid simulation system can create realistic water, smoke, and fire effects. By adjusting parameters like viscosity and gravity, you can simulate how liquids and gases interact with the environment and objects.
- Particle Systems: Particle systems in Blender can be used for creating rain, snow, dust, or magical effects. They offer control over emission rate, particle life span, and behavior, allowing for a wide range of visual effects.
- Soft Body and Cloth Simulation: For animations that require realistic cloth movement or soft body dynamics, Blender provides tools to simulate fabric and deformable objects interacting with forces and obstacles.
- Rigid Body Physics: When your scene requires interaction between hard objects, Blender\"s rigid body physics engine simulates realistic collisions, stacking, and falling objects.
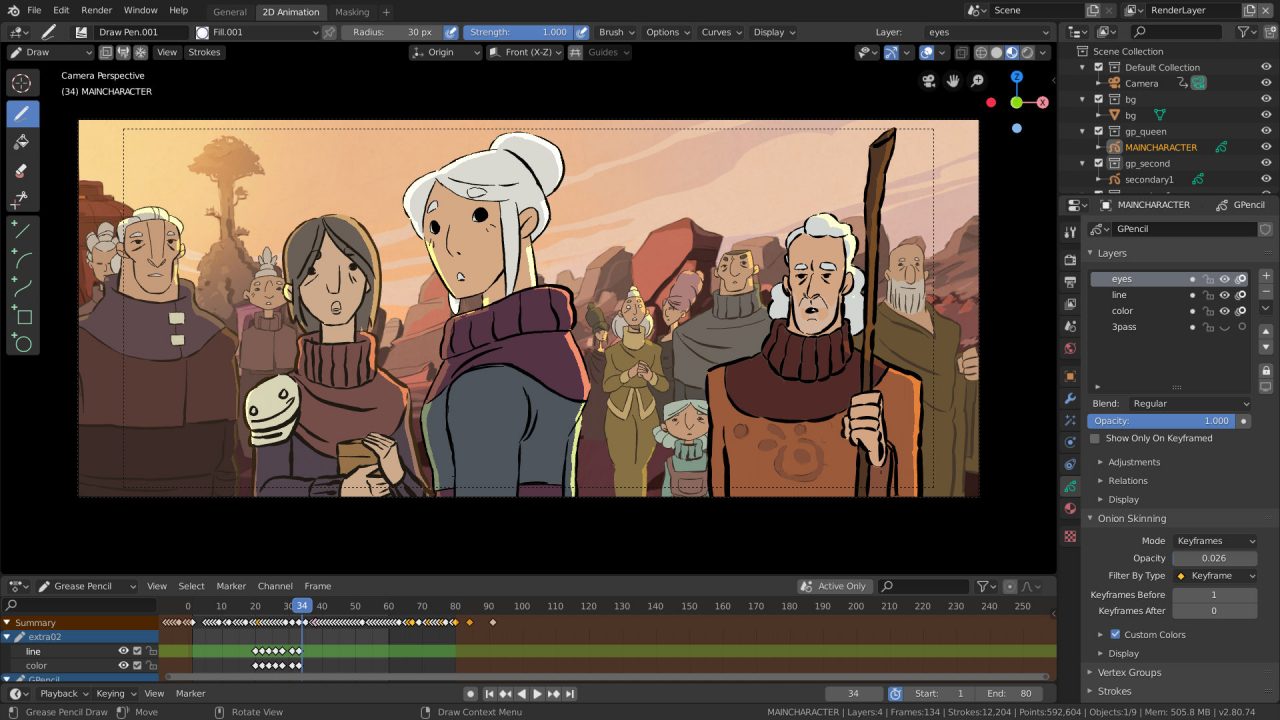
- Grease Pencil for 2D Animation: Blender’s Grease Pencil brings 2D drawing and animation into the 3D space, allowing for the integration of 2D elements into 3D animations for unique effects.
Mastering these advanced techniques requires patience and practice, but the results can be stunningly realistic and visually compelling. Experimenting with different settings and combining multiple simulation types can help achieve the desired effect for your project. Blender also supports custom scripts for even more control over simulations, enabling artists to push the boundaries of traditional animation.
Rendering and Exporting: Finalizing Your 3D Projects
Rendering and exporting are crucial final steps in the 3D animation process with Blender, transforming your meticulously crafted models and animations into stunning visuals and shareable formats.
- Setting Up Your Scene for Rendering: Begin by adjusting your camera angles, lighting, and render settings. Blender offers two primary rendering engines, Cycles and Eevee, each with its own advantages. Cycles is a ray-traced engine that produces photorealistic results, while Eevee is a real-time engine for faster previews.
- Choosing the Right Render Settings: Configure your render settings based on the desired output quality and file size. This includes setting the resolution, sampling rates for Cycles, and optimizing performance settings.
- Rendering Your Animation: Once satisfied with your setup, use Blender\"s Render Animation feature to process each frame of your animation. You can render your project as a sequence of images or as a video file.
- Exporting Your Project: For sharing or further processing, Blender supports exporting to various formats, including .obj, .fbx, and .dae for models, and .mp4 or .avi for animations. Choose the format that best suits your needs, considering compatibility with other software or platforms where you\"ll showcase your work.
For newcomers, rendering and exporting might seem daunting, but Blender\"s community and extensive documentation provide valuable resources to guide you through the process. Experimenting with different settings and formats will help you find the perfect balance between quality and efficiency for your projects.
_HOOK_
READ MORE:
Community and Resources: Learning More and Getting Help
The Blender community is vast and supportive, offering an abundance of resources for both beginners and experienced users looking to deepen their knowledge or troubleshoot issues. Here are key ways to engage with the community and find valuable learning materials.
- Official Blender Website: The official site (blender.org) is the go-to place for downloads, updates, and official tutorials. It also hosts a forum where users can ask questions and share insights.
- Blender Artists Community: Blender Artists is an online community forum where users can post work, get feedback, and discuss all things Blender. It\"s a great place to connect with fellow enthusiasts.
- Online Tutorials and Courses: Platforms like Udemy, Coursera, and YouTube host a wide range of tutorials and courses covering everything from basic introductions to advanced techniques in 3D animation with Blender.
- Blender Network: For professional connections, the Blender Network connects Blender professionals and enthusiasts in a business network, facilitating job opportunities and collaborations.
- Blender Foundation and Open Projects: Participating in or studying Blender Foundation’s open projects can provide insight into professional workflows and techniques.
- Documentation and Books: Blender’s extensive documentation and a variety of books cater to all levels, offering detailed guides on using Blender effectively.
- Workshops and Meetups: Look for local and online Blender workshops and meetups to learn in a collaborative environment and network with other users.
Leveraging these resources can significantly enhance your Blender skills and understanding, whether you\"re working on personal projects or aiming for professional development. The community is welcoming and eager to help, making it easier to overcome challenges and achieve your 3D animation goals.
Embrace the power of Blender to transform your creative ideas into stunning 3D animations. Join the vibrant community, leverage extensive resources, and start your journey towards mastering this versatile software today.