Topic blender light linking: Discover the transformative power of Blender Light Linking, a game-changing feature in 3D design that enhances control over lighting, bringing your creative visions to life with unparalleled precision and flexibility.
Table of Content
- How to effectively utilize light linking in Blender for improved rendering results?
- What is Light Linking?
- How to Utilize Light Linking
- Practical Application
- Conclusion
- How to Utilize Light Linking
- Practical Application
- YOUTUBE: Blender Light Linking Is Finally Here
- Conclusion
- Practical Application
- Conclusion
- Conclusion
- Introduction to Blender Light Linking
- Understanding Light Linking in Blender 4.0
- How to Use Light Linking in Blender
- Types of Light Linking in Blender
- Benefits of Using Light Linking in Blender
- Practical Applications and Examples of Light Linking
- Optimizing Scenes with Light Linking for Render Farms
- Comparing Light Linking in Blender with Other 3D Software
- Advanced Tips and Tricks for Light Linking
- Future Developments and Community Resources for Light Linking
- Conclusion and Wrap-Up
How to effectively utilize light linking in Blender for improved rendering results?
To effectively utilize light linking in Blender for improved rendering results, follow these steps:
- Select the light source or emissive mesh object in your scene.
- Go to the Shading panel in Blender.
- Create a new light or shadowing linking collection.
- Drag and drop objects or materials that you want to link to the light source or collection.
- Adjust the settings and properties of the linked objects to customize how they interact with the light source.
- Experiment with different linking configurations to achieve the desired lighting effects in your scene.
READ MORE:
What is Light Linking?
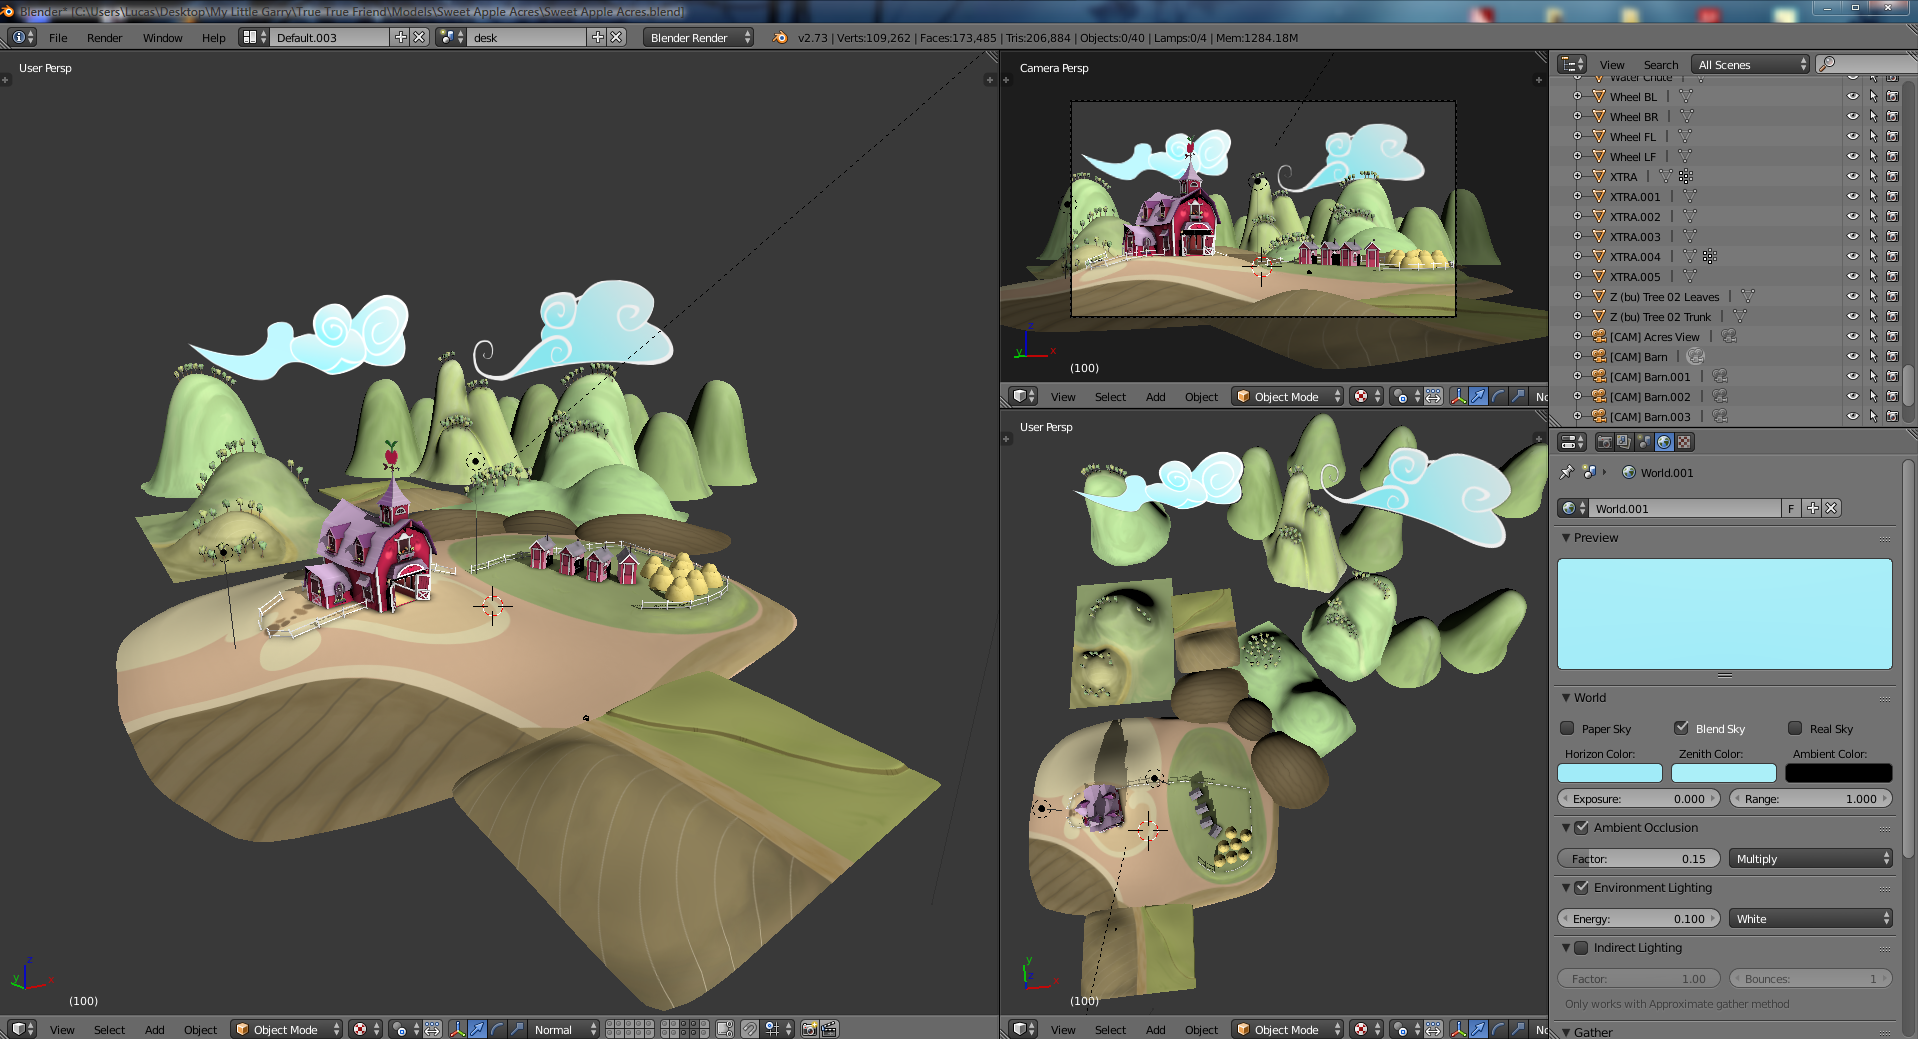
Light Linking enables artists to specify which objects are affected by certain lights, facilitating creative control and faster render times. This feature, long available in commercial render engines like Arnold and V-Ray, is now accessible in Blender, initially in experimental builds and fully integrated into Cycles with Blender 4.0.
Types of Light Linking
- Direct Light Control: Choose which objects receive light, limiting its effect to selected items within a group.
- Shadow Control: Designate shadow blocker objects, allowing for precise manipulation of shadows and light penetration.

How to Utilize Light Linking
To use Light Linking, select a light, navigate to Object Properties Panel > Shading, and find the Light Linking option. Objects can be linked via drag-and-drop from the outliner or by selecting them and using shortcut commands for efficient workflow enhancements.
Key Benefits
- Significantly improves rendering times with Cycles X, enabling focused lighting control for specific scene elements.
- Facilitates better lighting management during the rendering process, complementing existing lighting addons and tools.
- Optimizes scenes for reduced render times and costs, especially beneficial when working with render farms.

Practical Application
Light Linking is invaluable for complex lighting scenarios, such as illuminating character faces or managing mixed indoor and outdoor environments. By restricting light effects to selected objects or collections, artists can achieve more intricate and detailed lighting setups without overburdening the rendering process.
Optimizing Render Farm Usage
Employing Light Linking can lead to significant reductions in render times and costs on render farms. By selectively applying lights to certain scene areas, unnecessary path tracing calculations are minimized, maintaining high image quality with reduced noise.

Conclusion
Blender\"s Light Linking feature marks a significant advancement in 3D rendering, offering unprecedented control over lighting effects. As it evolves, this feature promises to further empower artists in their creative endeavors, making Blender an even more versatile tool for 3D animation and modeling.

_HOOK_
How to Utilize Light Linking
To use Light Linking, select a light, navigate to Object Properties Panel > Shading, and find the Light Linking option. Objects can be linked via drag-and-drop from the outliner or by selecting them and using shortcut commands for efficient workflow enhancements.
Key Benefits
- Significantly improves rendering times with Cycles X, enabling focused lighting control for specific scene elements.
- Facilitates better lighting management during the rendering process, complementing existing lighting addons and tools.
- Optimizes scenes for reduced render times and costs, especially beneficial when working with render farms.

Practical Application
Light Linking is invaluable for complex lighting scenarios, such as illuminating character faces or managing mixed indoor and outdoor environments. By restricting light effects to selected objects or collections, artists can achieve more intricate and detailed lighting setups without overburdening the rendering process.
Optimizing Render Farm Usage
Employing Light Linking can lead to significant reductions in render times and costs on render farms. By selectively applying lights to certain scene areas, unnecessary path tracing calculations are minimized, maintaining high image quality with reduced noise.
Blender Light Linking Is Finally Here
Linking: \"Discover the power of linking in this captivating video that showcases how connections create endless possibilities. Learn how to link ideas, concepts, and people for maximum impact and success!\" Shader: \"Step into the world of shaders with an engaging video that delves into the art and science of creating stunning visual effects. Explore how shaders can transform ordinary images into extraordinary works of art.\"
Everything New in Blender 4.0 Light Linking AgX New Principled Shader and more
Read the updates as an article: https://b3d.cgcookie.com/nx4LHC Blender 4.0 has been officially released, and the big number ...
Conclusion
Blender\"s Light Linking feature marks a significant advancement in 3D rendering, offering unprecedented control over lighting effects. As it evolves, this feature promises to further empower artists in their creative endeavors, making Blender an even more versatile tool for 3D animation and modeling.

Practical Application
Light Linking is invaluable for complex lighting scenarios, such as illuminating character faces or managing mixed indoor and outdoor environments. By restricting light effects to selected objects or collections, artists can achieve more intricate and detailed lighting setups without overburdening the rendering process.
Optimizing Render Farm Usage
Employing Light Linking can lead to significant reductions in render times and costs on render farms. By selectively applying lights to certain scene areas, unnecessary path tracing calculations are minimized, maintaining high image quality with reduced noise.

Conclusion
Blender\"s Light Linking feature marks a significant advancement in 3D rendering, offering unprecedented control over lighting effects. As it evolves, this feature promises to further empower artists in their creative endeavors, making Blender an even more versatile tool for 3D animation and modeling.
_HOOK_
Conclusion
Blender\"s Light Linking feature marks a significant advancement in 3D rendering, offering unprecedented control over lighting effects. As it evolves, this feature promises to further empower artists in their creative endeavors, making Blender an even more versatile tool for 3D animation and modeling.

Introduction to Blender Light Linking
Blender Light Linking is an innovative feature introduced in Blender 4.0, revolutionizing the way lighting affects your 3D scenes. It offers unprecedented control, allowing artists to specify which objects are influenced by particular lights. This capability is invaluable for achieving the desired mood, focus, and depth in your renders without complex workarounds or extensive post-processing.
Before Blender 4.0, lighting in Blender was global, affecting all objects within its range. Light Linking changes this by enabling selective lighting, a technique previously available only in high-end 3D software. Whether you\"re adding a dramatic rim light to a character without affecting the background or isolating light effects to enhance storytelling, Light Linking provides the tools to fine-tune your lighting setup for each object or collection in your scene.
To use Light Linking, you begin by selecting an object or collection to restrict or include in the light\"s influence. This can be done by creating a new light-linking collection or selecting an existing one, then linking objects to this collection. The process involves selecting the object, choosing the light, and then using a specific command to establish the link. This level of detail ensures that artists can achieve their vision with precision and flexibility, making Light Linking a must-use feature for any serious Blender artist.
Understanding Light Linking in Blender 4.0
Light Linking in Blender 4.0 introduces a paradigm shift in how lighting can be controlled within 3D scenes, offering a level of detail and customization previously unavailable. This feature allows artists to selectively determine which lights affect specific objects or collections, enhancing the ability to direct the viewer\"s attention, set the mood, and add depth to renders.
- Selective Lighting: You can now illuminate selected objects with specific lights while excluding others, enabling focused storytelling or highlighting in your scenes.
- Enhanced Creativity: By providing the means to experiment with light and shadow without affecting the entire scene, Light Linking fosters a more creative and exploratory approach to lighting.
- Efficiency in Workflow: Artists can streamline their workflow by reducing the need for complex layering or compositing techniques traditionally used to achieve similar effects.
- Compatibility: Light Linking works seamlessly with Blender\"s Cycles and Eevee render engines, ensuring wide applicability across different types of projects.
To effectively use Light Linking, it\"s essential to understand its interface and functionality within Blender 4.0. This involves navigating to the object properties panel, selecting the light object, and then using the Light Linking options to include or exclude objects from being influenced by the selected light. Mastery of these steps opens up new possibilities for lighting in Blender, making it an indispensable tool for any 3D artist looking to push the boundaries of their creative work.
How to Use Light Linking in Blender
Light Linking in Blender offers a sophisticated way to manage how lights interact with objects in your scenes. This guide will walk you through the basics of using this powerful feature to enhance your 3D projects.
- Understanding Light Linking: Light Linking allows you to control which objects or collections a light affects, enabling more creative and precise lighting setups.
- Accessing Light Linking: To start using Light Linking, select a light source in your scene. In the light\"s object data properties, you will find options for Light Linking.
- Selecting Objects or Collections: Decide which objects or collections you want the light to influence. This can be done by selecting the object or collection and then adjusting the Light Linking settings in the light source\"s properties.
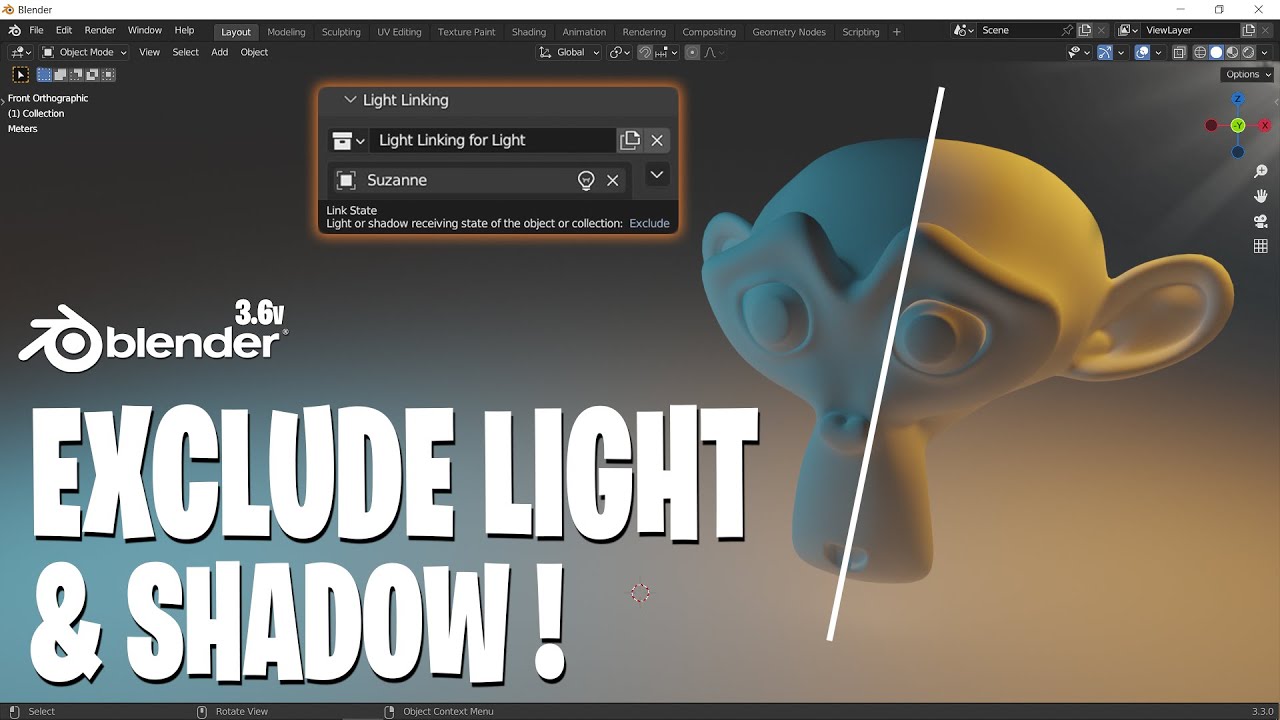
- Linking Lights: In the Light Linking settings, choose \"Include\" or \"Exclude\" to specify how the light should interact with selected objects or collections. \"Include\" will ensure the light only affects the chosen objects, while \"Exclude\" will make the light affect everything except the selected items.
- Adjusting Light Properties: Once you have set up Light Linking, you can further adjust the light\"s properties, such as intensity, color, and falloff, to achieve the desired effect on your linked objects or collections.
- Previewing and Rendering: Use Blender\"s viewport shading modes to preview how the light affects your scene. Adjust as necessary, then render your scene to see the final effects of your Light Linking setup.
With practice, Light Linking can become an essential part of your lighting workflow in Blender, offering unparalleled control over the illumination of your scenes, enhancing realism or artistic effect according to your needs.
Types of Light Linking in Blender
Blender\"s implementation of light linking introduces a flexible approach to lighting, allowing for more nuanced control over how lights interact with different elements within a scene. Understanding the types of light linking available in Blender can significantly enhance your lighting skills.
- Object-Based Light Linking: This type allows you to link lights to specific objects. When a light is linked to an object, only that object is affected by the light, allowing for focused lighting setups that can highlight particular aspects of a scene without influencing surrounding elements.
- Collection-Based Light Linking: With this type, lights can be linked to entire collections. This is useful for scenes where you want to uniformly light a group of objects, such as a set of props or characters, without affecting other objects or collections in the scene.
- Include/Exclude Options: Blender offers the ability to either include specific objects or collections in a light\"s influence or exclude them. This dual approach provides artists with the flexibility to precisely control which areas of their scene are illuminated by each light source.
These types of light linking empower artists to create complex and dynamic lighting setups that were previously difficult or impossible to achieve. Whether you\"re working on a detailed still life, a dynamic character portrait, or an expansive architectural visualization, understanding and utilizing these light linking options can dramatically elevate the quality of your renders.
_HOOK_
Benefits of Using Light Linking in Blender
Light Linking in Blender opens up a world of creative possibilities for 3D artists and designers. This powerful feature enhances your lighting setup, rendering workflow, and final output quality. Here are some of the key benefits:
- Enhanced Creative Control: Light Linking gives you the ability to precisely control how each light affects different objects or groups within your scene, enabling a higher level of artistic expression and realism.
- Improved Scene Composition: By selectively lighting objects, you can draw attention to key areas of your scene, improve composition, and create mood and atmosphere without the need for complex post-processing.
- Efficiency and Flexibility: Light Linking can significantly streamline your workflow, allowing for quicker iterations and experiments with lighting setups. This flexibility is invaluable for both small and large projects.
- Reduced Render Times: By optimizing how lights interact with objects, Light Linking can help reduce render times and computational load, especially important for complex scenes or when using render farms.
- Compatibility with Blender\"s Ecosystem: Light Linking works seamlessly with Blender’s rendering engines, Cycles and Eevee, ensuring that you can use it effectively regardless of your preferred rendering method.
Whether you\"re working on detailed product visualizations, dynamic character animations, or immersive architectural walkthroughs, the benefits of using Light Linking in Blender can elevate the quality of your work while providing greater control and efficiency in your rendering workflow.
Practical Applications and Examples of Light Linking
Light Linking in Blender is not just a feature; it\"s a transformative tool that can be applied across a wide range of projects to enhance visual storytelling, highlight details, and create mood and atmosphere. Here are some practical applications and examples:
- Character Highlighting: Use light linking to cast a spotlight on a character in a crowded scene, ensuring they stand out without overexposing the background or other elements.
- Product Visualization: Highlight specific features of a product with targeted lighting, enhancing its appeal by isolating it from less relevant elements within the scene.
- Architectural Renders: Emphasize architectural details or create time-of-day effects by selectively lighting parts of your model, adding depth and realism to your renders.
- Mood Setting: Craft specific atmospheres within a scene by using light linking to control the play of light and shadow, thus guiding the viewer\"s emotional response.
- Complex Scenes: In scenes with multiple light sources, light linking can help manage light interactions, preventing unwanted shadows or highlights and ensuring each element is lit appropriately.
These examples demonstrate the versatility and power of Light Linking in Blender. By mastering this feature, artists and designers can unlock new levels of creativity and precision in their work, pushing the boundaries of what\"s possible in 3D rendering.
Optimizing Scenes with Light Linking for Render Farms
Utilizing Light Linking in Blender not only enhances the visual quality of your renders but also optimizes scenes for efficient rendering on render farms. This optimization is crucial for managing resources effectively and reducing render times on these powerful networks. Here\"s how Light Linking contributes to optimization:
- Targeted Rendering: By allowing specific lights to only affect designated objects or collections, Light Linking reduces the complexity of calculations required during rendering, which can lead to faster processing times on render farms.
- Efficient Resource Use: Light Linking helps in prioritizing rendering resources for critical parts of the scene, ensuring that render farms allocate computational power where it\"s most needed, thus enhancing overall efficiency.
- Reduced Render Times and Costs: With the ability to minimize unnecessary light calculations, scenes optimized with Light Linking can be rendered more quickly and at a lower cost, an essential consideration when using render farms.
- Improved Workflow: Artists can iterate more rapidly through their designs by reducing render times, allowing for more creative experimentation and faster project completion.
Implementing Light Linking in your Blender projects before sending them to a render farm can significantly impact the efficiency and cost-effectiveness of your rendering workflow. This optimization step is especially valuable for large-scale projects or when working under tight deadlines.
Comparing Light Linking in Blender with Other 3D Software
Blender\"s Light Linking feature, introduced in Blender 4.0, offers a unique approach to lighting management in 3D scenes, distinguishing it from other 3D software. Here\"s a comparison of how Light Linking in Blender stacks up against similar features in other applications:
- Flexibility: Blender\"s Light Linking provides a highly flexible system for controlling which objects or collections lights affect. This level of granular control is comparable to, and in some cases surpasses, that of other leading 3D software.
- User Interface: The intuitive UI in Blender for managing Light Linking is designed to be accessible for both beginners and advanced users, making it easier to implement complex lighting setups quickly.
- Integration with Rendering Engines: Light Linking seamlessly integrates with Blender’s Cycles and Eevee, offering a smooth workflow. Other software may require additional steps or plugins to achieve similar results.
- Cost-effectiveness: Being part of Blender, Light Linking is available at no extra cost, providing a powerful tool for artists working on a budget. In contrast, similar functionalities in other software can be locked behind higher tiered pricing or subscriptions.
- Community and Support: Blender benefits from a vibrant community and extensive online resources, making troubleshooting and learning about Light Linking more accessible compared to some proprietary software.
While each 3D software has its strengths, Blender’s Light Linking feature offers a compelling mix of flexibility, ease of use, and cost-effectiveness, making it an attractive option for artists looking to achieve professional lighting effects without the overhead of additional software or plugins.
Advanced Tips and Tricks for Light Linking
Mastering Light Linking in Blender can dramatically improve the quality of your renders. Here are some advanced tips and tricks to help you make the most out of this powerful feature:
- Layering Lights: Use Light Linking to layer lights in your scene for added depth and dimension. By selectively illuminating objects, you can create a more complex and dynamic lighting setup that mimics real-world lighting conditions.
- Isolating Effects: For scenes with special effects like fog or glow, use Light Linking to isolate these effects to specific areas or objects. This can help in creating more focused and impactful visual effects without overwhelming the entire scene.
- Utilizing Light Groups: Organize your lights into groups and link these groups to objects or collections. This can simplify the management of multiple lights affecting the same object, allowing for quick adjustments across the board.
- Dynamic Lighting: Experiment with animating the links between lights and objects for dynamic lighting effects. This can be particularly effective in scenes with moving elements, where the lighting needs to adapt to changing conditions.
- Optimizing for Render: Use Light Linking to optimize your scene for rendering by minimizing the number of lights affecting each object. This can reduce render times and computational resources, especially important for complex scenes or when using render farms.
Implementing these advanced techniques can unlock new creative possibilities and enhance the realism and impact of your renders. As you become more familiar with Light Linking, you\"ll discover even more ways to refine your lighting setups for stunning results.
_HOOK_
Future Developments and Community Resources for Light Linking
The future of Light Linking in Blender looks bright, with ongoing developments and a supportive community that continuously enhances its functionality and usability. Here are insights into what the future holds and the resources available for users:
- Ongoing Development: The Blender development team is actively working on refining and expanding Light Linking capabilities, ensuring it becomes even more integrated and powerful in future releases.
- Community Contributions: Blender\"s open-source nature means that the community plays a significant role in testing, providing feedback, and even contributing code to improve Light Linking features.
- Learning Resources: There\"s a wealth of tutorials, forums, and documentation available online, created by the Blender community. These resources are invaluable for both beginners and advanced users looking to master Light Linking.
- Experimental Features: Future versions of Blender will likely introduce experimental Light Linking features before they are fully integrated, giving users the chance to try out the latest advancements and provide feedback.
- Integration with Rendering Engines: As Blender\"s rendering engines evolve, so too will the integration and capabilities of Light Linking, offering enhanced realism and creative possibilities in rendering.
Staying connected with the Blender community through forums, social media, and official Blender sites will keep users informed about the latest developments and resources related to Light Linking. This vibrant community is a treasure trove of knowledge, tips, and support for users at all levels, driving the future of Light Linking in Blender.
READ MORE:
Conclusion and Wrap-Up
Blender\"s Light Linking feature represents a significant leap forward in 3D lighting control, offering artists and designers unprecedented flexibility and precision in their work. By enabling selective lighting, Blender users can create more dynamic, realistic, and visually appealing scenes with greater efficiency and creativity.
The introduction of Light Linking in Blender 4.0 has not only leveled the playing field with other professional 3D software but has also opened up new possibilities for creative expression. Whether you are a seasoned professional or just starting out, mastering Light Linking can enhance the quality of your renders and streamline your workflow.
As the Blender community continues to grow and contribute, we can expect to see further enhancements and innovative uses of Light Linking in the future. By staying engaged with the community and exploring the vast array of resources available, users can continue to learn, innovate, and push the boundaries of what is possible with Blender.
In conclusion, Light Linking in Blender is more than just a feature; it\"s a powerful tool that can transform your 3D projects. Its benefits, from enhanced creative control to improved efficiency, make it an essential technique for anyone looking to excel in 3D design and animation.
Embrace the power of Blender Light Linking to revolutionize your 3D projects, unlocking unparalleled control and creativity. Join the vibrant Blender community to explore, learn, and push the boundaries of digital art and design.