Topic how to make a video game using blender: Discover the thrill of game development with Blender, a powerful tool that transforms your creative ideas into stunning video game realities. Start your journey to creating an immersive gaming world today!
Table of Content
- How can Blender be used to create computer games?
- Step 1: Get to Know Blender
- Step 2: Plan Your Game
- Step 3: Create Your Game Assets
- Step 4: Game Logic and Physics
- Step 5: Choose a Game Engine
- Step 6: Assemble and Test Your Game
- Step 7: Publish Your Game
- Additional Resources
- Step 2: Plan Your Game
- Step 3: Create Your Game Assets
- Step 4: Game Logic and Physics
- YOUTUBE: Is Blender Good for Game Development
- Step 5: Choose a Game Engine
- Step 6: Assemble and Test Your Game
- Step 7: Publish Your Game
- Additional Resources
- Step 3: Create Your Game Assets
- Step 4: Game Logic and Physics
- Step 5: Choose a Game Engine
- Step 6: Assemble and Test Your Game
- Step 7: Publish Your Game
- Additional Resources
- Step 4: Game Logic and Physics
- Step 5: Choose a Game Engine
- Step 6: Assemble and Test Your Game
- Step 7: Publish Your Game
- Additional Resources
- Step 5: Choose a Game Engine
- Step 6: Assemble and Test Your Game
- Step 7: Publish Your Game
- Additional Resources
- Step 6: Assemble and Test Your Game
- Step 7: Publish Your Game
- Additional Resources
- Step 7: Publish Your Game
- Additional Resources
- Additional Resources
- Introduction to Blender and Its Capabilities for Game Development
- Setting Up Blender for Your Game Development Project
- Planning Your Game: Concept, Genre, and Design Basics
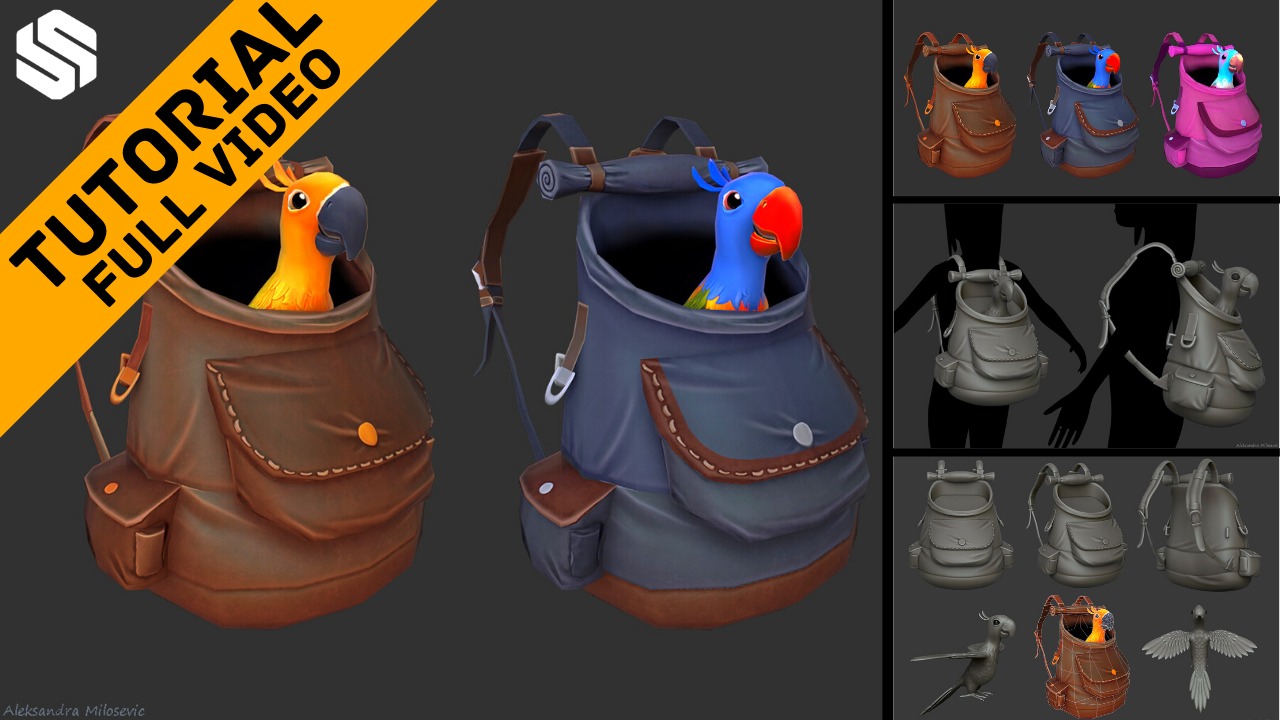
- Creating 3D Models: Characters, Environments, and Props
- Texturing and Materials: Bringing Realism to Your Models
- Animation Techniques for Characters and Objects
- Implementing Game Logic and Physics with Blender
- Integrating Blender Assets with Game Engines
- Testing, Debugging, and Polishing Your Game
- Publishing Your Game: Platforms and Best Practices
- Continued Learning: Resources and Communities for Blender Game Developers
How can Blender be used to create computer games?
To use Blender to create computer games, you can follow these steps:
- Install Blender: Start by downloading and installing Blender on your computer. Blender is a free and open-source 3D creation suite that includes all the tools you need to create games.
- Learn Blender Basics: Familiarize yourself with Blender\'s interface and basic functionalities. You can find tutorials and resources online to help you get started.
- Create Game Assets: Use Blender to create 3D models, textures, animations, and other assets needed for your game. Blender has powerful tools for modeling and sculpting that you can use for this purpose.
- Set Up Game Logic: Blender has a built-in Game Engine that allows you to create interactive games. You can use the logic editor in Blender to set up game logic, controls, and interactions between game elements.
- Test and Refine: Once you have created your game, you can test it within Blender to see how it performs. Make sure to test different aspects of the game and make refinements as needed.
- Export the Game: Finally, when you are satisfied with your game, you can export it to the desired format for distribution. Blender supports various export options for games.
READ MORE:
Step 1: Get to Know Blender
Before diving into game development, familiarize yourself with Blender\"s interface and features. Explore tutorials and resources to understand the basics of 3D modeling, texturing, and animation.

Step 2: Plan Your Game
Decide on the concept, genre, and scope of your game. Sketch your ideas and create a basic storyboard to outline your game\"s flow and key elements.
Step 3: Create Your Game Assets
- Modeling: Use Blender\"s modeling tools to create the 3D models of your characters, environments, and props.
- Texturing: Apply textures to your models to give them color and detail.
- Animation: Animate your characters and objects to bring them to life within your game.
Step 4: Game Logic and Physics
Utilize Blender\"s logic editor to define game behaviors and interactions. Set up physics to add realism to your game, handling collisions, and dynamics.
_HOOK_
Step 5: Choose a Game Engine
While Blender can be used to create assets and simple game prototypes, for full game development, you\"ll likely need to export your assets to a game engine like Unity or Unreal Engine. Learn the basics of your chosen engine to integrate your Blender assets effectively.
Step 6: Assemble and Test Your Game
Import your assets into your game engine, assemble your scenes, and script the gameplay. Regularly test your game to find and fix bugs.

Step 7: Publish Your Game
Once your game is complete, consider publishing it on platforms like Steam, itch.io, or the App Store. Ensure you have the rights to all assets and have followed the necessary steps for publishing on these platforms.
Additional Resources
For detailed tutorials and courses, consider platforms like Udemy, YouTube, and game development forums. These resources offer step-by-step guides on using Blender for game development and can help you with specific aspects of your game.
Step 2: Plan Your Game
Decide on the concept, genre, and scope of your game. Sketch your ideas and create a basic storyboard to outline your game\"s flow and key elements.
_HOOK_
Step 3: Create Your Game Assets
- Modeling: Use Blender\"s modeling tools to create the 3D models of your characters, environments, and props.
- Texturing: Apply textures to your models to give them color and detail.
- Animation: Animate your characters and objects to bring them to life within your game.

Step 4: Game Logic and Physics
Utilize Blender\"s logic editor to define game behaviors and interactions. Set up physics to add realism to your game, handling collisions, and dynamics.
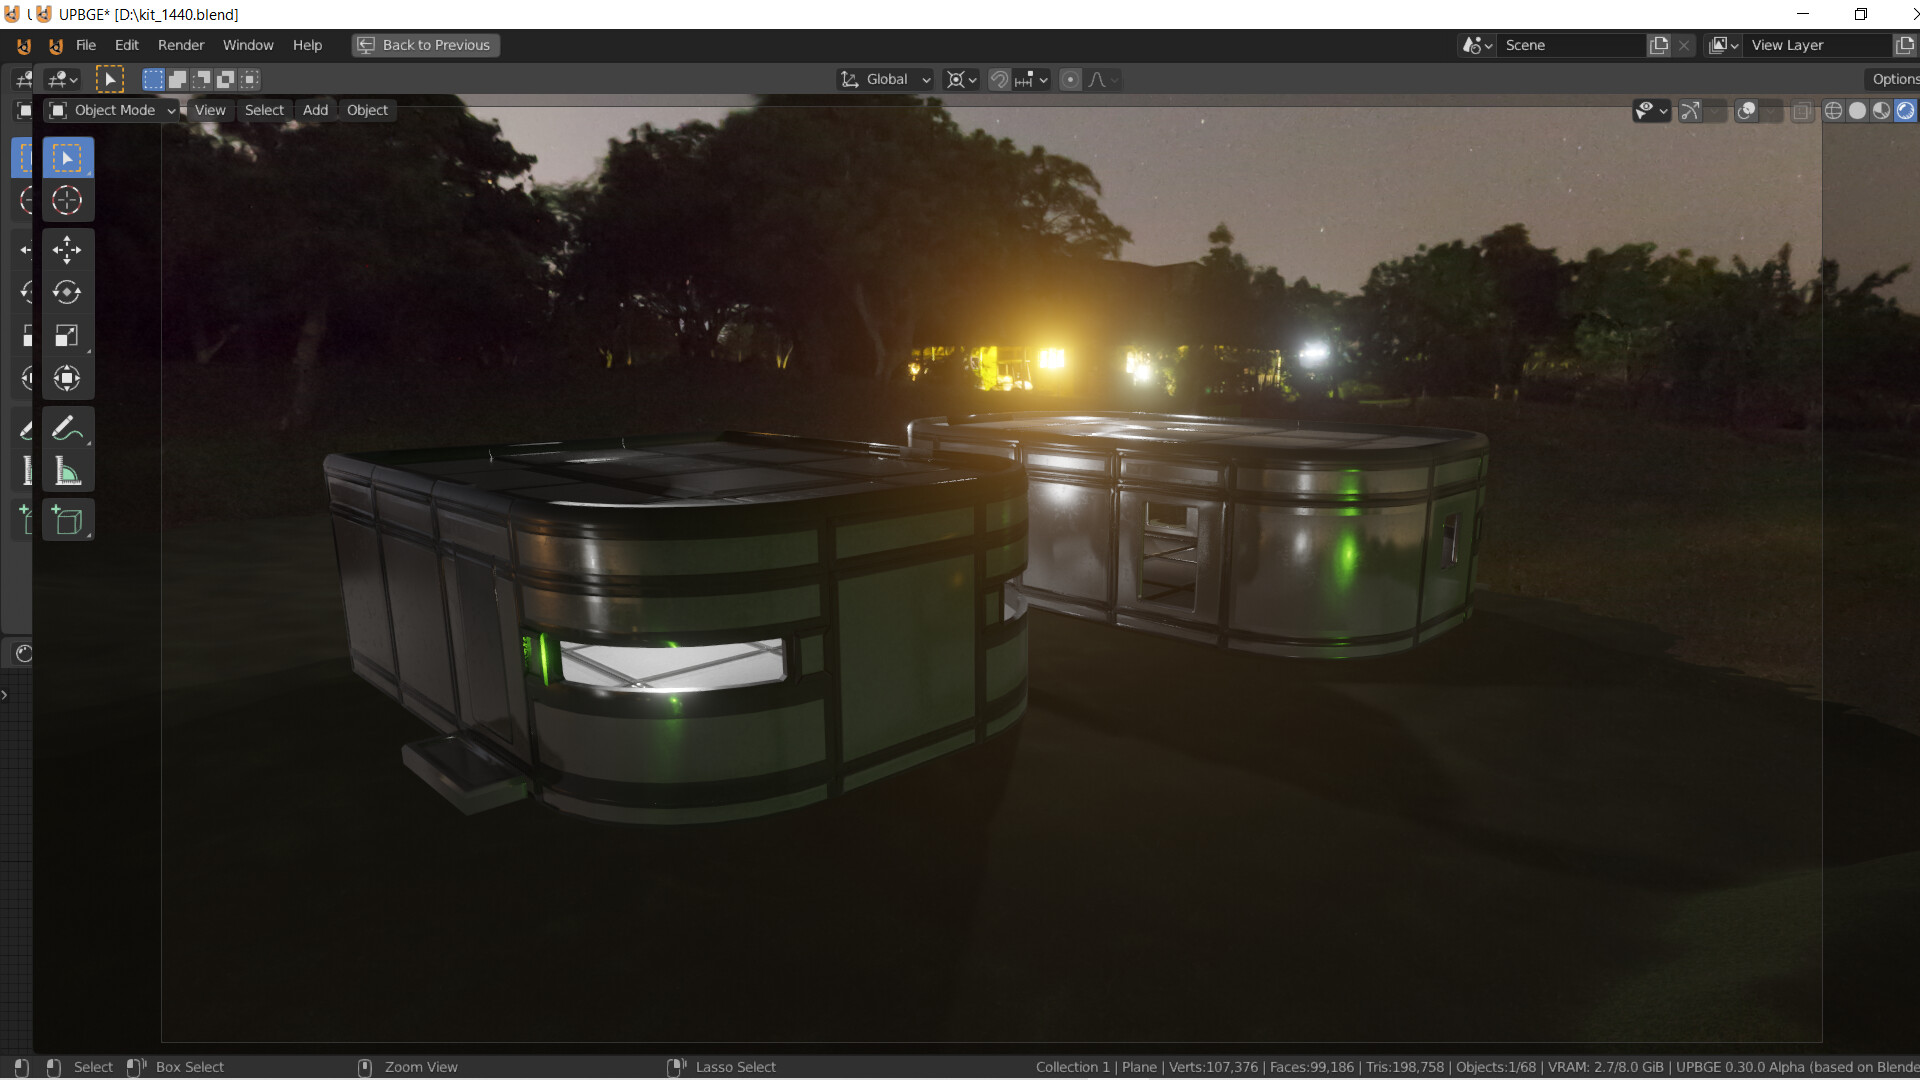
Is Blender Good for Game Development
Blender Game Development: Dive into the exciting world of Blender Game Development and unleash your creativity by creating immersive games from scratch. Learn advanced techniques and master the art of game design in this engaging video! UPBGE Games: Explore a mesmerizing collection of UPBGE Games that will transport you to fantastical worlds and challenge your gaming skills. Watch this video to experience stunning graphics and captivating gameplay like never before!
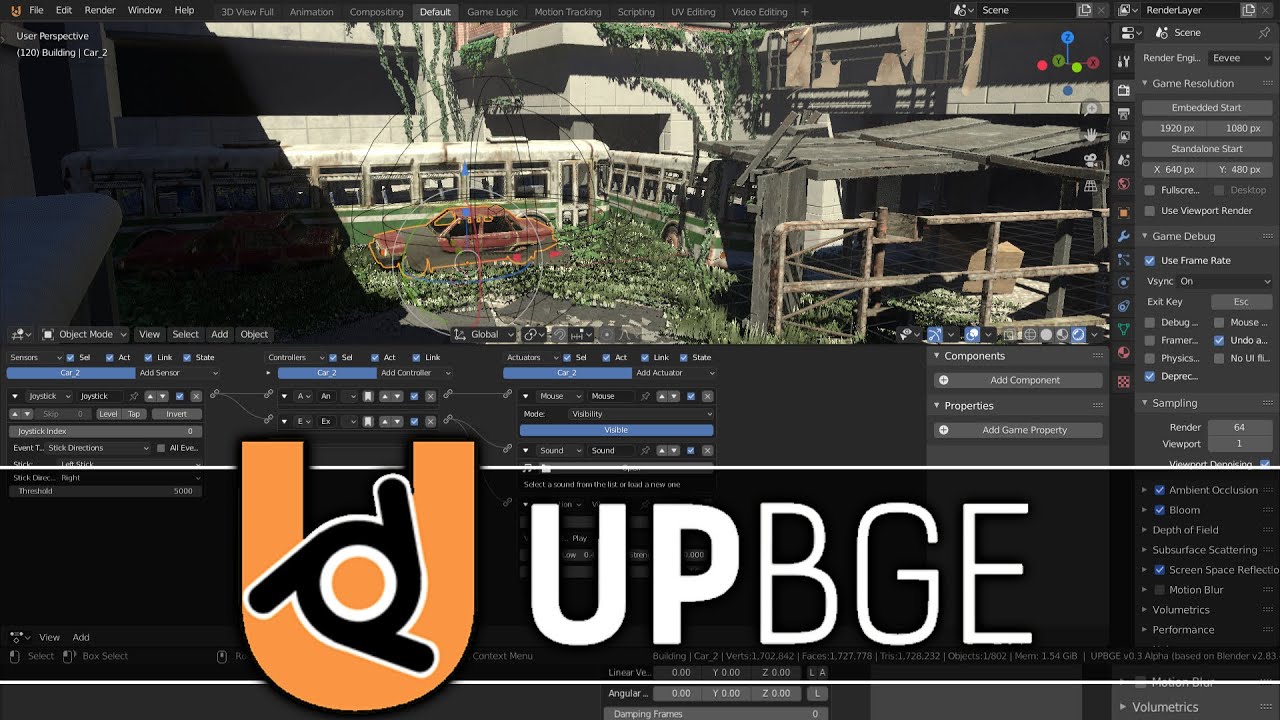
Games Made with Blender Game Engine UPBGE
UPBGE is Blender\'s open-source 3D game engine that was forked from the old Blender Game Engine and deployed with Blender ...
Step 5: Choose a Game Engine
While Blender can be used to create assets and simple game prototypes, for full game development, you\"ll likely need to export your assets to a game engine like Unity or Unreal Engine. Learn the basics of your chosen engine to integrate your Blender assets effectively.
Step 6: Assemble and Test Your Game
Import your assets into your game engine, assemble your scenes, and script the gameplay. Regularly test your game to find and fix bugs.
Step 7: Publish Your Game
Once your game is complete, consider publishing it on platforms like Steam, itch.io, or the App Store. Ensure you have the rights to all assets and have followed the necessary steps for publishing on these platforms.
_HOOK_
Additional Resources
For detailed tutorials and courses, consider platforms like Udemy, YouTube, and game development forums. These resources offer step-by-step guides on using Blender for game development and can help you with specific aspects of your game.
Step 3: Create Your Game Assets
- Modeling: Use Blender\"s modeling tools to create the 3D models of your characters, environments, and props.
- Texturing: Apply textures to your models to give them color and detail.
- Animation: Animate your characters and objects to bring them to life within your game.
Step 4: Game Logic and Physics
Utilize Blender\"s logic editor to define game behaviors and interactions. Set up physics to add realism to your game, handling collisions, and dynamics.
Step 5: Choose a Game Engine
While Blender can be used to create assets and simple game prototypes, for full game development, you\"ll likely need to export your assets to a game engine like Unity or Unreal Engine. Learn the basics of your chosen engine to integrate your Blender assets effectively.
Step 6: Assemble and Test Your Game
Import your assets into your game engine, assemble your scenes, and script the gameplay. Regularly test your game to find and fix bugs.
_HOOK_
Step 7: Publish Your Game
Once your game is complete, consider publishing it on platforms like Steam, itch.io, or the App Store. Ensure you have the rights to all assets and have followed the necessary steps for publishing on these platforms.
Additional Resources
For detailed tutorials and courses, consider platforms like Udemy, YouTube, and game development forums. These resources offer step-by-step guides on using Blender for game development and can help you with specific aspects of your game.
Step 5: Choose a Game Engine
While Blender can be used to create assets and simple game prototypes, for full game development, you\"ll likely need to export your assets to a game engine like Unity or Unreal Engine. Learn the basics of your chosen engine to integrate your Blender assets effectively.
Step 6: Assemble and Test Your Game
Import your assets into your game engine, assemble your scenes, and script the gameplay. Regularly test your game to find and fix bugs.
Step 7: Publish Your Game
Once your game is complete, consider publishing it on platforms like Steam, itch.io, or the App Store. Ensure you have the rights to all assets and have followed the necessary steps for publishing on these platforms.
_HOOK_
Additional Resources
For detailed tutorials and courses, consider platforms like Udemy, YouTube, and game development forums. These resources offer step-by-step guides on using Blender for game development and can help you with specific aspects of your game.
Step 6: Assemble and Test Your Game
Import your assets into your game engine, assemble your scenes, and script the gameplay. Regularly test your game to find and fix bugs.
Step 7: Publish Your Game
Once your game is complete, consider publishing it on platforms like Steam, itch.io, or the App Store. Ensure you have the rights to all assets and have followed the necessary steps for publishing on these platforms.
Additional Resources
For detailed tutorials and courses, consider platforms like Udemy, YouTube, and game development forums. These resources offer step-by-step guides on using Blender for game development and can help you with specific aspects of your game.
Step 7: Publish Your Game
Once your game is complete, consider publishing it on platforms like Steam, itch.io, or the App Store. Ensure you have the rights to all assets and have followed the necessary steps for publishing on these platforms.
_HOOK_
Additional Resources
For detailed tutorials and courses, consider platforms like Udemy, YouTube, and game development forums. These resources offer step-by-step guides on using Blender for game development and can help you with specific aspects of your game.
Additional Resources
For detailed tutorials and courses, consider platforms like Udemy, YouTube, and game development forums. These resources offer step-by-step guides on using Blender for game development and can help you with specific aspects of your game.
Introduction to Blender and Its Capabilities for Game Development
Blender is a comprehensive, free, open-source 3D creation suite capable of supporting the entire 3D pipeline for game development. It is an ideal tool for individuals and small teams looking to bring their video game concepts to life. With Blender, you can model characters, environments, and props, apply textures, animate elements, and even handle complex simulations like physics.
- Blender\"s modeling tools allow for the creation of detailed 3D models, essential for game assets.
- Its texturing and material systems enable developers to add realism and depth to their creations.
- Animation features in Blender are robust, supporting everything from simple movements to complex character animations.
- Blender also includes physics and game logic capabilities, allowing for the integration of realistic behaviors and game mechanics directly within the software.
- For comprehensive game development, Blender\"s assets can be exported to popular game engines such as Unity or Unreal Engine, making it a versatile part of the game development process.
Blender\"s community offers extensive resources and tutorials, making it accessible to beginners while still powerful enough for experienced developers. Whether you\"re looking to create your first game or are a seasoned developer, Blender provides a solid foundation for all aspects of game creation.
Setting Up Blender for Your Game Development Project
Starting your game development journey with Blender requires setting up the software to suit your project\"s needs. Here\"s a step-by-step guide to configuring Blender for game development.
- Download and Install Blender: Ensure you have the latest version of Blender installed from the official website to access all the current features and improvements.
- Customize the Interface: Blender\"s interface is highly customizable. Tailor it to your workflow by adjusting the layout, themes, and shortcuts to enhance your productivity.
- Set Up the Blender Game Engine (BGE): Although BGE is no longer included in the latest Blender versions, you can still use older versions or alternative game engines for real-time interactive content.
- Explore Add-ons: Blender supports numerous add-ons that can streamline game development. Install essential add-ons for tasks like UV mapping, texturing, and rigging.
- Learn the Basics: Familiarize yourself with Blender\"s tools and features such as modeling, animation, and physics simulations through tutorials and documentation.
- Organize Your Project: Use Blender\"s file management system to organize your assets, scenes, and libraries efficiently. This will save time and reduce complexity as your project grows.
- Prepare for Export: Understand how to export your models and animations to your chosen game engine, maintaining compatibility and optimizing performance.
By following these steps, you\"ll create a solid foundation for your game development project in Blender, enabling you to focus on bringing your creative visions to life.
Planning Your Game: Concept, Genre, and Design Basics
Embarking on the journey of creating a video game with Blender starts with a solid foundation in planning. This crucial phase involves conceptualizing your game, choosing a genre, and laying out the basic design elements. Here\"s how to effectively plan your game development project:
- Define Your Game Concept: Start with a clear, compelling idea. What is the core gameplay mechanic? What makes your game unique?
- Select a Genre: Choose a genre that fits your concept and passion. Whether it\"s an adventure, RPG, puzzle, or something else, ensure it aligns with your vision.
- Create a Design Document: Document every aspect of your game, including story, settings, characters, gameplay mechanics, levels, and user interface. This will be your blueprint.
- Sketch Out Visuals: Use concept art to give a visual representation of your ideas, helping to communicate the game\"s look and feel to others and guide development.
- Plan Game Mechanics: Detail the rules, challenges, player progression, and controls. How will the game play? What will keep players engaged?
- Consider the Scope: Be realistic about what you can achieve. Start small if you\"re new, to avoid becoming overwhelmed. You can always expand later.
- Research and Inspiration: Look at games in similar genres for inspiration and understanding of what works well. Note what you can improve or do differently.
Proper planning sets the stage for a successful game development project, helping you stay focused and organized throughout the process. With Blender as your tool, you\"re well-equipped to bring your creative visions to life.
_HOOK_
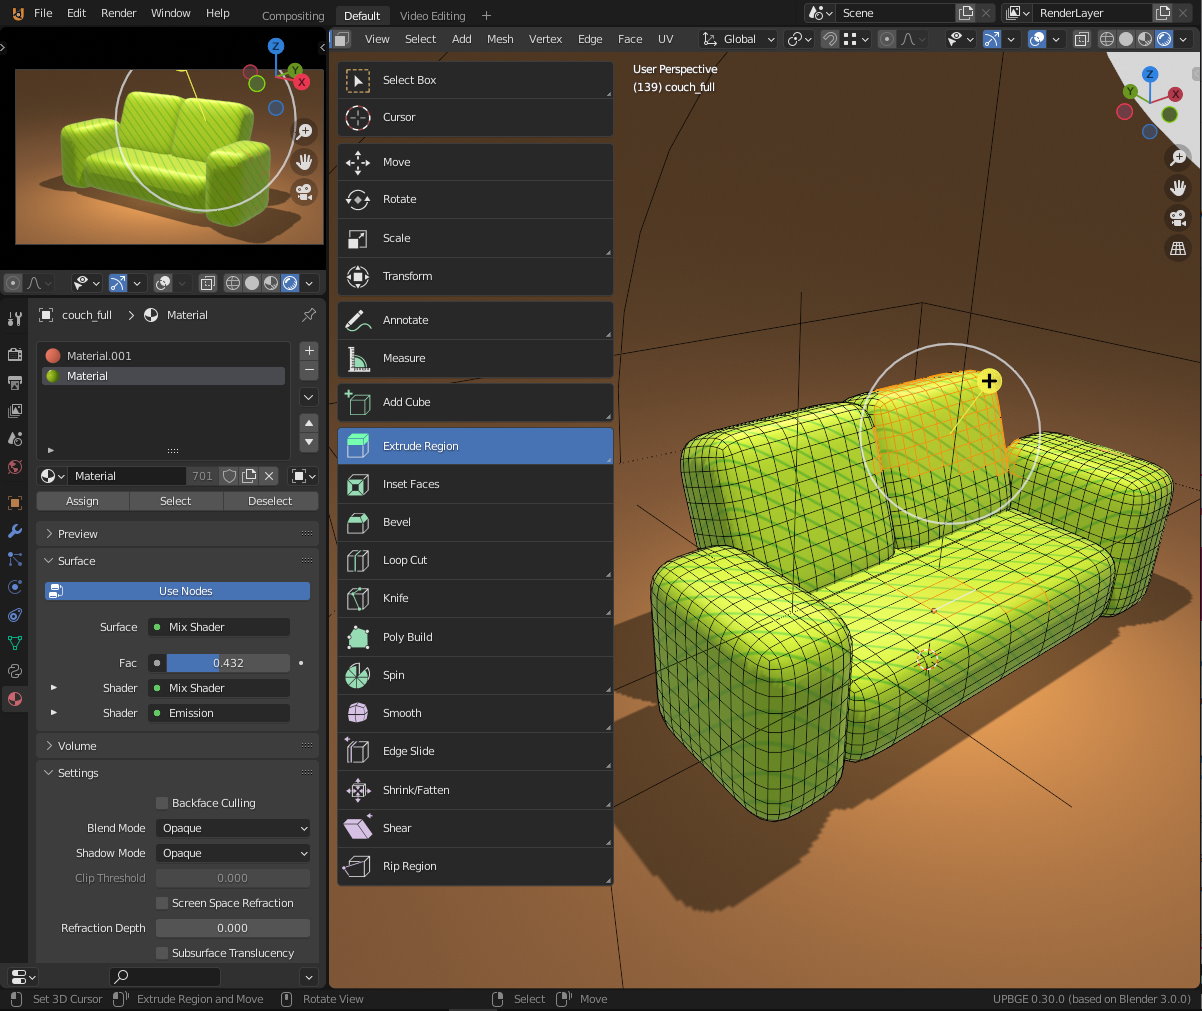
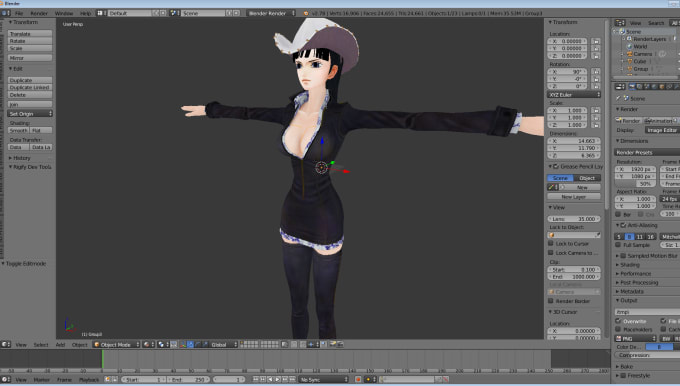
Creating 3D Models: Characters, Environments, and Props
Creating captivating 3D models is a fundamental step in video game development with Blender. This process involves designing and sculpting characters, crafting detailed environments, and modeling props to bring your game world to life. Follow these steps to master the art of 3D modeling in Blender:
- Mastering Basic Shapes: Begin with simple shapes to understand Blender\"s modeling tools. Learn to manipulate vertices, edges, and faces to form complex objects.
- Character Modeling: Start with a reference image or concept art. Use Blender\"s sculpting tools to mold detailed characters, focusing on proportions and anatomy.
- Environment Creation: Design immersive game worlds by modeling landscapes, buildings, and natural elements. Use Blender\"s modifiers for terrain and architectural details.
- Modeling Props: Create objects that players can interact with, such as weapons, tools, and items. Attention to detail here adds depth and realism to your game.
- Texturing and Materials: Apply textures and materials to your models to give them color, detail, and realism. Blender\"s shading and UV mapping tools are essential for this process.
- Rigging and Animation: For characters and certain props, rigging is necessary to define movement. Use Blender\"s armature system to create skeletons for animation.
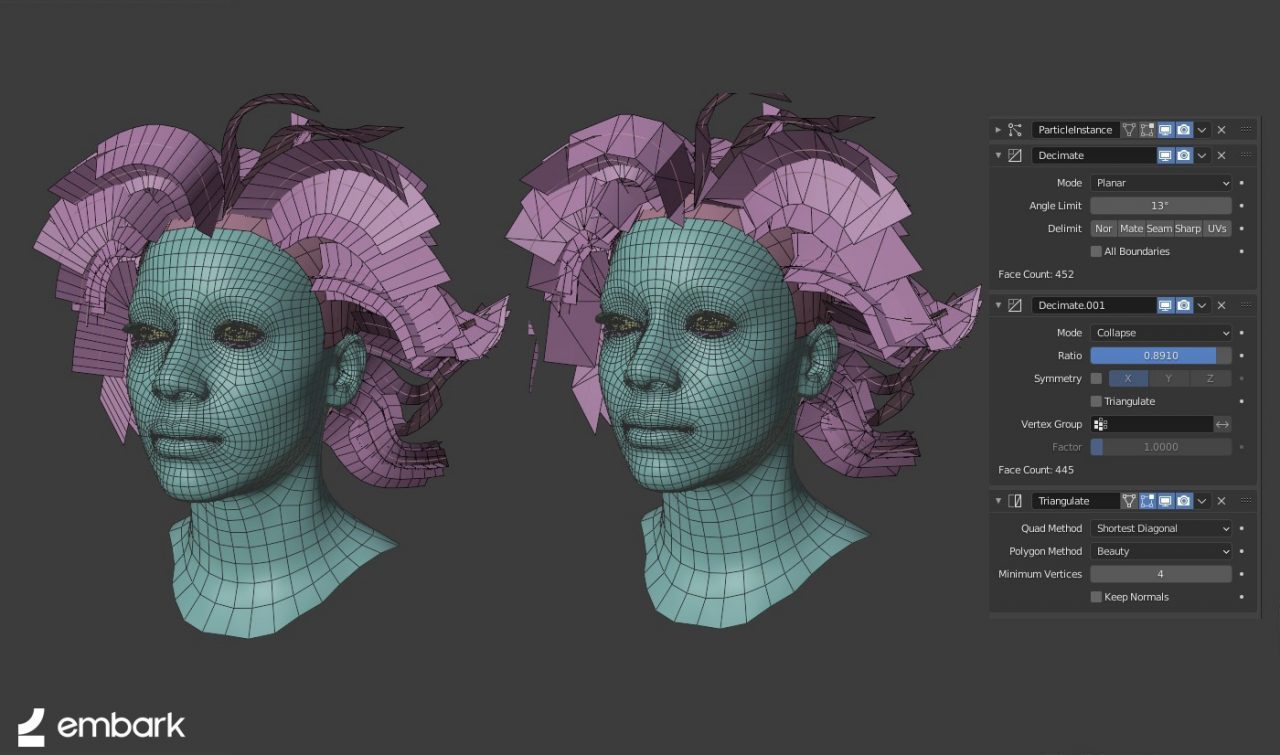
- Optimization: Optimize your models for performance, especially for complex scenes. This includes reducing polygon counts and simplifying textures without sacrificing quality.
Through practice and exploration of Blender\"s extensive toolset, you can craft detailed and engaging 3D models that are the backbone of any great video game.
Texturing and Materials: Bringing Realism to Your Models
Applying textures and materials is a crucial step in 3D game development with Blender, adding realism and depth to your models. This process involves mapping detailed images, patterns, and shaders to the surface of your 3D objects. Follow these guidelines to enhance the visual appeal of your game assets:
- Understanding Textures: Learn about different types of textures, including diffuse, specular, normal, and bump maps, and how they contribute to the overall appearance of your model.
- UV Mapping: Unwrap your models to create a 2D representation of the surface, allowing textures to be accurately applied to 3D objects.
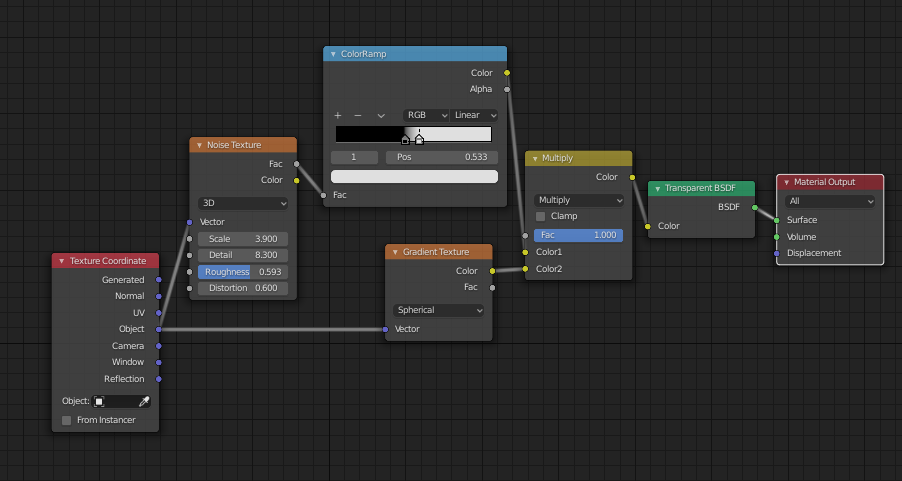
- Creating Materials: Use Blender\"s material system to define the color, shininess, transparency, and texture of your models. Experiment with nodes in the shader editor for complex materials.
- Applying Textures: Assign textures to your materials using Blender\"s texture settings. This can include image textures for realism or procedural textures for more abstract effects.
- Baking Textures: For efficiency, bake lighting and shading into your textures to reduce real-time rendering load, especially important for complex scenes or lower-end hardware.
- Procedural Texturing: Explore Blender\"s procedural texturing capabilities for creating materials and textures that can be dynamically generated and easily adjusted.
- Testing in Game Environment: Import your textured models into the game engine to see how they look in-game. Adjust materials and textures based on performance and visual feedback.
Mastering texturing and material application in Blender will significantly impact the visual quality of your game, making your environments and characters more immersive and believable.
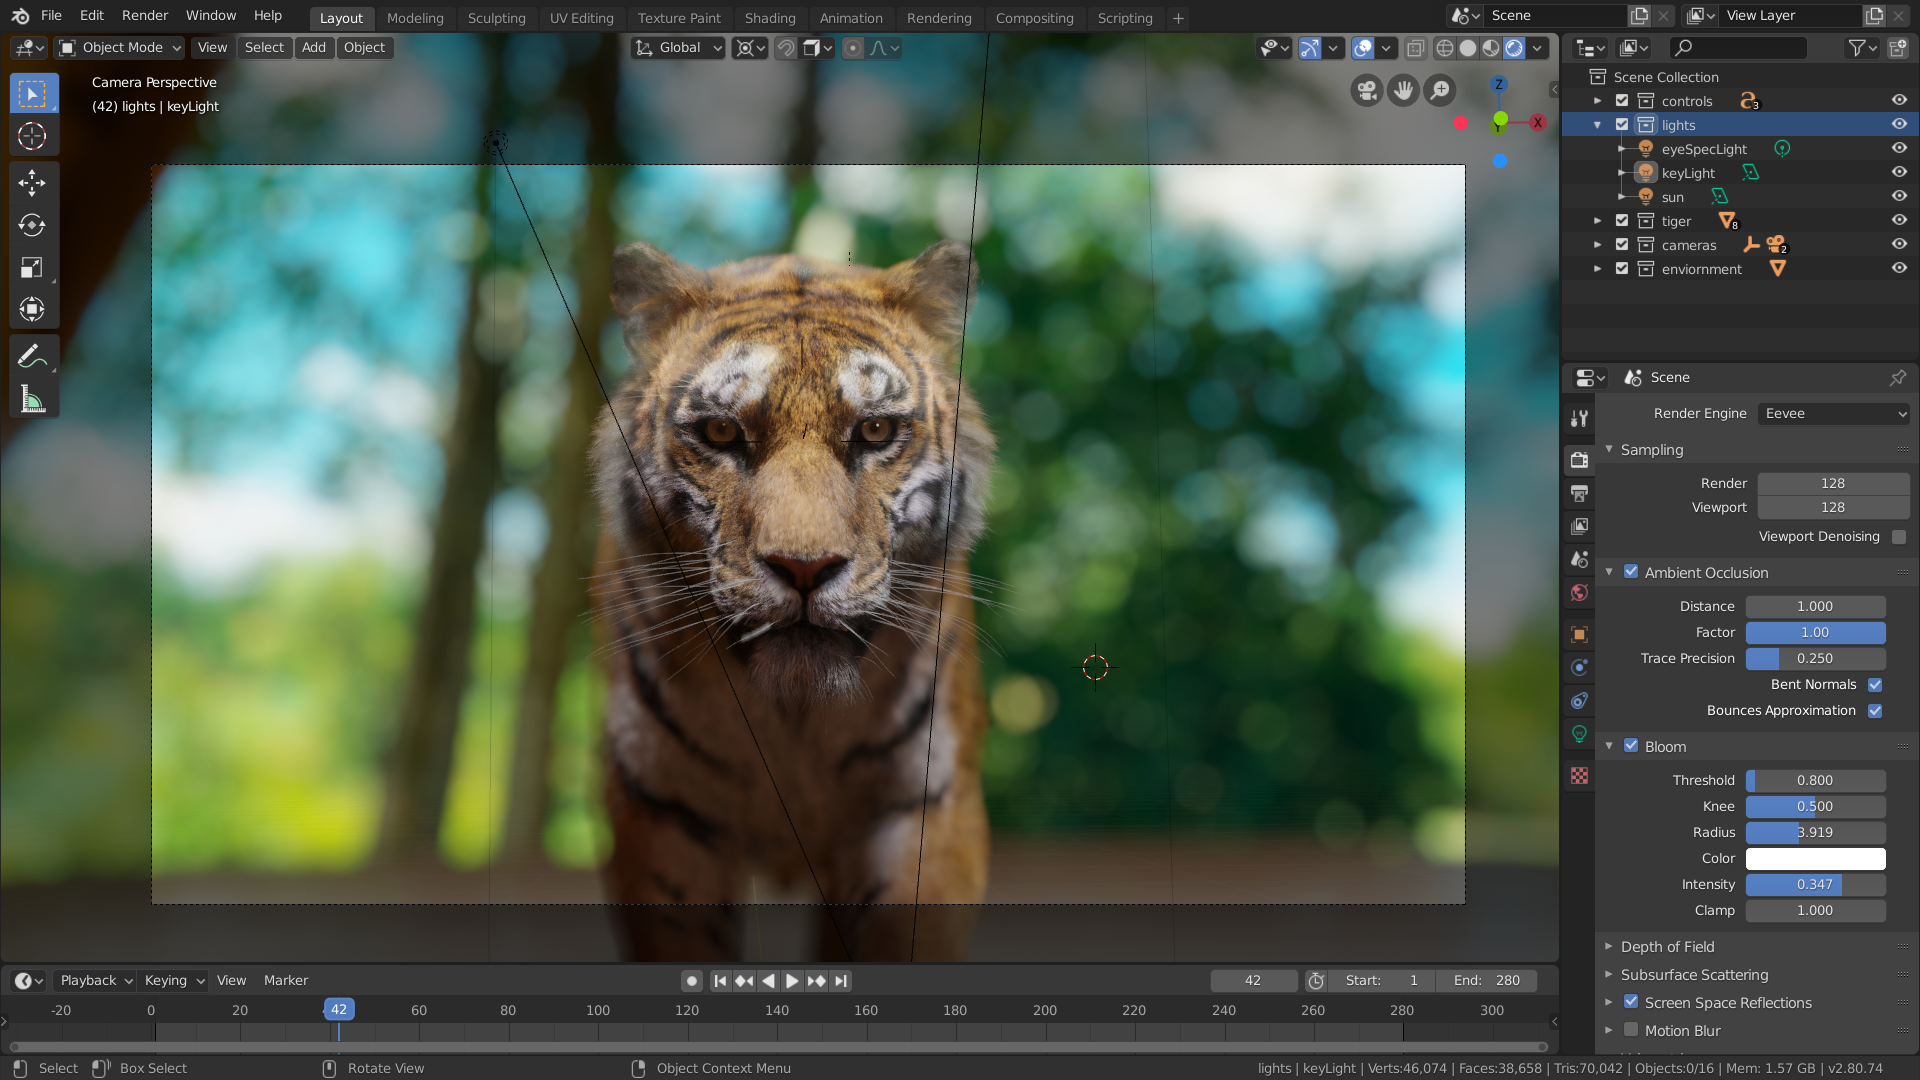
Animation Techniques for Characters and Objects
Animation breathes life into your video game\"s characters and objects, making your virtual world vibrant and dynamic. Blender offers a comprehensive suite of tools for animation, allowing developers to create fluid, realistic movements. Here\"s how to leverage Blender\"s animation capabilities for your game:
- Understanding the Basics: Start with Blender\"s fundamental animation concepts, including keyframes, timelines, and interpolation. These are the building blocks for any animation.
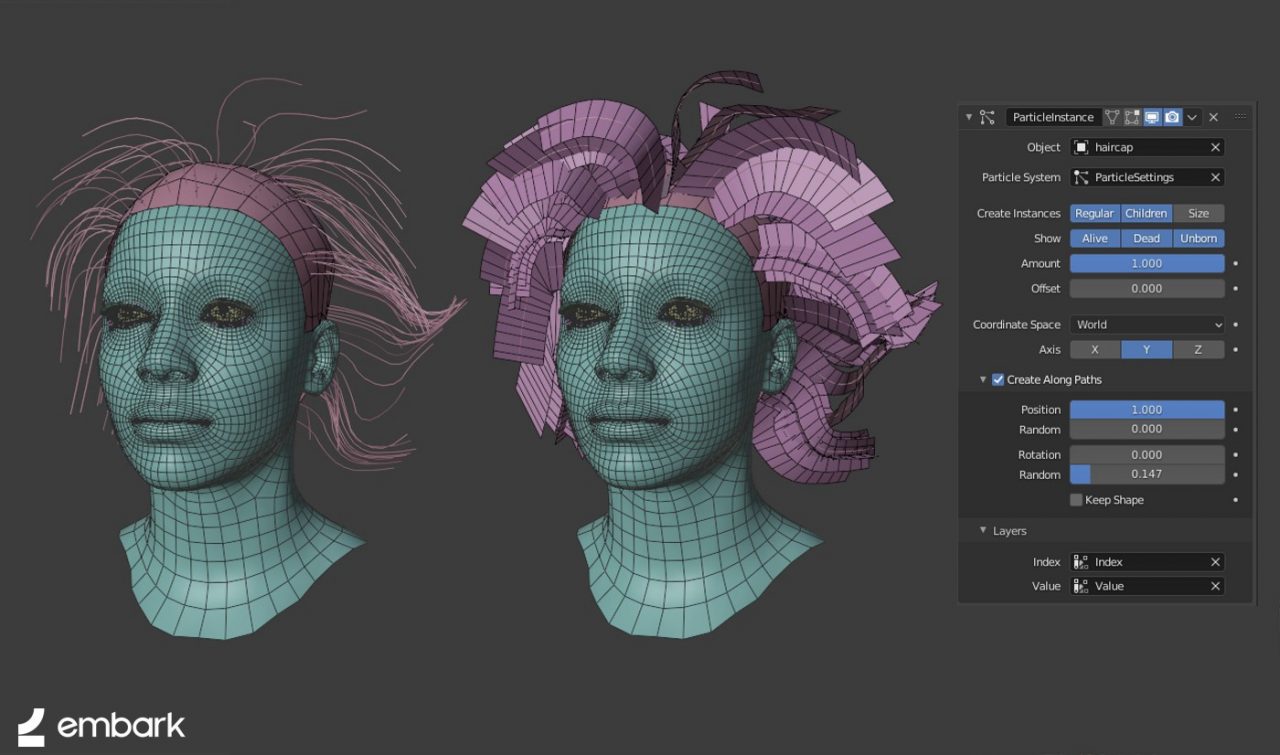
- Rigging Characters: Before animating characters, they must be rigged. Rigging involves creating a skeleton that defines how your character moves. Blender\"s armature system allows for intricate rigging setups.
- Animating Movements: Use keyframes to animate your characters and objects. Position, rotate, and scale your models at different points along the timeline to create motion.
- Facial Animation and Lip Syncing: For character expressions, Blender\"s shape keys enable detailed facial animations and lip-syncing to voice tracks.
- Using Motion Paths: Motion paths help visualize the trajectory of moving objects or characters, making it easier to plan and adjust animations.
- Physics and Simulations: Incorporate realism with Blender\"s physics simulations, such as cloth, hair, fluid, and rigid body dynamics, for natural movements.
- Non-Linear Animation (NLA): The NLA editor in Blender allows for the layering and blending of different animation sequences, enabling complex animations without cluttering the timeline.
- Exporting Animations: Finally, ensure your animations are compatible with your chosen game engine. Blender supports exporting animations in formats used by most engines, including Unity and Unreal.
With practice and exploration, you can use Blender to create animations that add depth and excitement to your game, making your characters and objects move in believable, engaging ways.
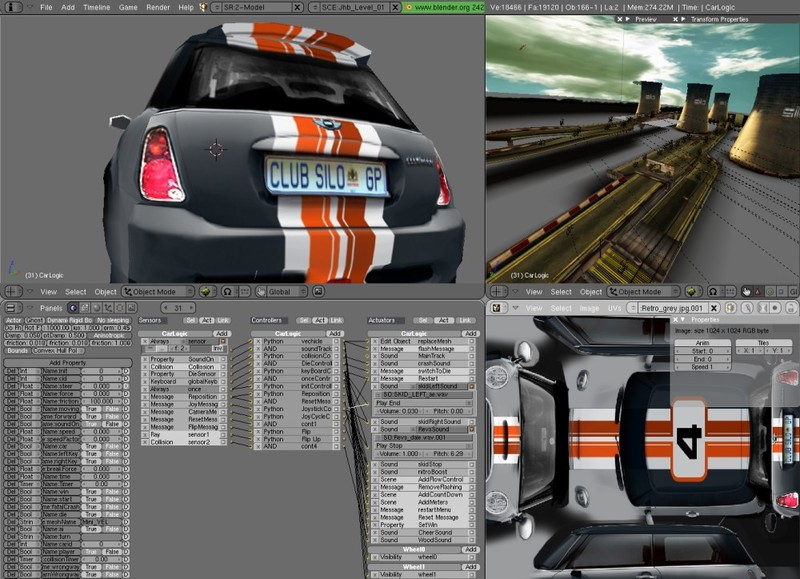
Implementing Game Logic and Physics with Blender
Implementing game logic and physics is essential in creating interactive and realistic video games. Blender, with its integrated tools, allows developers to infuse their games with complex behaviors and natural laws. Follow these steps to incorporate game logic and physics into your Blender projects:
- Understanding Logic Bricks: Blender\"s visual programming system, Logic Bricks, enables the creation of game logic without writing code. It consists of sensors, controllers, and actuators.
- Setting Up Sensors: Sensors detect events in the game world, such as collisions, keyboard input, or mouse movements. Use these to trigger actions.
- Configuring Controllers: Controllers process input from sensors and determine how to respond. They can be simple AND/OR gates or more complex Python scripts.
- Using Actuators: Actuators are the action components that respond to controllers. They can move objects, change properties, play sounds, or create other effects.
- Applying Physics: Blender supports various physics types, including rigid body, soft body, and fluid simulations. Use these to add realism to your game, simulating gravity, collisions, and other physical interactions.
- Creating Interactive Environments: Combine logic bricks and physics to make your game world interactive. For instance, use collision sensors with actuators to open doors or trigger events when a player approaches.
- Optimizing Game Performance: Physics simulations can be demanding. Optimize your game by simplifying physics calculations, using layers to manage objects, and limiting the physics to essential elements.
- Testing and Debugging: Continuously test your game logic and physics setups. Use Blender\"s built-in game engine or export to other game engines to evaluate performance and behavior.
By mastering these components, you can create engaging and dynamic games that captivate players with their interactive and lifelike environments.
Integrating Blender Assets with Game Engines
Successfully integrating Blender assets into game engines is a critical step in game development, ensuring that the visual and functional elements created in Blender perform seamlessly within the game environment. Here\"s a guide to effectively transferring your Blender creations into popular game engines like Unity and Unreal Engine.
- Exporting Assets from Blender: Learn the proper formats for exporting your models, animations, and textures. Formats like FBX, OBJ, and glTF are commonly used and widely supported by game engines.
- Understanding Game Engine Requirements: Each game engine has its own set of requirements and best practices for importing assets. Familiarize yourself with the documentation of your chosen engine to ensure compatibility.
- Optimizing Blender Assets: Before exporting, optimize your assets for performance in the game engine. This includes reducing polygon counts, simplifying textures, and ensuring animations are efficiently rigged.
- Importing Assets into the Game Engine: Once exported, import your assets into the game engine. This process might require adjusting import settings to correctly interpret materials, textures, and animations.
- Material and Shader Adjustments: After import, you may need to recreate or adjust materials and shaders within the game engine to match the visual fidelity you achieved in Blender.
- Testing in the Game Environment: Thoroughly test your imported assets within the game environment to identify and resolve any issues with performance, collisions, or visual discrepancies.
- Iterative Refinement: Game development is an iterative process. Be prepared to refine and re-import assets as your game evolves and as you receive feedback from testing and gameplay.
By following these steps, you can ensure a smooth transition of assets from Blender to your game engine, allowing you to maintain the integrity and quality of your game\"s visual elements.
_HOOK_
Testing, Debugging, and Polishing Your Game
Testing, debugging, and polishing are critical phases in the game development process, ensuring that your game is engaging, stable, and free of errors. These steps are essential for delivering a high-quality gaming experience to your audience. Here’s how to approach each stage effectively:
- Setting Up Testing Environments: Create various testing environments that mimic potential player conditions, including different hardware configurations and operating systems.
- Implementing Automated Tests: Utilize automated testing tools to identify bugs and issues in your game. This includes unit tests for individual components and integration tests for overall functionality.
- Conducting Playtests: Organize playtesting sessions with real users to gather feedback on gameplay, difficulty levels, and user experience. Pay attention to how players interact with your game and any points of frustration or confusion.
- Debugging: Use Blender\"s and your game engine’s debugging tools to track down and fix bugs. Address performance issues, crashes, and gameplay bugs based on feedback and test results.
- Optimization: Optimize your game for better performance and loading times. This may involve adjusting graphics settings, streamlining code, and reducing asset sizes.
- Polishing: Add final touches to your game, such as refining animations, improving lighting and shadows, and enhancing audio. Polishing improves the overall aesthetics and quality of your game.
- User Interface and Experience: Ensure that your game’s interface is intuitive and user-friendly. Make adjustments based on playtest feedback to improve navigation, menus, and readability.
- Final Testing Round: Before launch, conduct a final round of testing to ensure all elements of your game work harmoniously and that any previous issues have been fully resolved.
Through thorough testing, diligent debugging, and careful polishing, you can elevate your game from a functional prototype to a polished, market-ready product that captivates players.
Publishing Your Game: Platforms and Best Practices
Publishing your game is the final step in bringing your vision to the gaming community. Choosing the right platform and following best practices are key to your game\"s success. Here\"s a comprehensive guide to publishing your game developed with Blender:
- Choose the Right Platform: Consider platforms like Steam, itch.io, and the Epic Games Store for PC games. For mobile games, Google Play Store and Apple App Store are essential. Each platform has its own audience and requirements.
- Prepare Your Game: Ensure your game meets the technical requirements of the chosen platform. This includes optimizing performance, fixing bugs, and ensuring compatibility with different devices and operating systems.
- Marketing and Promotion: Create a marketing plan to promote your game. Use social media, gaming forums, and press releases to generate interest. Consider creating a trailer that highlights the best features of your game.
- Create Compelling Storefronts: Your game\"s page on digital storefronts is your main selling point. Include high-quality screenshots, engaging descriptions, and user reviews to attract potential players.
- Set the Right Price: Research similar games to set a competitive price for your game. Consider offering launch discounts or bundles to attract initial players and build a player base.
- Understand the Publishing Process: Each platform has its own publishing process, including submission, review, and approval stages. Familiarize yourself with these processes to avoid delays.
- Gather and Implement Feedback: After launch, pay attention to player feedback. Addressing concerns and releasing updates can improve your game\"s reputation and player satisfaction.
- Legal and Financial Considerations: Ensure you have the rights to all assets used in your game. Understand the tax implications and revenue sharing models of the platforms where you publish your game.
By carefully selecting your publishing platform, preparing your game for launch, and actively engaging with your community, you can maximize the success of your game developed with Blender.
READ MORE:
Continued Learning: Resources and Communities for Blender Game Developers
The journey of a Blender game developer is one of continuous learning and community engagement. Whether you\"re a beginner or an experienced developer, there are numerous resources and communities available to help you improve your skills, stay updated with the latest trends, and connect with like-minded individuals. Here are some key resources and communities to support your development journey:
- Blender.org Tutorials: The official Blender website offers extensive tutorials covering all aspects of 3D creation, including specific guides for game development.
- GameDev Academy: Find specialized tutorials that focus on using Blender for game development, offering practical tips and project-based learning.
- Blender Artists Community: An online forum where Blender users share their work, ask for feedback, and offer support to fellow developers.
- Blender Discord Servers: Join real-time discussions and get instant feedback or assistance from the Blender community on Discord.
- YouTube Channels: Numerous channels dedicated to Blender tutorials, offering visual guides ranging from basic modeling to advanced game asset creation.
- Udemy Courses: Online courses that cater to game developers looking to master Blender and integrate their work with game engines like Unity and Unreal.
- Blender Stack Exchange: A Q&A community for Blender users to seek answers to specific technical questions or troubleshooting issues.
- Blender Network: Connect with professional Blender artists and developers, ideal for collaboration or finding talent for your project.
Engaging with these resources and communities can significantly accelerate your learning curve, provide valuable insights, and open up networking opportunities to further your game development career with Blender.
Embark on a rewarding journey to create your own video game with Blender, leveraging its powerful tools for modeling, animation, and game logic. Unleash your creativity and join a thriving community of developers. Start shaping your game world today!