Topic blender modeling techniques: Explore the world of 3D modeling with Blender, mastering techniques that bring your creations to life. From beginners to pros, learn to sculpt, texture, and render with our comprehensive guide.
Table of Content
- What are some advanced blender modeling techniques for creating complex models?
- Key Blender Modeling Tools
- Modeling Techniques
- Modeling Tips and Best Practices
- Learning Resources
- Modeling Techniques
- Modeling Tips and Best Practices
- Learning Resources
- YOUTUBE: Favorite Modeling Techniques for Beginners in Blender
- Modeling Tips and Best Practices
- Learning Resources
- Learning Resources
- Introduction to Blender Modeling
- Getting Started with Blender
- Basic Modeling Tools and Techniques
- Advanced Modeling Techniques in Blender
- Texturing and Rendering Models
- Common Modeling Challenges and Solutions
- Blender Modeling Projects and Ideas
- Resources for Learning Blender Modeling
- Conclusion: Mastering Blender Modeling
What are some advanced blender modeling techniques for creating complex models?
Advanced Blender modeling techniques for creating complex models include:
- Use of modifiers: Utilize Blender\'s modifier stack to create complex shapes and structures, such as mirror modifier, array modifier, bevel modifier, etc.
- Sculpting tools: Utilize Blender\'s sculpting tools to add intricate details and textures to your models.
- Proportional editing: Use proportional editing to easily manipulate multiple vertices, edges, or faces at once, allowing for more organic and natural shapes.
- Retopology: Refine and optimize your models by using retopology techniques to create cleaner topology for smoother deformation and better performance.
- UV unwrapping: Properly unwrap your models\' UVs to apply textures seamlessly and accurately, enhancing the overall look of the model.
- Boolean operations: Use boolean operations to combine, subtract, or intersect shapes to create complex geometry and cutouts in your models.
- Advanced techniques: Experiment with techniques like curve modeling, procedural modeling, and using shape keys to create complex and dynamic models.
READ MORE:
Key Blender Modeling Tools
- Keyboard shortcuts for efficient workflow
- Support for N-Gons
- Advanced operations like edge slide, collapse, and dissolve
- Grid and bridge fill options for complex structures
- Python scripting for custom tools and add-ons
- Non-destructive modifiers for automatic effects
Modeling Techniques
Blender accommodates a wide range of modeling techniques suitable for various projects, including:
- Digital 3D sculpting for organic shapes
- Photogrammetry for real-world accuracy
- Simulation for dynamic models
- Procedural modeling for automated textures and forms
- Boolean modeling for complex intersections
- Kit bashing for efficient use of pre-made assets
- Modular modeling for scalable designs
Modeling Tips and Best Practices
Enhance your modeling workflow in Blender with these tips and best practices:
- Utilize keyboard shortcuts to speed up your modeling process.
- Experiment with modifiers to achieve complex effects effortlessly.
- Explore Blender\"s comprehensive sculpting tools for detailed organic models.
- Practice modular modeling techniques for efficient creation of large scenes.
- Adopt procedural modeling for creating textures and landscapes dynamically.

Learning Resources
To master Blender\"s modeling capabilities, consider the following resources:
- Online tutorials and guides focusing on hard-surface and organic modeling
- Comprehensive courses covering basics to advanced 3D modeling techniques
- Community forums and platforms for peer support and knowledge exchange
- Project-based learning to apply techniques in practical scenarios
Conclusion
Blender\"s versatile modeling tools and techniques offer endless possibilities for 3D creation. Whether you\"re sculpting a character, designing a vehicle, or creating a vast landscape, Blender provides all the necessary tools to bring your vision to life. Dive into Blender\"s rich modeling environment and unleash your creativity.
_HOOK_
Modeling Techniques
Blender accommodates a wide range of modeling techniques suitable for various projects, including:
- Digital 3D sculpting for organic shapes
- Photogrammetry for real-world accuracy
- Simulation for dynamic models
- Procedural modeling for automated textures and forms
- Boolean modeling for complex intersections
- Kit bashing for efficient use of pre-made assets
- Modular modeling for scalable designs

Modeling Tips and Best Practices
Enhance your modeling workflow in Blender with these tips and best practices:
- Utilize keyboard shortcuts to speed up your modeling process.
- Experiment with modifiers to achieve complex effects effortlessly.
- Explore Blender\"s comprehensive sculpting tools for detailed organic models.
- Practice modular modeling techniques for efficient creation of large scenes.
- Adopt procedural modeling for creating textures and landscapes dynamically.

Learning Resources
To master Blender\"s modeling capabilities, consider the following resources:
- Online tutorials and guides focusing on hard-surface and organic modeling
- Comprehensive courses covering basics to advanced 3D modeling techniques
- Community forums and platforms for peer support and knowledge exchange
- Project-based learning to apply techniques in practical scenarios
Conclusion
Blender\"s versatile modeling tools and techniques offer endless possibilities for 3D creation. Whether you\"re sculpting a character, designing a vehicle, or creating a vast landscape, Blender provides all the necessary tools to bring your vision to life. Dive into Blender\"s rich modeling environment and unleash your creativity.

Favorite Modeling Techniques for Beginners in Blender
For Beginners: \"Join our video to discover a fun and easy way to kickstart your journey into the world of [topic]. Perfect for beginners, our step-by-step guide will have you feeling confident in no time!\" For Skills: \"Unlock your full potential and level up your [topic] skills with our expert video tutorial. From basic techniques to advanced tricks, our video will help you master new skills like a pro.\"
5 Quick And Powerful Blender Modeling Tips to Improve Your Skills
Quick tips on leveling up your modeling game. Discord Community - https://discord.gg/TqzAv5JHbu Support us by becoming ...
Modeling Tips and Best Practices
Enhance your modeling workflow in Blender with these tips and best practices:
- Utilize keyboard shortcuts to speed up your modeling process.
- Experiment with modifiers to achieve complex effects effortlessly.
- Explore Blender\"s comprehensive sculpting tools for detailed organic models.
- Practice modular modeling techniques for efficient creation of large scenes.
- Adopt procedural modeling for creating textures and landscapes dynamically.

Learning Resources
To master Blender\"s modeling capabilities, consider the following resources:
- Online tutorials and guides focusing on hard-surface and organic modeling
- Comprehensive courses covering basics to advanced 3D modeling techniques
- Community forums and platforms for peer support and knowledge exchange
- Project-based learning to apply techniques in practical scenarios
Conclusion
Blender\"s versatile modeling tools and techniques offer endless possibilities for 3D creation. Whether you\"re sculpting a character, designing a vehicle, or creating a vast landscape, Blender provides all the necessary tools to bring your vision to life. Dive into Blender\"s rich modeling environment and unleash your creativity.

_HOOK_
Learning Resources
To master Blender\"s modeling capabilities, consider the following resources:
- Online tutorials and guides focusing on hard-surface and organic modeling
- Comprehensive courses covering basics to advanced 3D modeling techniques
- Community forums and platforms for peer support and knowledge exchange
- Project-based learning to apply techniques in practical scenarios
Conclusion
Blender\"s versatile modeling tools and techniques offer endless possibilities for 3D creation. Whether you\"re sculpting a character, designing a vehicle, or creating a vast landscape, Blender provides all the necessary tools to bring your vision to life. Dive into Blender\"s rich modeling environment and unleash your creativity.
Introduction to Blender Modeling
Blender is a comprehensive 3D creation suite that offers a robust array of modeling tools enabling artists to create, transform, sculpt, and edit their models with ease. It includes keyboard shortcuts for a fast workflow, N-Gon support, edge slide, collapse and dissolve, grid and bridge fill, and Python scripting for custom tools and add-ons. Modifiers in Blender are automatic operations that affect an object in a non-destructive way, allowing for many effects to be performed automatically without altering the base geometry of the object.
Blender also features advanced UV Unwrapping tools, allowing artists to easily unwrap their mesh right inside Blender, and use image textures or paint their own directly onto the model. This includes fast Cube, Cylinder, Sphere, and Camera projections, conformal and angle-based unwrapping with edge seams and vertex pinning, painting directly onto the mesh, multiple UV layers, and UV layout image exporting.
To further enhance modeling capabilities, Blender incorporates sculpting tools for a more intuitive and natural modeling experience. Sculpting in Blender can speed up the workflow significantly, enabling adjustments to a large number of vertices quickly, which would be much slower if done manually.
Understanding Blender\"s interface and utilizing its comprehensive toolset can dramatically improve modeling efficiency and creativity. From hard surface modeling techniques ideal for creating objects with precise geometry like vehicles and machinery, to organic modeling for characters and environments, Blender\"s versatility supports a wide range of artistic endeavors.
Blender\"s 3D cursor, an often misunderstood feature, acts as a custom transform origin or placement point for new objects, greatly aiding in precise model construction. Precision in transformations and rotations is crucial in 3D modeling, and Blender facilitates this with functions that allow for incremental adjustments. The marquee selection tool, activated by pressing \"B\", and the ability to lock transformations to specific axes further streamline the modeling process.
For artists looking to quickly prototype or generate base meshes, Blender\"s Skin Modifier is a powerful feature. Similar to ZSpheres in ZBrush, it allows for the creation of complex shapes from simple edge extrusions, offering a quick way to establish the basic form of a model which can then be refined.
Blender\"s capabilities extend to creating realistic hair using particle systems, constructing intricate nature scenes with elaborate details, and even generating entire cityscapes with real-life building layouts using add-ons like Open Street Map. This versatility makes Blender a preferred tool for artists working across different genres, from video games and movies to architectural visualization.
Learning and mastering Blender modeling requires practice and exploration of its diverse toolset. With dedication, artists can leverage Blender to bring their most ambitious visions to life, creating stunning 3D models and scenes that push the boundaries of digital art.
Getting Started with Blender
Blender is a robust open-source software for 3D modeling, animation, and rendering. Perfect for beginners and professionals alike, it provides a comprehensive suite of tools for creating detailed 3D models and animations.
- Download and Install Blender: Begin by downloading the latest version of Blender from the official Blender website. Follow the installation instructions to set up Blender on your computer.
- Familiarize Yourself with the Interface: Upon launching Blender, take some time to get accustomed to the interface. Explore the 3D viewport, timeline, properties editor, and outliner to understand the layout and functions.
- Learn Basic Navigation and Manipulation: Master the essentials of navigating and manipulating objects in the 3D viewport. Use the middle mouse button to orbit, scroll wheel to zoom, and Shift + middle mouse button to pan. Practice selecting, moving, rotating, and scaling objects.
- Explore Blender\"s Primitive Objects: Blender offers various primitive objects like cubes, spheres, and cylinders to kickstart your modeling process. Add them to your scene and experiment with basic manipulations.
- Discover Blender\"s Modeling Tools: Delve into Blender\"s rich array of modeling tools. Familiarize yourself with the Extrude tool (E), Loop Cut (Ctrl + R), and Bevel (Ctrl + B) to start shaping your models.
- Learn the Basics of Materials and Texturing: Understand how to apply materials and textures using the Shader Editor and Blender\"s node-based material system. Start with basic materials and gradually explore UV mapping and texture painting.
- Render Your First 3D Model: With your model and materials ready, navigate to the Render Properties panel to use Blender\"s rendering engines, Eevee and Cycles, for your final output. Adjust settings as needed and hit \"Render\" to see your creation.
- Expand Your Knowledge: As you grow more comfortable with Blender, look into tutorials and resources offered by the community. This will help you learn advanced techniques and solve any challenges you might face.
Starting with Blender opens up a world of creativity and technical skill. With patience and practice, you\"ll find yourself capable of creating stunning 3D models and animations. Remember, the journey in 3D modeling is continuous, and there\"s always something new to learn.
Basic Modeling Tools and Techniques
Blender offers a vast array of tools and features for 3D modeling, making it an ideal platform for both beginners and advanced users. Understanding the basic modeling tools and techniques is crucial for creating detailed and complex models efficiently.
- Extrude: Allows for the extension of meshes from selected vertices, edges, or faces.
- Spin: Rotates the selection around a pivot point, useful for creating circular symmetrical objects.
- Shear: Skews objects along a plane, providing a way to create angled sides.
- Split: Separates the selection from the rest of the mesh, allowing for independent manipulation.
- Rip: Similar to split, but specifically designed to tear edges, creating openings in the mesh.
- Fill: Creates a face or faces within a selected edge loop, closing gaps in the mesh.
- Grid Fill: Efficiently fills a selected edge loop with grid-like topology, ideal for closing large holes with even geometry.
- Bridge Edge Loops: Connects two edge loops with a series of faces, creating a \"bridge\" between them.
- Join: Merges vertices to form a single vertex, used for closing gaps or reducing geometry.
- Merge: Combines selected vertices at a specific location, essential for cleaning up and refining the mesh.
- Subdivide: Splits faces into smaller components, increasing mesh density for adding details.
- Un-Subdivide: Reduces the complexity of a mesh by removing subdivisions, simplifying the geometry.
These tools, along with Blender\"s comprehensive support for N-Gon (polygons with more than four edges), edge sliding, collapsing, dissolving, and the ability to create custom tools through Python scripting, make it a powerful software for 3D modeling. Modifiers add another layer of functionality, allowing for non-destructive transformations and adjustments to objects, such as subdivision surfaces for smoothing geometry without altering the base mesh.
Understanding and mastering these tools and techniques will significantly enhance your modeling workflow in Blender, enabling you to create more complex and detailed models efficiently.
Advanced Modeling Techniques in Blender
As you progress in your Blender modeling journey, mastering advanced techniques will enable you to tackle complex projects and bring your creative visions to life. This section delves into several sophisticated modeling methods that can significantly enhance your workflow and model quality.
Subdivision Surface Modeling
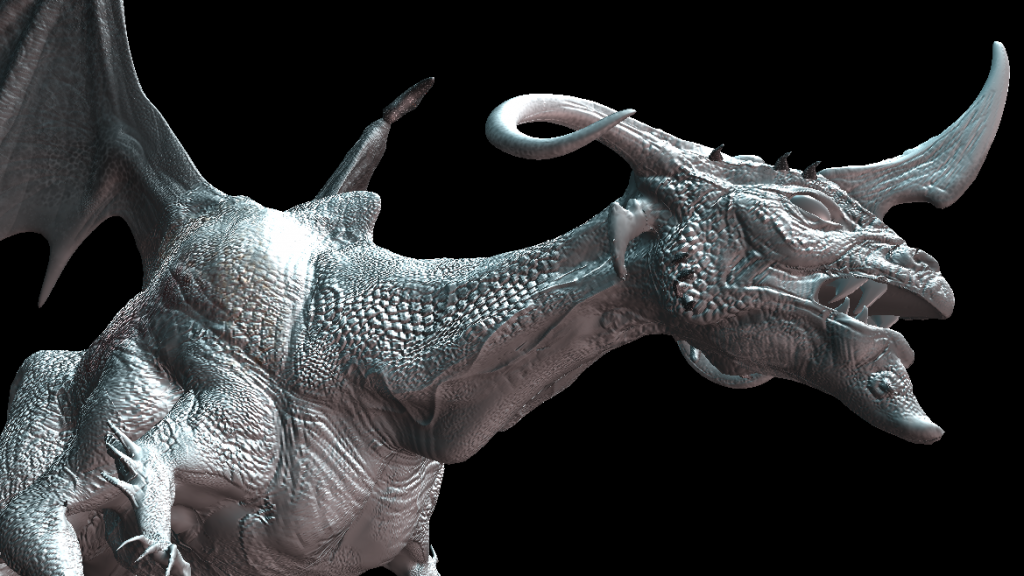
Subdivision surface (Subsurf) modeling is a technique that smooths a model by subdividing its polygons, creating a smoother surface. This method is particularly useful for creating organic shapes such as characters and animals.
- Start by adding a Subdivision Surface modifier to your mesh.
- Adjust the subdivision levels for both the viewport and render to control the smoothness.
- Use loop cuts and edge sliding to define sharp edges and maintain control over the mesh’s form.
Sculpting
Blender’s sculpting tools allow for intuitive shaping of models through various brushes and settings. This is ideal for detailed character modeling, terrain creation, and any scenario where manual control over form is desired.
- Switch to Sculpt Mode from the mode menu in the 3D viewport.
- Select a brush and adjust its strength, size, and other properties to suit your needs.
- Use dynamic topology for a flexible sculpting process that adds geometry where needed.
Boolean Operations
Boolean operations are powerful tools for creating complex shapes by combining basic ones. You can add, subtract, or intersect meshes to achieve intricate designs with precision.
- Utilize the Boolean modifier and select the operation type: Union, Difference, or Intersection.
- Apply the modifier to combine your meshes in complex ways, perfect for mechanical and architectural models.
Retopology
Retopology is the process of simplifying the mesh topology of high-polygon models while retaining the original shape as much as possible. This is crucial for animation and game asset creation, making models lighter and easier to animate.
- Use the Shrinkwrap modifier to project a low-poly mesh onto the surface of a high-poly model.
- Employ Blender’s retopology tools, such as F2 and Poly Build, to manually refine the mesh.
Non-Destructive Modeling
Non-destructive modeling involves using modifiers to make changes to your mesh that can be adjusted or removed at any time without permanently altering the base geometry. This approach encourages experimentation and flexibility in the modeling process.
- Stack multiple modifiers, like Mirror, Array, and Solidify, to create complex structures with ease.
- Adjust modifier settings to iterate quickly and explore different design options.
Procedural Texturing and Displacement
Going beyond modeling, procedural texturing and displacement can add incredible detail and realism to your models. By using Blender’s node-based materials, you can create textures that dynamically adjust to the model’s geometry.
- Utilize the Displacement node in your material setup to physically alter the mesh surface based on a texture.
- Experiment with procedural textures to create complex material effects without the need for image textures.
By incorporating these advanced techniques into your Blender workflow, you will be able to create more complex and detailed models. Practice each method to understand its full potential and how it can be applied to your specific modeling projects. Remember, the key to mastery is experimentation and continuous learning.
_HOOK_
Texturing and Rendering Models
Texturing and rendering are crucial steps in bringing your 3D models to life in Blender. This section will guide you through the process of applying textures, materials, and lighting to your models, followed by rendering them into stunning images or animations. Understanding these techniques will elevate the visual quality of your projects.
Creating and Applying Textures
Textures are images or patterns applied to the surface of a model to give it color, detail, and realism. Blender supports a variety of textures, from simple color maps to complex procedural textures.
- Begin by unwrapping your model to lay out its 3D surface in 2D space, allowing for accurate texture application.
- Use the Shader Editor to create material nodes, including texture nodes, and connect them to define how the texture affects the surface.
- Experiment with different types of textures, such as Diffuse, Bump, Specular, and Normal maps, to add depth and realism to your model.
Lighting Your Scene
Lighting is essential for setting the mood and emphasizing the details of your models. Blender offers various light sources, including point, sun, and area lights, each with adjustable properties.
- Place lights strategically around your scene to highlight key features of your model and create the desired atmosphere.
- Adjust light properties such as color, intensity, and falloff to simulate realistic lighting conditions.
- Use the Principled BSDF shader to achieve realistic material properties, reacting naturally to the lighting in your scene.
Setting Up Cameras
The camera in Blender defines the viewpoint from which your scene will be rendered. Positioning and configuring your camera correctly is vital for capturing your models in their best light.
- Position the camera in your scene to frame your model effectively, considering composition principles like the rule of thirds.
- Adjust camera settings such as focal length, depth of field, and aperture to enhance the visual appeal of your render.
Rendering Your Scene
Rendering transforms your 3D scene into a 2D image or animation. Blender offers two powerful render engines, Cycles and Eevee, each with its strengths.
- Choose between Cycles for photorealistic renders or Eevee for faster, real-time rendering.
- Configure render settings, including resolution, sample rate, and output format, to optimize the quality and efficiency of your render.
- Use the Compositor in Blender to add post-processing effects, such as color grading, blurs, and glare, to further enhance your final image.
By mastering texturing and rendering techniques in Blender, you will be able to produce visually compelling images and animations that stand out. Remember, practice and experimentation are key to developing your skills and finding your unique style.
Common Modeling Challenges and Solutions
Every Blender artist, regardless of their level of expertise, faces various challenges throughout the modeling process. Identifying these common issues and understanding their solutions can significantly improve your workflow and the quality of your models. Here are some frequent challenges and how to address them.
Topology Issues
Proper topology is crucial for the smooth deformation of models, especially for animation. Poor topology can lead to issues like pinching or incorrect shading.
- Solution: Use the knife tool for adding necessary edge loops and the merge tool for fixing n-gons into quads or tris. Practice retopology techniques for complex models to ensure a clean, animatable mesh.
UV Unwrapping Complex Shapes
UV unwrapping is the process of projecting a 3D model onto a 2D plane for texturing. Complex shapes can result in stretching or overlapping UVs.
- Solution: Mark seams on your model to guide the unwrapping process. Use the live unwrap feature to adjust seams in real-time and achieve an optimal UV layout.
Lighting and Material Assignment
Creating realistic materials and lighting can be challenging, especially for beginners. It can be difficult to achieve the desired level of realism or stylization.
- Solution: Experiment with Blender\"s shader editor to create custom materials. Utilize HDRIs for realistic lighting and shadows. Study real-life materials and lighting conditions for reference.
High-Poly Model Management
Managing high-poly models can lead to performance issues and slow down the modeling process.
- Solution: Use modifiers like Decimate to reduce polygon count without significantly affecting the model\"s appearance. Implement layer management and viewport shading options to optimize performance.
Realistic Texturing
Applying textures that look realistic can be daunting, especially when trying to mimic specific materials like skin, metal, or cloth.
- Solution: Utilize Substance Painter or Blender\"s own procedural texturing capabilities to create realistic textures. Incorporate bump and displacement maps to add depth to your materials.
Rendering Times
Complex scenes can result in long rendering times, making the process inefficient, especially for animations.
- Solution: Optimize your scene by reducing the samples in Cycles or utilizing Eevee for real-time rendering. Consider baking lighting and shadows for static objects to save time.
Overcoming these common challenges in Blender requires patience, practice, and a willingness to experiment with different techniques. By applying these solutions, you can streamline your modeling process and create more polished and professional-looking models.
Blender Modeling Projects and Ideas
Embarking on Blender modeling projects is a fantastic way to hone your skills, experiment with new techniques, and bring your creative ideas to life. Whether you\"re a beginner looking to practice basic skills or an experienced modeler seeking new challenges, there\"s a project for everyone. Here are some engaging project ideas to inspire your next creation in Blender.
Character Design and Modeling
Create your own character from scratch, focusing on unique features and personalities. This project can range from realistic human figures to imaginative creatures.
- Start with basic shapes to block out the form and proportions.
- Refine the model with sculpting tools for detailed features.
- Experiment with textures and shaders to bring your character to life.
Architectural Visualization
Model a realistic or fictional building and its surroundings. This can be a great way to practice precision modeling and explore architectural styles.
- Use reference images or blueprints to model the building accurately.
- Apply materials and textures to mimic real-life surfaces like brick, glass, and wood.
- Enhance the scene with environmental elements such as landscaping, people, and vehicles.
Product Design and Modeling
Choose a product, such as a piece of furniture or an electronic device, and model it in detail. This project helps develop an eye for detail and understanding of product design.
- Focus on getting the proportions and details accurate to the real product.
- Use shaders to create realistic materials, like metallic finishes or fabric textures.
- Create a scene to showcase your product in a realistic or stylized setting.
Environment Creation
Build an immersive environment, like a natural landscape or a fantasy setting. This project is excellent for practicing large-scale modeling and environmental storytelling.
- Plan the layout and major elements of your environment, considering composition and focal points.
- Use a combination of modeling and sculpting to create terrain, foliage, and architectural elements.
- Experiment with lighting and atmospheric effects to set the mood of your scene.
Animation-Ready Models
Create a model specifically designed for animation, focusing on clean topology and rigging-friendly design. This can include characters, animals, or mechanical objects.
- Ensure your model has a logical flow of edge loops for smooth deformations.
- Practice rigging your model to understand the requirements of animation-ready designs.
- Create simple animations to test the functionality and flexibility of your model.
These project ideas offer a broad spectrum of challenges and learning opportunities. By tackling different types of projects, you\"ll gain a comprehensive skill set in Blender modeling, texturing, and rendering. Remember, the key to improvement is consistent practice and experimentation. Happy modeling!
Resources for Learning Blender Modeling
Finding the right resources can be pivotal in mastering Blender modeling. Whether you are a beginner or looking to enhance your skills, the following resources offer a wide range of learning materials to suit your needs:
- Blender Official Website: The Blender Foundation offers extensive documentation, tutorials, and a user forum. It\"s a great starting point for beginners and a reference for advanced users.
- Blender Guru: A popular YouTube channel and website featuring tutorials that cover basics to advanced techniques, including the famous \"Donut\" tutorial for beginners.
- CG Cookie: This platform provides structured courses on Blender, ranging from modeling and texturing to animation and game development. It\"s ideal for those looking for a comprehensive learning path.
- BlenderNation: Stay updated with the latest Blender news, tutorials, and art showcases from the Blender community.
- Udemy and Coursera: Both platforms offer a variety of Blender courses for all levels. These courses are often created by industry professionals and provide a certificate upon completion.
- ArtStation and Behance: For inspiration and to see what\"s possible with Blender, browse projects from talented artists. These platforms are also great for networking with other Blender users.
- Books: \"Blender 3D: Noob to Pro\" and \"Blender Master Class\" are excellent books that cover a range of topics from basics to advanced techniques in Blender modeling.
Practicing regularly and experimenting with different techniques are key to mastering Blender. Combining the use of these resources with active participation in forums and communities will significantly enhance your learning curve and modeling skills.
READ MORE:
Conclusion: Mastering Blender Modeling
Mastering Blender modeling is a journey that combines creativity, technical skills, and continuous learning. As you progress through this journey, remember that patience and practice are your best allies. Here are some final thoughts to guide you:
- Practice Makes Perfect: Regular practice is crucial. Set aside time each day or week to hone your skills, experiment with new techniques, and work on projects.
- Embrace Challenges: Don\"t be afraid to tackle complex projects. Challenges are opportunities to grow and learn. Break down big projects into manageable tasks and learn as you go.
- Stay Updated: Blender is constantly evolving, with new features and improvements. Keep yourself updated with the latest versions and explore new tools and functionalities to enhance your work.
- Join the Community: Blender has a vibrant and supportive community. Participating in forums, social media groups, and local meetups can provide valuable insights, feedback, and motivation.
- Share Your Work: Sharing your creations with others can open up opportunities for collaboration, feedback, and even professional growth. Use platforms like ArtStation, Behance, and Blender Artists to showcase your work.
- Never Stop Learning: The field of 3D modeling and Blender is vast. There are always new techniques to learn, trends to follow, and creative ideas to explore. Take advantage of online resources, tutorials, and courses to keep your skills sharp.
In conclusion, mastering Blender modeling is an achievable goal with dedication, practice, and the right resources. Remember to enjoy the creative process and celebrate your progress. Your journey in Blender modeling is not just about the end results but also about the skills you develop, the creativity you unleash, and the community you become a part of. Happy modeling!
Embark on your Blender modeling journey with confidence, leveraging our comprehensive guide to transform your creativity into stunning 3D models. Your adventure in digital art starts here—unleash your potential today!
_HOOK_


.jpg)